Security Groups
Security Groups determine whether Users can access and/or modify Customer information in that Security Group. Each Security Group is assigned a certain permission level for the Customers in that group. Each User assigned to a Security Group is assigned the permissions for that Security Group.
Note:
This option is available only if the user has been assigned the SystemAdmin role. See the Oracle Retail Customer Engagement Cloud Service Implementation Guide for more information on assigning User Roles.
Accessing Security Groups
To access the Security Groups do the following:
-
Click Menu.
-
Click the Admin task.
-
Click the Security Groups task. The Security Groups window displays.
Figure 13-48 Security Groups

The following fields are displayed:
-
The following fields are displayed:
Group ID – ID of the Security Group.
-
Group Name – Name of the Security Group.
-
Default Privilege – The access privileges given to Users in the Security Group. These access privileges are specific to the Customer. For a description of the Default Privilege Types, see , Default Privilege.
-
Active – Indicates whether the Security Group is Active or not.
Sorting Results
In the Security Groups window, the user can sort the list to refine the results (see Figure 13-48). Results can be sorted Ascending or Descending using the following sorting options:
-
Active
-
Default Privilege
-
-
Read/Write
-
Read Only
-
Limited Read
-
No Access
-
-
Group ID (Default)
-
Group Name
Working with the Security Groups
Creating a New Security Group
To create a new Security Group do the following:
-
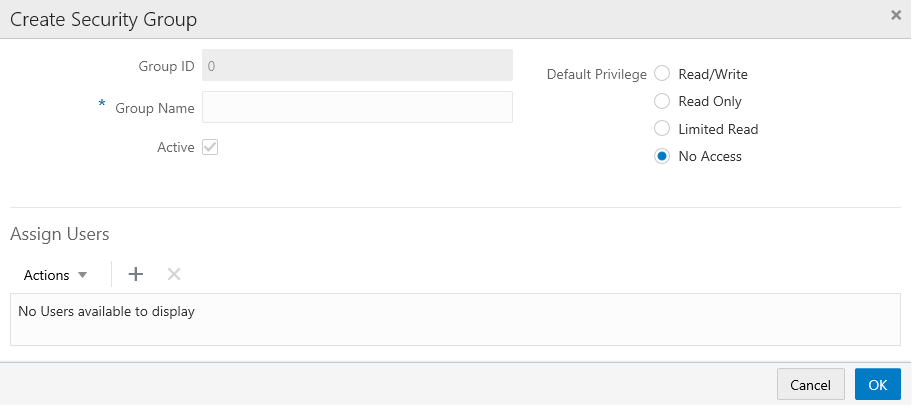
Click the Actions Menu, and then click Add, or Click the Add (+) icon. The Create Security Group window displays.
Figure 13-49 Create Security Group
-
Enter the following information:
-
Group ID – (Read Only) Automatically assigned ID of the Security Group.
-
Group Name – (Required) The name you want to give to the Security Group.
-
Active – Indicates whether the Security Group is Active or not.
-
Default Privilege – Security Groups have the following privilege types available, listed in order from most permissible to least.
-
Read/Write - Users in the Security Group can read and update all data for Customers who have had the Security Group applied.
-
Read Only - Users in the Security Group can read all data for Customers who have had the Security Group applied, but cannot make updates.
-
Limited Read - Users in the Security Group can read some data for Customers who have had the Security Group applied, but cannot read sensitive Customer information (such as Address, Telephone Numbers, and Email Addresses) and cannot make updates.
-
No Access - A User in the Security Group will not even see that the Customer exists in the system.
-
-
-
Select OK to save or Cancel to exit. You do not at this time have to add users. If you wish to associate users to the new group at this time, then proceed to the Assign Users section.
Assign Users
-
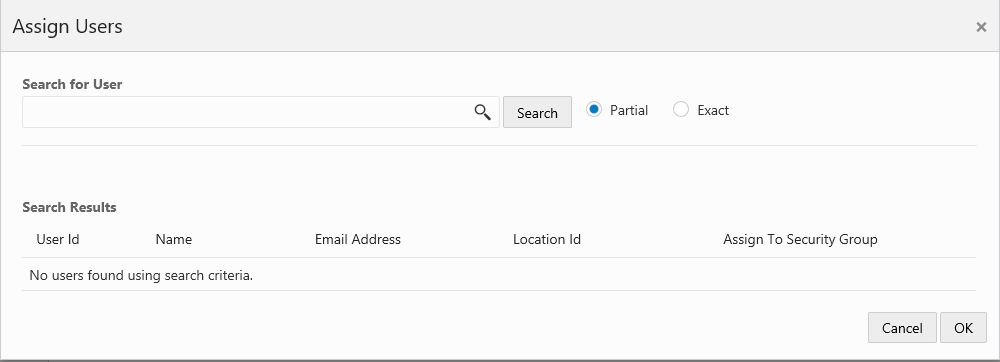
In the Assign Users section of the Create Security Group window, click the Actions Menu, and then click Add, or Click the Add (+) icon. The Assign Users window displays.
Figure 13-50 Assign Users
-
In the Search for User field, enter the User ID, Name, Email Address, or Location of the user you want to search for.
-
Select Partial, if you want to results that match part of what you enter, or select Exact if you only want results that are an exact match.
-
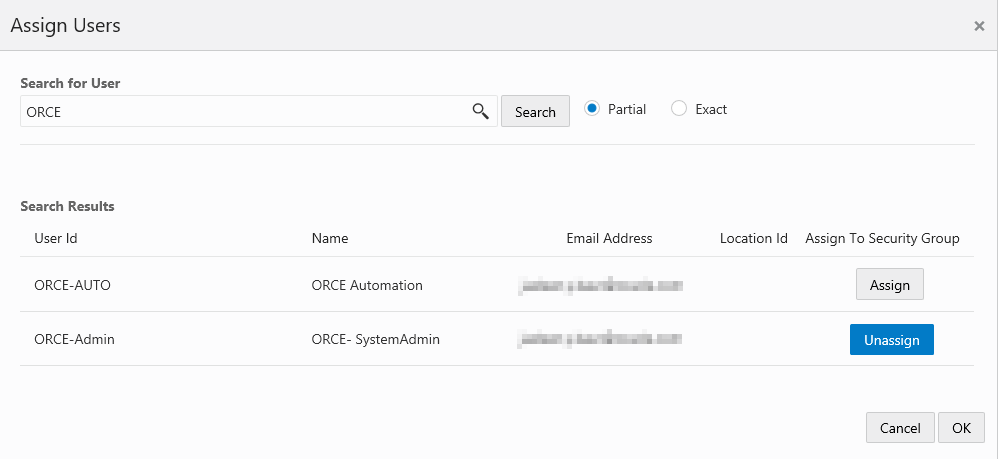
Click Search. A list of users matching the search text is displayed in the Search Results grid.
Figure 13-51 Search Results Grid
-
For each user you wish to assign, click Assign.
-
For each user you wish to unassign, click Unassign.
-
Click OK to accept the changes, or Cancel to close the window without saving.
-
Click OK to save the new Security Group, or Cancel to close the window without saving.
-
Click the Refresh icon to update the Security Groups results.
Viewing Security Group Details
To view Security Group Details do the following:
-
Highlight a Security Group from the list of results.
-
Click the Actions Menu, and then click View, or click the View icon. The View Security Group window displays.
Figure 13-52 View Security Group
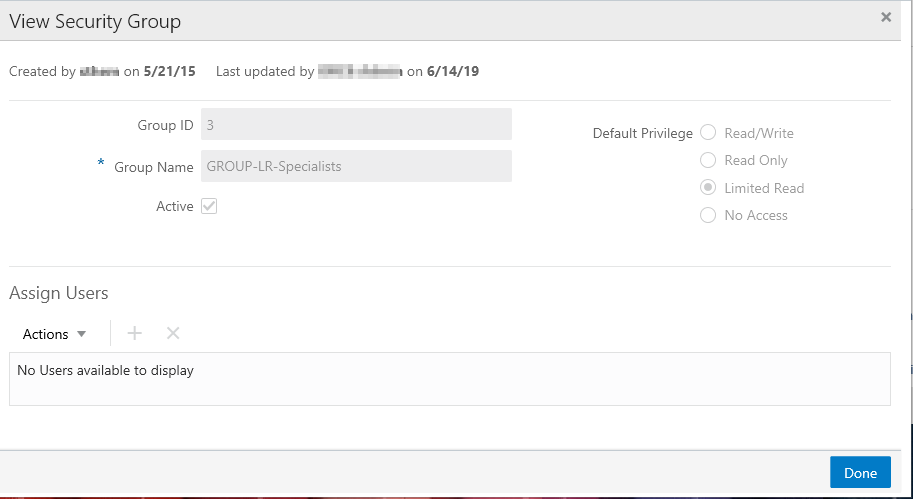
The following information is displayed:
-
Group ID - ID of the Security Group.
-
Group Name - Name of the Security Group.
-
Active - Indicates whether the Security Group Privilege is active or not.
-
Privilege Type - Determine the access privileges given to Users in the Security Group.
-
-
Click Done to close the window and return to the Security Group window.
Edit an Existing Security Group
To edit the Security Group Details do the following:
-
In the Security Group window, highlight a Security Group you wish to edit.
-
Click the Actions Menu, and then click Edit, or click the Edit icon. The Edit Security Group window displays.
Figure 13-53 Edit Security Group
-
The following fields are editable:
-
Group Name
-
Active
-
Default Privilege
-
-
You may edit the assigned users section to Add new, or Remove, any existing users.
-
Select OK to save or Cancel to exit.