System Configuration
You have the ability to view and edit system configurations, so that the system can be configured to work in the way the business operates.
Accessing System Configuration
To access System Configuration do the following:
-
Click Menu.
-
Click the Admin task.
-
Click the System Configuration task. The System Configuration window displays.
Figure 13-54 System Configuration
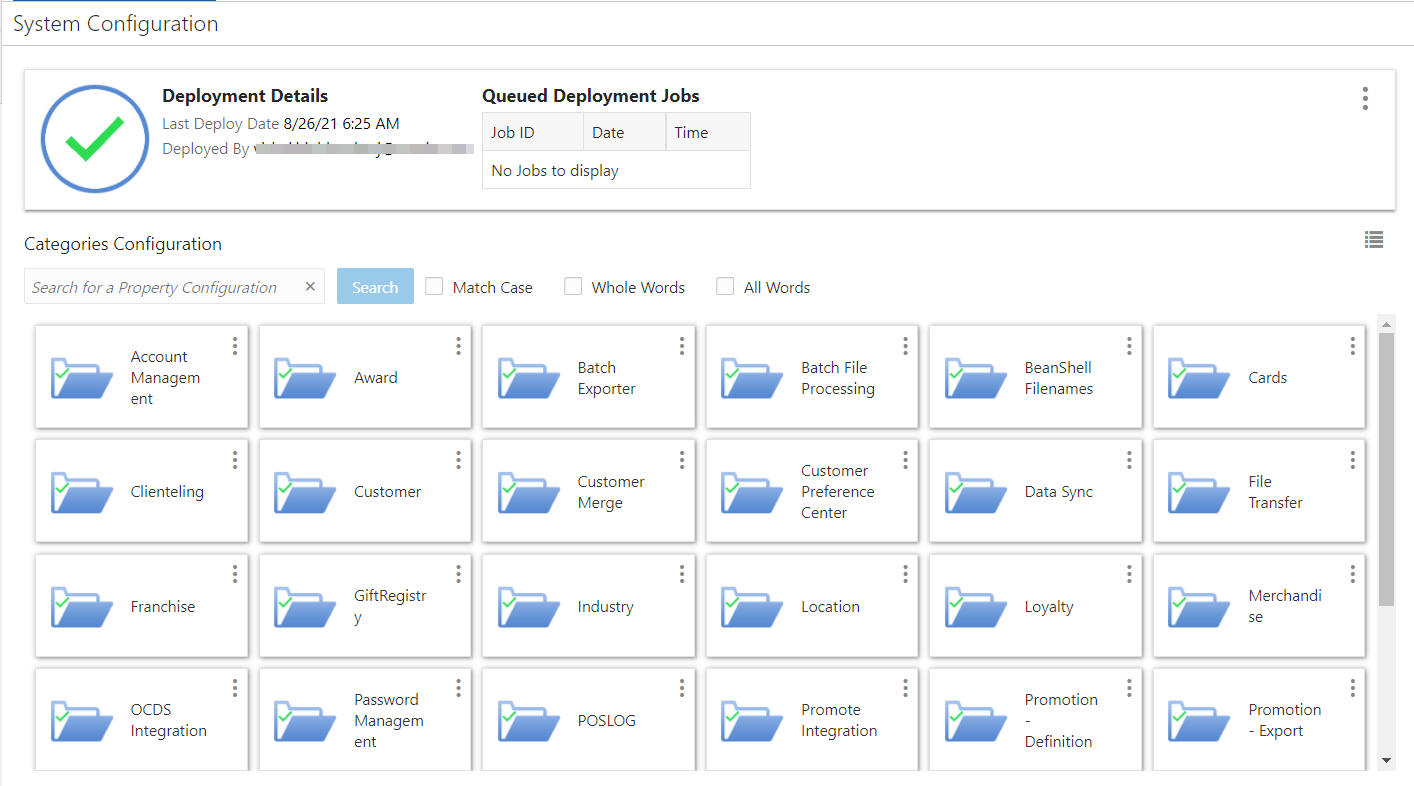
The System Configuration window consists of the following areas:
-
Deployment Details
-
Queued Deployment Jobs
-
Categories Configuration
-
-
To refresh the results at any time click the System Configuration Action menu and click Refresh.
Categories Configuration
The Categories Configuration displays the Property Configurations.
Figure 13-55 Categories Configuration

Searching for Property Configurations
To search for a Property Configuration do the following:
-
Enter any or all of a Property Configuration name.
-
You may use search options that include:
-
Match Case
-
Whole Words
-
All Words
-
-
Click Search.
-
To reset the search click the System Configurations Action menu and then click Return to Categories.
Categories Configuration Views
Click the Switch to List view icon to see the configurations in list form.
Figure 13-56 Switch to List

Click the Switch to Card view icon to see the configurations in list form.
Figure 13-57 Switch to Card

Viewing Property Configurations
To view a Property Configuration do the following:
-
Click a Category Configuration tile or click the Action menu for that tile and click Edit. The Property Configurations for that Category Configuration display.
Figure 13-58 Property Configuration

-
To Edit the Property Configuration click the tile or click the Action menu and click Edit.
-
Make any Value changes deemed necessary.
-
Enter a Justification.
-
Click OK to save the changes, or click Cancel to close the window without saving.
Note:
Saved property configurations need to be deployed. See Deploy for more information.
-
At any time you can refresh the results by clicking the System Configurations Action menu and then click Refresh.
-
To return to the Categories Configuration click the System Configurations Action menu and then click Return to Categories.
Working with System Configurations
The following Action Menu options include:
-
Audit Log
-
Cancel Deploy
-
Deploy
-
Export File
-
Import File
-
Refresh
-
Rollback
-
Upload File
Audit Log
To access the Audit Log do the following:
-
Click the Action menu.
-
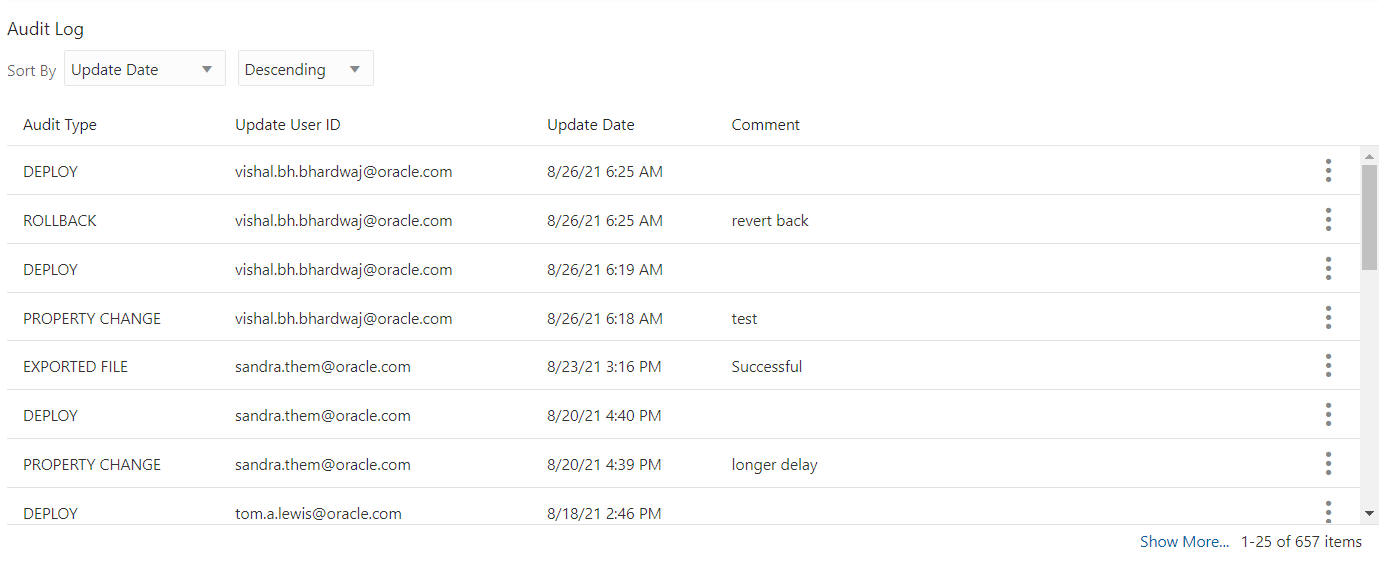
Click Audit Log. The Audit Log window displays.
Figure 13-59 Audit Log
-
The Audit Log is sorted ascending or descending using the following Sort By options:
-
Audit Type
-
Update Date (default)
-
Update User ID
-
-
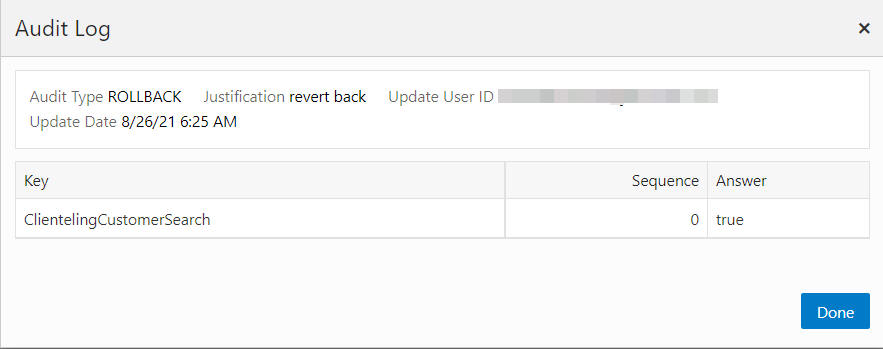
To view the Audit Log details, click the Action menu for the desired Audit Log and click View. The Audit Log appears.
Figure 13-60 Audit Log
-
Click Done to close the window.
-
At any time you can refresh the results by clicking the System Configurations Action menu and then click Refresh.
-
To close the Audit Log click the System Configurations Action menu and then click Return to Categories.
Cancel Deploy
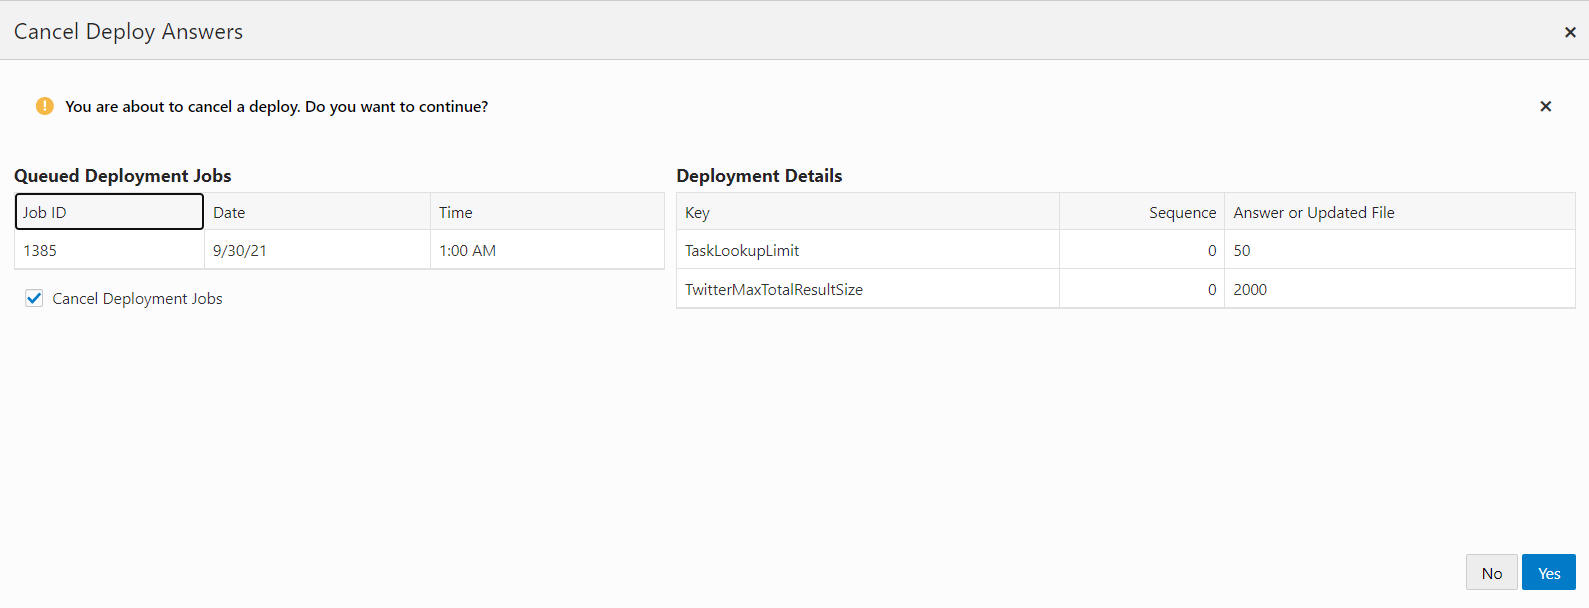
You have the ability to cancel deploy configuration changes, so that you can control how changes are made to the system. To Cancel Deploy a job do the following:
-
Click the System Configuration Action menu and click Cancel Deploy. The Cancel Deploy Answers window displays.
Figure 13-61 Cancel Deploy Answers
-
Click Yes to Cancel the job or No to close the window without saving. A notification appears indicating a successful cancel deployment is scheduled.
Figure 13-62 Notification

Deploy
You have the ability to deploy configuration changes, so that you can control how changes are made to the system. To Deploy a job do the following:
-
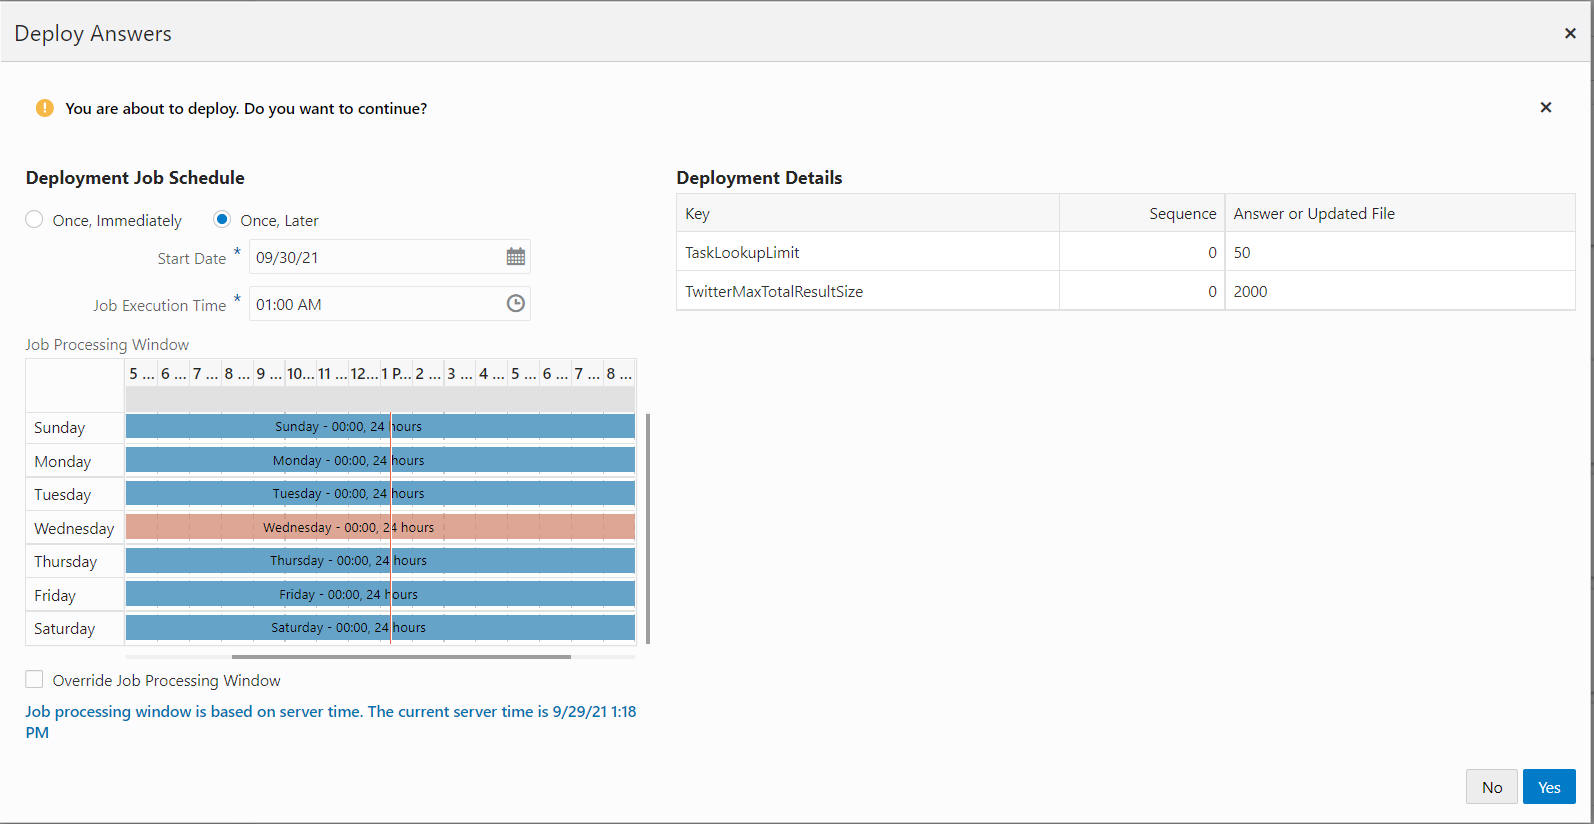
Click the System Configuration Action menu and click Deploy. The Deploy Answers window displays.
Figure 13-63 Deploy Answers
-
Enter the Deployment Job Schedule, options include:
-
Once, Immediately
-
Once, Later
-
-
View the Job Processing Window to see when Jobs are processed. Then decide if you need to select the Override Job Processing Window check box.
-
Click Yes to Deploy the job or No to close the window without saving. A notification appears indicating a successful deployment is scheduled.
Figure 13-64 Notification

Export File
To Export a configuration file do the following:
-
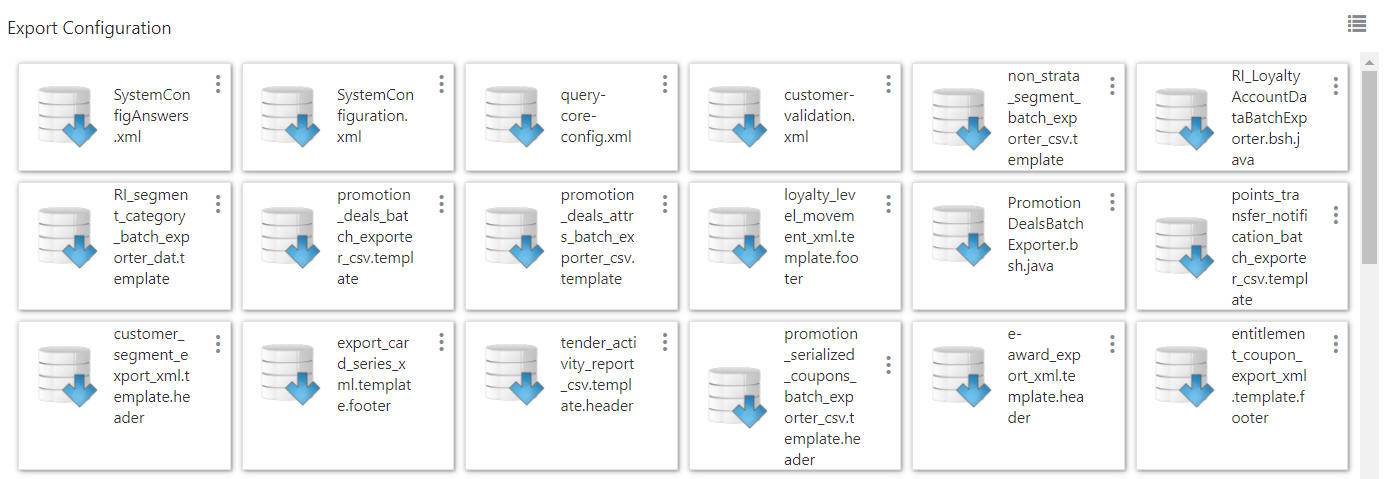
Click the System Configurations Action menu and then click Export File. The Export Configurations display.
Figure 13-65 Export Configuration
-
Click the tile to Export, or use the Action menu for that tile and click Export. A notification appears indicating the successful export.
Figure 13-66 Notification

-
At any time you can refresh the results by clicking the System Configurations Action menu and then click Refresh.
-
To close the Export Configuration click the System Configurations Action menu and then click Return to Categories.
Import File
To Import a configuration file do the following:
-
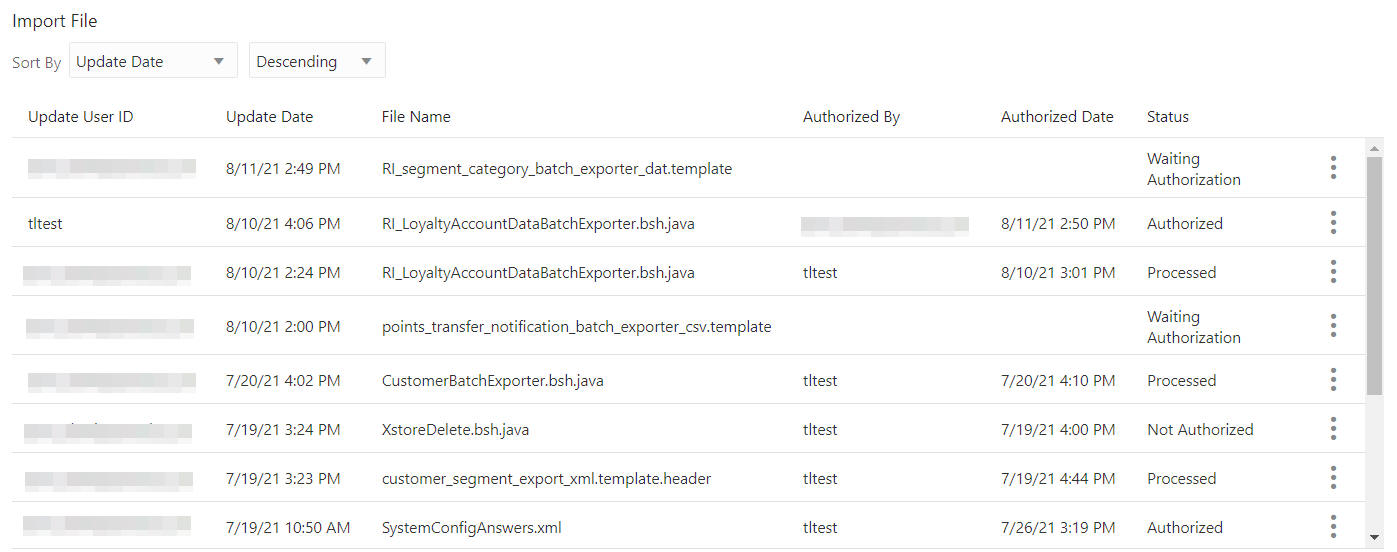
Click the System Configurations Action menu and then click Import File. The Import File list displays.
Figure 13-67 Import File
-
The Import File list is sorted ascending or descending using the following Sort By options:
-
Authorized By
-
Authorized Date
-
File Name
-
Status
-
Update Date (default)
-
Update User ID
-
-
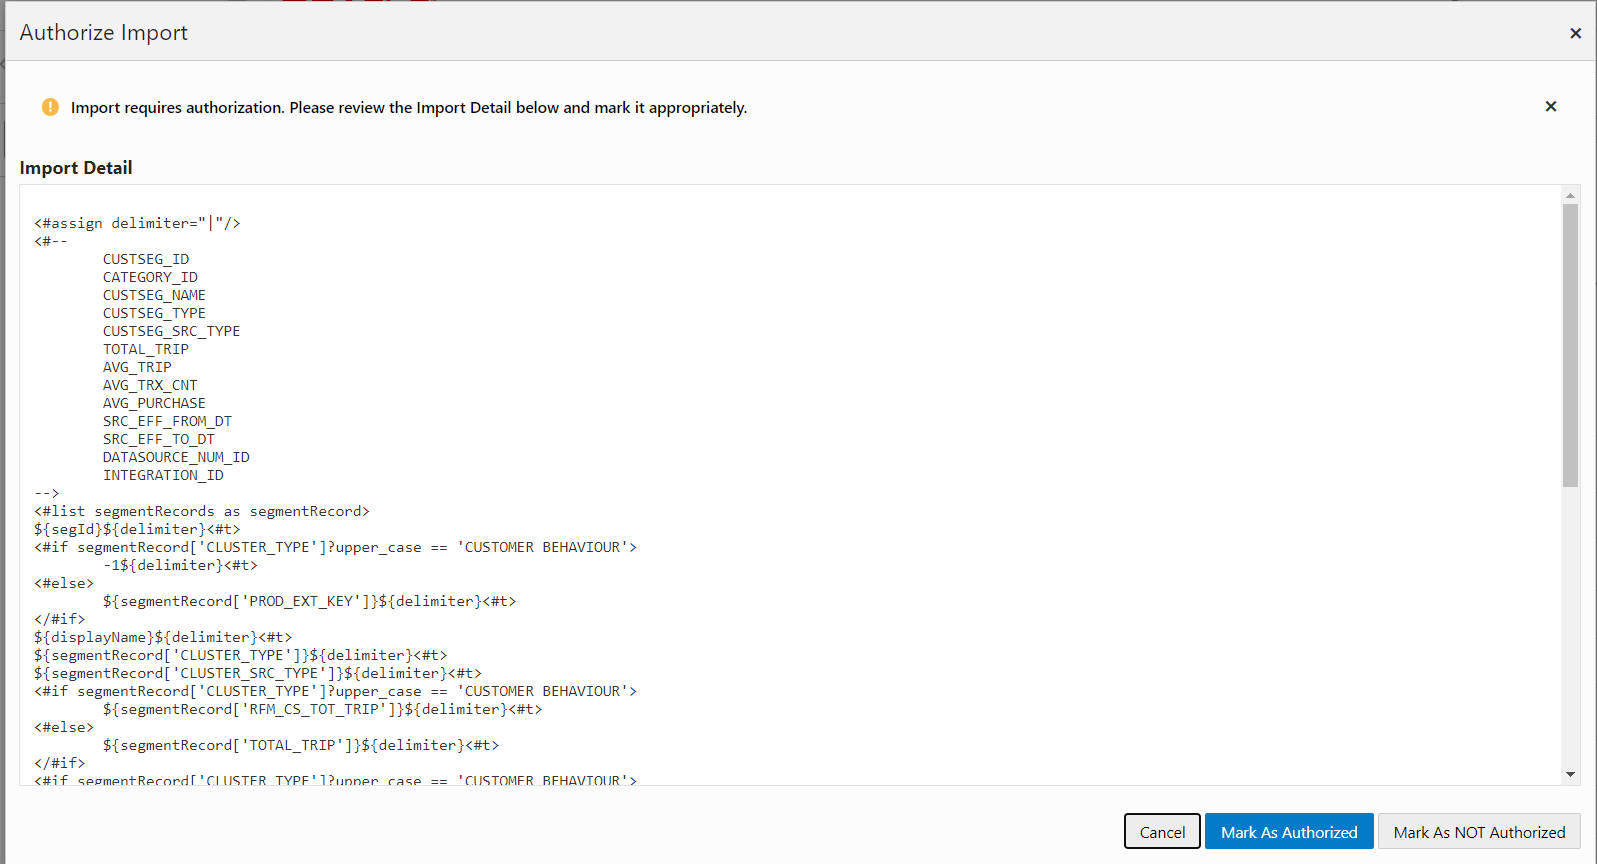
Only files with the status of Waiting Authorization can be authorized. Click the Action menu for the file and click Authorize. The Authorize Import window displays.
Figure 13-68 Authorize Import
-
After reviewing the Import Details, either click:
-
Mark As Authorized to authorize the file, a notification appears.
Figure 13-69 Notification

-
Mark as NOT Authorized to indicate the file is not authorized for import.
-
Cancel to close the window and mark the status as Waiting Authorization.
Note:
Using the Authorize action on any other file status will open the Import Details for viewing. Click Cancel to close the window.
-
-
At any time you can refresh the results by clicking the System Configurations Action menu and then click Refresh.
-
To close Import File click the System Configurations Action menu and then click Return to Categories.
Rollback
To Rollback a configuration do the following:
-
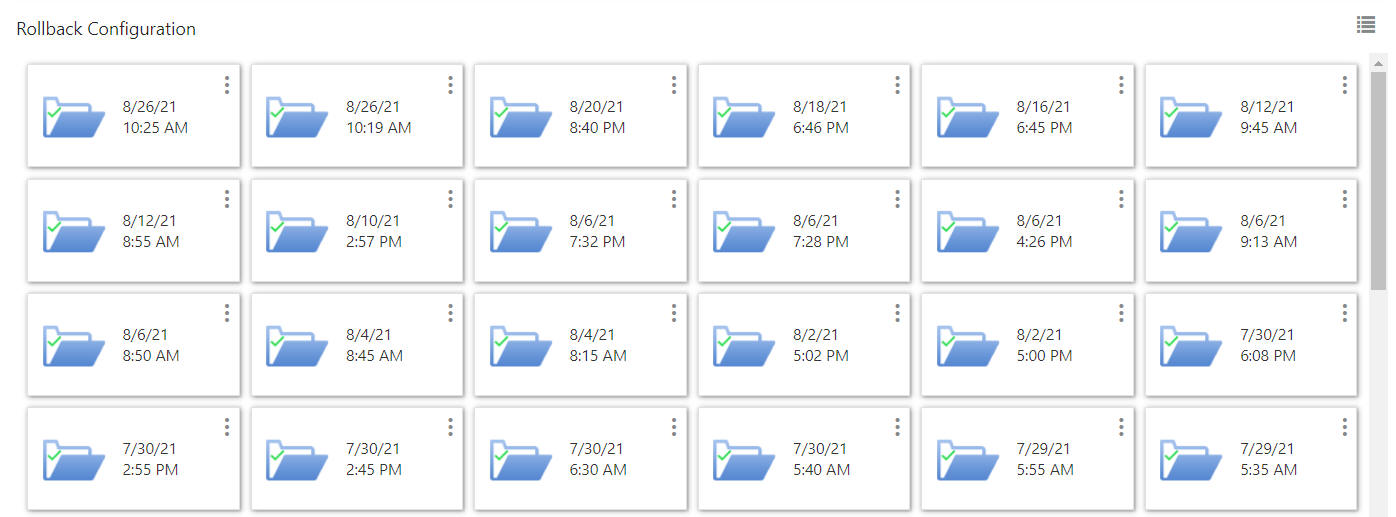
Click the System Configurations Action menu and then click Rollback. The Rollback Configurations display.
Figure 13-70 Rollback Configuration
-
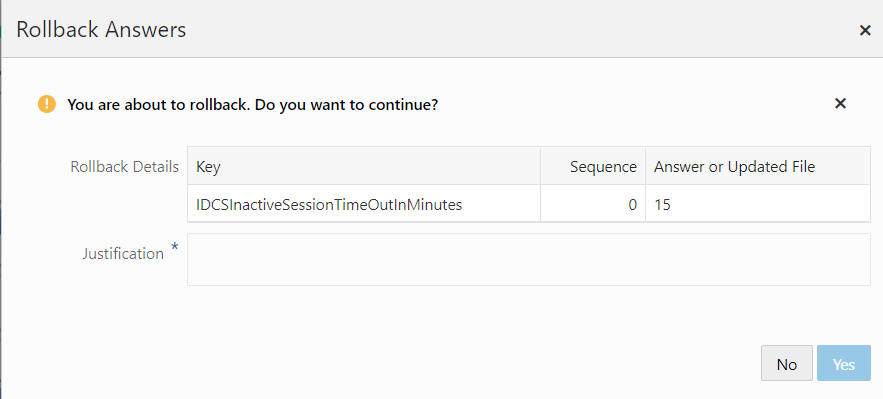
Click the tile to Rollback, or use the Action menu for that tile and click Rollback. The Rollback Answers window displays.
Figure 13-71 Rollback Answers
-
Enter a Justification.
-
Click Yes to Rollback, or No to close the window without saving.
Figure 13-72 Notification

-
At any time you can refresh the results by clicking the System Configurations Action menu and then click Refresh.
-
To close the Rollback Configuration click the System Configurations Action menu and then click Return to Categories.
Upload File
To upload a file configuration do the following:
-
Click the System Configurations Action menu and then click Upload File. The Upload Configurations display.
Figure 13-73 Upload Configuration

-
Click the tile to Upload, or use the Action menu for that tile and click Upload. The Upload Configuration window displays.
Figure 13-74 Upload Configuration

-
To add a file to upload, either:
-
Drag and Drop a file as shown in Figure 13-74.
-
Click anywhere in the Drop a file here or click to upload box.
-
-
Click Upload File to upload the file, or Cancel to close the window without saving.
-
At any time you can refresh the results by clicking the System Configurations Action menu and then click Refresh.
-
To close the Upload Configuration click the System Configurations Action menu and then click Return to Categories.