Segments
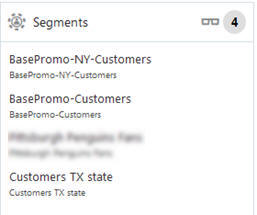
The Segments panel displays the unstratified segments to which the customer belongs.
Figure 4-48 Customer Segments

-
An eyeglass icon lets you view details about all the Segments to which the customer belongs. See Viewing Customer Segments
-
A badge with the total number of segments to which the customer belongs displays on the right side of the title bar.
-
The following information is displayed for each segment:
-
Segment Name
-
Segment Description
-
-
If a segment is designated as private, it is only displayed for the user who created it.
-
Scroll bars are available if the number of segments do not fit in the display area of the panel.
-
If there are no segments assigned to the customer, the following image is displayed:
Figure 4-49 No Segments Available Image

Viewing Customer Segments
-
Click the Eyeglass icon in the title bar. This displays the Segments for (Customer) window:
Figure 4-50 Segments for Customer

This window displays the following view-only information about the segments associated with the customer:
-
The Customer Name and ID Number are displayed in the Segments for title bar. If there are no segments assigned, the title displays No Segments Assigned.
-
Assigned Unstratified Segments Grid
-
Segment ID – ID of the segment.
-
Segment Name – Name of the segment.
-
Description – Description of the segment
-
Create User – the user who created the segment.
-
Added On – the date on which the customer was added to the segment.
-
Customer Count – The number of customers in that segment.
-
-
-
Click Done, to return to the Customer Dashboard.