Cash Drawers
This section describes the Cash Drawer options:
Attaching a Cash Drawer Till
Use this procedure to attach a till into the networked cash drawers in order to track money in the cash drawer.
-
From the Till menu, select the Till Maintenance option and press Enter for OK.
-
From the Till Maintenance menu, select the Attach Cash Drawer Till option and press Enter for OK.
-
The system displays a list of tills available to be attached.
Figure 11-39 Select Cash Drawer Till to Attach
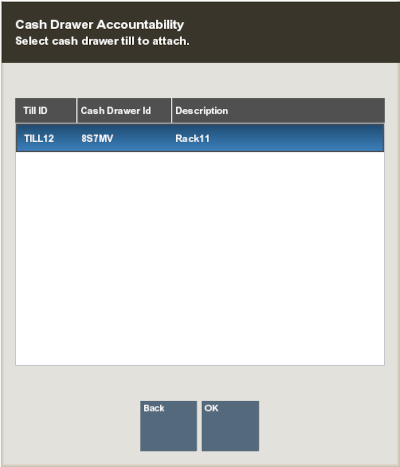
Select a till from the list and press Enter for OK.
-
Scan the cash drawer. The cash drawer ID is verified to determine it is in the correct state.
If the scanned drawer is not in the correct state, an error message is displayed. "Cash drawer is currently unavailable." Press Enter for OK.
If the scanned cash drawer barcode does not match to the selected cash drawer, an error message is displayed "The scanned cash drawer does not match the selected cash drawer." Press Enter for OK.
-
Confirm you want to attach the till to the cash drawer: "Are you sure you want to attach till to cash drawer <cash drawer id and name>?" Select Yes on this prompt, to continue.
The cash drawer is opened, and the till is attached to the cash drawer.
A confirmation message is displayed: "Till <insert till name> has been attached to cash drawer <Cash Drawer ID and name>."
Press Enter for OK and close the drawer. You are returned to the Xstore Home screen.
-
Repeat this procedure for further cash drawers.
Removing a Cash Drawer Till
Oracle Retail Xstore Point of Service gives managers and associates the option to remove their own till from a register or remove a till assigned to someone else, depending on the option chosen in the Manage Tills menu. The ability to combine the cash drawer close and reconcile processes together is configurable.
To remove a till from a networked enabled cash drawer, do the following:
-
From the Till menu, select the Till Maintenance option.
-
From the Till Maintenance menu, select Remove Cash Drawer Till.
-
Oracle Retail Xstore Point of Service displays a list of tills attached to the cash drawer.
Figure 11-40 Select Cash Drawer Till to Remove
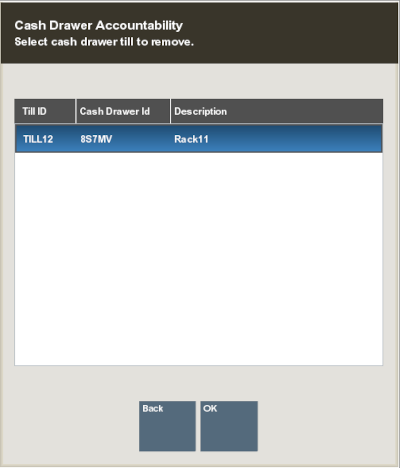
Select the till you are removing, then press Enter for OK.
-
Scan the cash drawer. The cash drawer ID is verified to determine it is in the correct state.
If the scanned drawer is not in the correct state, an error message is displayed. "Cash drawer is currently unavailable." Press Enter for OK.
If the scanned cash drawer barcode doesn't match to the selected cash drawer, an error message is displayed "The scanned cash drawer does not match the selected cash drawer." Press Enter for OK.
-
Confirm you want to remove the till from the cash drawer: "Are you sure you want to remove till from cash drawer <cash drawer id and name>?" Select Yes on this prompt, to continue.
The cash drawer is opened, and the till is removed from the cash drawer.
A confirmation message is displayed: "Till <insert till name> has been removed from cash drawer <Cash Drawer ID and name>."
Press Enter for OK and close the drawer. You are returned to the Xstore Home screen.
-
Repeat this procedure for further cash drawers.
Reconciling a Networked Cash Drawer Till
This procedure allows you to reconcile the transactions associated to a cash drawer. It does not reconcile the register. You need to close the cash drawer first (at any time) and then reconcile the cash drawer (at any time). The cash drawer does not have to be closed before the End of Day Process. This is particularly applicable for 24/7 trading to minimize downtime.
-
From the Till menu, select the Till Maintenance option.
-
From the Till Maintenance menu, select the Reconcile Cash Drawer option.
Figure 11-41 Till Maintenance - Reconcile Cash Drawer
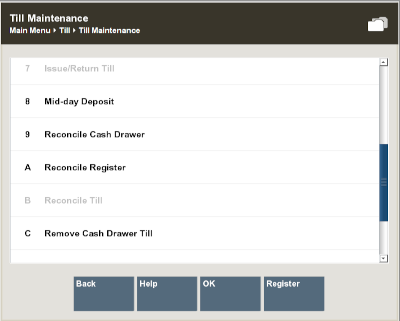
The ability to combine the Cash Drawer Close and Reconciliation Processes is configurable (for register accountability in a normal store environment). Therefore, if configured, the reconciliation process would begin directly after the Cash Drawer Close flow. In 24/7 trading the cash drawer and reconciliation processes is separate.
-
Any register's back office can be used to reconcile networked cash drawers.
The Networked Cash Drawer Reconciliation button is always available. If you attempt to access it and no cash drawers are available to reconcile, an error message "All closed cash drawers have been reconciled." is displayed.
-
Select the cash drawer to reconcile from a list of cash drawers available to reconcile.
Figure 11-42 Cash Drawer Selection
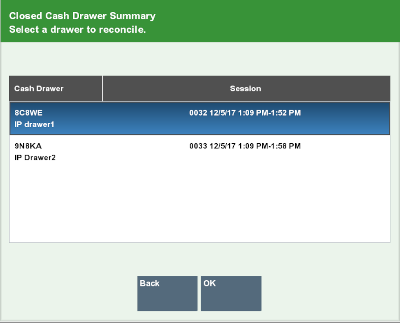
Once a cash drawer has been reconciled, it is no longer displayed on the list of available cash drawers to reconcile.
The cash drawers do not have to be reconciled in a specific order. The cash drawers' name, description and Session ID are listed.
-
Select the Cash Drawer and press the OK button.
The system prompts you with the question: "Do you want to reconcile the following cash drawer? <Insert Cash Drawer Device Name>".
Figure 11-43 Confirm Cash Drawer Reconciliation
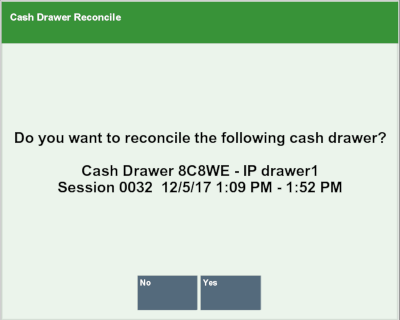
Select Yes on this prompt, to continue.
-
The existing Xstore reconcile flow is followed for the limited tenders accepted on the networked cash drawer. Any transaction from any register completed on the cash drawer and has the selected networked cash drawer's ID saved with the transaction should be reconciled at this time.
The cash drawer has been reconciled and the user is returned to the Xstore Home screen.