8 Discounts
A transaction discount is applied equally to each eligible item in the transaction, and a group discount is applied to a group of selected items in a transaction. Discounts may be specified as either amount (for example, $5.00 off) or percentages (for example, 10% off) for both item and transaction discounts.
See Discount an Item to add a discount to a line item.
Adding a Discount to a Transaction or Group of Items
-
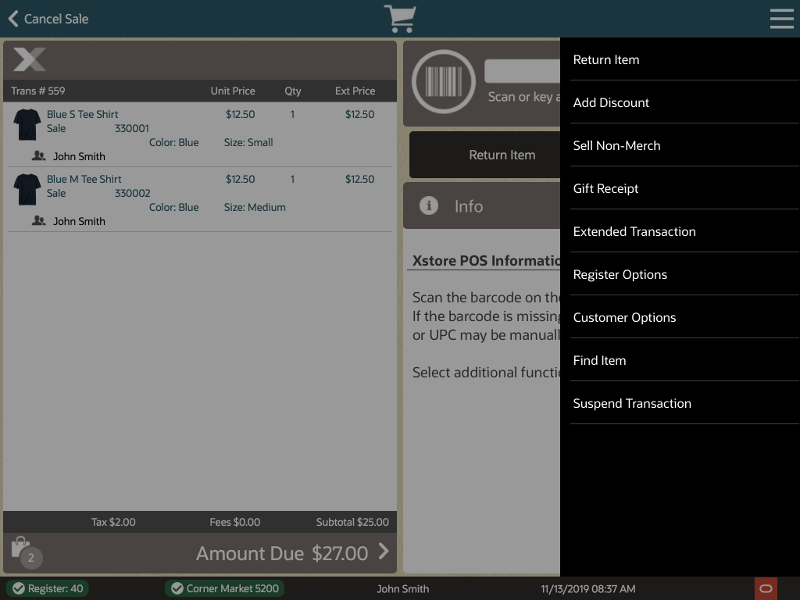
After adding an item or items at the Register Sale screen, select the Add Discount option from the Context Menu button in the upper-right corner of the transaction screen.
Figure 8-1 Add Discount Option
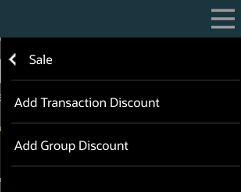
Xstore POS prompts you for the discount type: Transaction, or Group.
-
Select the discount type:
Figure 8-2 Add Discount Menu Options
-
If you chose a transaction discount, continue with Transaction Level Discounts, step 1.
-
If you chose a group discount, continue with Group Discounts, step 1.
Note:
Because each Xstore POS menu is configurable, the discount options shown on your system may be different than the options shown here.
-
Transaction Level Discounts
-
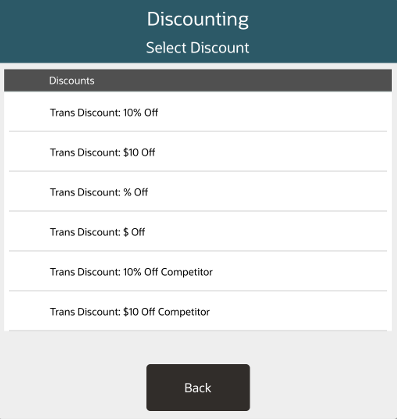
Select Add Transaction Discount from the Add Discount menu.
Figure 8-3 Select Transaction Discount Menu
-
Select the discount to apply. Scroll down to view more discounts.
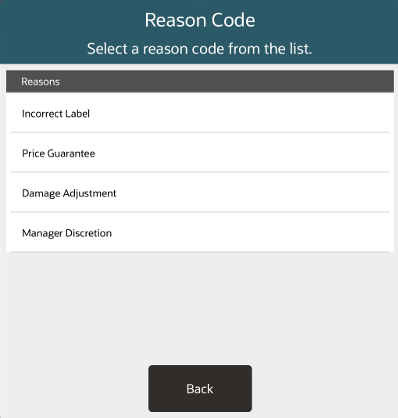
Figure 8-4 Reason Code List
-
Select the reason for applying the discount.
Figure 8-5 Enter Discount Amount
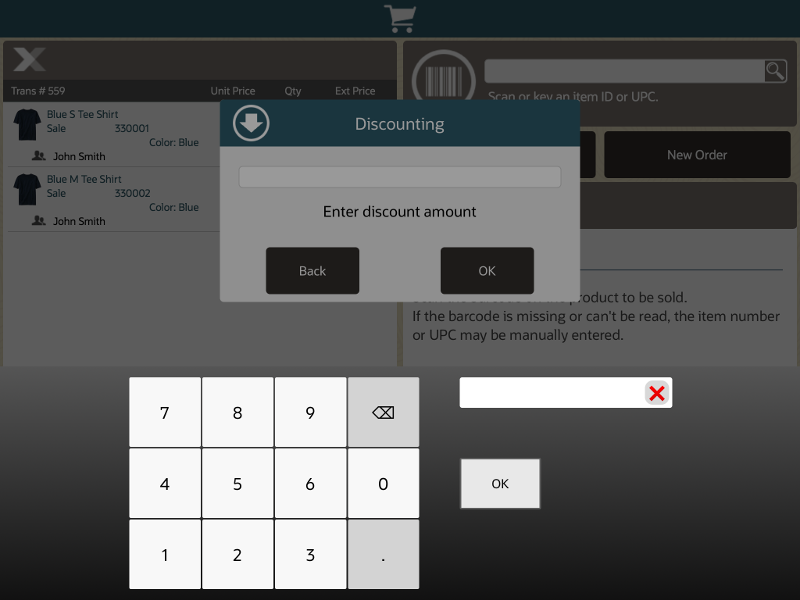
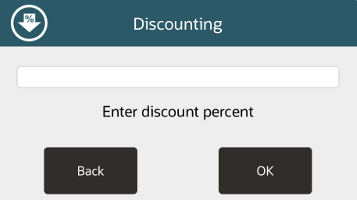
Figure 8-6 Enter Discount Percent
-
If the discount is not fixed, enter the amount or percentage of the discount.
-
Select OK.
The discount is applied to the transaction. Return to the sale screen.
Group Discounts
A Group Discount can be applied to a group of selected items in a transaction. The customer purchases these grouped items and receives a price that is less than the retail price of the items if they were sold singly.
To add a discount to a group of items in a transaction:
-
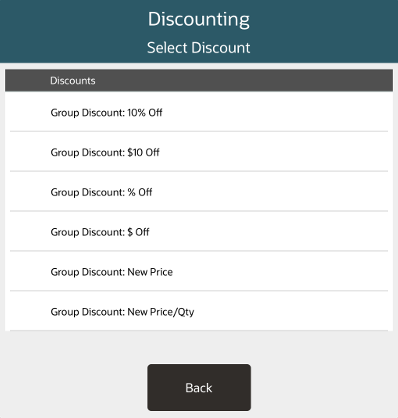
Select Add Group Discount from the Add Discount menu.
Figure 8-7 Select Group Discount
-
Select the discount to apply.
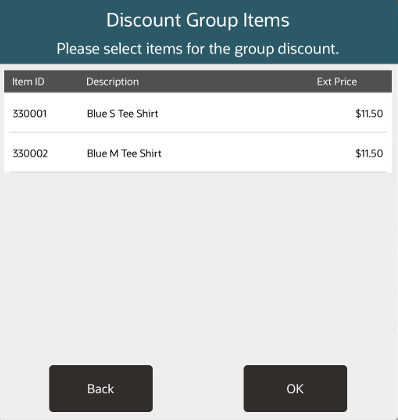
Figure 8-8 Items Eligible for Group Discount
-
Xstore POS displays a list of the items on the transaction that are eligible for a group discount. Select the items to include in the group.
-
Select each item to be included in the group discount.
-
When you have selected all the items for the group discount, press OK to continue.
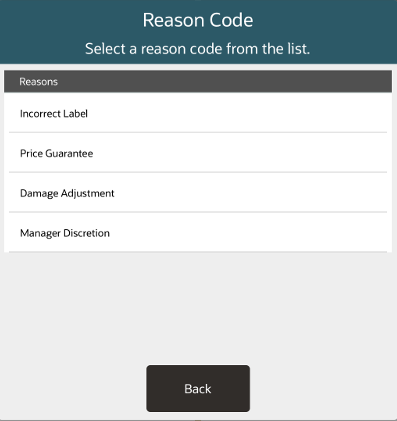
Figure 8-9 Reason Code List
-
If prompted, select the reason for applying the discount.
Figure 8-10 Enter Discount Amount

Figure 8-11 Enter Discount Percent

-
If the discount is not fixed, enter the amount or percentage of the discount.
-
Select OK.
The discount is applied to the items. Return to the sale screen.
Modifying Discounts
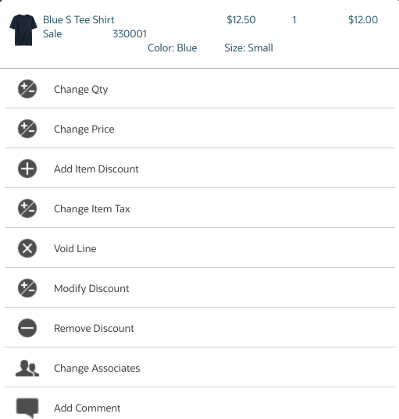
This option is only available when a discount is on the transaction. After selecting this option, you are prompted to select the discount you want to change. To change the discount on a selected item (see Adjusting an Item):
Figure 8-12 Xstore POS Item Adjustment Menu
-
Select the Modify Discount button.
-
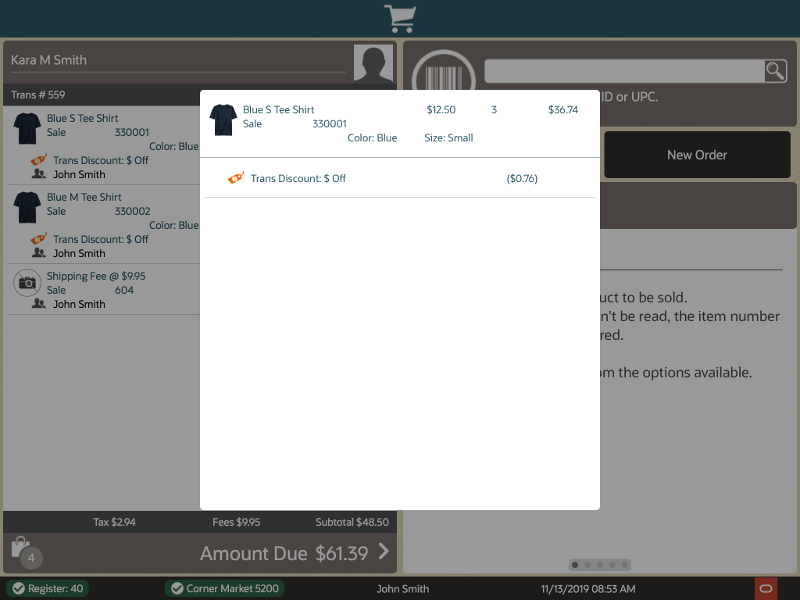
Select the discount to modify.
Figure 8-13 Select Discount
-
Select the proper discount.
Figure 8-14 Select Transaction Discount Menu

-
Select the proper reason for the discount.
Figure 8-15 Reason Code List

-
If prompted to enter an amount, enter the discount amount.
-
Select OK.
The discount is modified and Xstore POS returns to the item entry screen.
Removing Discounts
To remove a discount on a selected item (see Adjusting an Item):
-
Select Remove Discount. See Figure 8-12.
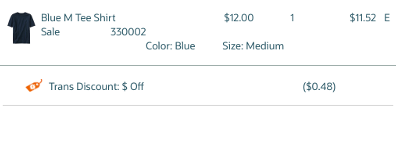
Figure 8-16 Discount List
-
Select the discount to remove.
The discount is removed and Xstore POS returns to the sale screen.