Inventory Location Maintenance
Inventory Location Maintenance allows you to edit the parameters of an inventory location or add/delete store-specific inventory locations for the local store. When editing an inventory location, Inventory Location Maintenance allows you to search for a specific inventory location by Location ID, location description, or associated bucket (for example, Special Order, Damaged, Order, and so on).
Note:
Inventory Location Maintenance does not allow you to edit items. Item edits within an inventory location must be performed within the Item Transfer function. See Item Transfer.
-
After logging in to the Back Office by entering your employee ID and password, select the Inventory option on the Main Menu.
-
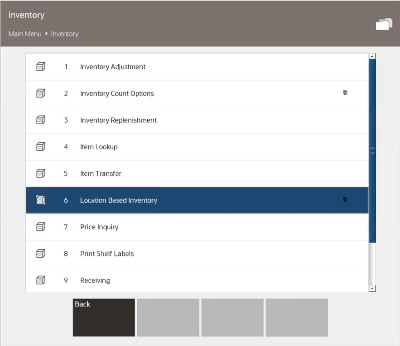
Select Location Based Inventory on the Inventory Menu.
Figure 6-5 Location Based Inventory Option
-
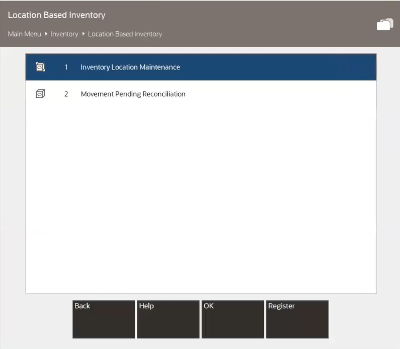
At the Location Based Inventory Menu, select the Inventory Location Maintenance option.
Figure 6-6 Inventory Location Maintenance Option
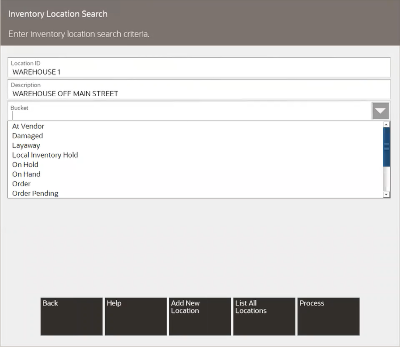
The system displays the Inventory Location Search form.
Figure 6-7 Inventory Location Search Form
-
Search options:
-
If you know a Location ID, enter it in the Location Id field and select Process. The system lists the matching Location IDs, and you may select the one you want. Continue with step 5.
-
If you do not know the ID of the location you want to see, select List All. The system displays all the existing Location IDs. Select the one you want and choose OK. Continue with step 5.
-
To search by the Bucket, select one or more buckets from the list and then select Process.
-
If you want to create a new inventory location, select Add New Location. See Define a New Inventory Location.
-
-
Maintain the location as needed at the Inventory Location Maintenance form.
Select one of these options:
-
Back: This returns you to the Inventory Location Search form.
-
Edit Location: Select this option to make changes to the location. The Location ID cannot be changed.
-
Description: Edit the description as needed.
-
Location Active: Enabled indicates the location is currently being used and grayed out means the location is inactive and cannot be counted unless its status is enabled.
For each Bucket ID, indicate the tracking method used by selecting an option from the drop- down list in the Tracking Method field.
After making your changes, select the Save Changes option to update the location.
-
-
Delete Location: Select this option if you decide to remove the location. You are prompted to confirm the deletion. Select Yes to proceed or No to continue without deleting the location.
-
Print Item List: Select this option to print a list showing all items in the location.
-
Define a New Inventory Location
This feature allows you to specify a new inventory location within your store.
-
After logging in to the Back Office by entering your employee ID and password, select the Inventory option on the Main Menu.
-
Select Location Based Inventory on the Inventory menu.
-
At the Location Based Inventory menu, select the Inventory Location Maintenance option.
The system displays the Inventory Location Search form (Figure 6-7).
-
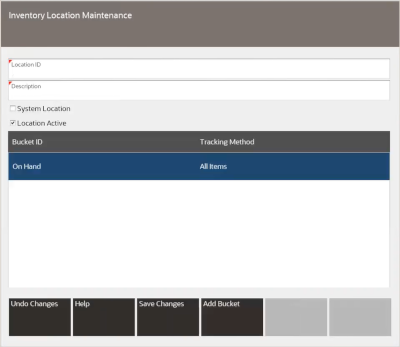
Select Add New Location. The system displays a form where you can define a new inventory location for your store:
Figure 6-8 Defining a New Inventory Location
-
In the Location ID field, enter the name you are assigning to the new location.
-
In the Description field, enter a brief text description for the new location.
-
The System Location field is defined and set up by the Home Office and cannot be changed or deleted. Home-office defined locations show as checked status in this field.
-
Select the Location Active status. Checked indicates the location is currently being used and blank means the location is inactive and cannot be counted unless its status its status is enabled.
-
-
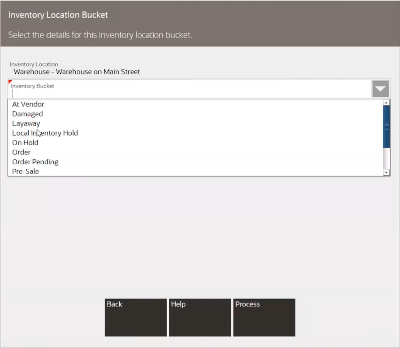
Select Add Bucket and select a bucket to use at this location.
Figure 6-9 Inventory Location Buckets
Note:
You cannot define new buckets. All buckets are defined by and downloaded from the Home Office.
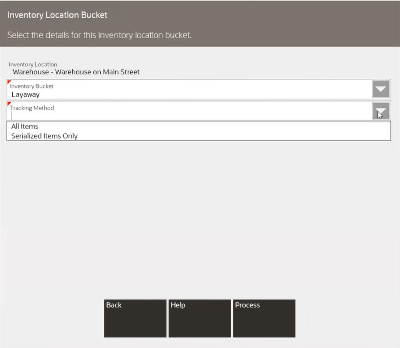
You must decide what tracking method is used for each bucket that you include in the new Location ID. Select whether all items are tracked, or just serialized items only are tracked, from the drop-down list in the Tracking Method field for each bucket that you assign to the location.
Figure 6-10 Inventory Location Bucket Tracking Method
Repeat for each bucket at this location.
-
After you have determined which buckets are included and you have assigned their respective tracking methods, select Save Changes to create the new location. The system displays a read-only view of the selections for the new Location ID.
Select one of these options:
-
Back: This returns you to the Inventory Location Search form.
-
Edit Location: Select this option to make changes to the new location.
-
Delete Location: Select this option if you decide to remove the location. You are prompted to confirm the deletion. Select Yes to proceed or No to continue without deleting the location.
-
Print Item List: Select this option to print a list with all items in the location, according to the Bucket IDs that you assigned to that location.
Note:
To edit items within an inventory location, use the Item Transfer function. See Item Transfer.
-