Location Based Inventory Menu
The Location Based Inventory Menu offers selections that allow you to perform various operations related to inventory locations and the items that are located there:
-
Inventory Location Maintenance: Existing inventory locations may be maintained (viewed, edited, and deleted). See Inventory Location Maintenance. You also have the option to create a new inventory location. See Define a New Inventory Location.
-
Inventory Location Summary Count: An inventory location count can be performed at any time for a specific inventory location. If you use location based inventory to count, you will see a prompt for a location when creating an inventory count (physical, supply, or cycle count). If there is only one active inventory location defined, that location is used without prompting.
If you do not use location based inventory, no prompt is shown when creating an inventory count. See Physical Inventory Counting for more information on inventory counting.
-
Movement Pending Reconciliation: Use this option to reconcile inventory changes stored in a temporary location with the actual inventory. See Movement Pending Reconciliation.
-
Inventory Movement Pending Report: The Inventory Movement Pending Report shows items from transactions in which an inventory location has not yet been specified when Location Based Inventory is being used. This report shows the transaction number, transaction date, item ID and quantity, and the inventory action code that is currently assigned. Refer to the Oracle Retail Xstore Point of Service Reports Guide for information about this report, as well as the Inventory Movement Report, Inventory Movement History Report, and Item List Report
Movement Pending Reconciliation
The Movement Pending inventory location is a default, virtual location for any items for which an inventory location was not specified at the time of a sale, layaway setup, or inventory shipment. This inventory location is a temporary location and items in this inventory location must be reconciled.
To reconcile items in this virtual inventory location, the sold item must first be transferred from the Movement Pending inventory location to a defined merchandise inventory location/bucket. Next, the item must be removed from the merchandise inventory location/bucket, and transferred to either the SOLD bucket, LAYAWAY bucket, or SHIPPED bucket (based on the transaction type).
An item appears on the Movement Pending Reconciliation list if the following criteria are met:
-
Your system is set up to track inventory movements that are pending.
-
Your system does not prompt for a Location ID during a transaction (sales transactions and shipping transactions).
-
An item is found in more than one Location ID or is not assigned to any Location ID in your store.
-
An item is assigned to a specific Bucket ID within the Location ID where it is found. For example, for sales, shipping, and layaway setup transactions, the item must be in the ON_HAND bucket.
-
Select Movement Pending Reconciliation from the Location Based Inventory Menu.
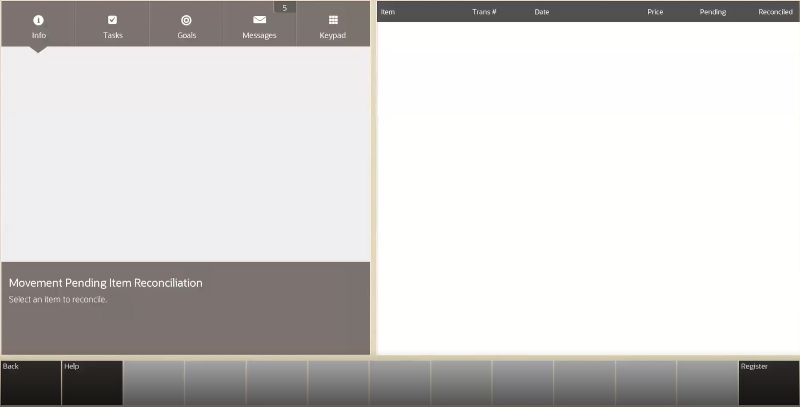
The system displays a screen where you can select pending items and reconcile them.
Figure 6-1 Movement Pending Reconciliation Screen

If you would like to have a printed report of the items pending reconciliation, select the Print Movement Pending option.
Figure 6-2 Inventory Movement Pending Report

-
Select the item on the list that you want to reconcile. Use the up and down arrow keys to scroll through the list and choose the Reconcile Selected Item option. See Figure 6-1.
Note:
If the item list is long, you can quickly find a specific item if you know its item ID. Select the Search Item menu option, enter the item ID when prompted, and press Enter. The system locates and highlights that item in the list.
-
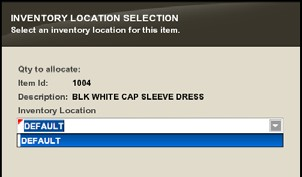
The system prompts for the item's source location. Select a location from the drop- down list and choose Process.
Figure 6-3 Select Source Location For Item Being Reconciled

-
The system prompts for the item quantity. Enter the number of items being moved from the location you selected, and press Enter.
Figure 6-4 Prompt for Quantity to be Reconciled

The system returns to the list of items that are awaiting reconciliation. The item that you just reconciled is highlighted in green, and the Transfer Qty column now displays the quantity that you entered for the item.
-
If needed, select one of the following menu options:
-
Change Quantity: You are prompted to select the item and then enter the quantity that you want to reconcile for the item.
-
Void Item: This resets the quantity for an item that you reconciled to the previous quantity.
-
Search Item: Enter an item ID and press Enter to locate and highlight that item in the list. This is useful when the item list is long and extends off the screen.
-
-
Select the Save & Exit option to retain the reconciliation(s) that you just completed.
-
You are prompted to confirm that you want to save your changes. Choose Yes to save the information, or No to return to the list of reconcilable items. If you choose Yes, the item is removed from the list of items awaiting reconciliation.
The system automatically prints the Inventory Movement Report and includes all the items that were just reconciled and saved.
After printing the report, the system returns to the Location Based Inventory menu.