Inventory Replenishment Reports
There are two reports to help manage your Inventory Replenishment orders. The Replenishment Product Request Report displays details about each item in a particular request document. The Replenishment Open Product Requests Report allows you to see a list of all open requests in the system.
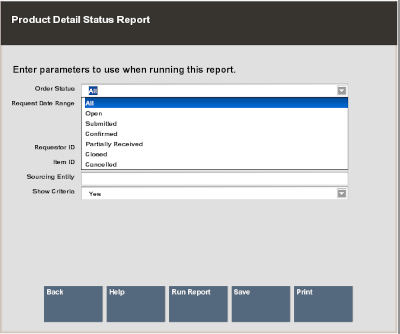
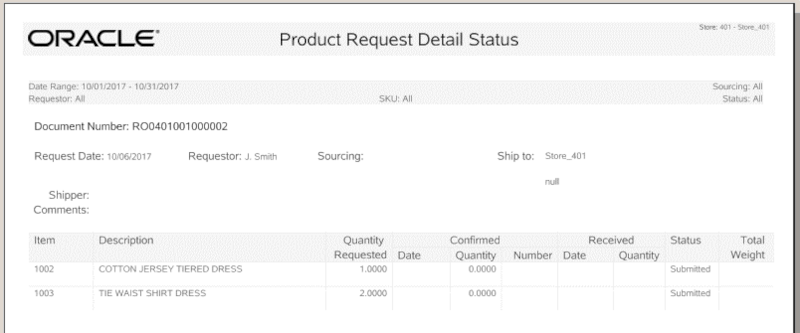
The Replenishment Product Request Report allows you to query by Order Status, Date Range or Specific Date, Requestor ID, Item ID, and Sourcing Entity. The report can be viewed on the screen and printed.
This report includes the following information for each item:
-
Item ID
-
Quantity Requested
-
Date the quantity for the item was confirmed
-
Confirmed Quantity
-
Confirmed Number - This is a confirmation # from a 3rd party.
-
Date item was received
-
Quantity Received
-
Status
The Replenishment Open Product Requests Report displays replenishment orders that are Open, Submitted, or Confirmed. The report can be viewed on the screen and printed. This report includes the following information for the orders:
-
Document #
-
Date Submitted (if applicable)
-
Source Entity Name (if applicable)
Running the Replenishment Product Request Report
-
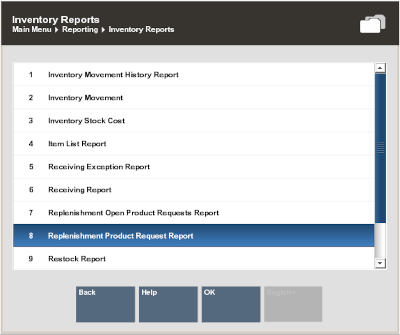
After logging in to the Back Office, select and enter Reporting, Inventory Reports, and then Replenishment Product Request Report.
Figure 3-37 Inventory Report Menu Options
-
The Product Detail Status Report parameters form displays. Enter your criteria to generate the report:
Figure 3-38 Product Detail Status Report Form
-
Order Status
-
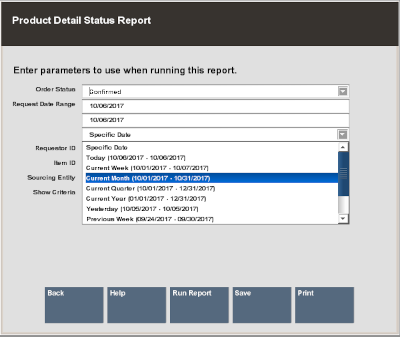
A Date Range (as shown in Figure 3-39)
<OR>
-
A date option from the list in the Specific Date field. For example, yesterday or today.
Figure 3-39 List of Relative Dates
-
Requestor ID
-
Item ID
-
Sourcing Entity
-
-
Select one of these options to finish your report:
-
Run Report: Execute the report and display the results on the screen.
-
Print: Execute the report and send the results to a printer.
-
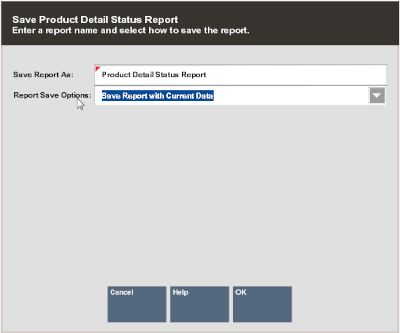
Save: You can save this report with the current data or save only the report parameters to run this specific report with these parameters again.
If you save the report, assign a name to it for future retrieval. Xstore Classic suggests a name, but you may type in the Save Report As field and override it.
Figure 3-40 Product Detail Status Report - Save Report Options
-
-
Choose one of the options in the Report Save Options list:
-
Save Report with Current Data - To save the report with the current values.
-
Save Report Parameters - To save only the parameters to use these parameters as a template to generate a new report later.
-
-
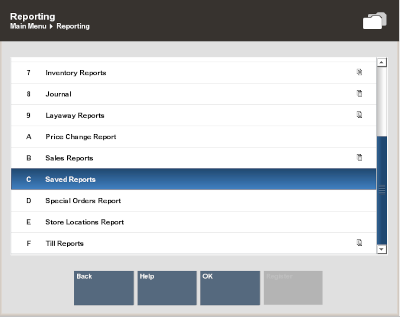
Select OK to save the report. Reports are saved to your personal report area and can be retrieved from the Saved Reports menu option and press Enter.
Figure 3-41 Saved Reports Menu Option
Note:
Refer to the Oracle Retail Xstore Point of Service Reports Guide for more information about setting up and running reports.
Figure 3-42 Replenishment Product Request Detail Report
Running the Open Product Requests Report
-
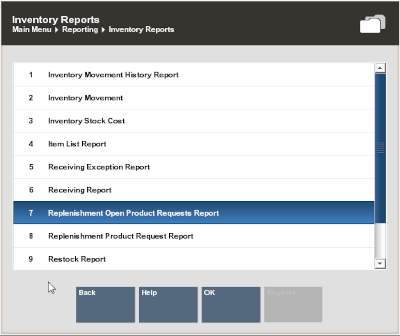
After logging in to the Back Office, select and enter Reporting, Inventory Reports and then Replenishment Open Product Requests Report.
Figure 3-43 Replenishment Open Product Requests Report Menu Option
-
The report displays and gives you several options for viewing:
-
Print: Send the results to a printer.
-
Save: You can save this report with the current data or save only the report parameters to run this specific report with these parameters again.
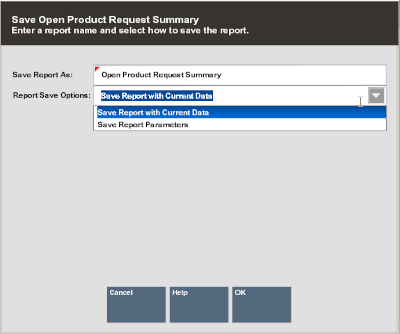
If you chose to save the report, assign a name to your report for future retrieval.
Figure 3-44 Open Product Request Summary
-
-
Choose one of the options in the Report Save Options list:
Save Report with Current Data - To save the report with the current values.
<OR>
Save Report Parameters - To save only the parameters to use these parameters as a template to generate a new report at another time.
-
Select OK to save the report. Reports are saved to your personal report area and can be retrieved from the Saved Reports menu option and press Enter.
Figure 3-45 Saved Reports Menu Option

Note:
Refer to the Oracle Retail Xstore Point of Service Reports Guide for more information about setting up and running reports.
Figure 3-46 Replenishment Open Product Request Summary Report
