Shipping Document
This section discusses shipping documents.
Searching for a Shipping Document
...continued from step 4.
-
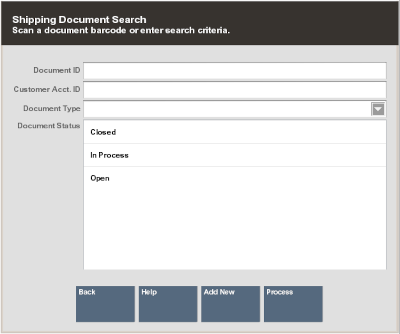
Xstore Classic prompts you to enter the Shipping Document search criteria at the Shipping Document Search form:
Figure 4-4 Shipping Document Search Form
Note:
If you know a Shipping Document does not exist, you can select the Add New option at the Shipping Document Search form to create a new Shipping Document. Refer to Creating a New Shipping Document for more information.
-
Enter your search criteria:
-
Scan or enter a specific Shipping Document ID, (or leave all fields blank and select Process to return a list of shipping documents).
-
Enter a Customer Account ID.
-
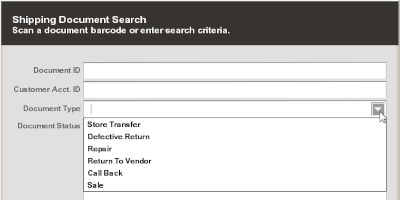
Select a document type from the list in the Document Type field:
Figure 4-5 Document Type List
Note:
Your list of document types may differ from the example shown here and is based on the shipping process used at your store.
-
Select one or more Document Status options:
-
Open
-
In Process
-
Closed
-
-
-
Select Process to display Shipping Documents that match your search criteria.
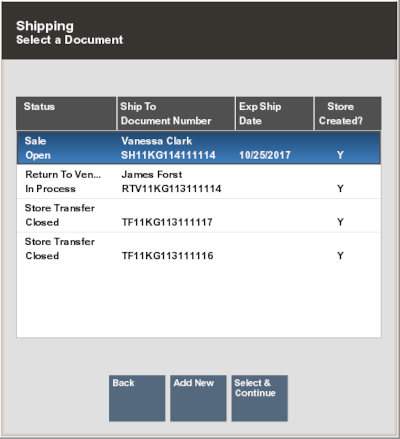
If your search criteria result in more than one record being found, you must select the record you want from the list.
Figure 4-6 Shipping Documents Search Results
Note:
If the document you are looking for is not found in the list of Shipping Documents select the Add New option at the Shipping Document search results form to create a new Shipping Document. Refer to Creating a New Shipping Document for more information about creating a new Shipping Document at the store.
-
Select a Shipping Document from the list and press Enter to continue.
Note:
Shipping Documents that have a CLOSED status are view-only and can only be edited with a manager's override, if allowed by your store's policy.
-
Xstore displays the Shipping Maintenance screen for the selected Shipping Document:
Figure 4-7 Shipping Maintenance Screen
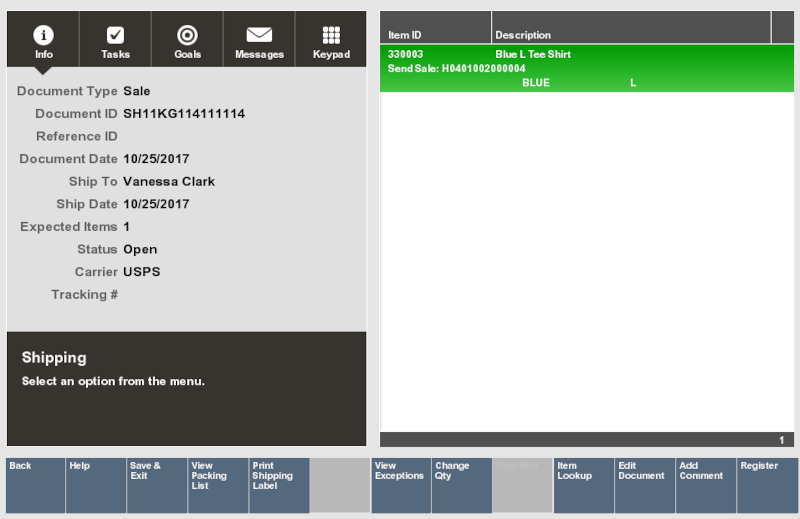
The Shipping Maintenance Screen shows the following information for the Shipping Document:
-
Document Type: The shipping document type. For example, Return To Vendor, Sale, Store Transfer, and so on.
-
Document ID: The shipping document identifier number.
-
Ref ID: The shipping document reference number (if applicable).
-
Document Date: The date the shipping document was created.
-
Ship To: The ship-to destination information.
-
Ship Date: The date the items were shipped.
-
Expected Items: The number of expected items in the Shipping Document (for user-created documents, this value is zero. Only documents created by the home office and downloaded to the store, and documents created by an external process such as Order, show an expected quantity.
-
Status: The Status of the shipment (OPEN, IN PROCESS, CLOSED).
-
Carrier: The Carrier selected to process the shipment.
-
Tracking #: The tracking number from the Carrier (if applicable).
This screen also shows the following information for each item within the Shipping Document:
-
Item ID
-
Item Description
-
Quantity To Ship
-
Quantity Shipped
Note:
The Shipping Document status determines the menu options that are available at the Shipping Maintenance screen. For example, the View Packing List option is only available when the Shipping Document is saved, and the packing list has been created.
-
-
Continue with Shipping the Items.
The only difference between shipping items using a user-created Shipping Document and a Shipping Document created by the home office or a process such as Order functionality, is the value in the Expected Quantity to Ship field. For user- created documents, this value is always zero.
Creating a New Shipping Document
Shipping Documents are often downloaded from the home office, but you can also create a Shipping Document in your store. For example, if there is no shipping document, you can create one to return items to a vendor or to transfer items to another store. Use the following process to create a new Shipping Document so that you can ship the items and update inventory.
-
A new Shipping Document can be initiated from two different forms. To create a new shipping document:
-
Select the Add New option at the Shipping Document Search form.
<OR>
-
Select the Add New option at the Shipping search results list.
Figure 4-8 Shipping Document Search Form

Figure 4-9 Shipping Document Search Results List
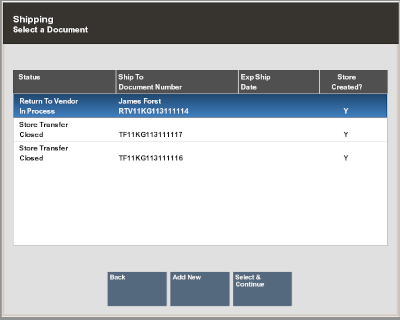
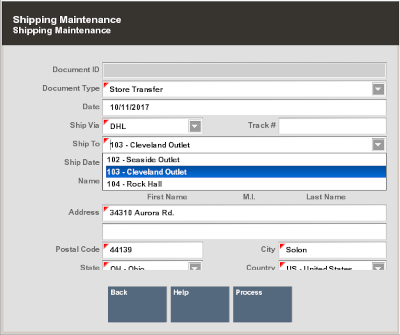
Xstore displays the Shipping Maintenance form.
Figure 4-10 Shipping Maintenance Form
-
-
Enter the information as required:
-
Document ID: Depending upon your system's configuration, the system may generate this number automatically.
-
Document Type: Select the Shipping Document type from the list. This is a required field.
-
Document Date: The date the Shipping Document was created or edited. This field defaults to today's date.
-
Ship Via: Select the method by which the shipment will be sent.
-
Track #: Enter the Tracking Number for the shipment, if known.
-
Ship To: Select a destination for the shipment from the list.
Note:
The list shown in the Ship To field varies depending upon the type of document that you select. For example, a list for an RTV document type shows a list of vendors; a list for a Store Transfer document type shows a list of stores.
-
Ship Date: Enter the date the shipment will be transferred from your store.
-
Name & Address fields: Enter the Ship To name and address information. These fields may be populated automatically based on the Ship To information.
-
-
When you have entered all the information for this new Shipping Document, select the Process option.
-
Xstore prompts for the items to be included in this Shipping Document.
Figure 4-11 Shipping Maintenance Screen Showing Item ID Prompt
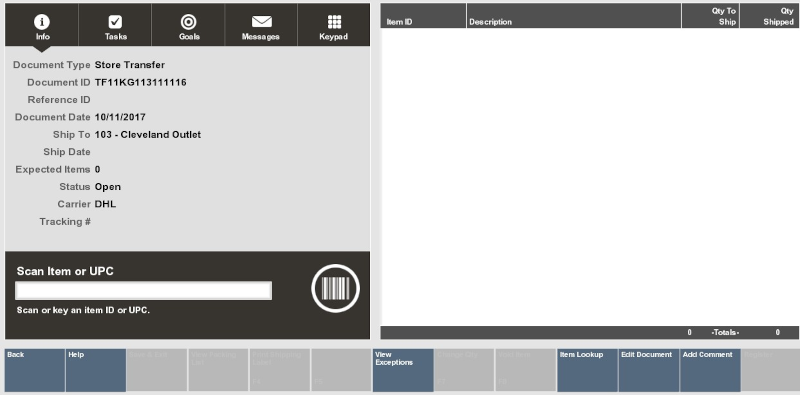
Note:
There is only one difference between shipping items using a user-created Shipping Document and using a Shipping Document created by the home office: the value in the Expected Quantity to Ship field is always zero on your user-created document.
-
Continue with Shipping the Items.
Shipping the Items
-
At the Shipping Maintenance screen, scan or enter an item ID at the Item ID or UPC prompt and press Enter.
Note:
You cannot add new items to a Shipping Document that was created by the home office and downloaded to your store. Only the items expected in a
downloaded document can be shipped. You must create a new Shipping Document to ship items from your store that was not specified by the home office. See Creating a New Shipping Document for more information.
-
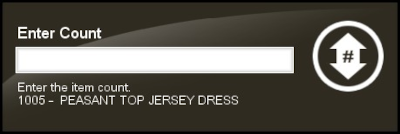
You can scan each item individually at this prompt and Xstore increments the total by one each time you scan an item. If you enter an item ID manually, Xstore prompts for the total number to be shipped for this item ID.
Note:
You can also scan an item ID and then select the Edit Item, Change Quantity options to enter the total number of items counted for this shipment.
-
If prompted, enter the total number of items to be shipped for this item ID and press Enter to continue.
Figure 4-12 Shipping Maintenance Screen - Item Count Prompt
-
Continue counting all items to be shipped in this Shipping Document and select the Save & Exit option to continue with the shipping process.
-
At the Save Changes prompt, select Yes to save this Shipping Document.
-
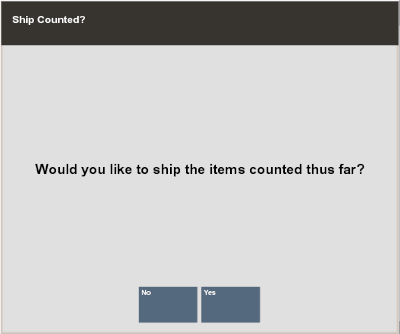
Xstore prompts if you want to ship the items you have counted:
Figure 4-13 Ship Counted Items - Verification Prompt
-
Select Yes to ship the items or No to leave this Shipping Document in an in-process state so that you can continue to access this document and make changes before shipping the items from the store.
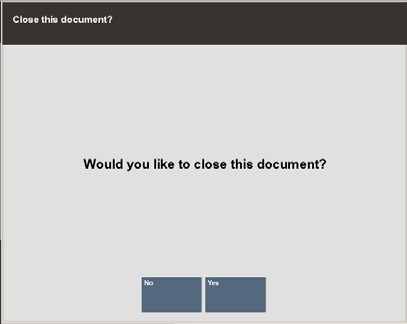
If you select Yes to ship the items, you may be asked if you want to close this document:
Figure 4-14 Close Document Verification Prompt
-
Select Yes to set the Shipping Document status to CLOSED.
-
Select No to leave this Shipping Document in an In-Process state so that you can continue to access this document and make changes before closing the document. The system returns to the Document Search form.
-
Print Shipping Label
-
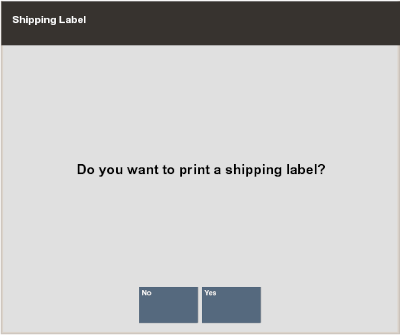
If you selected Yes to ship the items, Xstore displays a prompt asking if you want to print a shipping label. Select Yes to print a shipping label for the shipment.
Figure 4-15 Print Shipping Label Prompt
-
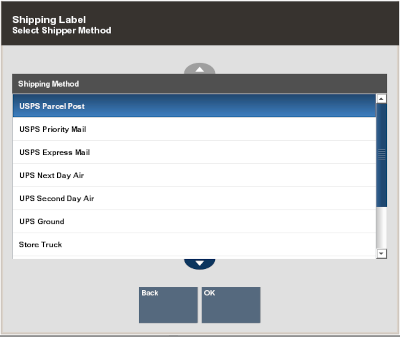
Xstore may prompt if you want to change the Carrier you selected for the shipment:
-
If prompted, select OK to continue with the selected Carrier, or
-
Select Override Shipping Method to select a different Carrier for the shipment.
Figure 4-16 Select Shipper Method
-
-
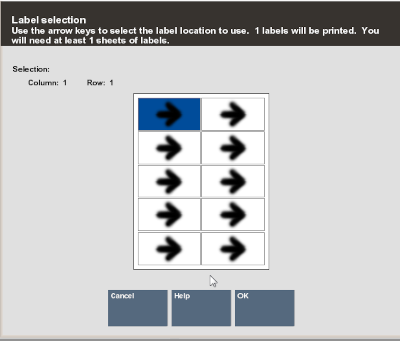
Xstore shows the number of label sheets you need and prompts you to select the position on the label sheet for the printed label. Select the location for the label and press Enter. The column/row you selected is shown in the Selection area on the form. In this example, Column: 1 Row: 1:
Figure 4-17 Label Location Prompt
Note:
Label location selection allows you to use partial sheets of labels to ensure that expensive labels are not wasted.
Xstore briefly displays a Calculating Label Layout message that requires no response.
-
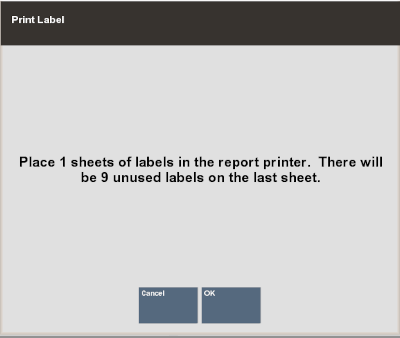
Xstore displays a message indicating the number of label sheets you need and the number of unused labels that will remain on the last sheet. Press Enter to acknowledge the message and print labels.
Figure 4-18 Number of Sheets Required
-
Xstore prompts if you want to print a packing slip:
Figure 4-19 Print Packing LIst Prompt
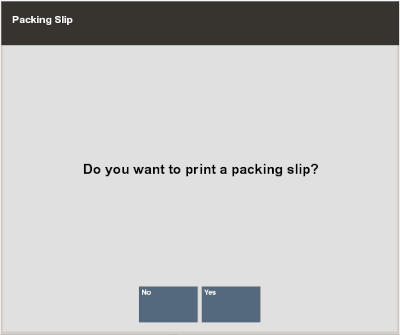
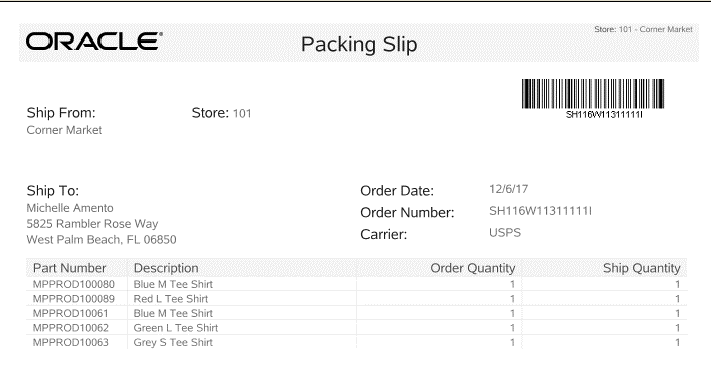
Select Yes to print a packing slip that lists the items and their quantities.
Figure 4-20 Packing Slip Example
