Store Layout Maintenance
The most efficient way to count physical inventory is to divide the store into specific count sections, based on the physical store layout, and possibly the number of associates that will be counting the items. These count sections are set up for inventory buckets you have defined for your store. Each count section will generate a list of items on a count sheet. For example, if you set up four sections, then four separate count sheets will be created for the count process. This allows you to assign the associates to specific areas of the store, equipped with a count sheet specifying the items to be counted in that section.
-
At the Register Login screen, select the Back Office option.
-
After logging in to the Back Office by entering your employee ID and password, select the Inventory option from the Main Menu and OK.
-
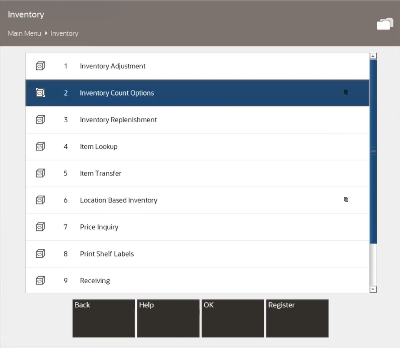
At the Inventory menu, select the Inventory Count Options option.
Figure 5-39 Inventory Menu - Inventory Count Option
-
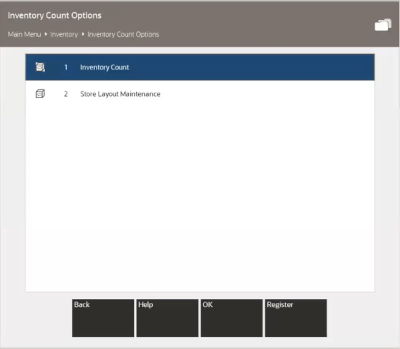
At the Inventory Count Options menu, select the Store Layout Maintenance option.
Figure 5-40 Store Layout Maintenance Option
-
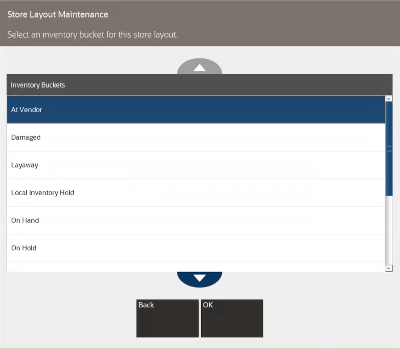
The system displays a list of the inventory buckets defined for the store. Select an inventory bucket for this count section.
Figure 5-41 Store Layout Maintenance - Inventory Bucket List
-
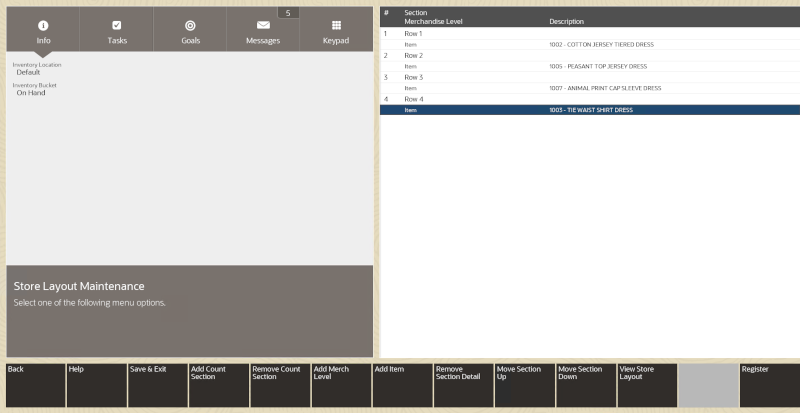
The system opens the Inventory Bucket - Add Count Section window. Select the Add Count Section menu option to create a count section for the bucket.
Figure 5-42 Inventory Bucket - Add Count Section Window
Note:
If the inventory bucket has other count sections defined, the disabled menu options shown in Figure 5-42 above will be enabled and the count sections will be listed on the view port.
-
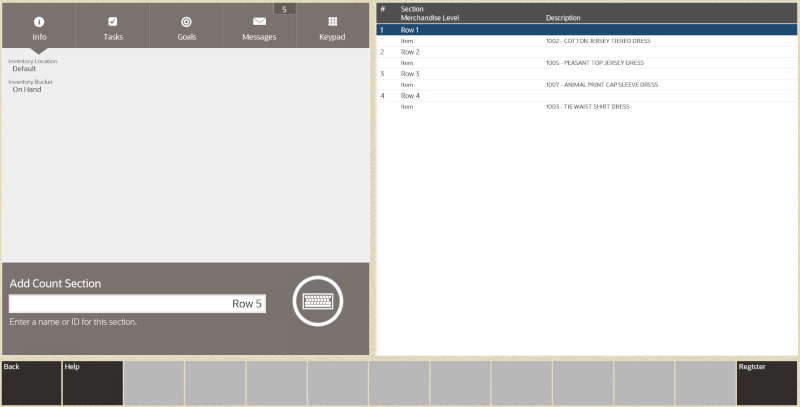
Type a name or ID for the new count section within this inventory bucket and press Enter to add the count section to the bucket.
Figure 5-43 Count Sections for Order Bucket Example
Note:
Repeat adding count and entering name sections to the inventory bucket as needed.
-
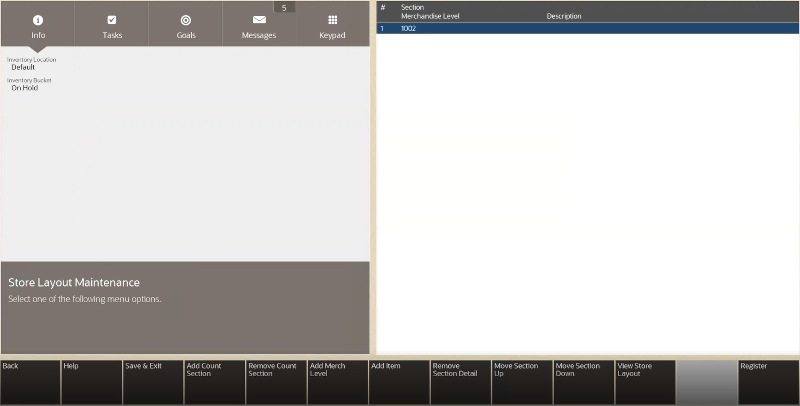
Next, define the items that are part of the count section. Items can be added individually (Add Item option) or by merchandise level (Add Merch Level option).
Figure 5-44 Menu Button Options
-
Select either the Add Item option or the Add Merch Level option (Figure 5-44).
-
Select the count section from the list and press Enter.
-
If you chose to add an item, scan or enter the item ID at the prompt and press Enter.
Figure 5-45 Add Item Level Prompt

-
If you chose to add a merchandise level, select the merchandise level from the list and select Process.
Figure 5-46 Merchandise Levels List
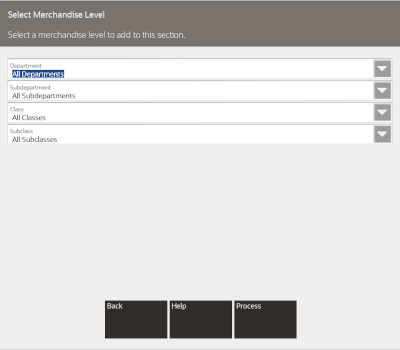
The items and/or merchandise levels are added to each count section for the inventory bucket and shown on the view port.
The following options are available if you need to modify the count sections and items:
-
Select the Remove Count Section option to remove a count section and the associated items from the store layout.
-
Select the Remove Section Detail option to remove an item or merchandise level from a count section.
-
Select the Move Section Up or Move Section Down options to move the count section position higher or lower in the list of count sections.
-
Select the View Store Layout option to view or print a report showing the Store Layout setup for the inventory bucket.
Figure 5-47 Store Layout

-
-
-
Select the Save & Exit menu option to save the store layout and return to the Inventory Count Options menu.
Once count sections are set up for an inventory bucket, you can maintain these sections by adding or removing items and merchandise levels as needed. However, any updates you make to the store layout will only apply to new Inventory Counts going forward. Any existing Inventory Counts that have been generated will use the layout defined at the time the Inventory Count was set up.