Sell a Warranty
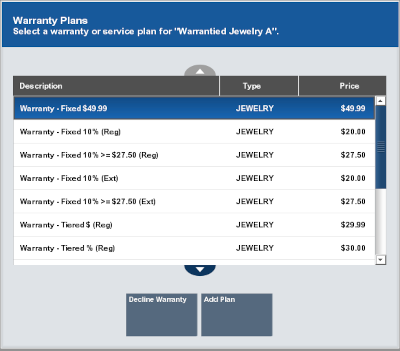
When you sell an item that is eligible for a warranty or service plan, the system automatically displays a list, in the Message Window, of plans that are available for the specific item.
Figure 14-1 Warranty Plans

Note:
Items that are eligible for warranty plans but have not been associated with any plan show a No Warranty Purchase icon next to them in the View Port.
When are prompted to select a warranty:
-
Select whether to add a warranty:
-
Select Decline Warranty to continue the transaction without adding a warranty.
-
Select the warranty to add:
-
Click the warranty.
-
Use the up and down arrows to highlight the warranty.
-
-
-
Click Add Plan.
The warranty is added to the transaction and Xstore Point of Service prompts for the customer to assign to the warranty.
-
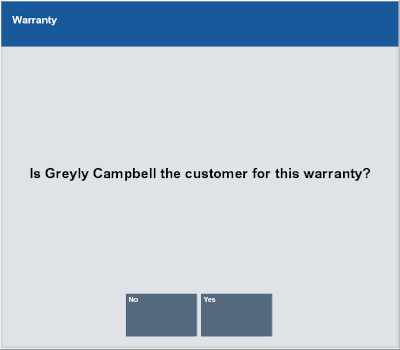
If a customer is associated with the transaction, Xstore Point of Service prompts whether to assign the current customer to the warranty. Continue with Step 3.
-
If no customer is associated with the transaction, Xstore Point of Service prompts for customer information for the warranty. Continue with Step 4.
Note:
Because a warranty must have an owner, you must associate a customer name with the warranty plan. The plan owner may be a different person than the customer who purchases the item and the warranty. For example, the customer may purchase an item as a gift and wants to assign the warranty to the person receiving the gift.
Figure 14-2 Warranty Current Customer Prompt

-
-
Indicate whether to assign the warranty to the current customer:
-
Click Yes to assign the warranty to the current customer.
Continue the transaction.
-
Click No to assign the warranty to a different customer.
Xstore Point of Service prompts for the warranty owner.
-
-
Enter the warranty owner information.
-
Click Yes.
The person's name is added to the warranty.
Figure 14-3 Sale Customer Different than the Warranty Plan Owner
