Verified Returns
If the customer has the original receipt or credit card, the system verifies that the receipt that accompanies the return, or the original credit card used in the sale, is found either on the local system or the home office system. When the original transaction is found, the system displays the original sale information in the View Port. A return using the customer's original sale receipt or credit card to locate the transaction information stored in the database is a verified return.
Start the Return
You can start a return by doing one of the following:
Scan the Original Transaction Receipt
To start a verified return:
-
Scan the barcode on the customer's original receipt at the Register Sale screen.
-
If you are prompted to enter customer information:
-
Enter customer search information.
-
Click Process.
Xstore Point of Service displays a list of customers matching the search criteria.
-
Select the customer from the list.
-
Click OK.
Continue with Return Items.
-
Swipe a Credit Card or Enter the Receipt Data
To start a verified return:
-
Click Return Item in the Register Sale menu.
-
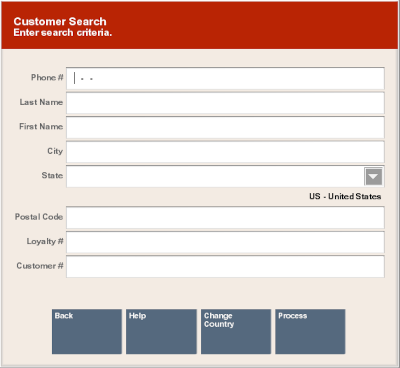
If you are prompted for customer information, enter the customer information.
Figure 4-1 Customer Search Form
-
Select Process.
Xstore Point of Service displays a list of customers matching the search criteria.
-
Select the customer from the list.
-
Click OK.
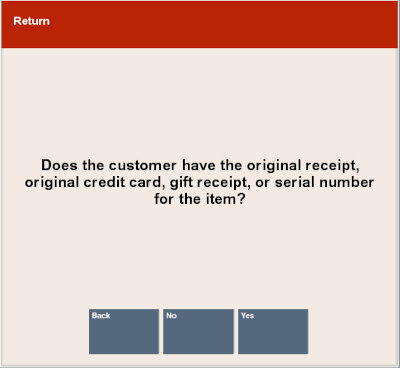
Xstore Point of Service displays a prompt asking whether the customer has the original receipt, original credit card, gift receipt, or serial number for the item.
Figure 4-2 Return Original Receipt Prompt
-
Click Yes.
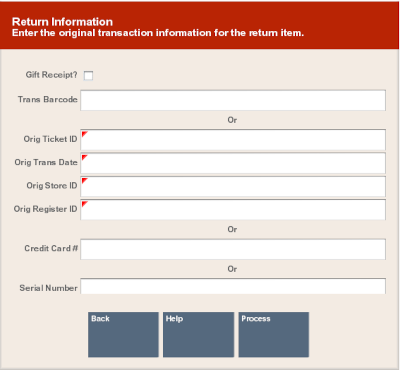
The system prompts for information about the original sale transaction.
Figure 4-3 Original Transaction Return Information
-
Do one of the following:
-
Enter the credit card or debit card used in the transaction (enter the card in the chip reader or swipe the card).
Xstore Point of Service prompts for an item ID. Continue with Step 8.
-
Enter the receipt barcode information and click Process.
Continue with Return Items.
-
Scan the receipt barcode.
Continue with Return Items.
-
-
Scan the item or enter the item ID.
-
If prompted to select a transaction:
-
Click the correct transaction or use the up and down arrows to highlight the correct transaction.
-
Click OK.
Continue with Return Items.
-
Search for the Transaction
To start a verified return:
-
Click Return Item in the Register Sale menu.
-
If you are prompted for customer information, enter the customer information. See Figure 4-1.
-
Click Process.
Xstore Point of Service displays a list of customers matching the search criteria.
-
Select the customer from the list.
-
Click OK.
Xstore Point of Service displays a prompt asking whether the customer has the original receipt, original credit card, gift receipt, or serial number for the item. See Figure 4-2.
-
Click Yes.
The system prompts for information about the original sale transaction. See Figure 4-3.
-
Enter search information for the transaction and click Process.
This prompt has the following criteria:
-
Orig Ticket ID - ID of the original transaction.
-
Orig Trans Date (MM/DD/YYYY) - Date of the original transaction.
-
Orig Store ID - ID of the store where the original transaction was performed.
-
Orig Register ID - ID of the register where the original transaction was performed.
-
-
Click Process.
Enter Web Order ID
If customers can return items from online purchases at a store (cross-channel returns), do the following to perform a cross-channel return:
-
Enter the ID from the shipping document in the Web Order ID field.
-
Click Process.
Note:
Freight, handling, or other delivery changes are not returnable.
Transaction Not Found
If the transaction is not found, a prompt opens:
-
Click Yes to continue with an unverified return. See Blind & Unverified Returns.
-
Click No to re-enter transaction information. See Start the Return.
Return Items
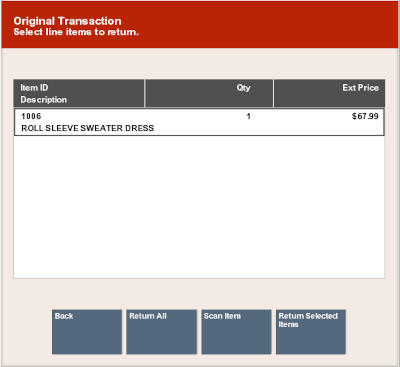
After attaching a transaction to the return transaction, enter items:
Note:
Click Return All to return all items in the original transaction.
Figure 4-4 Original Transaction Information
-
Select the items to return:
-
Click items to select them.
-
Use the up and down arrows to highlight items, then press the Spacebar to select them.
-
-
Click Return Selected Item(s).
-
If you are prompted for the quantity of an item:
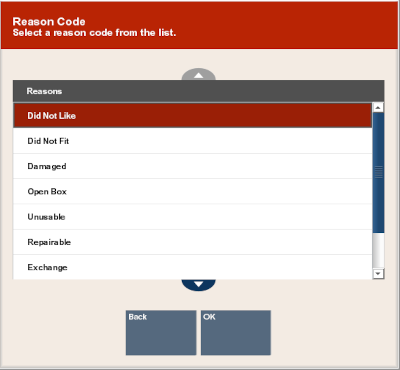
Xstore Point of Service prompts for a reason for the return.
Figure 4-5 Return Reason Code List
-
Select the reason for the return:
-
Click the reason.
-
Use the up and down arrows to select the reason, then press the Spacebar.
-
-
Click OK.
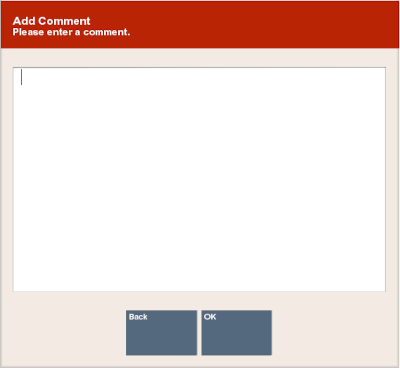
Figure 4-6 Return Comment Form
-
If you are prompted for comments:
-
Enter additional information about the return.
-
Click OK.
-
-
If the item is part of a kit, indicate whether all kit items are available:
-
Click No if all items in the kit are not available. The return item is removed from the transaction. If no other items are included, return to Step 1.
-
Click Yes if all items in the kit are available. The return continues.
-
-
If an acknowledgement prompt opens, read the message and click OK to continue.
Xstore Point of Service returns to the return items screen.
Note:
The return item quantity has been decremented by the quantity returned for each item that was added to the return.
-
Repeat Steps 1 to 8 to return additional items from the transaction.
Note:
Depending upon your return policy, certain items may be returned at a prorated value from their original purchase price. If so, the amount refunded for these prorated items is determined by the number of days between the original date of purchase and the date of return.
For example, some store return policies offer a full refund if the item is returned within 30 days. After 30 days, a reduced refund (declining over time following the purchase date) is calculated automatically.
-
Continue the transaction:
-
Click Add Tenders tender the transaction.
-
Click Exit Return to return to the sales transaction.
-
Click New Return to return more items from a different transaction.
-