Blind & Unverified Returns
A blind return is a return without a receipt. An unverified return is a return where the customer has a sale receipt, but it cannot be found in the database. These two return procedures are essentially the same.
If the customer does not have the original receipt for the return item, or the customer's receipt cannot be verified, perform the following procedure to complete the return transaction.
Start the Return
To start a blind or unverified return:
-
Click Return Item in the sale screen.
-
If you are prompted to enter customer information, continue with Step 2. See Figure 4-1.
-
If you are prompted for a receipt, continue with Step 6. See Figure 4-2.
-
-
Enter the customer search information:
-
Phone # - Customer phone number.
-
Last Name - Customer last name.
-
First Name - Customer first name.
-
City - City for customer's address.
-
State - State in the customer's address.
-
Postal Code - Postal code or zip code for he customer's address.
-
Loyalty # - ID number for the customer's loyalty account.
-
Customer # - Customer ID number.
-
-
Click Process.
-
If necessary, select the customer in the search results:
-
Click the customer.
-
Use the up and down arrows to highlight the correct customer, then press Spacebar.
-
-
Click OK.
-
Indicate whether the customer has the original receipt:
-
Click Yes if the customer has the receipt.
-
Click No if the customer does not have the receipt.
-
-
Enter an item:
-
Scan the item.
-
Enter the item ID the press Enter.
-
-
If prompted for an item quantity, enter the quantity, then click OK.
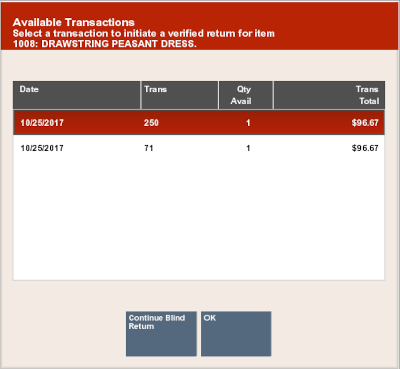
Figure 4-7 Item Found In Customer's Transaction History
-
If the item is found in the customer's transaction history:
-
Select a transaction from the list.
-
Click OK.
-
Continue with Return Items in Verified Returns.
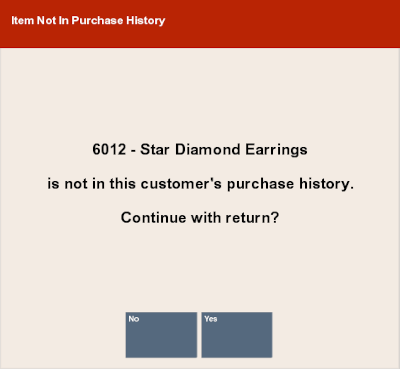
Figure 4-8 Item Not In Purchase History
-
If prompted that the item was not found in the customer's transaction history:
-
Click Yes to continue the return.
-
Click No to cancel the return transaction and return to the sale screen.
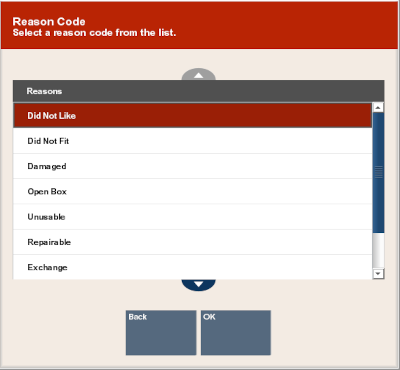
Figure 4-9 List Of Return Reason Codes
-
-
Select the reason for the return:
-
Click the reason.
-
Use the up and down arrows to highlight the reason, then press the Spacebar.
-
-
Click OK.
-
If you are prompted for additional information:
-
Enter the information.
-
Click OK.
-
-
If you are prompted with a list of previous prices for an item:
-
Select the item:
-
Click the reason.
-
Use the up and down arrows to highlight the reason, then press the Spacebar.
-
-
Click OK.
-
-
If the notification prompt opens indicating that a restocking fee is applied, click OK to acknowledge the prompt.
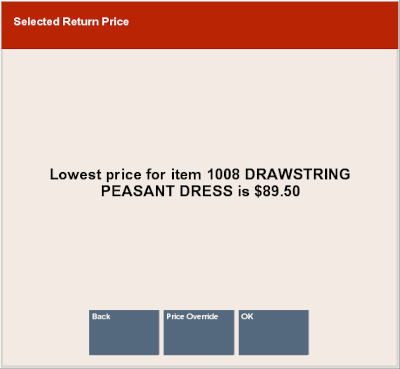
Figure 4-10 Lowest Item Price
-
If a notification prompt opens, indicating the lowest price for the item:
Figure 4-11 Price Override Prompt

-
Click Price Override to change the price.
-
Click OK to continue the return with the listed price.
-
-
If you are prompted for a serial number:
-
Enter the serial number.
-
Click OK.
-
-
If the item is part of a kit, indicate whether all kit items are available:
-
Click No if all items in the kit are not available. The return item is removed from the transaction. If no other items are included, return to Step 7.
-
Click Yes if all items in the kit are available. The return continues.
Xstore Point of Service returns to the return screen.
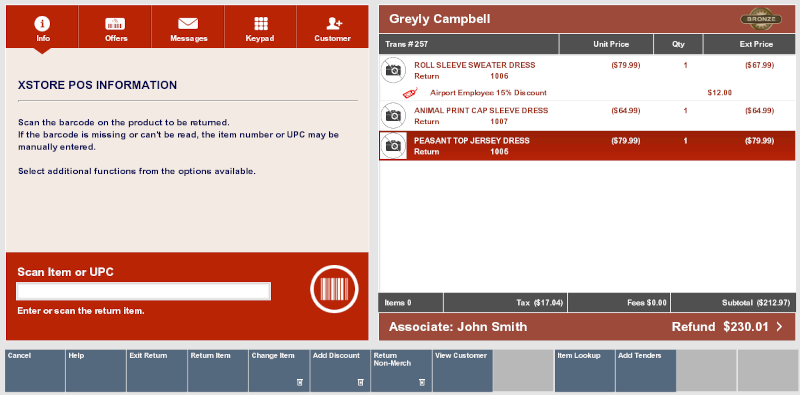
Figure 4-12 Return Items Displayed in View Port
-
-
Do one of the following:
-
Click Add Tenders to tender the transaction.
Note:
If your store has a maximum amount for a blind return, you may be prompted for manager approval, or you may not be permitted to complete the transaction. Ask your manager for assistance.
-
Click Exit Return to return to the sale screen to continue selling items.
-
Click Return Item to perform another return (for example, items that appear on an original receipt).
-
Click Change Item to modify an item. See Modify a Line Item for more information.
-
Click Add Discount to reduce the amount due to the customer.
-
Click Return Non-Merch to return a non-merchandise item. See
-
Click Item Lookup to find a return item Item ID for a return item. See Item Lookup.
-