Post Void
Performing a Post Void transaction changes the status of a sale transaction to Void. All records in the system are reset as if they had never occurred during the original transaction. For example, a post void adjusts the tender totals for the till involved in the transaction.
A transaction may be post voided only on the day it is created. Post Voids may be performed on a different register from the one where the original transaction was executed.
Certain kinds of sale transactions may involve extended transactions that occur outside the system. For example, special orders, work orders and layaways are extended transactions. Although the system checks for such conditions when a post void is executed, some aspects of the transaction may need to be reversed by an additional transaction such as a return. If the system detects an extended transaction, you are prompted about whether you want to continue the post void process.
A Post Void transaction may be performed from the Register or from the Back Office, depending upon your system's configuration and store policy. In the Back Office it is available on the Main Menu and from the Electronic Journal.
To perform a Post Void from the register:
-
Select Till in the Register Login screen.
Figure 22-18 Register Login Employee ID Prompt

-
Do one of the following, depending upon the configuration of your system:
-
Enter your password and press Enter.
Figure 22-19 Register Login Password Prompt

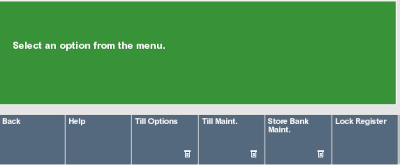
The Till menu opens.
Figure 22-20 Till Menu

-
Select Till Options.
Figure 22-21 Till Options Menu

-
Select Post Void.
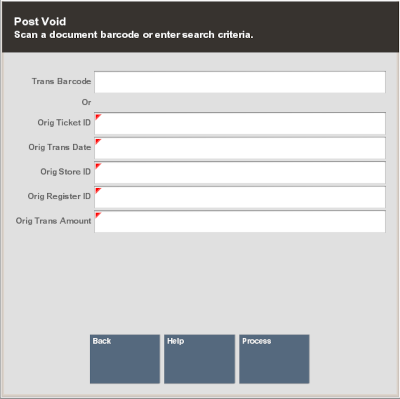
Xstore Point of Service prompts for the transaction information.
Figure 22-22 Prompt for Transaction Barcode

-
Enter the transaction information:
-
Scan the transaction barcode. Continue with Step 7.
-
Enter the transaction information:
-
Trans Barcode - Transaction barcode number.
Note:
If the transaction barcode is entered, the other field values will be ignored.
-
Orig Ticket ID - Ticket ID of the transaction to post void.
-
Orig Trans Date - Date of the transaction to post void.
-
Orig Store ID - ID of the store where the transaction was performed.
-
Orig Register ID - ID of the register where the transaction was performed.
-
Orig Trans Amount - Amount of the transaction to post void.
-
-
-
Select Process.
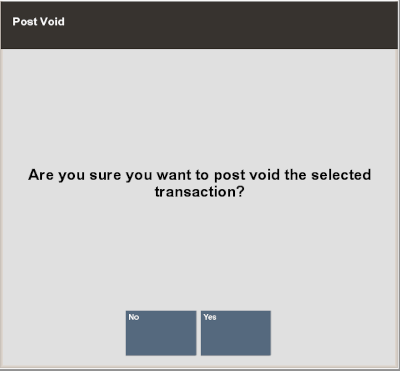
If the transaction is found, Xstore Point of Service prompts for confirmation to post void the transaction.
Figure 22-23 Prompt to Confirm Post Void

-
Indicate whether to post void the transaction:
-
Click Yes to post void the transaction.
-
Click No to cancel the post void.
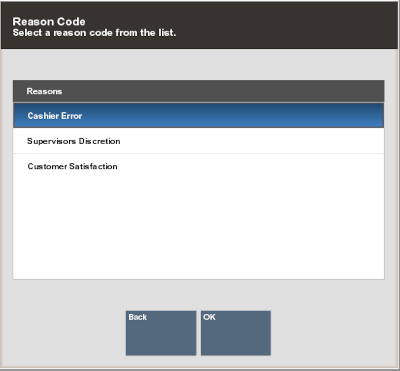
Xstore Point of Service may prompt for a reason for the post void.
Figure 22-24 List of Post Void Reasons

-
-
Select the reason:
-
Click the reason.
-
Use the up and down arrow to highlight the reason, then press the Spacebar.
-
-
Select OK.
The following prompts depend upon the configuration of your system.
-
If necessary, scan the cash drawer with which to perform the post void.
-
If necessary, enter additional information about the reason for the post void:
-
Enter the additional information.
-
Select OK.
Xstore Point of Service voids the transaction, performs any necessary refunds, prints void receipts for your records, and returns to the previous screen.
-