17 Local Orders
A Local Order transaction is for store associates that are in contact with customers not physically in the store, that would like to purchase item(s) that are in the store's inventory and pick up the items later.
The salesperson talks to the customer about items that the customer may be interested in from previous knowledge and experience. The salesperson offers to create a Local Order for the item with the expectation that the customer will pay for the item using selected tenders such as Credit Card (Customer Not Present), Digital Wallet, House Account and Pay By Link (Customer Not Present) (PBL). The Pay By Link tender type provides a link (QR code or e-mail) to the payment providers checkout web page. This allows a customer to scan/click a PBL URL for them to tender the transaction on their own device. The expectation is that the customer will pay for the transaction as soon as the link is sent to the customer - even while they are still on the phone and come to pick up the item in the next few days. Local Inventory Orders tendered with PBL that are awaiting payment or are voided due to the PBL expiring, are listed in the Messages Tab on the home screen.
Fulfilment of the order is from local store inventory only. The Local Order moves inventory from 'on hand' to 'local inventory hold' bucket so that it is considered on hold for the customer even though the customer is not present during the transaction since the transaction will take place over the phone with the salesperson. This is done to ensure that the customer does not miss out on the item because of their concern about in-person shopping. The order will be created, and the payment will be completed.
The store associate picks the item(s) setting them to reserved but ONLY after payment has been received. When the customer picks up the item(s) from the store, completion of the order occurs on Xstore POS and the item(s) removed from the store's inventory. An e-mail receipt is sent to the valid customer e-mail address.
If the customer decides that they don't want to pick up the item(s), the cancelation of the order is processed. If full payment was made, the customer is provided a refund for the amount.
This chapter covers the following topics:
Local Order Maintenance is accessible outside of a sale for viewing, picking/reserving items, and maintaining local inventory orders.
Local Order Transactions
To create a local inventory order transaction:
-
Begin a sales transaction and assign a customer.
-
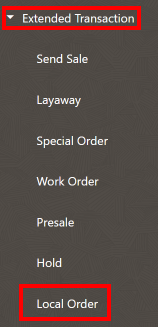
From the Sale screen select Extended Transaction.
-
At the Extended Transaction menu, select Local Order.
Figure 17-1 Extended Transaction Menu
Choose from one of the following options:
Searching for a Local Order
...continued from Local Order Transactions step 3 above.
-
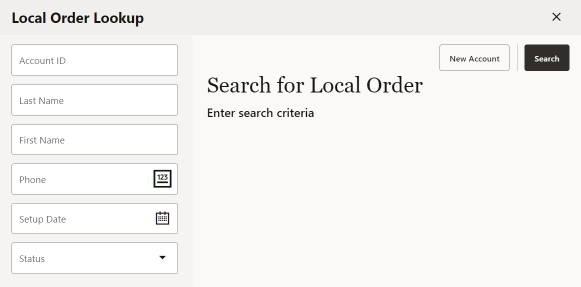
To search for a Local Order, enter search criteria in the Local Order form.
Figure 17-2 Local Order Search Form
-
Account ID: The Local Order identifier.
-
Last Name: The Local Order customer's last name.
-
First Name: The Local Order customer's first name.
-
Phone #: The Local Order customer's phone number.
-
Setup Date: Date order was made.
-
Status: Select from: New, Ready for Pickup, Open, Awaiting Payment, Void, and Closed.
-
-
Select Search.
-
If there are no orders matching your search criteria, a message displays indicating no orders were found. Select New Account to create a new local order. See Creating a New Local Order.
-
If at least one order matches your search criteria, the orders are listed in the Local Order Search Results Form. Select an order. See Picking Up Local Order Items and Canceling a Local Order.
-
Creating a New Local Inventory Order
...continued from Local Order Transactions step 3 above.
If there are no existing Local Order accounts for the customer, the following message prompt is displayed.
Figure 17-3 No Existing Local Orders Message

-
Select New Account.
-
Scan or enter the item ID.
Figure 17-4 Local Order
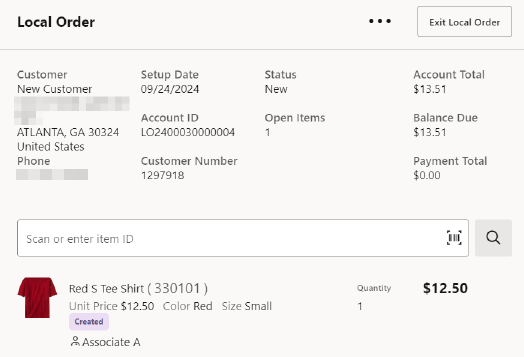
Depending on your store policy, you may be prompted for an originating inventory location.
If prompted, select the inventory location from which the item originated, or leave the inventory location blank to leave the location pending. Select Search .
Figure 17-5 Local Order Overflow Menu
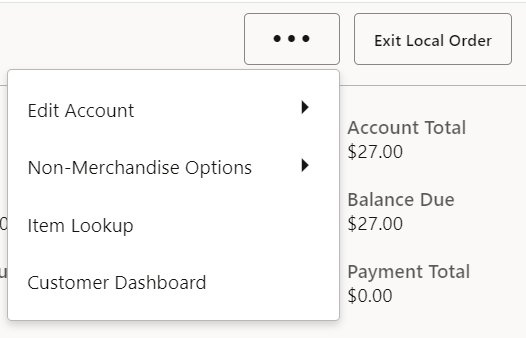
You have the following options at the Local Order screen before payment is made.
You can:
-
edit the account by:
-
adding a coupon
Figure 17-6 Add Coupon Prompt
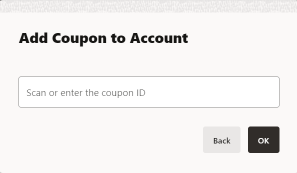
Enter or scan the coupon ID and select OK.
-
Add a Group Discount
Figure 17-7 Add Group Discount
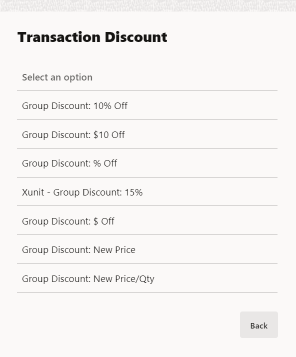
Select an option from the list. See Transaction Level Discounts for more information.
-
adding a comment
Figure 17-8 Add Comment Prompt
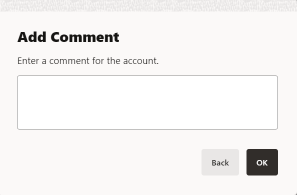
Enter a comment and select OK.
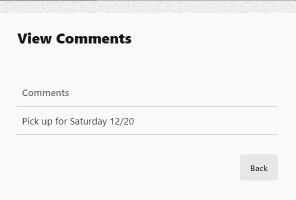
Once a comment is added, it can subsequently be viewed.
Figure 17-9 View Comment
-
-
Sell Non-Merchandise
-
Perform an Item Lookup
-
View Customer Dashboard
-
Scan or enter another item
-
-
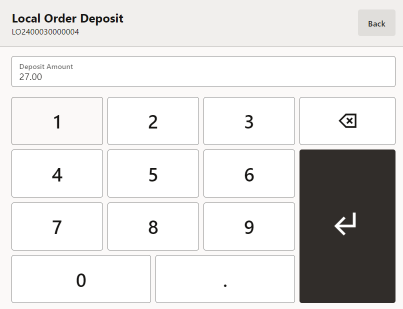
Select Exit Local Order to make payment. All local orders must be paid in full before picking up is allowed.
Figure 17-10 Enter Deposit Amount for Local Order
-
Enter the Deposit amount and select Return. Partial deposits are not allowed. Ensure the full amount is deposited.
-
Select Amount Due.
Figure 17-11 Select Tender Type

-
Select the tender type to complete the transaction. Only certain sale tenders are possible as the customer is not present.
-
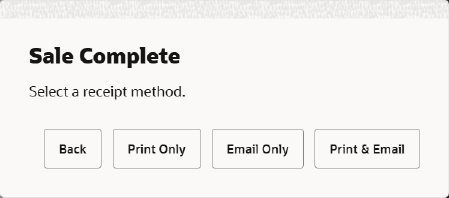
Continue with the tendering process and select a receipt method.
Picking Up Local Order Items
...continued from Local Order Transactions step 3.
-
Find the Local Order for pick up by the customer:
-
If prompted, enter search criteria to find the Local Order.
-
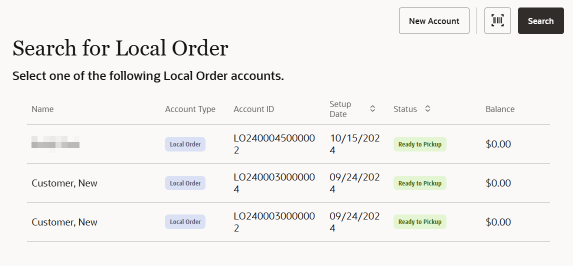
If a customer has been associated with the transaction, Xstore POS returns a list of Local Orders for the customer.
Figure 17-12 Local Order Ready to Pickup
-
-
Select a Local Order from the list. Only items that are in the state Ready to Pickup can be collected.
-
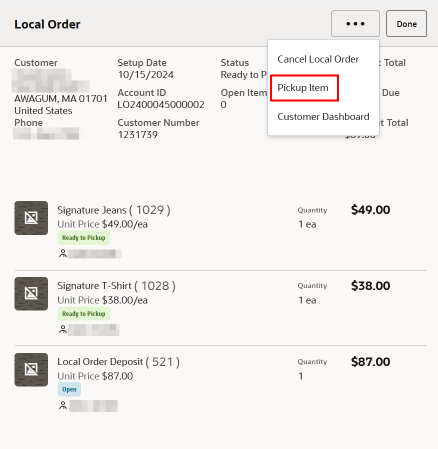
At the Local Order screen, select the Header Overflow Menu, and then select Pick Up Item.
Figure 17-13 Local Order Pickup Item
Note:
Your system may be set to not allow partial pickups. If prompted select Yes to pick up all items now or No to return to the Local Order. -
When the Scan Item Configuration is enabled, you are prompted to scan items at pick up to ensure they are the correct items being collected. The items are set to Picked Up status after scanning.
If Scan Item Configuration is not configured, the items go into Picked Up status and the sale is complete.
-
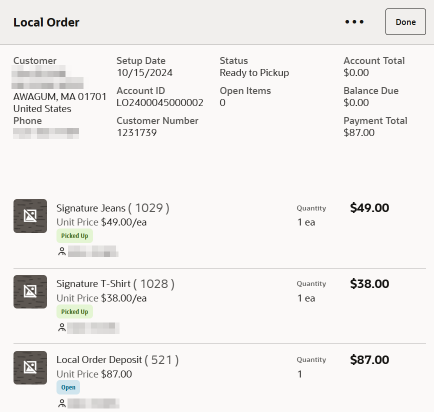
The system returns to the Local Order screen and all items are marked as Picked Up.
Figure 17-14 Local Order Showing Item Picked Up
-
Select Amount Due or Complete Sale to select a receipt method and to complete the transaction.
Figure 17-15 Local Order Sale Complete
Canceling a Local Order
...continued from Local Order Transactions step 3 above.
-
Search for the local order account that you want to cancel. See Searching for a Local Order.
Note:
You can cancel local orders up to and including the Ready to Pickup state.
Closed accounts cannot be canceled.
Orders paid using Pay By Link (Customer Not Present) (PBL) AND the status is Awaiting Payment, cannot be canceled.
-
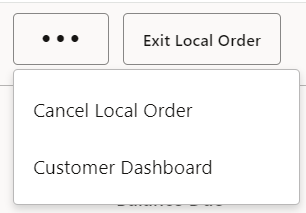
At the Local Order screen Overflow Menu, select Cancel Local Order.
Figure 17-16 Local Order Overflow Menu
-
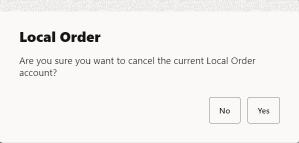
When prompted, select Yes to confirm you want to cancel this order. Selecting No returns to the Local Order screen.
Figure 17-17 Local Order Cancellation Confirmation
-
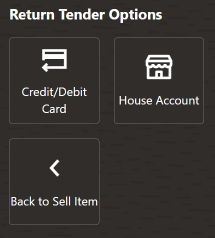
The system displays a message asking if the customer is present during the cancellation of the local inventory order account. Select Yes or No. The process is the same for both options but the tender types that the refund can be made to differs.
Figure 17-18 Checking for Presence of Customer
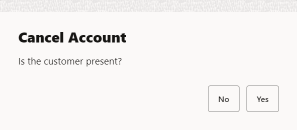
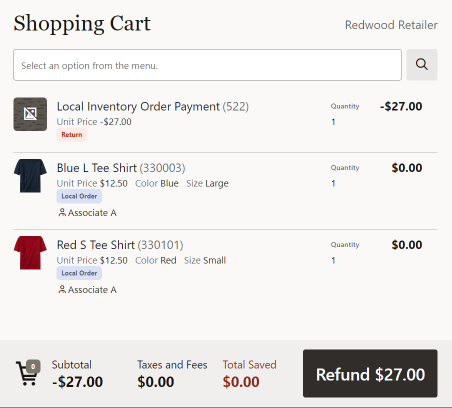
Figure 17-19 Local Order Refund
-
Select Refund. A list or return tender types are shown.
Figure 17-20 Local Order Return Tender Types for Customer Present
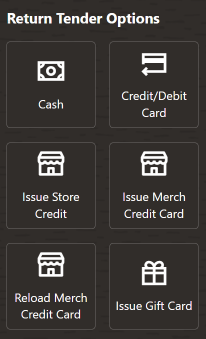
Figure 17-21 Local Order Return Tender Types for Customer Not Present
-
Select a return tender type. The system returns to Sale mode where you can complete the cancel process and process a refund.