18 Pre-Sale Transactions
A Pre-Sale Transaction is typically performed when a customer wants to purchase an item that is not currently available for sale in the store. Pre-sale transactions have the following requirements:
-
The transaction must be associated with a customer.
-
The transaction must be paid in full at setup.
-
Only items on file can be added to the transaction.
-
All Pre-Sale items must be picked up at the same time, partial pickups are not allowed.
-
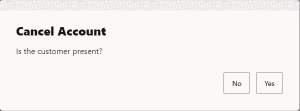
Pre-Sale accounts cannot be canceled if the customer is not present.
This chapter describes the following topics:
Pre-Sale Account Transactions
-
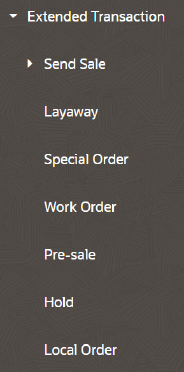
From the Sale screen Context Menu, select Extended Transaction.
Figure 18-1 Sale Screen Main Menu
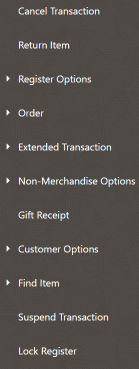
Figure 18-2 Extended Transaction Options
-
Click Presale.
The window that opens will depend upon whether a customer is associated with the transaction and, if so, whether that customer has any existing pre-sales accounts.
If a customer is associated with the transaction
When a customer has been associated with the current transaction, the system automatically searches the database to locate any open Presale accounts for this customer.
-
If no Presale accounts are found, you have the following options:
Figure 18-3 No Presale Accounts

-
Select New Account to create a new Presale transaction. Continue with Creating a Presale Transaction.
-
-
If a Presale account is found, you have the following options:
Figure 18-4 Presale Account Found

-
Select New Account to create a new Presale account. Continue with Creating a Presale Transaction.
-
Select the Presale account.
-
If a customer has not been associated with the transaction
When there is no customer associated with the current transaction, the Presale Search form displays. You have the following options:
-
Select New Account to create a new Presale account. After associating a customer with the transaction, continue with Creating a Presale Transaction.
-
To search for a Presale account, enter search criteria.
-
Account ID: The Presale account identifier.
-
Last Name: The Presale account owner's last name.
-
First Name: The Presale account owner's first name.
-
Setup Date: The date the Presale account was created.
-
Status: The Presale account status. Status include: New, Ready to Pickup, Open, Awaiting Payment, Void, and Closed.
-
-
Select Search.
-
If there are no Presale accounts matching your search criteria, you will see a message indicating no accounts were found.
-
If at least one Presale account matches your search criteria, the account or accounts are listed in the Presale Account Search Results Form. See Figure 18-4.
-
Creating a Presale Transaction
-
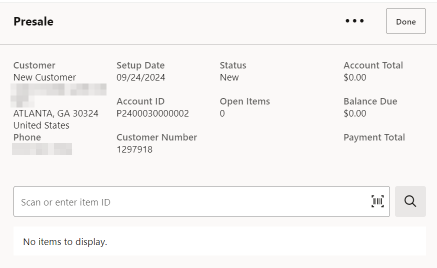
After a customer is associated with the transaction, scan or enter the Presale item ID.
Figure 18-5 Presale Item ID Prompt
-
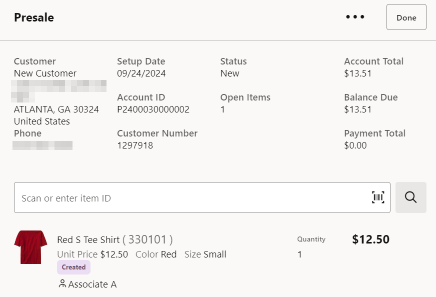
You have the following options at the Presale screen before tendering:
Figure 18-6 Presale Screen - item Added
-
You can scan another Presale item.
-
You can change an item by:
-
Adding a discount (See Adding a Discount to a Transaction or Group of Items).
-
Changing the item price (Changing the Item Price).
-
Voiding a line item (Voiding an Item).
-
Voiding a discount (this is only available for items with a discount applied and uses the same process as voiding an item).
-
-
-
After adding items to the Presale, select Done to exit Presale mode and return to sale mode before tendering the sale.
-
Select Return to accept the deposit amount. Presale items must be paid in full at setup.
Figure 18-7 Presale Deposit Amount Prompt
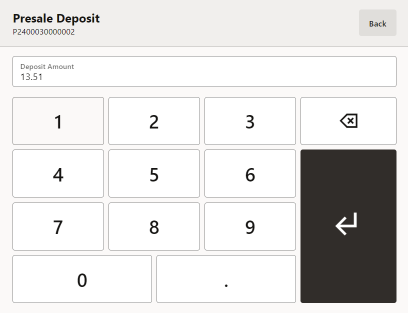
Figure 18-8 Presale Deposit Added
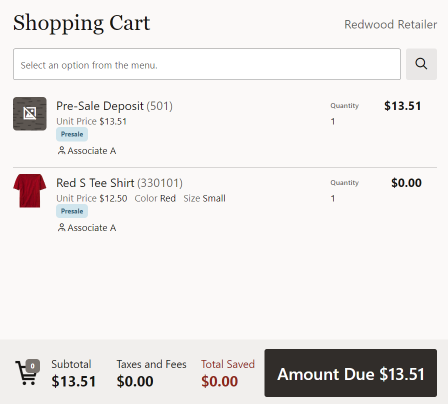
Complete the Sale. See Tendering the Transaction.
Note:
You cannot over tender a Presale.
You cannot override the deposit amount. Presale items must be paid in full at setup.
Presale items may only be modified in the Presale screen.
You cannot change the Presale item quantity.
Picking Up Presale Items
-
From the Sale screen Context Menu, select Extended Transaction.
-
Click Presale.
-
Find the Presale Account:
-
If prompted, enter search criteria to find the Presale Account.
-
If a customer has been associated with the transaction, Xstore POS returns a list of Presale accounts for the customer.
-
-
Select a Presale account from the list.
Figure 18-9 Presale Account List

-
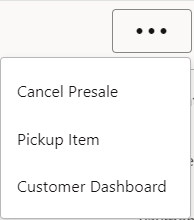
At the Presale Account screen, select the Overflow Menu.
-
Select Pick Up Item.
Figure 18-10 Pick up Item
Note:
Partial pickups are not permitted for Presales.
Figure 18-11 Presale Account Screen - Item Received
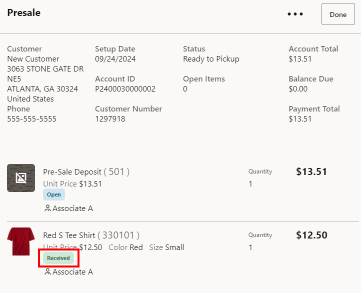
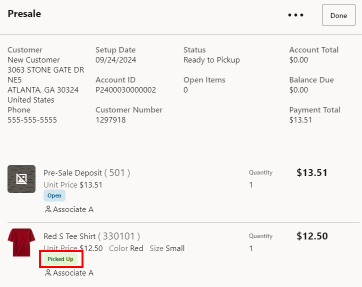
The system returns to the Presale Account screen and all items are marked as Picked Up.
Figure 18-12 Presale Account Screen - Item Picked Up Example
-
Complete the transaction. Select Done to return to the Sale screen before tendering the sale.
Canceling a Presale Account
-
From the Sale screen Main Menu, select Extended Transaction.
-
At the Extended Transaction menu, select Presale.
-
Find the Presale Account:
-
If prompted, enter search criteria to find the Presale Account.
-
If a customer has been associated with the transaction, Xstore POS returns a list of Presale accounts for the customer.
-
-
Select a Presale account from the list.
Figure 18-13 Presale Account List

-
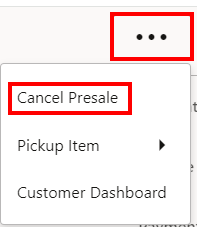
At the Presale Account screen, select the Overflow Menu.
Figure 18-14 Cancel Presale
-
Select Cancel Presale.
-
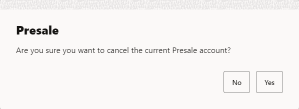
When prompted, select Yes to confirm you want to cancel this Presale account. Selecting No returns to the Presale Account screen.
Figure 18-15 Cancel Presale Account Confirmation Prompt
-
When prompted, select Yes to confirm the customer is present.
Figure 18-16 Customer Is Present Confirmation Prompt
Note:
If the customer is not present, select No. Presale Accounts cannot be canceled if the customer is not present.
-
The system returns to Sale mode where you can refund the customer's deposit.
Figure 18-17 Sale Screen - Refund Deposit
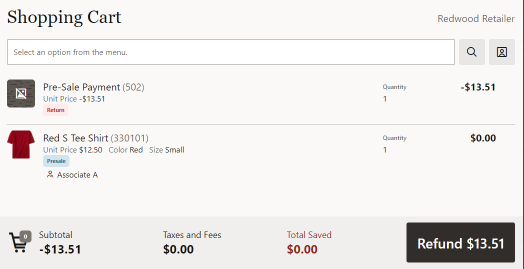
Figure 18-18 Refund Presale Payment
