Deployment: Using a Single Deployment
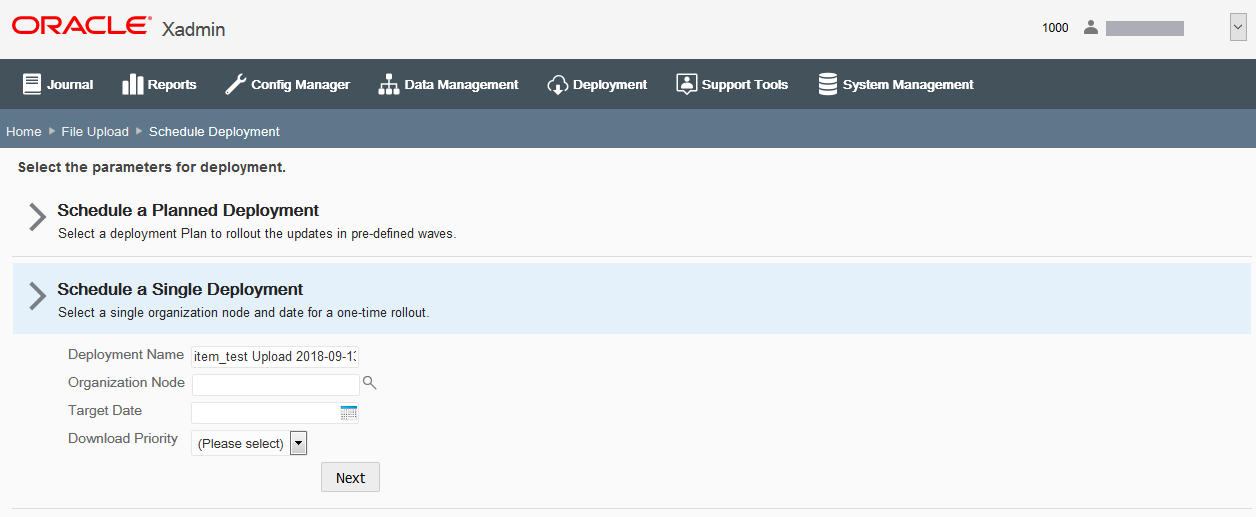
If you selected Schedule a Single Deployment in step 3 on page 4, the Single Deployment section of the screen expands to show the required fields.
Figure 7-6 Single Deployment Fields

-
Complete the following fields, then click Next. All fields are required.
Table 7-1 Single Deployment Fields
Field Description Deployment Name
This field defaults to the file name and date it was uploaded. Accept this default or enter a name to identify this deployment.
Organization Node
Select the organization target for the configuration changes.
Target Date
Select the date the changes will be sent to the store.
Download Priority
Select the download priority to be specified in the manifest:
Immediate - Download the files now.
End of Day - Download the files at end-of-day.
-
Review the deployment information:
Figure 7-7 Single Wave: Review Deployment Schedule

Note:
Waves Section - For Single Deployments, the Wave Name defaults to Default Wave and the Launch Type defaults to Automatic. These values cannot be changed.
The following Wave information is shown on the Review Deployment Schedule page:
Table 7-2 Review Deployment Schedule Fields
Field Description Wave #
The wave identifier.
Name
For Single Deployments, the Wave Name defaults to Default Wave and cannot be changed.
Date
The date the changes will be sent to the store.
Launch Type
The launch type, defaults to Automatic.
Organization Nodes
The targeted org node or nodes.
# of Stores
The number of stores affected by this single deployment.
-
If all information is correct, go to step 6 below.
-
If you need to change the launch date, select the wave and enter the new date at the Edit Wave window, then click OK.
-
If you need to make any other changes, click the Schedule Deployment breadcrumb to return to the previous page where you can edit the information. Go to step 4 on page 5.
-
-
Click Deploy.
-
When prompted, click Yes to confirm you want to schedule the deployment.
-
Click OK to close the Deployment Scheduler status bar window.
The deployment file is placed in the root directory of Apache Server with a file name of
{org}_{deployment
id}_!!_{filename}
and a record is written to thedpl_deploymenttable.See Viewing Deployments for more information about the deployed file.