15 Servicing the Temperature Sensor (FRU)

The following section describes how to service the temperature sensor. The temperature sensor is a field-replaceable unit (FRU). For more information about FRUs, see Illustrated Parts Breakdown and Field-Replaceable Units.

Caution:

The temperature sensor must be removed and replaced only by authorized Oracle Service personnel.

Caution:

Ensure that all power is removed from the server before removing or installing the temperature sensor. You must disconnect the power cables before performing this procedure.

Caution:

These procedures require that you handle components that are sensitive to electrostatic discharge. This sensitivity can cause the component to fail. To avoid damage, ensure that you follow electrostatic discharge safety measures and antistatic practices. See Electrostatic Discharge Safety.

This section covers the following procedures:
Remove the Temperature Sensor

  1. Prepare the server for service.
    1. Power off the server and disconnect the power cords from the power supplies.
    2. Remove the server from the rack.
    3. Attach an antistatic wrist strap to your wrist, and then to a metal area on the chassis.
    4. Remove the server top cover.
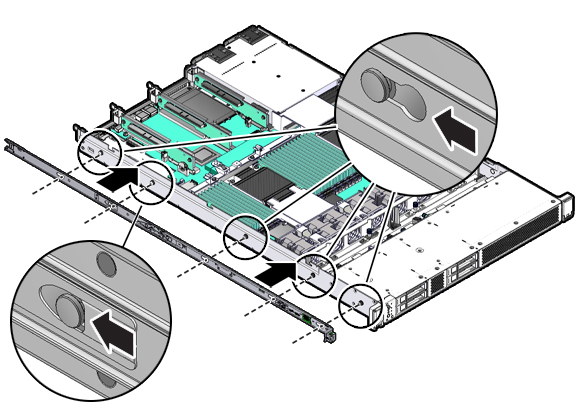
  2. If attached, remove the left-side mounting bracket from the server chassis.

    Figure showing the left-side mounting bracket being removed from the server chassis.
    1. Lift up on the mounting bracket clip to disengage the clip from the chassis locating pin.
    2. Pull the mounting bracket toward the rear of the chassis until all five chassis locating pins protrude through the five keyhole openings in the mounting bracket.
    3. Lift the mounting bracket off the locating pins and set it aside.
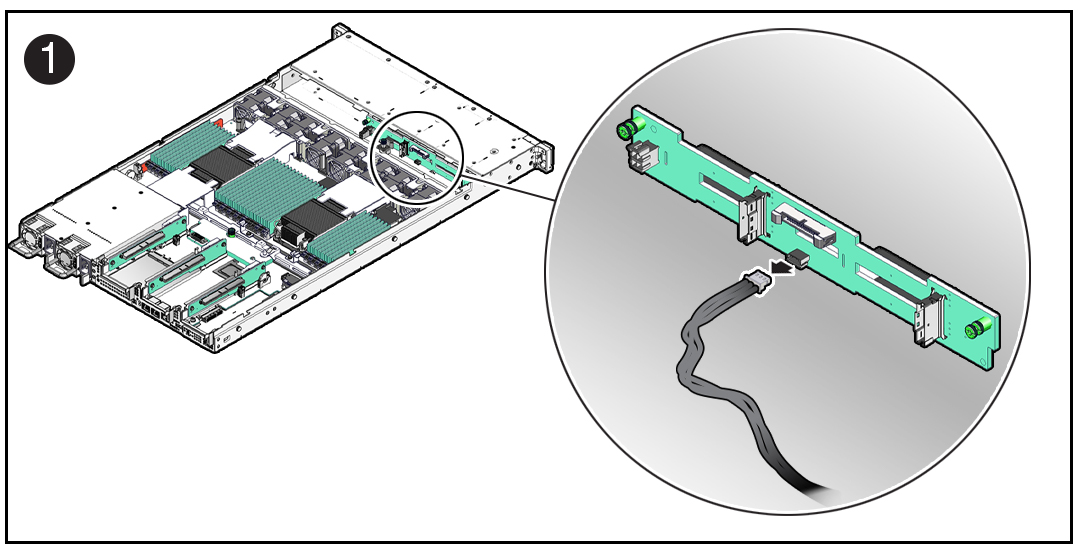
  3. Disconnect the temperature sensor cable from the disk backplane.

    Figure showing the temperature sensor cable being disconnected from the disk backplane.
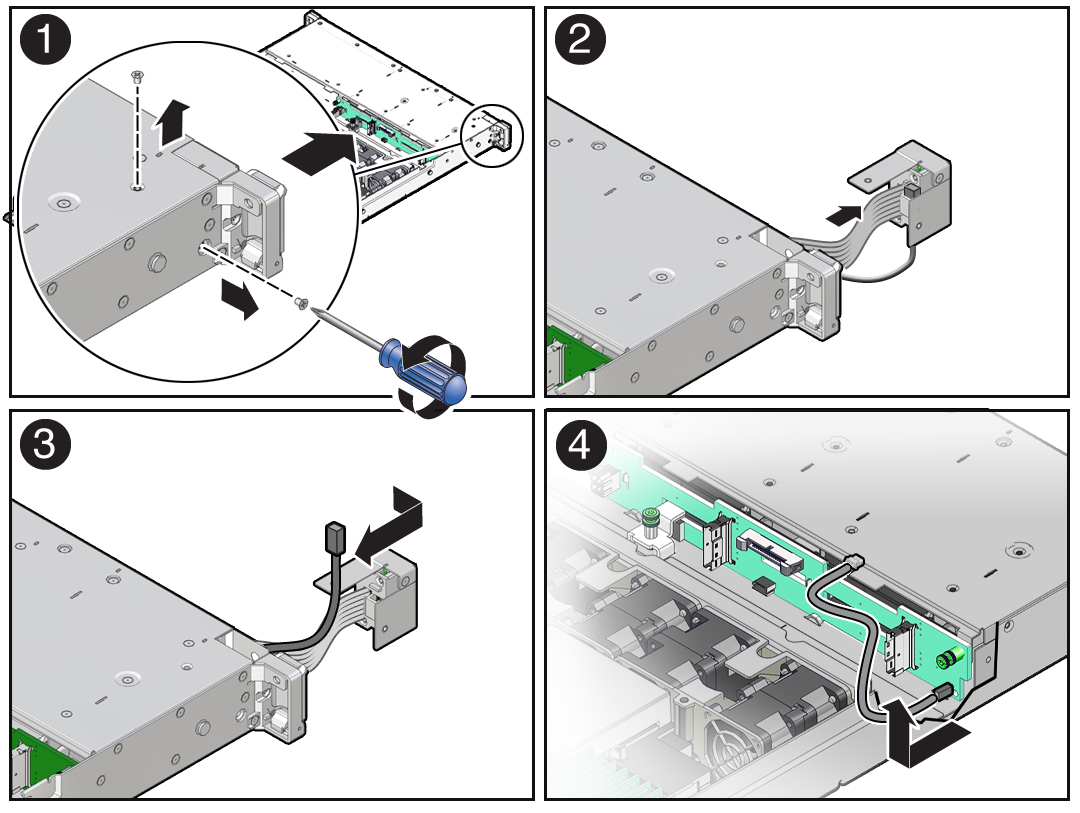
  4. Using a Phillips screwdriver, remove the two screws that secure the front indicator module (FIM) assembly to the server chassis [1].

    Figure showing the temperature sensor being removed from the chassis.
  5. Carefully slide the FIM assembly toward the front of the server to remove it from the chassis [2].
  6. Remove the temperature sensor from the plastic housing by pulling the sensor from its seated location, and remove the sensor cable by pulling it through the slit in the housing [2, 3].
  7. Remove the temperature sensor and cable by carefully pulling the sensor cable rearward and through the left-front chassis sidewall, and lift the temperature sensor from the chassis [4].

Install the Temperature Sensor

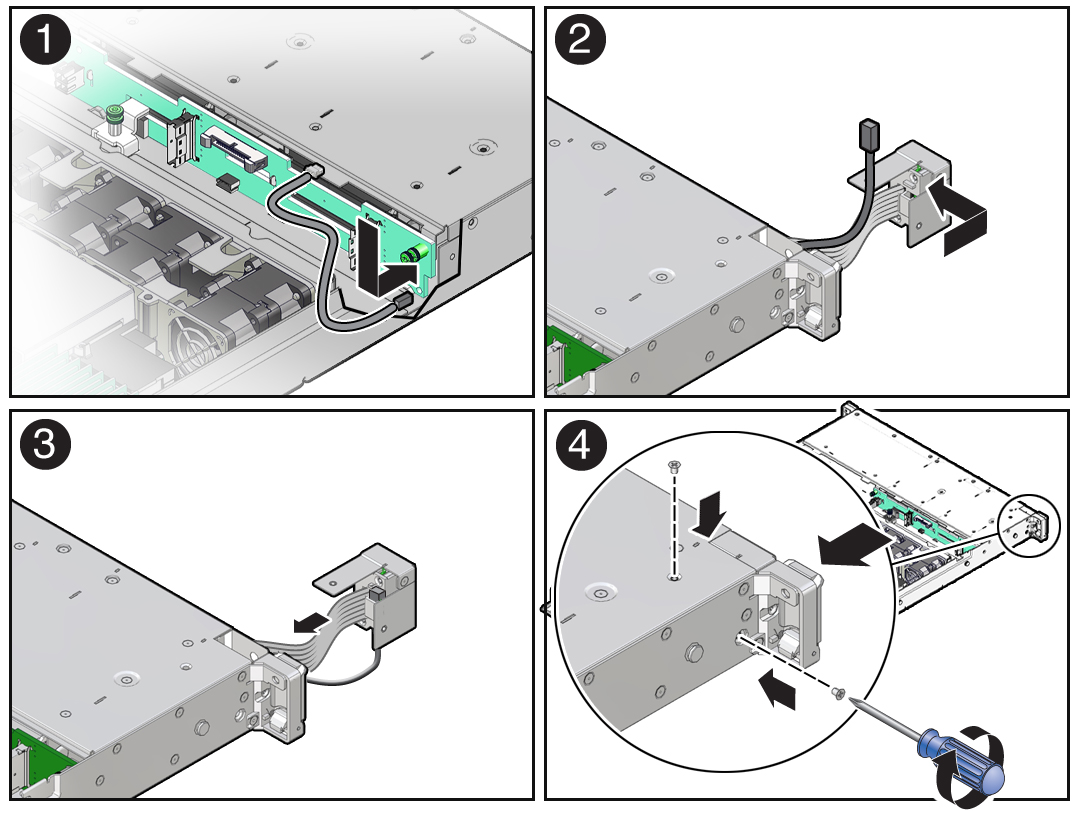
  1. Install the temperature sensor by carefully inserting the sensor-end of the cable through the rear opening directly under the left side of the disk backplane, and push/pull the sensor cable through the left-front chassis sidewall [1].

    Figure showing the temperature sensor being installed into the chassis.
  2. Install the temperature sensor into the plastic housing by inserting the cable through the slit in the housing, and ensure that the temperature sensor is properly seated into the housing [2, 3].
  3. Carefully insert the FIM assembly into the front panel of the server chassis [3].
  4. Install and tighten the two Phillips screws to secure the FIM assembly to the server chassis [4].
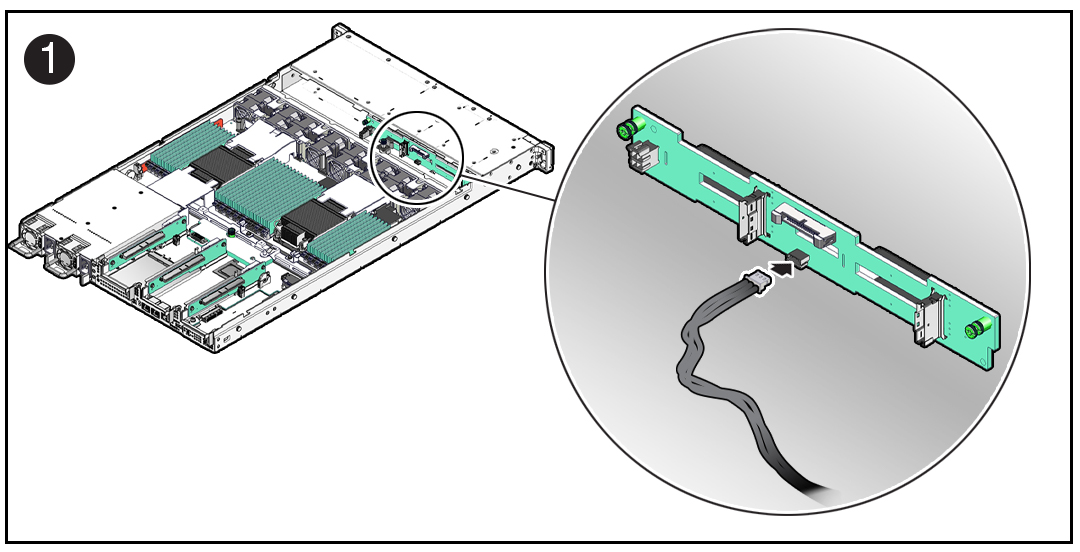
  5. Reconnect the temperature sensor cable to the disk backplane.

    Figure showing the temperature sensor cable being connected to the disk backplane.
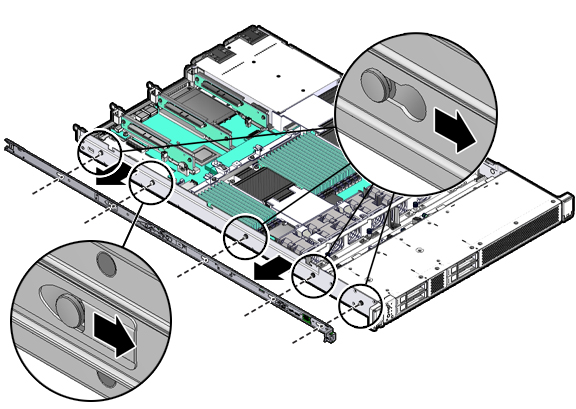
  6. If required, reattach the left-side mounting bracket to the server chassis.

    Figure showing the left-side mounting bracket being installed on to the server chassis.
    1. Position the mounting bracket against the chassis so that the five keyhole openings on the mounting bracket are aligned with the five locating pins on the side of the chassis.
    2. When the heads of the five chassis locating pins protrude through the five keyhole openings in the mounting bracket, pull the mounting bracket toward the front of the chassis until the mounting bracket clip locks into place with an audible click.
    3. Verify that the locating pin is engaged with the mounting bracket clip.
  7. Return the server to operation.
    1. Install the server top cover.
    2. Reinstall the server into the rack.
    3. Reconnect the power cords to the power supplies, and power on the server.
    4. Verify that the power supply AC OK LED is lit.