- Installation and Configuration Guide
- Install STA
- Install STA
- Install STA with the Installation Wizard
Install STA with the Installation Wizard
Install STA by completing the prompts within the installation wizard.
Note:
System changes are not implemented until you complete all the installer screens and click Install on the summary screen. Anytime before then, you can return to a previous screen and modify your entries.
- Before running the installer, review the following to familiarize yourself with what you will configure during the installation:
- Launch the installer by following the instructions in Run the STA Installer.
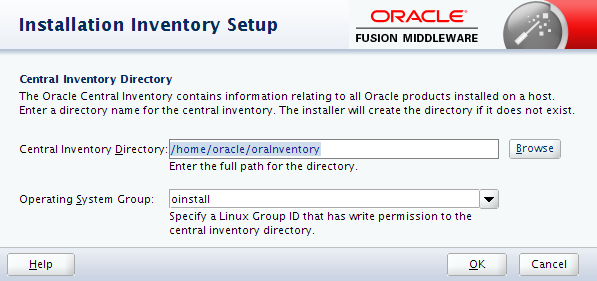
- On the Installation Inventory Setup screen:
- Central Inventory Directory — Enter an absolute path or click Browse
to navigate to the directory to use for the Oracle Central Inventory
directory (see "Oracle central inventory location"). For example
/opt/oracle/oraInventory. - Operating System Group — Enter the Linux group that will have write
permissions to the central inventory group (see "Oracle group"). For example
oinstall.
- Central Inventory Directory — Enter an absolute path or click Browse
to navigate to the directory to use for the Oracle Central Inventory
directory (see "Oracle central inventory location"). For example
- Review the Welcome screen, then click Next.

- On the Installation Location screen:
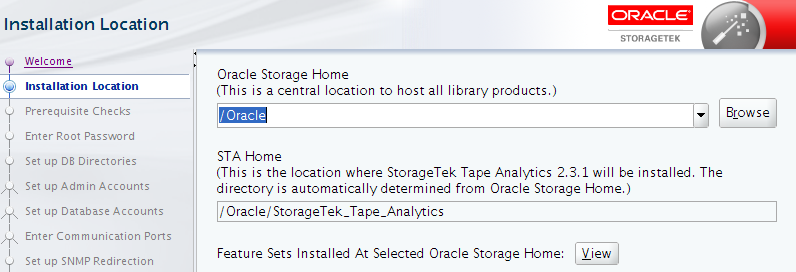
- Oracle Storage Home — Enter an absolute path or click Browse to
navigate to the directory where STA and associated Oracle software will
be installed. For example,
/Oracle.- If the directory already exists, the Oracle user and group must have full permissions to it.
- If the directory does not exist, the Oracle user and group must have full permissions to the parent directory, so the STA installer can create the Oracle Storage Home directory.
- STA Home — This cannot be changed. This is the subdirectory within Oracle
Storage Home where STA will be installed. This subdirectory is assigned
the name
StorageTek_Tape_Analyticsand it will be created automatically during the installation. - View — Click this button to display a list of all software currently installed in the Oracle Storage Home directory you have specified.
- Oracle Storage Home — Enter an absolute path or click Browse to
navigate to the directory where STA and associated Oracle software will
be installed. For example,
- On the Prerequisite Checks screen, the installer performs a series of checks which may take several minutes.
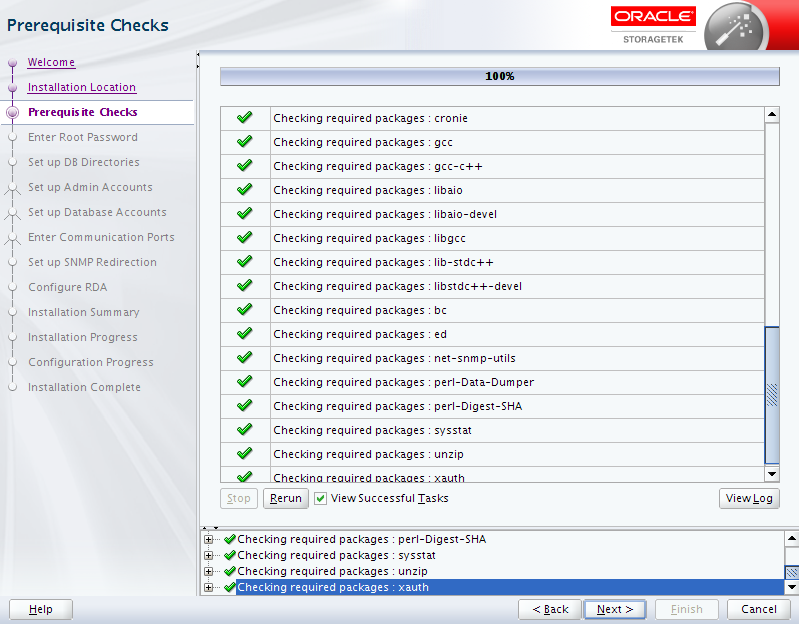
The possible outcomes of each verification test are:
- Success
 —The prerequisite passed successfully.
- Warning
 —The recommended prerequisite did not pass.
- Failure
 —The required prerequisite did not pass.
You cannot continue the installation if there are any Failures. You should resolve all Warning outcomes before continuing. You can keep the installer up at this screen while you resolve any issues, and then click Rerun to run the verification process again.
Depending on the nature of a prerequisite, you may need to stop a service, change user privileges, or install a yum package to resolve issues. Click a task in the main window. The task is highlighted in the Message pane with expanded detail.
- Success
- On the Enter Root Password screen, enter the existing system root password.
- On the Set up DB Directories screen, enter:
- Database Data Location — the absolute path to the directory where the STA
database will be located (for example
/dbdata). - Database Backup Location — the absolute path to the directory where the STA
database backups will be located (for example
/dbbackup). This cannot be the same as the database data location.
- Database Data Location — the absolute path to the directory where the STA
database will be located (for example
- Review the Set up Admin Accounts screen, then click Next. Follow the prompts to enter the username and passwords for each of the following users.
- WebLogic Administrator
- STA Administrator
Caution:
Make a secure record of the account credentials (passwords) you create. If you lose them, you will not be able to login and must re-install STA.
- Review the Set up Database Accounts screen, and then click Next. Follow the prompts to enter the username and passwords each of the following users:
- Database Root User
- Database Application User
- Database Reports User
- Database Administrator
- Review the Enter Communication Ports screen, then click Next. Follow the prompts to enter the ports for the following:
- WebLogic Admin Console
- STA Engine
- STA Adapter
- STA UI
The typical ports used are listed in Ports Configured During STA Installation.
- On the Set up SNMP Redirection screen, enter the redirection port used for SNMP traps.
- On the Configure RDA screen, enter your site's fully qualified domain name. For example,
us.example.com.STA uses RDA to take snapshots of all logs related to the STA application and database, including operating system, installation, and configuration information.
- Review the Installation Summary screen.
Note:
Once you click Install, you cannot pause or cancel the installation.
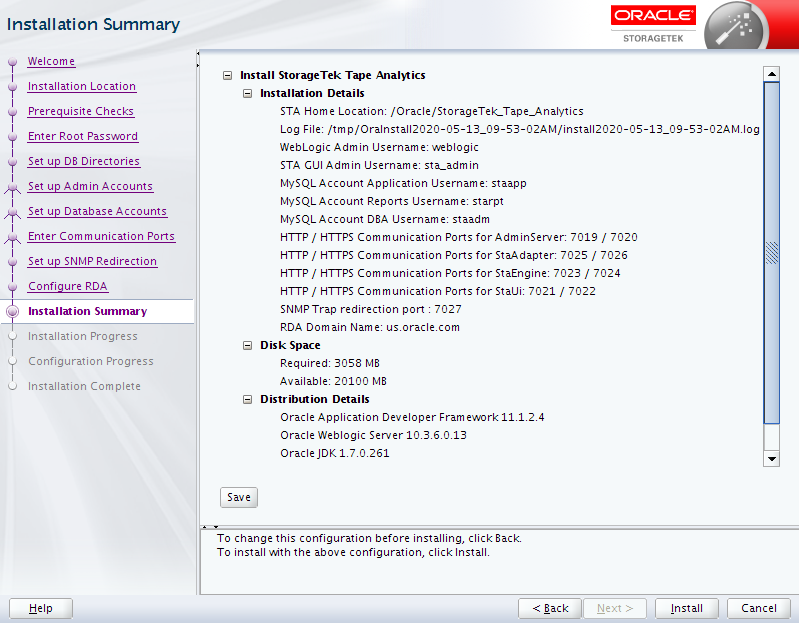
Optionally, click Save to save the installation details to a .txt file. Once you are ready to install STA, click Install.
- The Installation Progress and Configuration Progress screens will display the current status of the installation. Configuration can take 30-60 minutes to complete.
Note:
Do not close this window or interrupt the installation, as this may leave incomplete installation components on the server.
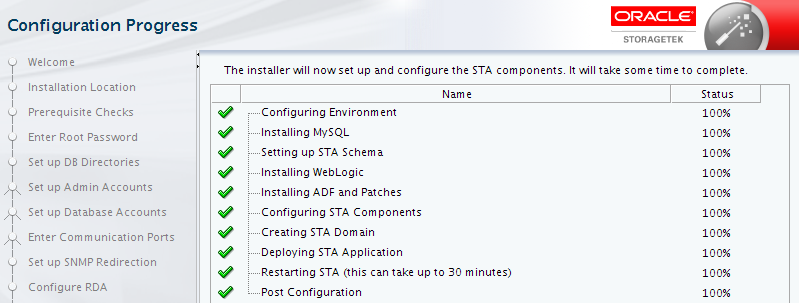
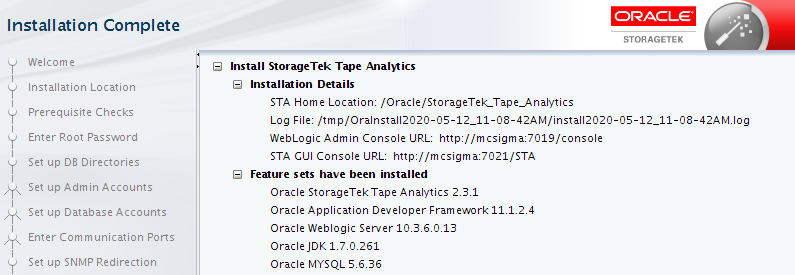
- Once the Installation Complete screen displays, you can click Finish.
