Chapter 5 Networking Tab
Use the Networking tab to manage networks and their functions in your environment, create, edit and delete networks, manage VLAN interfaces, and manage Virtual NICs used by virtual machines.
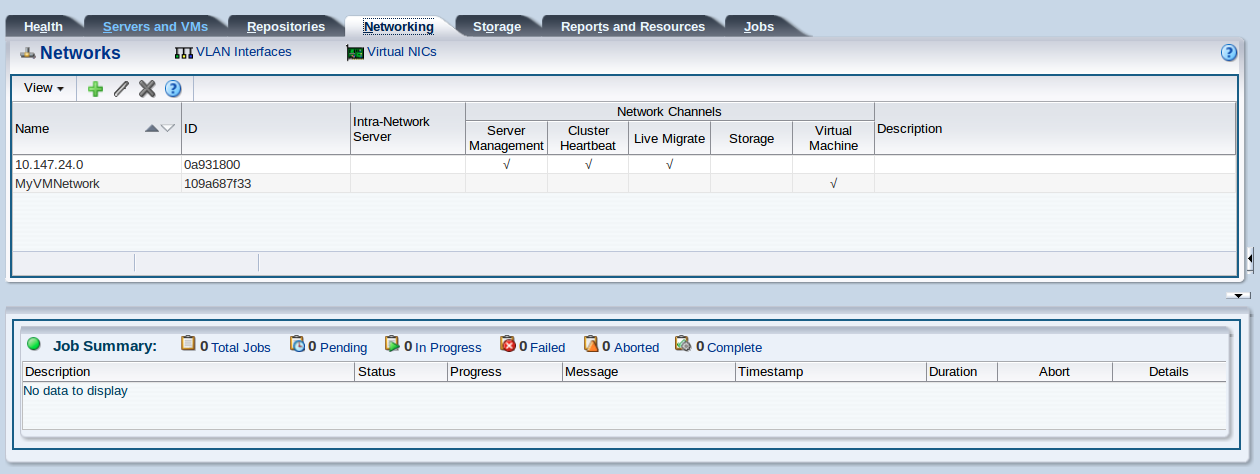
Figure 5.1, “Networking tab” shows the Networking tab.
The Networking tab contains the subtabs set out in Table 5.1, “Networking Subtabs”.
|
Subtab |
Description |
|---|---|
Displays information about networks. Use this tab to create, edit, and delete networks. Select the Networks subtab to display this pane. Select a network in the table to view and edit information about networks within your environment. You can use this pane to create new networks either using ports, bonds or VLAN interfaces [a] ; or as virtual networks on a single server for the use of any virtual machines on that server. See Section 5.1, “Networks” for more information on managing networks. |
|
Displays information about VLAN Interfaces. Use this tab to create, edit and delete VLAN interfaces. Select the VLAN Interfaces subtab to display this pane. Select a VLAN Interface in the table to view and edit information about the ports, VLAN IDs and IP address assignment for a VLAN . See Section 5.2, “VLAN Interfaces” for more information on managing VLAN Interfaces. |
|
Displays information about virtual NICs. Use this tab to view the virtual NICs in use by your virtual machines. You can also use this tab to define the MAC address range that should be used when a virtual NIC is created on a virtual machine. See Section 5.3, “Virtual NICs” for more information on managing virtual NICs. |
[a] If you intend to create a network using VLAN interfaces, these need to be configured first on the VLAN Interfaces pane.
5.1 Networks
The Networks subtab provides facilities to add, edit and delete networks; and presents a tabular view of the networks that are currently configured within the Oracle VM environment. Configuration options can be accessed using the toolbar at the top of the tab.
The toolbar at the top of the tab consists of the following options:
|
Toolbar Icon Option |
Icon |
Description |
|---|---|---|
|
|
Displays the Create Network dialog box. Use this option to create a new network within Oracle VM Manager. |
|
|
|
Displays the Edit Network dialog box. Use this option to change the network configuration for an existing network. |
|
|
|
Displays the Delete Confirmation dialog box. Use this option to delete the selected network. | |
|
|
Displays context sensitive help. |
The table view in the Networks subtab includes the following fields:
-
ID: The UUID for the network.
-
Name: The name defined for the network within Oracle VM Manager.
-
Intra-Network Server: The name of the server on which a local network is defined, if the network is of this type.
-
Network Channels: A grouping of the different network channels or roles that a network may support.
-
Server Management: A check box item to indicate whether or not the network is a member of the Server Management channel.
-
Cluster Heartbeat: A check box item to indicate whether or not the network is a member of the Cluster Heartbeat channel.
-
Live Migrate: A check box item to indicate whether or not the network is a member of the Live Migrate channel.
-
Storage: A check box item to indicate whether or not the network is a member of the Storage channel.
-
Virtual Machine: A check box item to indicate whether or not the network is a member of the Virtual Machine channel.
-
-
Description: A field to present the text description defined for the network within Oracle VM Manager.
5.1.1 Create New Network
-
On the Networking tab, click the Networks subtab.
-
Click the Create New Network icon
 . A dialog is displayed with the following two options:
-
Create a Network with Ports/Bond Ports/VLAN Interfaces: Use this option to create a normal network that makes use of physical ports, bond ports or VLAN Interfaces defined on your servers.
NoteIf you have not already defined any VLAN interfaces as described in Section 5.2, “VLAN Interfaces”, you are unable to add any VLAN interfaces to the network. In other words, you must define your VLAN interfaces on the VLAN Interfaces subtab before attempting to add any VLAN interfaces to a network.
-
Create a Local Network on a single server: Use this field to create a virtual network running on a single Oracle VM Server, usually to facilitate communication between virtual machines running on that server.
-
-
Click Next to begin one of the following procedures:
-
After you select a network configuration, the Create Network wizard displays the following fields to configure your network:
-
Name: The name of the network in Oracle VM Manager.
-
Description: Optional information you would like to add about this network.
-
Network Uses: A set of check boxes that allow you to define the various network roles or channels that are enabled on the network.
-
Management: Used to manage the physical Oracle VM Servers in a server pool, for example, to update the Oracle VM Agent on the different Oracle VM Servers. This network function is assigned to at least one network by default.
-
Live_Migrate: Used to migrate virtual machines from one Oracle VM Server to another in a server pool, without changing the status of the virtual machine.
-
Cluster_Heartbeat: Used to verify if the Oracle VM Servers in a clustered server pool are up and running.
-
Virtual_Machine: Used for the network traffic between the different virtual machines in a server pool.
-
Storage: Enables you to associate specific networks with storage use.
-
Click Next to continue to the next stage of the wizard, or click Cancel to exit the wizard without making any changes.
-
-
The Select Ports stage of the wizard is displayed. This dialog allows you to define which ports or bonds on each Oracle VM Server are attached to the network and presents a tabular view of ports and bonds that are attached to the network.
NoteIf you only wish for your network to contain VLAN interfaces, there is no requirement for you to add any network ports to the network in this dialog. You are able to add VLAN interfaces to the network in the next stage of the wizard.
At the top of the table is a toolbar containing options to
Add New Ports,
 Edit Port(s), or
 Delete Port(s).
To Add A Port To The Network
Delete Port(s).
To Add A Port To The Network-
Click the
Add New Ports icon at
the top of the table.
-
The Add Ports to Network dialog is displayed. Select the server where the network port or bond that you wish to add is located, and expand the node alongside it. Select the port or ports that you wish to add.
NoteOnly ports that are not bonded are displayed. Once a port is part of a bond, it can no longer be used outside of that bond.
-
Click OK to add the ports that you have selected, or click Cancel to exit without any changes.
To Edit A Port Within The Network-
Select the port or ports that you wish to edit within the network.
-
Click the
Edit Port(s) icon.
-
The Edit Port(s) dialogue is displayed.
-
For each port listed, you are able to edit the MTU setting, and the IP Address assignment settings.
-
Click OK when you have finished editing ports to save the changes, or click Cancel to exit.
To Delete A Port From The Network-
Select the port or ports that you wish to remove from the network.
-
Click the
Delete Port(s) icon.
-
The Delete Confirmation dialog box is displayed. Click OK to delete the port from the network.
When you have finished defining the ports that belong to the network, you can click Next to continue to the next stage of the wizard, or click Cancel to exit the wizard. Note that if you only wish for your network to contain VLAN interfaces, there is no requirement for you to add any network ports to the network in this dialog, as you are able to add VLAN interfaces to the network in the next stage of the wizard.
-
-
The Select VLAN Interfaces stage of the wizard is displayed. This dialog allows you to define which VLAN interfaces on each Oracle VM Server are attached to the network and presents a tabular view of VLAN interfaces that are attached to the network. Note that in order to add a VLAN interface to a network it must have been defined prior to starting this wizard, as described in Section 5.2, “VLAN Interfaces”. At the top of the table is a toolbar containing options to
Add VLAN Interfaces,
Edit VLAN Interface(s), or
Delete VLAN Interface(s).
To Add A VLAN Interface To The Network-
Click the
Add VLAN Interfaces
icon in the toolbar.
-
The Add VLAN Interfaces to Network dialog is displayed. In the panel on the left, you are able to expand nodes showing servers assigned to different server pools, or unassigned servers. By clicking on the different nodes in this panel, you are able to update the tabular view of the different available VLAN interfaces on the right.
Note that if you have not already defined any VLAN interfaces as described in Section 5.2, “VLAN Interfaces”, no VLAN interfaces are displayed in this view and you are unable to add any VLAN interfaces to the network. In other words, you must define your VLAN interfaces on the VLAN Interfaces subtab, before attempting to add any VLAN interfaces to a network.
-
Identify the VLAN interfaces that you wish to add to the network and check the check box alongside them.
-
Click OK to add the selected VLAN interfaces to the network, or click Cancel to exit without making any changes.
To Edit A VLAN Interface Within The Network-
Select the VLAN interface that you wish to edit within the network.
-
Click the
Edit VLAN Interface(s)
icon in the toolbar.
-
The Edit VLAN Interface(s) dialog is displayed.
-
For each VLAN interface listed, you are able to edit the MTU setting, and the IP Address assignment settings.
-
Click OK when you have finished editing VLAN interfaces to save the changes, or click Cancel to exit.
To Delete A VLAN Interface From The Network-
Select the VLAN interfaces that you wish to remove from the network.
-
Click the
Delete VLAN
Interface(s) icon.
-
The Delete Confirmation dialog box is displayed. Click OK to delete the VLAN interface from the network.
When you have finished adding any VLAN interfaces to the network, you are able to click Finish to save the new network configuration. Alternatively, you can click Cancel to exit the wizard without saving the network changes. Note that if you edited the configuration for a Port, Bond or VLAN interface in any of the sub-wizards, these changes have already been effected.
-
-
After you select a network configuration, the Create Network wizard displays the following fields to configure your network:
-
Name: The name of the network in Oracle VM Manager.
-
Description: Optional information you would like to add about this network.
Click Next to continue to the next stage of the wizard, or click Cancel to exit the wizard without making any changes.
-
-
The Select Server stage is displayed in the wizard. This stage provides a drop-down list of all of the servers configured within Oracle VM Manager. Select the server where you wish to create the local network, and click Finish to save the new network configuration. Alternatively, you can click Cancel to exit the wizard without saving the network changes.
5.1.2 Edit Existing Network
It is possible to edit the configuration for an existing network. The steps and options to do so are described below.
-
On the Networking tab, click the Networks subtab link and select the network that you wish to edit.
-
Click the
Edit Network icon in the
toolbar.
-
A dialog opens to allow you to reconfigure the network. The dialog has three separate tabs:
-
Configuration:: A tab containing a form allowing you to edit the following information:
-
Name: The name of the network in Oracle VM Manager.
-
Description: Optional information you would like to add about this network.
-
Network Uses: A set of check boxes that allow you to define the various network roles or channels that are enabled on the network.
NoteIf the network is used by many servers, modifying this parameter may cause the edit operation to take several minutes to complete.
-
Management: Used to manage the physical Oracle VM Servers in a server pool, for example, to update the Oracle VM Agent on the different Oracle VM Servers. This network function is assigned to at least one network by default.
-
Live_Migrate: Used to migrate virtual machines from one Oracle VM Server to another in a server pool, without changing the status of the virtual machine.
-
Cluster_Heartbeat: Used to verify if the Oracle VM Servers in a clustered server pool are up and running.
-
Virtual_Machine: Used for the network traffic between the different virtual machines in a server pool.
-
Storage: Reserved for future use and currently has no practical function or application.
-
-
-
Ports: A tab allowing you to manage which ports or bonds on each Oracle VM Server are attached to the network. This tab contains a tabular view of ports and bonds that are already attached to the network. At the top of the table is a toolbar containing options to
Add New Ports,
Edit Port(s), or
Delete Port(s).
To Add A Port To The Network-
Click the
Add New Ports icon
at the top of the table.
-
The Add Ports to Network dialog is displayed. Select the server where the network port or bond that you wish to add is located, and expand the node alongside it. Select the port or ports that you wish to add.
NoteOnly ports that are not bonded are displayed. Once a port is part of a bond, it can no longer be used outside of that bond.
-
Click OK to add the ports that you have selected, or click Cancel to exit without any changes.
To Edit A Port Within The Network-
Select the port or ports that you wish to edit within the network.
-
Click the
Edit Port(s) icon.
-
The Edit Port(s) dialog is displayed.
-
For each port listed, you are able to edit the MTU setting, and the IP Address assignment settings.
-
Click OK when you have finished editing ports to save the changes, or click Cancel to exit.
To Delete A Port From The Network-
Select the port or ports that you wish to remove from the network.
-
Click the
Delete Port(s)
icon.
-
The Delete Confirmation dialog box is displayed. Click OK to delete the port from the network.
-
-
VLAN Interfaces: A tab allowing you to manage which VLAN interfaces are attached to the network. This tab contains a tabular view of VLAN interfaces that are already attached to the network. At the top of the table is a toolbar containing options to
Add VLAN Interfaces,
Edit VLAN Interface(s),
or
Delete VLAN
Interface(s).
To Add A VLAN Interface To The Network-
Click the
Add VLAN Interfaces
icon in the toolbar.
-
The Add VLAN Interfaces to Network dialog is displayed. In the panel on the left, you are able to expand nodes showing servers assigned to different server pools, or unassigned servers. By clicking on the different nodes in this panel, you are able to update the tabular view of the different available VLAN interfaces on the right.
Note that if you have not already defined any VLAN interfaces as described in Section 5.2, “VLAN Interfaces”, no VLAN interfaces are displayed in this view and you are unable to add any VLAN interfaces to the network. In other words, you must define your VLAN interfaces on the VLAN Interfaces subtab, before attempting to add any VLAN interfaces to a network.
-
Identify the VLAN interfaces that you wish to add to the network and check the check box alongside them.
-
Click OK to add the selected VLAN interfaces to the network, or click Cancel to exit without making any changes.
To Edit A VLAN Interface Within The Network-
Select the VLAN interface that you wish to edit within the network.
-
Click the
Edit VLAN
Interface(s) icon in the toolbar.
-
The Edit VLAN Interface(s) dialog is displayed.
-
For each VLAN interface listed, you are able to edit the MTU setting, and the IP Address assignment settings.
-
Click OK when you have finished editing VLAN interfaces to save the changes, or click Cancel to exit.
To Delete A VLAN Interface From The Network-
Select the VLAN interfaces that you wish to remove from the network.
-
Click the
Delete VLAN
Interface(s) icon.
-
The Delete Confirmation dialog box is displayed. Click OK to delete the VLAN interface from the network.
-
-
-
When you have finished editing the network, click OK to save the changes, or Cancel to exit out of the dialog without saving any changes.
5.1.3 Delete Existing Network
It is possible to delete a network. The steps and options to do so are described below.
-
On the Networking tab, click the Networks subtab link and select the network that you wish to delete.
-
Click the
Delete Network icon in the
toolbar.
-
The Delete Confirmation dialog box is displayed. Click OK to delete the network.
5.2 VLAN Interfaces
The VLAN Interfaces tab allows you to define and manage VLAN interfaces on your Oracle VM Servers [2] . If your network is configured to support VLANs, you should define interfaces for your different VLAN IDs on each of your servers, so that you are able to define Oracle VM networks that take advantage of VLAN separation.
The VLAN Interfaces tab is divided into two sections, a Navigation Pane and a Management Pane displaying a tabular view of the VLAN Interfaces associated with the item selected in the navigation pane.
5.2.2 Management Pane
The Management Pane on the VLAN Interface tab allows you to create, edit or delete VLAN interfaces configured within Oracle VM Manager. VLAN interfaces are listed in a tabular view that includes a toolbar providing options to manage interfaces. The VLAN Interfaces that are displayed in the table at any point in time are controlled using the Navigation Pane.
The VLAN Interface tab includes a toolbar in the management pane that consists of the following options:
|
Toolbar Icon Option |
Icon |
Description |
|---|---|---|
|
|
Displays the Create VLAN Interface(s) dialog box. Use this option to create a new VLAN Interface within Oracle VM Manager. |
|
|
|
Displays the Edit VLAN Interface(s) dialog box. Use this option to change the description, MTU settings or IP address assignment options for an existing VLAN Interface. |
|
|
|
Displays the Delete Confirmation dialog box. Use this option to delete the selected VLAN Interface. | |
|
|
Displays context sensitive help. |
The table view in the VLAN Interface subtab includes the following fields:
-
Name: The name of the VLAN interface as defined in Oracle VM Manager.
-
VLAN ID: The VLAN ID that is assigned to the VLAN interface.
-
Server Pool: The server pool where this VLAN interface is located (if any).
-
Server: The server where the VLAN interface is located.
-
Port: The network port on which the VLAN interface is assigned.
-
MTU: The MTU value for the VLAN interface.
-
Network: The network that the VLAN interface is attached to (if any).
-
Addressing: A grouping of fields to display IP address assignment.
-
Type: Describes the network address assignment type (either Static, Dynamic or blank if None).
-
IP Address: The IP address allocated to the VLAN interface (if any).
-
Netmask: The netmask applied to the VLAN interface (if any).
-
-
Description: The description of the VLAN interface as defined in Oracle VM Manager.
5.2.3 Create VLAN Interfaces
If your environment is configured to use VLANs, you need to configure VLAN interfaces within Oracle VM Manager before you are able to use them within a network configuration.
-
On the Networking tab, click the VLAN Interfaces subtab link.
-
Click the
Create VLAN Interface icon
in the toolbar.
-
The Create VLAN Interface(s) dialog is displayed.
-
A navigation tree similar to the one shown in the Navigation Pane is displayed in the pane on the right of the dialog. Use the navigation tree to identify server ports or bonds that are configured for your VLANs. You are able to expand nodes in the navigation tree to identify individual servers, and then expand each server to identify the ports that are available. Alongside each port, listed for a server, is a check box that allows you to enable the port to configure VLAN interfaces that are attached to it. You must select at least one port. Be careful not to select a port that is already in use or which is part of a bond. The user interface does not filter the ports to allow you to only select unused ports.
-
Once you have selected the ports for which you wish to create VLAN interfaces, you can click Next to continue to the next stage of the wizard, or click Cancel to exit the wizard without making any changes.
-
The Select VLAN IDs stage is displayed in the wizard. In the panel on the right, you are able to select a VLAN ID range. Using the two fields available you can specify a range of VLAN IDs that are configured on the network ports for which you are creating VLAN interfaces. Use the
Add,DeleteandDelete Allbuttons to manage the VLAN IDs for which VLAN interfaces should be created. A VLAN interface is created for each VLAN ID specified in the list provided here. You must select at least one VLAN ID. -
When you have finished selecting VLAN IDs, you can click Next to continue to the next stage of the wizard, or click Cancel to exit the wizard without making any changes.
-
The Configure IP Address stage is displayed in the wizard. On the panel on the right, a table is presented listing each of the VLAN interfaces that have been created. For each VLAN interface listed, you are able to edit the MTU setting, the IP Address assignment settings and the description. The Addressing field provides a drop-down selector that allows you to choose either
None,StaticorDynamicto specify how IP Addressing should be configured on this interface. If you selectStatichere, the IP Address and Mask fields become available to edit, otherwise they remain uneditable.A Filter By VLAN ID drop-down selector is provided at the top of the table, to allow you to quickly limit the VLAN interfaces displayed in the table to make changes in a more orderly fashion.
-
Click Finish when you have finished editing VLAN interfaces to save the changes, or click Cancel to exit.
5.2.4 Edit VLAN Interfaces
-
On the Networking tab, click the VLAN Interfaces subtab link.
-
Use the navigation pane to locate filter the list of VLAN interfaces displayed in the management pane.
-
Select the VLAN interface that you wish to edit from the interfaces listed in the management pane.
-
Click the
Edit VLAN Interface icon in
the toolbar.
-
The Edit VLAN Interface(s) dialog is displayed.
-
For each VLAN interface listed, you are able to edit the MTU setting, the IP Address assignment settings and the description. The Addressing field provides a drop-down selector that allows you to choose either
None,StaticorDynamicto specify how IP Addressing should be configured on this interface. If you selectStatichere, the IP Address and Mask fields become available to edit, otherwise they remain uneditable. -
Click OK when you have finished editing VLAN interfaces to save the changes, or click Cancel to exit.
5.2.5 Delete VLAN Interfaces
-
On the Networking tab, click the VLAN Interfaces subtab link.
-
Use the navigation pane to locate filter the list of VLAN interfaces displayed in the management pane.
-
Select the VLAN interfaces that you wish to remove from Oracle VM Manager from the interfaces listed in the management pane.
-
Click the
Delete VLAN Interface(s)
icon at the top of the table displayed in the management
pane.
-
The Delete Confirmation dialog box is displayed. Click OK to delete the VLAN interface from Oracle VM Manager.
5.3 Virtual NICs
A VNIC is a virtualized Network Interface Card, used by a Virtual Machine as its network interface. A VNIC is assigned a MAC address. Each MAC address corresponds with a single virtual NIC, which is used by a virtual machine. You create VNICs when you create a virtual machine. The Virtual NICs tab is used to display the VNICs assigned to different virtual machines within your environment and to control the MAC addresses applied to each VNIC.
The Virtual NICs tab presents a list of all of the VNICs configured within Oracle VM Manager in tabular format. The following fields are displayed for each VNIC:
-
Name: The name of the VNIC, which is usually the same as the MAC address assigned to it.
-
Virtual NIC: The MAC address of the VNIC.
-
Network: The network that the VNIC is attached to.
-
Assigned to VM: The virtual machine that the VNIC is assigned to.
-
Assigned to VM Template: The virtual machine template that the VNIC is assigned to.
Above the table on the Virtual
NICs tab are a set of editable fields that allow you to
customize the MAC address range that can be assigned to VNICs as
they are generated within your environment. The fields accept
valid hexadecimal characters between 00 and FF. The first three
fields (octets) represent the Organizationally Unique Identifier
(OUI). Changing these fields can cause network conflicts and
ultimately network failure and is not recommended. If you edit the
MAC address range, you must click the Apply Range
button to save your changes. To reset the range, you can click the
Reset Range button.
If you select to change the first three octets of the OUI, a warning message is displayed, explaining the consequences of this change, since the MAC addresses assigned to your VNICs can overlap with vendor assigned OUIs. If you proceed to make this change, despite this warning, you receive no subsequent warnings for changing these three octets.
Changing the MAC address range affects the creation of subsequent VNICs during the process of creating or editing a virtual machine. It does not automatically update the MAC addresses already assigned to your virtual machines. To do this, you must edit each virtual machine to change the MAC address there.
For information on creating, editing and removing VNICs on virtual machines, please refer to Section 3.5.2.1, “Edit Virtual Machine” and Section 3.1.3, “Create Virtual Machine”.
It is important that you do not have overlapping MAC address ranges as this can lead to issues tracing network issues. Oracle VM Manager attempts to prevent the likelihood of this happening by generating unique MAC addresses. However, if you run more than one Oracle VM Manager instance, it is possible that an overlapping MAC address could be generated. If you create a MAC address that is already in the Oracle VM Manager database, an error message is displayed.
[2] VLAN configuration within Oracle VM Manager has changed significantly in Oracle VM 3.3. If you have used previous releases of Oracle VM, it is important that you understand these changes and it is recommended that you refer to Understanding Networks in the Oracle VM Concepts Guide.