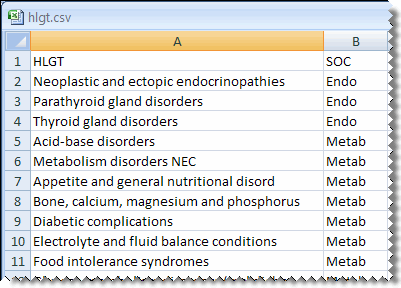
Typical format:
Format for subsidiary linked fields only:


In this section Hide
1. Determine the valid values for the field.
2. Prepare a Microsoft Notepad file with a single column and with a column heading in the first row. Enter a single value of up to 100 characters in each subsequent row.
Note: For a field that is the subsidiary field in a linked pair, the table that you upload should contain two columns. The first column should contain the values for that field, and the second column should contain the values that are valid for the controlling, parent field.
For example:
|
Typical format: |
Format for subsidiary linked fields only: |
|
|
|
3. Save the file with the .csv (comma-separated value) file extension.
1. Click Settings.
The Settings page appears.
2. In the Configure System section, click Manage Topic Workflow Configurations.
The Manage Topic Workflow Configurations page appears.
3. Click the row menu ( ) for a field, and click Manage Fields
The Manage Fields page appears
4. Click  for a field, and then click Define Values.
The Define Valid Field Values page appears.
5. Click Upload Table.
The Upload Values dialog box appears.
6. In the File to upload field, enter the full path and file name of the .csv file, or click Browse to locate the file on your computer.
7. Click Upload.
The application adds all values in the file after the first row as valid values.
8. If necessary, you can edit the values or change the display order for the values.