3 Supported Features of HTML5
This chapter describes the scope of HTML5 features supported by the JavaFX web component. The majority of the supported functionally is part of the WebEngine class and WebView class implementations, and this functionality does not have any public APIs.
The current implementation of the JavaFX web component provides support for the following HTML5 features:
-
Canvas and SVG
-
Media playback
-
Form controls
-
History maintenance
-
Interactive element tags
-
DOM
-
Web workers
-
Web sockets
-
Web fonts
Canvas and SVG
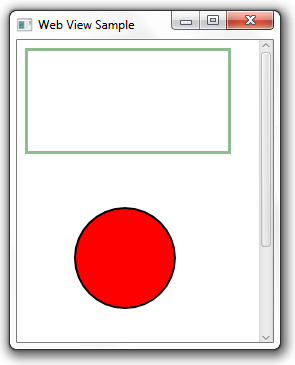
Support for the canvas and svg element tags enables basic graphical functionality including rendering graphics, building shapes by using Scalable Vector Graphics (SVG) syntax, and applying color settings, visual effects, and animations. Example 3-1 provides a simple test of using the <canvas> and <svg> tags to render the web component.
Example 3-1 Use of Canvas and SVG Elements
<!DOCTYPE HTML>
<html>
    <head>
        <title>Canvas and SVG</title>
        <canvas style="border:3px solid darkseagreen;" width="200" height="100">
        </canvas>
        <svg>
            <circle cx="100" cy="100" r="50" stroke="black"
                stroke-width="2" fill="red"/>
        </svg>
    </body>
</html>
When you load a page by using the HTML code from Example 3-1 into a WebViewSample application, it renders the graphics shown in Figure 3-1.
Media Playback
The WebView component enables you to play video and audio content within a loaded HTML page. The following codecs are supported:
-
Audio: AIFF, WAV(PCM), MP3, and AAC
-
Video: VP6, H264
-
Media containers: FLV, FXM, MP4, and MpegTS (HLS)
For more information about embedding media content, see the HTML5 specification for the video and audio tags.
Form Controls
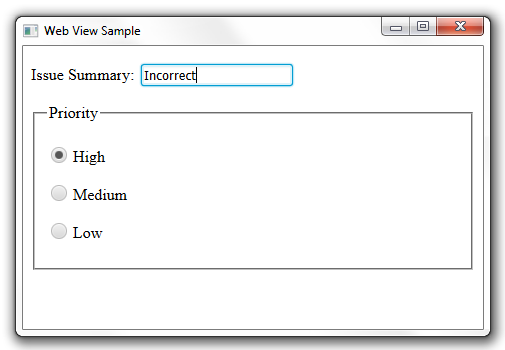
The JavaFX web component enables rendering forms and processing data input. The supported form controls include text fields, buttons, checkboxes, and other available input controls. Example 3-2 provides a simple set of the controls that enable you to enter an issue summary and specify its priority.
Example 3-2 Form Input Controls
<!DOCTYPE HTML>
<html>
<form>
 <p><label>Login: <input></label></p>
 <fieldset>
  <legend> Priority </legend>
  <p><label> <input type=radio name=size> High </label></p>
  <p><label> <input type=radio name=size> Medium </label></p>
  <p><label> <input type=radio name=size> Low </label></p>
 </fieldset>
</form>
</html>
When the HTML content from Example 3-2 is uploaded in the WebView component, it produces the output shown in Figure 3-2.
For more information about how users can submit data and process it using the form controls, see the HTML5 specification.
History Maintenance
You can obtain a list of visited pages by using the WebHistory class available in the javafx.scene.web package. The WebHistory class represents the session history associated with a WebEngine object.
This functionality is enabled in the WebViewSample application that you will use to learn the capabilities of the JavaFX web component. See the Managing Web History chapter for the implementation details.
Support for Interactive Element Tags
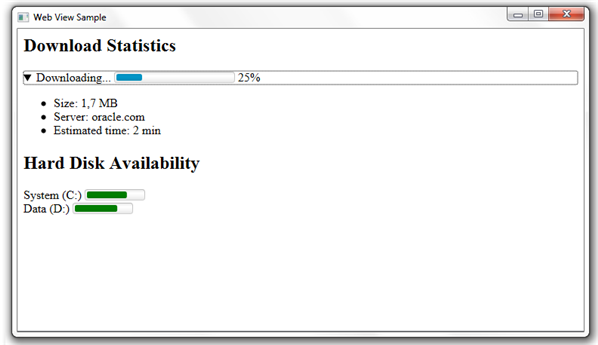
The WebView component provides support for interactive HTML5 elements such as details, summary, command, and menu. Example 3-3 shows how the details and summary elements can be rendered in the web component. The sample also uses the progress and meter control elements.
Example 3-3 Use of Details, Summary, Progress, and Meter Elements
<!DOCTYPE HTML>
<html>
<h1>Download Statistics</h1>
 <details>
  <summary>Downloading... <progress max="100" value="25"></progress> 25%</summary>
  <ul>
   <li>Size: 1,7 MB</li>
   <li>Server: oracle.com</li>
   <li>Estimated time: 2 min</li>
  </ul>
 </details>
<h1>Hard Disk Availability</h1>
  System (C:) <meter value=240 max=326></meter> </br>
  Data (D:) <meter value=101 max=130></meter>
</html>
When this page is loaded in the web component, the WebViewSample application looks as shown in Figure 3-3.
Figure 3-3 Rendering Interactive HTML5 Elements

Description of "Figure 3-3 Rendering Interactive HTML5 Elements"
See the HTML5 specification for more information about properties of the interactive elements.
Document Object Model
A WebEngine object, a nonvisual part of the JavaFX web component, can create and provide access to a Document Object Model (DOM) of a web page. The root element of the document model can be accessed by using the getDocument() method of the WebEngine class. Example 3-4 provides a code fragment to implement some simple tasks: obtaining a URI of the web page and displaying it in the title of the application window.
Example 3-4 Deriving a URI from a DOM
WebView browser = new WebView();
WebEngine webEngine = browser.getEngine();
stage.setTitle(webEngine.getDocument().getDocumentURI());
Additionally, the document model event specification is supported to define event handlers in JavaFX code. See the specification of the WebEngine class for the example that attaches an event listener to an element of a web page.
Web Sockets
The WebView component supports the WebSocket interface to enable JavaFX applications to establish bidirectional communication with server processes. The WebSocket interface is described in detail in the WebSocket API specification. Example 3-5 shows a common model for using web sockets.
Web Workers
The JavaFX web component supports running web worker scripts in parallel to activities on the loaded web page. This functionality enables long-running scripts to be executed without a need to wait for user interaction.
Example 3-6 shows a web page that uses the myWorker script for a long-running task.
Example 3-6 Using a Web Worker Script
<!DOCTYPE HTML>
<html>
<head>
<title>Web Worker</title>
</head>
<body>
<script>
   var worker = new Worker('myWorker.js');
   worker.onmessage = function (event) {
     document.getElementById('result').textContent = event.data;
   };
</script>
</body>
</html>
Learn more about the web worker script from the HTML5 specification.
Web Font Support
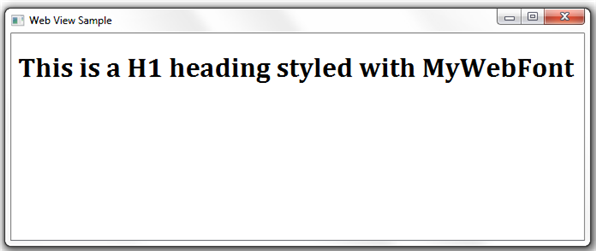
The JavaFX web component supports web fonts declared with the @font-face rule. This rule enables linking fonts that are automatically downloaded when needed. According to the HTML5 specification, this functionality provides the capability to select a font that closely matches the design goals for a given page. The HTML code in Example 3-7 uses the @font-face rule to link a font specified by its URL.
Example 3-7 Using a Web Font
<!DOCTYPE HTML>
<html>
  <head>
    <title>Web Font</title>
    <style>
      @font-face {
        font-family: "MyWebFont";
        src: url("http://example.com/fonts/MyWebFont.ttf")
      }
      h1 { font-family: "MyWebFont", serif;}
    </style>
  </head>
  <body>
    <h1> This is a H1 heading styled with MyWebFont</h1>
  </body>
</html>
When this HTML code is loaded into the WebViewSample application, it is rendered as shown in Figure 3-4.


