Implementing the Catalog
This chapter covers the following topics:
- Overview of Implementing the Catalog Chapter
- Understanding Customer Application Page Display
- Display Templates Overview
- Catalog Overview
- Understanding Section Display
- Section Templates Overview
- Section Templates
- Product Templates
- Creating and Maintaining Sections
- Maintaining Products in Sections
- Configuring Bin Placement and Content
- Mapping Source Files to Display Templates
- Setting up Section Display Templates Text Messages
- Using Product Relationships
- Direct Punchout Catalog
Overview of Implementing the Catalog Chapter
This chapter contains information on implementing the Customer Application product catalog in Oracle iStore, including creating the section hierarchy and adding products to the sections.
Understanding Customer Application Page Display
Oracle iStore utilizes JavaServer Pages (JSPs), which combine Application Programming Interfaces (APIs) to call dynamic data and HTML to present static data. A robust PL/SQL layer interfaces with the Oracle database to provide consistent and accurate data storage and retrieval.
In the Customer Application, each web page is made up of an overall JSP (for example the seeded Site Home Page, ibeCZzpHome.jsp) that calls other JSPs to display the various areas of the page. Oracle iStore uses templates and other components to present the Customer Application, including:
-
Display Templates: The bulk of the Customer Application display is presented through the hundreds of Display Templates that are seeded in Oracle iStore. Display Templates are of various types, depending upon which areas of the Customer Application they are meant to display. See the section, "Display Templates Overview", within this chapter, for more information.
-
Section and Product Hierarchy: Using sections and their products organized into a hierarchal structure, your product catalog is presented through a powerful section and product catalog building tool.
-
Content: Oracle iStore features flexible and reusable content tools. To present product images and HTML content in your specialty sites, you map content components to media objects, which are in turn linked to the content files. To present messages, you utilize hundreds of seeded text messages, some of which also are reusable media objects. See the chapter, Implementing Content, for more information.
Although many customers do customize Oracle iStore, given the application's range of configuration options, customizing is not necessary.
Display Templates Overview
This section contains general information on Display Template functionality within Oracle iStore.
Display Templates Present the Customer Application
Oracle iStore is supplied with over 800 Display Templates that present the Customer Application pages. In addition, you can create your own templates for use in the sites. Each template has a specific display purpose, depending upon which element of the customer-facing application it displays. The template categories are known as Applicable To categories in the Site Administration Application.
In order for a Display Template to present an element of the Customer Application, it must link to a source file --- this is where its content comes from. This source file typically is a Java Server Page (JSP). The seeded Display Templates that present the default Customer Application are linked to source JSPs. Other templates are left without source JSP files, so that you can configure your own Customer Application presentation with your own source JSPs.
Many of Oracle iStore's Display Templates can call logical media objects and content components to present image and HTML content. These can be any type of image file, such as .gif, .jpg, .bmp, etc., or HTML content in the form of .htm files. Some of the Display Templates present this type of content by calling seeded content components that are located within them. To map content, you must link content components to a logical media object, which you in turn map to the physical source content file (.gif, .htm, etc.). Each Display Template, depending upon its usage, contains the programmatic access names of specific content components. It uses these programmatic access names to call the components. Other Display Templates can call media objects directly. Some section Display Templates can understand content as well.
See the appendix, Seeded Display Data, for a list of templates and categories.
Display Template Characteristics
Display Templates have the following features:
-
Display Name: This is the template's name, to be used for your internal business purposes. The template name appears in the Site Administration Application, but cannot be seen in the Customer Application.
-
Programmatic Access Name: This is a unique code used by template processing pages to determine what to do with the template. The template programmatic access name appears in the Site Administration Application, but cannot be seen in the Customer Application.
-
Source Files: Each template used in the Customer Application must have a source JSP mapped to it for each site/language mapping for which it will be used. The source JSP determines the content of the page area covered by the template.
-
Description: This is an internal description, meant for your own business purposes, that provides information about the use of the template. The template description appears in the Site Administration Application, but cannot be seen in the Customer Application.
-
Keywords: After you enter them in the system, keywords can be used to search for templates in the Site Administration Application. These keywords cannot be seen by customers.
-
Applicable To: The Applicable To designation of a template is a display category that describes its purpose.
Creating New Display Templates
You also can register your own templates to link with your own JSP files, in order to customize the presentation of the Customer UI display. See the chapter, Advanced Display, for details.
Note: During upgrades, Oracle iStore does not alter custom templates and their JSP mappings, nor does it overwrite mappings of JSP files to specific site-language combinations.
Importing or Exporting Display Template Mappings
Oracle iStore's Display Template Mappings Import/Export functionality for Template Manager allows you to transfer template mappings between instances using XML files. See the chapter, Advanced Display, for details.
Catalog Overview
The catalog you build using Oracle iStore's sections and products allows you organize your sites into hierarchal sections with products, and to re-use the sections, their products, and any associated content, in one or multiple sites. You also can choose to exclude specific sections, subsections, or products from sites.
In combination with the Display Templates, your site sections --- connected in a parent-child fashion --- help determine the browsing path for the customer in your Customer Application specialty sites. All driven from the main Root section, together the sections, subsections, and products in your sites form a tree-like structure with which you organize and present your product catalog.
Use the Sections and Products pages within the Catalog tab in the Site Administration Application to perform section-product creation and maintenance tasks.
Using the Sections pages, you can:
-
Create sections
-
Duplicate existing sections, including all products and content
-
Assign Display Templates to sections to determine the layout of the sections
-
Assign products to sections -- either automatically or manually
-
Assign or exclude sections to/from site(s)
-
Preview sections in the context of the specialty site(s) in which they appear
-
Delete sections
-
Rename sections
-
Use the search utility to search for sections
For more information on products, see the chapter, Implementing Products.
Implementing Sections
In your initial implementation, the section hierarchy will consist of a single parent node, called Root. To this single node, you can add as many subsections as you wish, as long as you follow certain rules for section type (see the "Section Types" section). Your products "hang" upon the sections and subsections of the hierarchal tree.
Each site points to a single node of the section hierarchy. This node is known as the site's root section -- the site root section can be either the main (initial) Root node or one of the other main or subsections that you create. In the specialty sites that include the section, the sites' navigation is driven from the first top-level section in the hierarchy.
Catalog Hierarchy Guidelines and Behavior
Consider the following guidelines and behavior when building the section-product hierarchy:
-
Set up the top-level sections in the section hierarchy first. See the section, "Creating and Maintaining Sections", within this chapter, for more information.
-
Each top-level section will have the main Root node as its parent.
-
For each top-level section, you can create as many subsections as you wish. Each subsection also can have as many other subsections as you wish, as long as you follow the rules for section types; see the "Section Types" section, for these rules.
-
When assigning a parent section to a site, do not choose unpublished or non-active sections, as this will cause incorrect rendering in the Customer Application. If you wish to make a site unavailable to customers, end-date the site.
-
In the Customer Application, the Site Home Page will display the first navigational subsection under the Root section, not the root section page itself.
-
To present Featured sections on the Site Home Page, make them subsections of the first Navigational subsection.
-
If the root section has both Navigational and Featured subsections, the Navigational subsection will not be displayed in catalog pages.
For example, under the parent section Vision Computers and Support, Home is a navigational sub-section and Hot Deals is a Featured sub-section. Hot Deals section is displayed on the Product catalog page.
-
You can create groups of featured products at any level in the hierarchy by creating a subsection of type Featured in a Navigational section and then adding products to that Featured section.
-
You can assign individual products one-at-a-time to sections in the Products pages, and you can add a single or multiple products to a section at one time, using the Sections pages. See the sections: "Adding Products to Sections Using the Products Pages", and "Adding Products to Sections Using the Sections Pages", within this chapter, for details.
-
You also can use the Product Autoplacement functionality to populate Leaf sections with products from Inventory categories. See the chapter, Implementing Products, for details.
-
The top-level sections appear as tabs across the top of the Customer Application Web sites, and second-level sections appear as subtabs and in the Browse Bin. The number of tabs and subtabs that appear can be controlled by setting profile options. See the section, "Section and Product Display Profile Options", within this chapter, for details.
-
A Navigational section containing a Featured subsection and other subsections shows the products in the Featured section in the middle of the page and the other subsections in the Browse Bin.
-
If a section contains only products, it lists the products in the middle.
-
Products will not appear in the Customer Application unless you publish them in a published section appearing in a published site. Also, the effective dates of the products, sections, and sites must be valid to appear in the Customer Application.
-
In the Customer Application, when a user accesses a section which has a Featured subsection, the page flow automatically routes the user to the Featured subsection. Thus, in this scenario, the template mapped to the parent section of the Featured section determines the display of the Featured subsection, not the template mapped to the Featured subsection itself. Therefore, as a best practice, for the parent section of a Featured section, map a template whose category is Template for Section Contains Featured Subsections. Additionally, to preview a featured subsection in the Site Administration Application, preview the parent section to see the display of the featured subsection, not the featured subsection itself.
-
The Item Details icon is associated with a product. When you click on the Item Details icon the extended product attributes are displayed. The Item Details pop-up window allows the iStore user to add the product and quantity to the shopping cart directly without navigating to the Shopping Cart page.
-
From a single-line or multi-line display template, the iStore user can click on the Item Details icon to view product content. The iStore user can view the additional content defined in Oracle Inventory or defined by the iStore Administrator in the Section Attributes or the Product Extended Attributes XML file. This is the Item Details process flow for the B2B and the B2C iStore user.
You can find more information in the following sections:
-
"Product Statuses: Published or Unpublished" (within this chapter)
-
"Section Statuses: Published or Unpublished" (within this chapter)
-
"Create a Site: Getting Started and Entering Basic Information" (in the chapter, Implementing Site Management.)
Section Types
Site sections are of two basic types: Featured and Navigational. A third category, Leaf, can be of either main type, depending upon its placement in the hierarchy. See below for details.
Featured section:
-
Appears on the home page of its parent section
-
Contains products only
-
Cannot have subsections
Navigational section:
-
Appears as a hyperlink in the browsing map of its parent section -- users must select the section hyperlink to view the section
-
Can contain products or subsections, but not both
Leaf section:
Within these two types, a section also can be characterized as a Leaf section. Following are the Leaf section characteristics:
-
The Leaf section is always the ending section or sections on a hierarchy branch, and thus never has subsections.
-
The Leaf section can be a Featured or a Navigational type of section.
-
The Leaf section's main purpose is for usage with Oracle iStore's Product Autoplacement feature.
Note that a Leaf section is a logical definition, and not a section attribute that you can define in Oracle iStore.
See the chapter, Implementing Products, for more details.
Section Statuses
Before a section is available to customers in the Customer Application, you must flag the section as Published and save the changes. Unpublished sections cannot be seen by customers.
-
Published Section: :
-
Section and any published child sections or products are visible in both the Customer Application and Site Administration Application. In the Site Administration Application, the site administrator uses Preview mode to preview a section and its child sections in the context of a specialty site.
Note: In Preview mode, only specialty sites which support the administrator's current session language will display.
-
When publishing a section, the Apply status to all descendant sections checkbox in the Create/Update Section page enables you to publish the current section and all descendant sections (but not products) at the same time.
-
-
Unpublished Section:
-
Unpublished sections and all child sections or products are not visible in the Customer Application, unless being viewed by the site administrator (i.e., a user logged in with the iStore Administrator or equivalent responsibility).
-
Sections and all child sections or products (whether published or unpublished) also are viewable by the administrator through the use of Preview mode (selecting the Preview button in Site Administration Application pages).
-
Product Status
While working with the product catalog, you can determine whether or not to change the status of an Oracle Inventory product to Published or Unpublished. Only published products are able to display in the Customer Application, unless the site administrator is using Preview mode.
Setting a product's Published/Unpublished status in the Oracle iStore Site Administration Application is the same as changing the product's Web Status setting in Oracle Inventory.
Below are the definitions of the two Oracle iStore product statuses:
-
Published Products: Only published products can display in the Customer Application, unless the site administrator is using Preview mode. Remember that a published product also must be: (1) listed in at least one published section, and (2) that section is in an active site accessible to a user.
-
Unpublished Products: An unpublished product is not available in the Customer Application to end users. It will display, however, in Preview mode.
Note: Oracle Inventory allows users to set a Web Status of Disabled. Products in status, Disabled, cannot be queried in the Site Administration Application nor assigned to sections. Setting a product's Web Status to Disabled in Inventory will make products disappear in both the Site Administration and Customer UIs.
Understanding Section Display
Sections and their associated products display in the Customer Application in the context of the Display Templates in which they appear. All of the section templates appear in the center of the Customer Application screen. In addition to the Display Templates, section appearance is affected by the structure of your section hierarchy, any section-product associations, any content you have associated to a section or product, and any bins configured for the pages.
Section and Product Display Profile Options
Several profile options control how sections and products appear in the specialty site sections. These are discussed in this section.
Setting the Number of Home Page Tabs and Subtabs
Top-level sections of a site's root node become tabs across the top of the Site Home Page. The second-level sections become the subtabs across the top of the Site Home Page.
The number of tabs and subtabs is controlled by these profile options:
-
IBE: Number of Menu Tabs: Specifies the number of menu tabs across the top of the Site Home Page. See the appendix, Profile Options, for more information.
Warning: Do not set this profile option to zero (0). Setting it to zero will cause an application error in the Customer Application.
-
IBE: Number of Menu Subtabs: Specifies the number of menu subtabs below the menu tabs on the Site Home Page. See the appendix, Profile Options, for more information.
Setting the Number of Child Sections Per Page
The profile option, IBE: Sections Per Page for Display, allows you to set the maximum number of subsections to display on a page before the subsections fall to a new page. See the appendix, Profile Options, for more information.
Displaying the Section Path
The profile option, IBE: Use Section Path, determines whether the section path displays in those catalog templates which can display a section path. See the appendix, Profile Options, for more information.
Displaying Bins with Seeded Content
Three bins with seeded JSP content are controlled by profile options when using Fixed Layout for sections. These bins are:
-
Browse Bin
-
Global Bin
-
Welcome Bin
See the chapter, Implementing Initial Customer Application Pages, for more information.
Displaying a Set Number of Items in Leaf Sections
The profile option, IBE: Items Per Page for Display, specifies number of items to display in Leaf sections of the hierarchy (the ending sections of a node). See the appendix, Profile Options, for more information.
Displaying a Set Number of Items in Sections
The profile option, IBE: Items Per Section for Display, specifies the number of items to display in sections of the hierarchy that contain products. See the appendix, Profile Options, for more information.
Displaying a Set Number of Items in Multiple-Section Template
The profile option, IBE: Lines Per Section for Multiple Section Display, specifies the number of items to display per section in Display Templates that show multiple sections. See the appendix, Profile Options, for more information.
Section Templates Overview
The structure of your catalog sections as they display on Customer Application pages is determined by your layout and template choices for the sections. To aid your understanding of the options involved, following is a process flow for building section structure.
Process Flow for Building Section Structure
In this process, you associate each section to:
-
A Layout Template: This choice determines whether all sections have the same bin locations (Fixed Layout) or whether each section can have separate bin locations (Configurable Layout).
and
-
A Display Template: This choice determines which section elements (name, description, content components) display for each section and how the section looks.
Note that it is optional to configure section structure. You can always accept the default layout and default templates.
-
Select Layout Template: First, determine which Layout Template to use for each section. This is done in the Update Section: Layout page. The options for layout template are:
-
Fixed Layout --- When you use Fixed Layout for a section, the section's Display Template hard-codes bin locations. All sections using the same Display Template will display any mapped bins in the same location. For more information, see the following sections within this chapter:
--"Fixed Versus Configurable Layout with Section Display Templates"
--"Using Fixed Bin Layout"
-
Configurable Layout --- When you use Configurable Layout, bins are configurable by section, meaning that each section can have a mapped bin or bins in a different location. For more information, see:
--"Fixed Versus Configurable Layout with Section Display Templates"
--"Using Configurable Bin Layout"
See "Selecting Layout and Setting Display Templates for Sections", for steps detailing how to select Configurable or Fixed Layout and assign Display Templates to sections.
-
Custom Layout --- Create custom Layout Templates which will display in the Layout type LOV after creation.
-
-
Select Display Template: Next, select a Display Template for the section(s). This is done in the Update Section: Template page.
Display Template options are:
-
Default Template: Use the default Display Template for section(s). A default template exists for each section category. You can find the default templates in the section, "Section Templates", within this chapter
-
Template Gallery: Use a template from the template gallery. You can find a list of the templates in the section, "Section Templates".
For complete steps, see "Selecting Layout and Setting Display Templates for Sections", within this chapter.
-
Custom Templates: Create and use customized Display Templates.
-
-
Map Bins to Content: You can implement bins on the section pages to present content along the top, bottom, right, and left of your catalog pages. If using Configurable Layout, each section can have unique bin locations. If using Fixed Layout, all mapped bins display in the same location on all section pages using the same Display Template. See the section, "Configuring Bin Placement and Content", within this chapter, for steps detailing how to map bins to content, after you have selected either Fixed or Configurable Layout in the Update Section: Layout page.
Section Templates
Within the Oracle iStore Display Templates are those that display only sections and their related information. Display Templates allow Customer UI users to see such information as section name and description, links to subsections, and content (images or HTML files).
Overview of Section Template Categories
Templates are categorized by the type of section they display. The section category is known as the Applicable To category of the template. The categories are:
-
Section Contains Featured Subsections
-
Section Contains Navigational Subsections Only
-
Section Contains Products Only
-
Component for Sections Containing Featured Subsections
-
Component for Sections Contain Navigational Subsections Only
-
Component for Sections Containing Products Only
See the sections: "Applicable To Categories for Display Templates Associated with Fixed Layout" and "Applicable To Categories for Display Templates Associated with Configurable Layout", below, for more information.
Fixed Versus Configurable Layout with Section Display Templates
For each section, you can select Fixed or a Configurable layout for Display Templates. See the section, "Process Flow for Building Section Structure", within this chapter, to gain an understanding of the typical flow for building section structure.
The primary difference between the two layouts are:
Fixed Layout:
-
With Fixed Layout, the Display Templates hard-code all bins mapped to all locations. Thus, all sections using the same Display Template will have the same bin in each location (for bins mapped to content). See the section, "Using Fixed Bin Layout", within this chapter, for information about which bins can be used with Fixed Layout.
Configurable Layout:
-
Bins associated to your sections are configurable by section. The Display Template used for each section renders the center part of the page, allowing you to map different bins to the same location for different sections. Thus, all sections using the same Display Template have identical rendering only in the center portion of the catalog page, but still are able to have different bins in the same location surrounding different sections. See the section, "Using Configurable Bin Layout", within this section, for details.
-
The template gallery has two additional Display Templates which can understand content components -- these are the Multilevel Subsection List with Content and Section Detail.
Note that section templates in the Fixed Layout gallery have the same look and feel as those in the Configurable Layout gallery -- the same template look and feel that is available in the Fixed Layout gallery is similarly available in the Configurable Layout gallery. Templates within Fixed and Configurable layout are different templates, but each template for Fixed Layout has a corresponding Configurable Layout template with same appearance.
Important: In the Site Administration Application, you must first select the layout type (Fixed or Configurable) and then select a template for the section.
Applicable To Categories for Display Templates Associated with Fixed Layout
Three Applicable To categories exist within the Display Templates associated with Fixed Layout. These are:
-
Section Contains Featured Subsections: For a list of templates in this category, see the section, "Templates for Section Contains Featured Subsections Category", within this chapter.
-
Section Contains Navigational Subsections Only: For a list of templates in this category, see the section, "Templates for Section Contains Navigational Subsections Only Category", within this chapter.
-
Section Contains Products Only: For a list of templates in this category, see the section, "Templates for Section Contains Products Only Category".
Note: For backward compatibility purposes, a fourth category exists: Uncategorized section display templates. This category is for templates which have been migrated during an upgrade.
Applicable To Categories for Display Templates Associated with Configurable Layout
Three Applicable To categories exist for Display Templates associated with Configurable Layout. These are:
-
Component for Sections Containing Featured Subsections: All of the templates in this category have the same look and feel as those in the section, "Templates for Section Contains Featured Subsections Category" -- thus, this category does not have its own section describing each template; use the section, "Templates for Section Contains Featured Subsections Category", instead.
-
Component for Sections Containing Navigational Subsections Only: All but one of the templates in this category have the same look and feel as those in the section, "Templates for Section Contains Navigational Subsections Only Category" -- thus, use this section for descriptions. In addition, this category has one more template, Multilevel Subsection List with Content; see the section, "Templates for Component for Sections Contain Nav. Subsec. Only Category", for details about this template.
-
Component for Sections Containing Products Only: All but one of the templates in this category have the same look and feel as those in the section, "Templates for Section Contains Products Only Category" -- thus, use this section for template descriptions. In addition, this category has one more template, Section Detail. See the section, "Templates for Component for Sections Containing Products Only Category", for details about this template.
Templates for Section Contains Featured Subsections Category
With this category, the section itself also can have other Navigational subsections. For this type of template, the main (parent) section itself is never rendered, because when the user selects the parent section, the page flow automatically routes the user to the Featured subsection.
The following section templates are in this category:
-
Product Detail: See the "Product Detail" section, below, for information about this template.
-
Product Multi-Select: See the "Product Multi-Select" section, below, for information about this template.
-
Product Multi-Select with Section Links: See the "Product Multi-Select with Section Links" section, below, for information about this template.
Product Detail
This template shows:
-
Parent section short description
-
Parent section long description
-
Parent section additional information content component
-
Product names
-
Product small image content component
-
Product descriptions
Programmatic access name --- STORE_CTLG_FSUBSCT
Default mapped JSP --- ibeCCtpFSubSct.jsp
The following graphic shows how the template appears in the gallery.
Product Detail Section Display Template
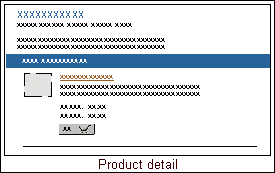
Note: This also is the default template for this category (Section Contains Featured Subsections).
Product Multi-Select
This template shows:
-
Parent section short description
-
Parent section long description
-
Parent section additional information content component
-
Product multi-selection option
Programmatic access name --- STORE_CTLG_FSUBSCT_MULT_2COL
Default mapped JSP --- ibeCCtpFSuStMs2.jsp
The following graphic shows how the template appears in the gallery.
Product Multi-Select Section Display Template
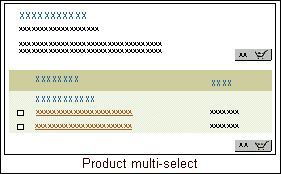
Note: If you use this section Display Template, you must change the seeded text message that displays. See the section, "Setting up Section Display Templates Text Messages", below, for more information.
Product Multi-Select with Section Links
This template shows:
-
Section short description
-
Section long description
-
Section additional information content component
-
Product multi-selection option
-
Section link
Programmatic access name --- STORE_CTLG_FSUBSCT_MULT_3COL
Default mapped JSP --- ibeCCtdFSuStMs3.jsp
The following graphic shows how the template appears in the gallery.
Product Multi-Select with Section Links Section Display Template
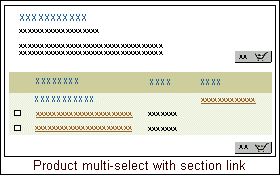
Note: If you use this section Display Template, you must change the seeded text message that displays. See the section, "Setting up Section Display Templates Text Messages", below, for more information.
Templates for Section Contains Navigational Subsections Only Category
The following section templates are applicable to those sections which contain Navigational subsections only:
-
Subsection List
-
Subsection List 2
-
Multilevel Subsection List
-
Subsection List with Product Detail
-
Subsection List with Product Pull-Down List
These templates are described in the sections that follow.
Subsection List
This template shows:
-
Parent section short description
-
Parent section long description
-
Parent section additional information content component
-
List of subsections as drill-down hyperlinks
Programmatic access name --- STORE_CTLG_SCT_BULLET_SUBSCT
Default mapped JSP --- ibeCCtpStBlSuSt.jsp
The following graphic shows how the template appears in the gallery.
Subsection List Section Display Template
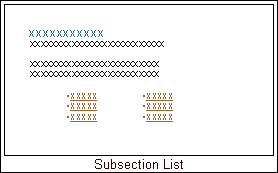
Note: This is also the default section template for this category (Section Contains Navigational Subsections Only).
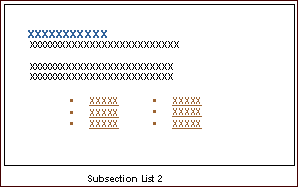
Subsection List 2
This template shows:
-
Parent section name
-
Parent section short description
-
Section additional information content component
-
List of subsections
Programmatic access name --- STORE_CTLG_SCTN_BULLET_SUBSCT
Default mapped JSP --- ibeCCtpStNBlSuSt.jsp
The following graphic shows how the template appears in the gallery.
Subsection List 2 Section Display Template
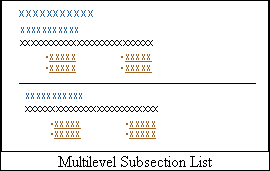
Multilevel Subsection List
This template shows:
-
Parent section short description
-
Subsections names
-
Subsections short description
-
Children sections of subsections with drill-down links
Programmatic access name --- STORE_CTLG_DLDN_SCT_BULLET
Default mapped JSP --- ibeCCtpDdLfStBl.jsp
The following graphic shows how the template appears in the gallery.
Multi-Level Subsection List Section Display Template
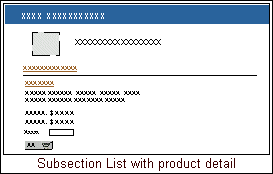
Subsection List with Product Detail
This template shows:
-
Parent section name
-
Parent section short description
-
Parent section small image content component
-
Subsections and their product details
-
Subsection short description
-
Subsection small image content component
Programmatic access name --- STORE_CTLG_DRILL_LEAF
Default mapped JSP --- ibeCCtpDrillLeaf.jsp
The following graphic shows how the template appears in the gallery.
Subsection List with Product Detail Section Display Template
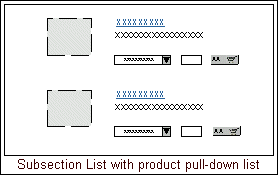
Subsection List with Product Pull-Down List
This template shows:
-
Subsection names
-
Subsection short descriptions
-
Subsection images mapped to section small image content component
-
Product pull-down list
Programmatic access name --- STORE_CTLG_SUBSCT_DPDN_ITEMS
Default mapped JSP --- ibeCCtpChStDdIts.jsp
The following graphic shows how the template appears in the gallery.
Subsection List with Product Pull-Down Section Display Template
Templates for Section Contains Products Only Category
The following section templates are applicable to those sections which contain only products:
-
Product Detail
-
Product Pull-Down
-
Product Detail Multi-Select
-
Product Multi-Select
-
Product Multi-Select with Drill-Down
These templates are described in the sections that follow.
Product Detail
This template shows:
-
Section name
-
Section short description
-
Section small image content component
-
Product names
-
Product small image content component
-
Product descriptions
Programmatic access name --- STORE_CTLG_LEAF_SCT_SINGLE
Default mapped JSP --- ibeCCtpLeafSctSs.jsp
The following graphic shows how the template appears in the gallery.
Product Detail Section Display Template
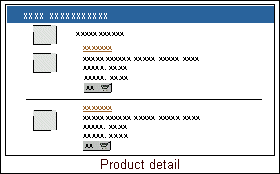
Note: This is also the default section template for this category (Section Contains Products Only).
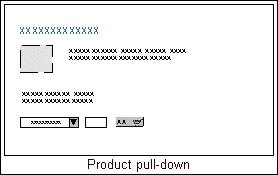
Product Pull-Down
This template shows:
-
Section name
-
Section long description
-
Section small image content component
-
Section additional information content component
-
Product pull-down list
Programmatic access name --- STORE_CTLG_SCT_DTL_DPDN_ITEMS
Default mapped JSP --- ibeCCtpStMmDtIts.jsp
The following graphic shows how the template appears in the gallery.
Product Pull-Down Section Display Template
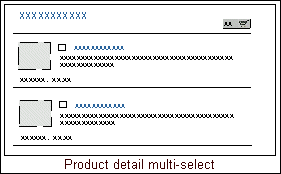
Product Detail Multi-Select
This template shows:
-
Section short description
-
Products multi-select option
-
Product names
-
Product small image content component
-
Product descriptions
Programmatic access name --- STORE_CTLG_LEAF_SCT_ITEMS
Default mapped JSP --- ibeCCtpLfStIts.jsp
The following graphic shows how the template appears in the gallery.
Product Detail Multi-Select Section Display Template
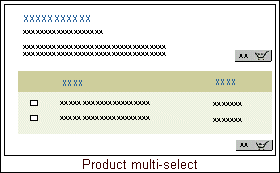
Product Multi-Select
This template shows:
-
Section short description
-
Section long description
-
Section additional information content component
-
Products multi-select option
Programmatic access name --- STORE_CTLG_LF_SCT_MULT_NOLINKS
Default mapped JSP --- ibeCCtpLfStMs.jsp
The following graphic shows how the template appears in the gallery.
Product Multi-Select Section Display Template
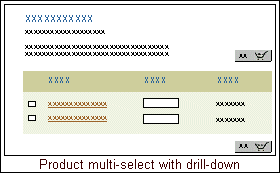
Product Multi-Select with Drill-Down
This template shows:
-
Section short description
-
Section long description
-
Section additional information content component
-
Products multi-select option
-
Links to product detail pages
Programmatic access name --- STORE_CTLG_LEAF_SCT_MULTIPLE
Default mapped JSP --- ibeCCtpLfStMsL.jsp
The following graphic shows how the template appears in the gallery.
Product Multi-Select with Drill-Down Section Display Template
Templates for Component for Sections Contain Nav. Subsec. Only Category
Within the configurable layout option, the following section templates are applicable to those sections which contain Navigational subsections:
-
Multilevel Subsection List with Content: This template is available for configurable layout only; see the section, "Multilevel Subsection List with Content", below, for more information.
-
Subsection List: This template also is available for fixed layout; see the section, "Subsection List", below, for more information.
-
Subsection List 2: This template also is available for fixed layout; see the section, "Subsection List 2", below, for more information.
-
Multilevel Subsection List: This template also is available for fixed layout; see the section, "Multilevel Subsection List", below, for more information.
-
Subsection List with Product Pull-Down List: This template also is available for fixed layout; see the section, "Subsection List with Product Pull-Down List", below, for more information
-
Subsection List with Product Detail: This template also is available for fixed layout; see the section, "Subsection List with Product Detail", below, for more information.
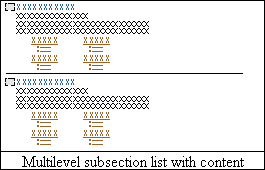
Multilevel Subsection List with Content
This template is specifically designed to show subsections within a section, along with content mapped to content components at the section level. This template shows:
-
Subsection name
-
Subsection image -- This is the image mapped to Section Small Image content component at the section level.
-
Subsection short description
-
Subsection additional information -- This is HTML content mapped at the section level to the Section Additional Information content component.
-
Subsubsection names -- All child sections within the subsection will display in column format; sub-subsection names are drill-down hyperlinks.
-
Content items mapped to sub-subsections -- A list of content items (as defined by any of the content components Section Additional Information 1 through 5 mapped to the child section) display under the subsubsection name; content item names are drill-down hyperlinks.
-
Detail areas showing subsubsection names and additional information mapped to the subsubsection
Programmatic access name --- STORE_SECT_MULTILEVEL_SUBSECT_INCL
Default mapped JSP --- ibeCCtdStMlSubStI.jsp
The following graphic shows how the template appears in the gallery.
Multilevel Subsection List with Content Section Display Template
Templates for Component for Sections Containing Products Only Category
Within the Configurable Layout option, the following section templates are applicable to those sections which contain only products:
-
Product Detail: This template also is available for Fixed Layout; see the section, "Product Detail", below, for more information.
-
Product Pull-Down: This template also is available for Fixed Layout; see the section, "Product Pull-Down", below, for more information.
-
Product Detail Multi-Select: This template also is available for Fixed Layout; see the section, "Product Detail Multi-Select", below, for more information.
-
Product Multi-Select: This template also is available for Fixed Layout; see the section, "Product Multi-Select", below, for more information.
-
Product Multi-Select with Drill-Down: This template also is available for Fixed Layout; see the section, "Product Multi-Select with Drill-Down", below, for more information.
-
Section Detail: This template is only available for Configurable Layout; see the section, "Section Detail", below, for more information.
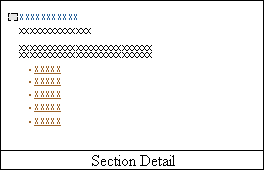
Section Detail
This template is specifically designed to show section details, along with content mapped to content components at the section level. This template shows:
-
Section name
-
Section image -- This is the image mapped to Section Small Image content component at the section level.
-
Section short description
-
Subsection additional information -- This is HTML content mapped at the section level to the Section Additional Information content component.
-
Content items mapped to sub-subsections -- A list of content items (as defined by any of the content components Section Additional Information 1 through 5 mapped to the child section) display under the subsection name; content item names are drill-down hyperlinks.
-
Detail areas showing sub-subsection names and additional information mapped to the sub-subsection
Programmatic access name --- STORE_SECT_DETAIL_INCL
Default mapped JSP --- ibeCCtdStDetI.jsp
The following graphic shows how the template appears in the gallery.
Section Detail Section Display Template
Product Templates
Within the Oracle iStore Display Templates are those that display products. Of course, since products only appear within the context of a section, the overall structure around the product display is affected by the section Display Templates.
This section lists the seeded templates for products:
-
Product Additional Information
-
Product Basic Information
-
Product Basic Information with Image
-
Product Detail with Image
-
Product Detail without Image
-
Product Detail with Services
These templates are described in the sections that follow.
For information on how to assign templates, see the "Setting Display Templates for Products", below.
Product Additional Information
Use this template to display Featured products in a Featured section.
Programmatic access name --- STORE_CTLG_ITEM_INFO
Default mapped JSP --- ibeCCtdItemInfo.jsp
Note: This is a migrated Display Template which appears in the Custom Display Template LOV in the Template Gallery of the Products, Display Template page. No image of this template displays in the Template Gallery.
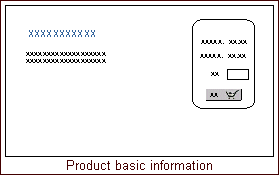
Product Basic Information
This template shows:
-
Product name
-
Product description
-
Add to Cart bin
Programmatic access name --- STORE_CTLG_ITEM_DESC
Default mapped JSP --- ibeCCtdItemDesc.jsp
The following graphic shows how the template appears in the gallery.
Product Basic Information Display Template
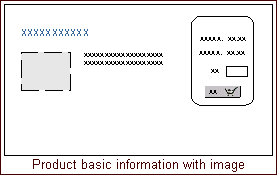
Product Basic Information with Image
This template shows:
-
Product name
-
Product description
-
Product large image content component
-
Add to Cart bin
Programmatic access name --- STORE_CTLG_ITEM_DESC_AND_IMG
Default mapped JSP --- ibeCCtdItemDescImg.jsp
The following graphic shows how the template appears in the gallery.
Product Basic Information with Image Display Template
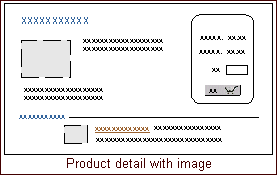
Product Detail with Image
This template shows:
-
Product name
-
Product description
-
Product large image content component
-
Product additional information content component
-
Add to Cart bin
-
Product descriptive flexfields
-
Related products
Programmatic access name --- STORE_CTLG_ITEM_DETAILS
Default mapped JSP --- ibeCCtdItemDetail.jsp
Note: This also is the default Display Template for products.
The following graphic shows how the template appears in the gallery.
Product Detail with Image Display Template
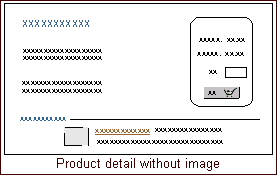
Product Detail without Image
This template shows:
-
Product name
-
Product description
-
Product additional information content component
-
Add to Cart bin
-
Product descriptive flexfields
-
Related products
Programmatic access name --- STORE_CTLG_ITEM_DETAILS_NO_IMG
Default mapped JSP --- ibeCCtdItemDtlNoImg.jsp
The following graphic shows how the template appears in the gallery.
Product Detail without Image Display Template
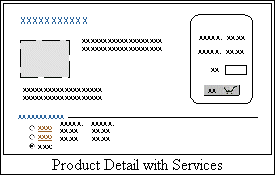
Product Detail with Services
This template is specifically designed to display service items. This template shows:
-
Product name
-
Product description
-
Product large image content component
-
Product additional information content component
-
Add to Cart bin
-
Descriptive flexfields
-
A "Services" area listing:
-
Services associated to the serviceable product as mutually exclusive radio buttons (default selection is "None")
-
Prices for each of the services, including "List/Retail Price" and "Your Price" support
-
Programmatic access name --- STORE_CTLG_SVA_SVC_LIST
Default mapped JSP --- ibeCCndSvaSvcList.jsp
The following graphic shows how the template appears in the gallery.
Product Detail with Services
Creating and Maintaining Sections
This section contains information on section creation and maintenance.
See the section, "Configuring Bin Placement and Content", within this chapter, for information on how you can implement bins to surround your section Display Templates with additional JSPs and content.
Note: All of the steps in this section assume you will log in to the Oracle iStore Site Administration Application as the iStore administrator.
For product maintenance tasks in the context of sections, see the section, "Maintaining Products in Sections", within this chapter.
Note on Categories page within the Section pages: The Categories page within the Sections menu is used for Oracle iStore's Product Autoplacement functionality only. See the chapter, Implementing Products, for more information.
Creating Sections
Using the Sections pages within the Site Administration Application Catalog tab, you can create as many sections as you wish. In the Sections summary page, Catalog Hierarchy, you can use the Focus icon located next to section names to focus in on and work with a particular section or a section and its children.
To create a section, log in to the Site Administration Application and select Catalog, then Sections , then Create Section icon (in the Sections column).
Create Section Icon
![]()
Guidelines
The following guidelines can assist you when creating sections:
-
Remember, only sections which have no products (Navigational sections) can contain subsections.
-
When you select the Create Section icon, the section in the row you selected will be the parent section for the section you are creating.
-
If you select a section containing products, you will get an error message saying that the section already contains products and that you cannot add subsections under this section. Sections can only contain subsections or products. You should use featured subsections to have sections and products at the same level.
-
Section Name field -- This name will appear in the Customer Application.
-
Section Code field -- Currently, section code is used only for your internal business purposes. Some of the section search screens allow you to search on this field. In addition, this code may be useful if you intend to customize iStore templates. For example, you could specify a section code to use as a name for the section in a customized JSP. The code in this custom template could then refer to the section and access its information directly by using its section code.
-
Short Description field -- This text will display in the Customer Application underneath the section name, if being used by a template which can display this information.
-
Long Description field -- This text will display in the Customer Application underneath the section short description, if being used by a template which can display this information.
-
Keywords field -- After you enter them in the system, you can search by keywords using the search utility. Separate multiple keywords with commas.
-
Parent Section field -- When creating sections, this field will default to the parent section chosen in the Catalog Hierarchy page. To assign a new parent section, use the flashlight icon to launch the Search and Select: Catalog Sections page
-
Search and Select: Catalog Sections page -- This page lists sections alphabetically by name. Sections of both published and unpublished statuses will display in this page. Featured sections and Navigational sections with products will not display, as these types of sections cannot have subsections.
-
Apply status to all descendant sections checkbox -- Select this checkbox to have all descendent sections of this section use the same published/unpublished status. De-select to allow each descendant section to have its own status values defined.
-
Start Date: Specify the start date for the catalog section. The system date is the default start date for the section. You can select the desired date using the Calendar icon or enter a date value.
-
End Date: Specify the end date for the catalog section. You can select the desired date using the Calendar icon or enter a date value.
-
Enable Product Comparisons check box: The Oracle iStore Administrator selects the Enable Product Comparisons check box while creating iStore Catalog sections to enable product comparison. If the Enable Product Comparisons check box is selected, then all iStore users accessing the catalog section can compare products.
Deleting Sections
You can delete a section at any time by selecting the section in the Catalog Hierarchy page and then pressing the Delete button. When you delete a section, all children (subsections or products) are removed.
Note: You cannot delete a section from the section hierarchy if that section or its child sections are being used as a root section for a site.
Duplicating Sections
The Catalog Hierarchy page within the Sections menu features the ability to duplicate any existing section or subsection.
To duplicate a section, log in to the Site Administration UI and select Catalog, then Sections; select a section and press Duplicate.
Important: If you try to duplicate a section that has more than 1,000 subsections as children, Oracle iStore does not complete the process and displays an error message. If you have more than 1,000 subsections, use the iStore Duplicate Section concurrent program. After running this concurrent program, you can then run the iStore Section Layout Mapping program to copy the content mapping of the newly duplicated section to all of its child sections. See the "iStore Duplicate Section Concurrent Program" and "iStore Section Layout Mapping Concurrent Program" sections, below, for more details.
Guidelines
-
When you duplicate a section, all data associated with the original section -- including parameters, children (subsections or products), templates, site assignments, and content -- are copied to the new section.
-
If the original section from which the copy was made is deleted, Oracle iStore can still access the products, content items, and templates data.
-
New Section Name field: While functionally the name for the new section need not be unique, as a best practice, it is recommended that you do not use identical names for your sections.
-
Parent Section field: If you do not select a new parent, the original section's parent section will be the parent section.
-
Search and Select: Catalog Sections page: Sections of both published and unpublished statuses will display. Featured sections and Navigational sections with products will not display, as these types of sections cannot have subsections.
iStore Duplicate Section Concurrent Program
Use this program to copy a section which has a large number (e.g., more than 1,000) children sections. Following are the parameters:
-
Duplicate Source Section: This LOV displays all sections in your implementation, along with their section codes (if any) and parent section name. From the list, select the section to be copied.
-
New Parent Section: This LOV displays all sections in your implementation, along with their section codes (if any) and parent section name. From the list, select the desired parent section for the copied section.
-
New Section Name: Enter a name for the newly copied section.
Remember to submit the request after entering parameters.
iStore Section Layout Mapping Concurrent Program
The iStore Section Layout Mapping concurrent program lets you copy all of the layout mappings (bins) from a Configurable Layout parent section to its children. To run this program, in the Section Name field, enter the name of the section whose layout bins content will be mapped to the child sections.
Additional Information: This concurrent program only works with sections using Configurable Layout.
Remember to submit the request after entering parameters.
Cascade Section Layout Mapping to Children Example
Section A has multiple bins mapped using Configurable Bin Layout. You wish to copy these bin mappings to all of its child sections. Log into Oracle Forms and run the iStore Section Layout Mapping concurrent program, choosing the parent section in the Section Name field. After the concurrent program is run, all of the bins mapped to the parent section will be mapped to the children sections.
Adding Products to Sections Using the Sections Pages
Within the Site Administration Application Catalog tab, you can add products to a section either through the Sections pages or through the Products pages. This section contains information about adding products to sections in the Sections pages. For instructions on how to assign sections to a single product using the Products pages, see the section, "Adding Products to Sections Using the Products Pages".
You also can use Oracle iStore's Product Autoplacement feature to automatically add products to leaf sections; see the chapter, Implementing Products, for details.
To add one or several products at once to a single section, log in to the Site Administration Application and select Catalog, then Sections > (select section), then Update, then Add Products icon.
Add Products Icon
![]()
Guidelines
-
To add products to a section, the section to which products are being added cannot have subsections.
-
If you attempt to add products to ineligible sections, an error message displays saying that the section already contains subsection(s) and that you cannot add products under this section. Sections can only contain subsections or products. You should use featured subsections to have sections and products at the same level.
-
For configured items, including telecommunications service ordering items, you may wish to utilize the Usage field to assign a usage to a product. Note that only configurable products (set up through Oracle Configurator) will display the Usage field. Refer to the Oracle Telecommunications Service Ordering Process Guide for more information.
-
Product Number relates to Item field in Oracle Inventory forms.
-
Product Name relates to Description field in Oracle Inventory forms.
-
The Start Date field will automatically set to system date. If you change this value, the date is stored in iStore schema; it indicates the start date for the association of section and product. It is not the product creation date in Oracle Inventory.
Assigning Sections to Sites
A section must be assigned to a site in order to display in the Customer Application.
To assign a section to a site, log in to the Site Administration Application and select Catalog, then Sections (select section), then Update, then the Sites hyperlink.
Guidelines
-
By default, when you create a section, it will be included in the sites that its parent section is included in. However, you can choose which sites the section should apply to.
-
When you navigate to the Site, Update page to associate a catalog root section, all the site-section associations are rebuilt in the database, and the old associations are cleaned up.
-
If the profile option, IBE: Use Catalog Exclusions, is set to No, the sections will still show up in excluded sites. Be sure to set the profile option to Yes for the exclusion functionality to work properly.
-
If the selected site has a parent section, only the sites to which this parent section belongs are candidates for inclusion. To include the section in other sites not in the list (sites to which the parent doesn't belong), you must change the parent section's site assignments or change the parent section assignment for this section.
-
Include this section in all future sites whose root section is an ancestor of this section checkbox - Selecting this will make this section automatically included in other sites that you create whose root section is an ancestor of this section.
-
Remember that each site is linked to a single parent section. If you wish a specialty site's top level navigation to be driven from a specific section, you must select that section as the Catalog Root Section in the Update Site: Details page. See the section, "Create a Site: Getting Started and Entering Basic Information", within the chapter, Implementing Site Management, for more information.
Adding Content to Sections
You can use Oracle iStore's content components and media object functionality --- in combination with your own content source files --- to add content to sections. See the chapter, Implementing Content, to learn the basics of how Oracle iStore can display content in your specialty sites.
To add content to a section, log in to the Site Administration Application and select Catalog, then Sections (select section), then Update, then the Content hyperlink.
Guidelines
-
The Update Section: Content page lists existing (seeded and non-seeded) content components that can be used for sections. Content components names appear in the Select Media area. See the chapter, Implementing Content, for a list and descriptions of seeded content components.
-
If you use a non-seeded content component, you must modify the Display Template to use the new content component. See the section, "Advanced Content Tasks", in the chapter, Advanced Display, for more information.
-
In the Search and Select: Media Object page, search for and then select a media object. To select a media object, activate the radio button of the object and press the Select button.
-
For more information about media objects classes, see the chapter, Implementing Content. For a list of the seeded media objects, see the appendix, Seeded Display Data.
-
You also can create a new media object in the Update Section, Content screen by selecting the Create Media Object icon and entering the new object information
-
Also in the Update Section, Content screen, you can show the site/language mappings for the content and add more content items by selecting the Show Details hyperlink. In Show mode, you can:
-
Select View Mapping to view any site/language mappings for the content associated to the media object, in the Media Object Details page. If no site/language mappings exist, then this button is de-active. A content file must be mapped to the media object before site/language mappings can be established.
-
Select Add Content to add a content item to the media object in the Update Section: Add Content page. If no media object has been selected, then this button is de-active.
-
-
Remember, you must map a content source file to the media object. You can do this from the Update Section, Content page (select Add Content button). You also can map content from the Content, Media Objects pages.
Selecting Layout and Setting Display Templates for Sections
Display Templates control the appearance of your site sections, and each section can have its own Display Template mapping.
To set the Display Template for a section, log in to the Site Administration Application and Select Catalog, then Sections (select section), then Update, then the Templates hyperlink. Within section templates functionality, you have the choice of using either Fixed or Configurable layout -- first you choose the layout type, then select a template from the gallery available within each layout type.
Guidelines
-
See the sections, "Process Flow for Building Section Structure" and "Fixed Versus Configurable Layout with Section Display Templates", for more information. When using Configurable Layout, you also can set bins to display for the section you're updating - see the section, "Using Configurable Bin Layout".
-
Though Oracle iStore does allow switching from Configurable to Fixed layout after components have been mapped, it not advisable to do so.
-
Two sub-pages are included within the Templates link: Layout and Display Template. After you select the layout type, you then use the Display Template link to select a Display Template that fits the Applicable To category of the section you are updating.
-
Optionally, you can map a custom Display Template for a section. Any custom Display Templates that you have created will display in the Custom Display Template LOV. Previously migrated templates also will display in this LOV. In the case of fixed layout, the custom display template can be one that customizes not only the central part of the layout but also the page layout.
Setting the Display Order of Section Descendants
You can set the display order of a section's descendant sections -- whether subsections or products. This allows you to re-arrange the order of subsections or products in the Customer Application without customization.
To set the display order for a section or product, log in to the Site Administration Application and select Catalog, then Sections (select section), then Update, then the Display Order hyperlink.
Guidelines
-
The Display Order pages change depending on which type of children a section has. If the section has subsections only, then the sections will display in the re-order window. Plus, the Advanced SQL ordering option is not available. If the section has products only, then the products will display in the re-order window, and the Advanced SQL option is available.
-
You cannot enable the reordering of both products and sections simultaneously.
-
The option: Or use the reordering shuttle table below will be the only option available if the section's descendants are subsections and not products.
-
Advanced users can use an SQL statement to order the products in the UI as well. See the section below for details.
Using SQL to Order Section Descendants
Advanced users may wish to use the Update Section: Display Order - Order by Clause page in the Sections menu to order products in a Featured section.
To re-order a section's descendants using an SQL clause, log in to the Site Administration Application. Select Catalog, then Sections (select section) , then Update, then the Display Order hyperlink.
Guidelines
-
Ensure that radio button is enabled for the option: Advanced SQL. Note that this option will not be available if the section's descendants are subsections and not products.
-
The SQL order by clause is used at runtime by the Customer Application, allowing the products to be displayed within the section template that you specify.
-
The SQL script can only contain subsets of the column attributes of the MTL_SYSTEM_ITEMS_B and MTL_SYSTEM_ITEMS_TL tables.
-
The order by clause must contain a list of columns with the sorting order, ascending or descending, for each column. The syntax is as follows: "COLUMN1 [ ASC | DESC ], COLUMN2 [ ASC | DESC], ..." Other syntaxes are not supported and will generate an error message in the specialty site.
Example -- A Section's Order By Clause
The following order by clause sorts items by creation date in descending order and description in ascending order: CREATION_DATE DESC, DESCRIPTION ASC
Using the Section Search Utility
Using the section search utility, you can perform Simple or Advanced searches of the section hierarchy.
To use section search, log in to the Site Administration Application. Select Catalog, then Sections. Select the Advanced button for advanced search.
Guidelines
-
Keywords field -- These are keywords you have entered and saved.
-
Status field -- Enter Published or Unpublished.
-
In the search textbox, enter all or partial values. The search utility is case-insensitive. You may use % symbol as a wildcard if desired.
Maintaining Products in Sections
This section contains information on maintaining products within the section hierarchy. This section assume you will log in to the Oracle iStore Site Administration Application as the iStore Administrator.
Product implementation and limited maintenance information can be found in the chapter, Implementing Products.
Optional integration with Oracle Marketing can provide enhanced product functionality. See the chapter, Integrating Oracle iStore with Oracle Marketing, for details.
Previewing Products
Oracle iStore's Preview mode allows site administrators to preview products in the context of the specialty site(s) that include the products. Typically, Preview mode is accomplished by pressing the Preview button on applicable screens in the Site Administration Application.
All products -- whether of published or unpublished status --- will display in Preview mode. You cannot perform any transactions while in Preview mode.
Note: In Preview mode, only specialty sites which support the administrator's current session language will display. Also, Preview mode is not supported when accessing the Customer Application through Oracle Application Server Web Cache. See the chapter, Verifying the Implementation, for more information.
Updating Product Details
In the Site Administration Application, you can update a product's basic information and set the Web Status (Published/Unpublished) flag.
To update a product, log into the Site Administration Application and select Catalog, then Products (select product), then Update.
Adding Products to Sections Using the Products Pages
You can add a single product to multiple sections at the same time.
To add a product to section(s), log in to the Site Administration Application and select Catalog, then Products, (select product), then Update, then the Sections hyperlink.
Guidelines
-
In the Search and Select: Catalog Sections page, only those sections who are candidates for product assignment will display.
-
For configured items, including telecommunications service ordering items, you may wish to utilize the Usage field to assign a usage to a product. Refer to the Oracle Telecommunications Service Ordering Process Guide for more information.
Including or Excluding Products from Sites
By default, products are included in all sites which their parent section belongs to. However, you can exclude or include a product in specific site(s).
To include/exclude products from sites, log in to the Site Administration Application. Select Catalog, then Products, then the Sites hyperlink.
If the profile option, IBE: Use Catalog Exclusions, is set to No, the products will still show up in excluded sites. Be sure to set the profile option to Yes for the exclusion functionality to work properly.
Setting Content at the Product Level
Just as you can with sections, you can add content to a product template using Oracle iStore's content component and media object functionality. Content mapped at the product level overrides all other mappings.
See the chapter, Implementing Content, for more information on content concepts.
To add content at the product level, log in to the Site Administration Application and select Catalog, then Products (select product), then Update, then the Content hyperlink.
Guidelines
When adding content to products, the same basic guidelines that apply to section content apply as well. See the section, "Adding Content to Sections", within this chapter, for more information.
For the types of templates that can display product information, see the section, "Product Templates", within this chapter.
Setting Display Templates for Products
Just as with sections, you can assign Display Templates to products to determine the layout and display elements surrounding the product.
To assign a Display Template to a product, log in to the Site Administration UI and select Catalog > Products > (update product) > Display Template hyperlink.
Searching for Products
Site administrators must search for products before they display in the Products Summary page. Both Simple and Advanced product searches are available.
To Log into the Site Administration Application and select Catalog, then Products.
Guidelines
-
The product database in the Site Administration Application is based on products within the Inventory Organization that matches the value of the profile option, IBE: Item Validation Organization, and from categories within the default category set, specified by the profile option, IBE: Category Set.
-
You can enter partial values and perform a search without using a wildcard, and the system will append the value you enter with a wildcard. Or you may use the percent sign (%) as a wildcard if desired, and the system will append another wildcard.
-
The search textbox is case insensitive.
-
If the search textbox is left blank and the Go button is selected, a search for all values will be performed.
Configuring Bin Placement and Content
The Oracle iStore Customer Application catalog pages are sectioned into several templates that function as bins. These bins can hold specific information (in the form of JSP files) and display it logically on the pages (left, right, top, bottom, and in some cases, middle page area). Some of the bins by default are mapped to supplied JSP files -- examples include the Browse Bin, the Global Bin, and the Welcome Bin. Others are left unmapped so that you can map your own JSP files. Of course, you also can change a seeded JSP mapping for a bin.
Bins Overview
Page types that have bins include:
-
Section display pages (See "Section Page Bins", below)
-
Item (product) detail display pages (See "Item Detail Page Bins", below)
-
Shopping cart display page (See "Shopping Cart Page Bins", below)
-
User registration display pages (See "Registration Page Bins", below)
-
Site Selection Page (See the chapter, Implementing Initial Customer Application Pages )
For a complete list of supplied bins, see the appendix, Seeded Display Data.
All bins are separate logical Display Templates available through Oracle iStore Template Manager; each has a display name and programmatic access name. The programmatic access name is used by Oracle iStore Display Manager at runtime to find mapped bin content (the JSP file).
Other Guidelines
Keep the following additional guidelines in mind:
-
The bin template, functioning as a placeholder, determines the size of the bin. The content (or JSP file), when mapped to the template, conforms (or attempts to conform) to the template size. Therefore, be sure to map JSP files to templates designed to match size of bin that the template displays. For example, you would not wish to map the seeded Welcome Bin JSP (ibeCAcdWelcome.jsp), which is meant to display in a single column, to a top or bottom page bin Display Template, since these templates are designed to span multiple columns.
-
Content must be mapped to the bin for it to display properly. See the section, "Mapping Source Files to Display Templates", within this chapter, for steps.
-
Changes to seeded bins which are shipped without seeded content will not be overwritten during patching. If you add new mappings for a seeded bin, regardless of whether the bin has a seeded mapping or not, the change will be preserved during patching.
Configurable and Fixed Layout Available
Section page bins can be configured in two ways -- using Fixed Layout, where every catalog section page using the same Display Template shows the mapped bins in the same location on every page, or using Configurable Layout, where bins can be placed on the page of a specific section and in a specific location.
See the following topics within this section for more information:
-
"Summary of Options for Changing Bin Placement and Content"
-
"Using Fixed Bin Layout"
-
"Using Configurable Bin Layout"
Summary of Options for Changing Bin Placement and Content
You can change bin placement or content in the following ways:
-
Profile Options: Change the profile options related to the catalog bins. Several profile options are supplied which alter the appearance and placement of sections and items. Note that section profile options control bins only when using Fixed Bin Layout. See the appendix, Profile Options, for a list of these profile options.
-
Fixed Bin Layout: Use bin Fixed Layout functionality, and associate your own JSPs with the seeded logical bin templates. See the section, "Using Fixed Bin Layout", within this chapter, for details.
Note: Several bins are seeded for the Site Home Page. For information on Site Home Page configuration options, see the "Implementing Initial Customer Application Pages" chapter.
-
Configurable Section Bin Layout: - Use Configurable Layout for section bins, and associate targeted bin content to specific sections. This functionality is especially useful if using sites integrated with Oracle iSupport and/or Oracle Partner Management.
Note: Configurable Layout for bins is only available for the section pages -- not for shopping cart, product detail, or registration page bins. See: the section, "Using Configurable Bin Layout", within this chapter. When you use Configurable Layout for bins, you automatically will be choosing from a slightly different section Display Template gallery -- see section, "Fixed Versus Configurable Layout with Section Display Templates", within this chapter, for information.
Using Fixed Bin Layout
With Fixed Layout, all sections using the same Display Template share the same bin layout. For example, if you map the section bin, STORE_CTLG_BIN_LEFT_1 template, to a JSP, then all section pages using the same template show the mapping for this bin in the same location. Of course, you can map different JSPs to site-language combinations to vary the content by site and language.
Section Page Bins
In addition to the seeded Browse Bin, Global Bin, Welcome Bin (which have seeded content and display automatically), the section pages contain seven bins to the right and seven bins to the left of the center display page, as well as a top bin and a bottom bin. These bins do not have seeded content.
Following is a summary of the section bin layout:
-
Left bins: The following seven bins display to the left of the center display page, if mapped to source files: STORE_CTLG_BIN_LEFT_1 through STORE_CTLG_BIN_LEFT_7.
-
Right bins: The following seven bins displaying to the right of the center display page, if mapped to source files: STORE_CTLG_BIN_RIGHT_1 through STORE_CTLG_BIN_RIGHT_7.
-
Top bin: Following is the name of the top section bin template, which displays across the top of the section pages -- STORE_CTLG_SECTION_BIN_TOP.
-
Bottom bin: Following is the name of the bottom section bin template, which displays across the bottom of the section pages -- STORE_CTLG_SECTION_BIN_BOTTOM.
The section bins with seeded content can be turned on or off through profile options, when using fixed section layout.
To copy bin mappings from a parent section to all of the children of the section, use the iStore Section Layout Mapping concurrent program.
Item Detail Page Bins
Item bins display along the sides, top, and bottom of the web page when a user views an item detail template. All seeded item bin templates share the same layout. You can customize the common item layout through profile option settings and template setup (in addition to this section, see the sections, "Section and Product Display Profile Options", and "Product Templates"). None of the item bins has a seeded JSP mapped.
Following is a summary of the item bins:
-
Left bins: The following seven bins display by default along the left side of the item detail display page: STORE_CTLG_ITEM_BIN_LEFT_1 through STORE_CTLG_ITEM_BIN_LEFT_7.
-
Right bins: The following seven bins display by default along the right side of the item detail display page: STORE_CTLG_ITEM_BIN_RIGHT_1 through STORE_CTLG_ITEM_BIN_RIGHT_7.
-
Top bin: STORE_CTLG_ITEM_BIN_TOP displays above the item detail display page.
-
Bottom bin: STORE_CTLG_ITEM_BIN_BOTTOM displays below the item detail display page.
Shopping Cart Page Bins
The Shopping Cart page contains bins which you can customize. None of the cart bins has a seeded JSP mapped.
Following is a summary of the shopping cart page bins:
-
Left bins: The following seven bins display by default along the left side of the shopping cart display page: STORE_CART_BIN_LEFT_1 through STORE_CART_BIN_LEFT_7.
-
Right bins: The following seven bins display by default along the right side of the shopping cart display page: STORE_CART_BIN_RIGHT_1 through STORE_CART_BIN_RIGHT_7.
-
Top bin: STORE_CART_ITEMS_BIN_TOP displays above the cart display page.
-
Bottom bin: STORE_CART_ITEMS_BIN_BOTTOM displays below the cart display page.
Registration Page Bins
The New User Registration page (ibeCRgdRegContainer.jsp) and subsequent registration information pages contain bins which you can customize. None of the registration page bins has a seeded JSP mapped.
Following is a summary of the registration page bins:
-
Left bins: The following three bins display by default along the left side of the registration display pages: STORE_REG_LEFT1_D through STORE_REG_LEFT3_D.
-
Right bins: The following three bins display by default along the right side of the registration display pages: STORE_REG_RIGHT1_D through STORE_REG_RIGHT3_D.
-
Top bin: STORE_REG_TOP_D displays above the registration display pages.
-
Bottom bin: STORE_REG_BOTTOM_D displays below the registration display pages.
Fixed Layout Bin Locations
The following graphic shows the default location for the Fixed Layout bin locations.
Fixed Layout Bin Locations
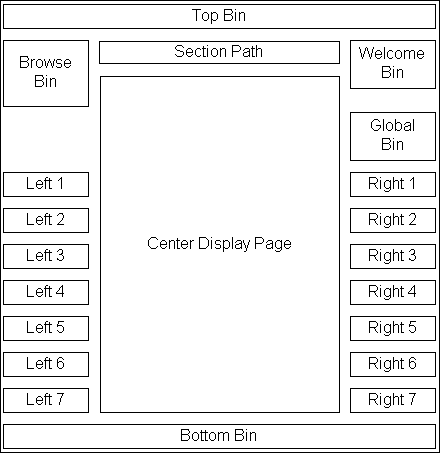
Using Configurable Bin Layout
Oracle iStore's Configurable Layout functionality allows you to display targeted bin content in different sections. See also: "Fixed Versus Configurable Layout with Section Display Templates" within this chapter.
Configurable Bin Layout Benefits and Behavior
The following points describe Configurable Layout benefits and behavior:
-
For Oracle iSupport and Oracle Partner Management applications integrating with Oracle iStore's site management, this functionality allows implementers to map Partner Management-specific section page bins to Partner Management content, and support-specific section page bins to Oracle iSupport content.
-
When you use configurable section layout you map layout components to seeded or custom templates. The templates that you map to the layout components must be linked to source JSP files, and their site-language mappings must be established.
-
The Configurable Layout for bins feature provides additional customization abilities that allow you to provide your own templates and link them to sections through layout components. This cannot be done using Fixed Layout; with Fixed Layout, you must change the JSP mapping for hard-coded bins.
-
Only bin templates within the Components for Section category are candidates for use with this functionality.
-
If you create custom bin templates for use in Configurable Layout, be sure to save them to the Components for Section category.
Remember, you can associate a Display Template to a section only through the Display Template gallery.
Layout Components for Configurable Bin Layout
Following are the layout components available in Configurable Layout:
-
Left components: Seven layout components are available for display to the left of the section display page. In the layout component mapping pages, these are known as Left 1 through Left 7 layout components.
-
Right components: Seven layout components are available for display to the right of the section display page. In the layout component mapping pages, these are known as Right 1 through Right 7 layout components.
-
Middle components: Four middle bins are available as layout components. In the section template setup pages, these are known as Middle 1 through Middle 4. Middle 1 displays just below the Top bin, but above the Section path. Middle 2 displays just below the Section path but above the center display page. Middle 3 and 4 display below the center portion of the page.
-
Top component: A single top section layout component is available across the top of the section pages.
-
Bottom component: A single bottom section layout component is available across the bottom of the section pages.
The following figure shows the location of the components available in Configurable Layout.
Component Locations in Configurable Layout
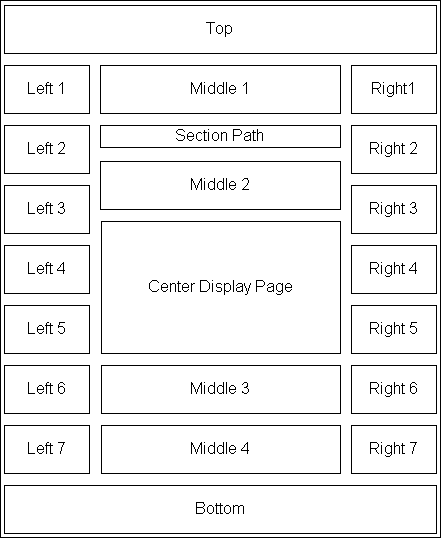
Configurable Bin Layout Steps
Use the following procedure to set up a section using Configurable Layout components. See the section, "Selecting Layout and Setting Display Templates for Sections", for information on using the Fixed Layout feature.
Log in to the Site Administration Application and select Catalog, then Sections (select section), then Templates, then Layout, then Configurable Layout.
Guidelines
-
Though Oracle iStore does allow switching from configurable to fixed layout after components have been mapped, it not advisable to do so.
-
Each bin template must also have a source file (JSP) mapped to it. For more information, see the section, "Mapping Source Files to Display Templates", within this chapter.
Group Bins
After assigning specialty sites to groups, you can set up bins which allow navigation to the specialty sites within the groups, by mapping the bins to the section pages of your choice using Configurable Layout. Oracle iStore seeds a group bin for each of these groups: Stores, Support, Partners.
Following is the high-level process:
-
Ensure that at least one specialty site has been assigned to a seeded group for the bin you wish to display.
-
Map one of the seeded group bins to the section of your choice using Configurable Bin Layout (see the section, "Using Configurable Bin Layout", within this chapter, for more information).
See also: Integrating Oracle iStore with Oracle iSupport, and Integrating Oracle iStore with Oracle Partner Management
The following figure shows an example of how the Stores group bin might look in an implementation of Oracle iStore.
Stores Group Bin Example
Custom Group Bins
If you have created a custom group, you can set up a bin for the custom group. Following is the high-level process.
-
Create a new group by modifying the Oracle AOL lookup code. For example, create NEW_GROUP. See the chapter, Implementing Messages and Prompts, for more information.
-
Create a new Display Template for the new group, and register it in Template Manager. See the following sections of the chapter, Advanced Display, chapter for more information: "Creating New Templates", and "Registering New Templates in the Template Manager".
-
Re-use the existing out-of-box group bin JSP, ibeCAcdGroupSiteBin.jsp, and append the new group code parameter to this JSP (as ibeCAcdGroupSiteBin.jsp?groupCode=NEW_GROUP).
-
Map the new JSP file with the parameter to the new template, setting up specific site-language mappings if desired. See the section, "Mapping Source Files to Display Templates", within this chapter, for more information.
-
Map the new template (bin) to the desired location in the catalog, using Configurable Layout fir bins. See the section, "Using Configurable Bin Layout", within this chapter, for more information.
Mapping Source Files to Display Templates
Each template or bin used in the Customer UI must be mapped to a source JSP in order for it to display content.
To map JSP content to existing templates, log in to the Site Administration Application and select Advanced, then Template Manager, then Update icon, then Add Source File.
Prerequisites
-
An appropriate template has been created. You can use the seeded templates or create templates of your own.
-
JSP source files have been created for each site-language combination that you wish to enable. Note that the mapping process will be easier if you have recorded the names of the source files you will enter in the Source File Name field, and have them readily available before this procedure.
-
Store all of your source JSPs in the server's /OA_HTML/directory.
Guidelines
-
Remember, many of the Display Templates have seeded JSPs mapped to All sites and All languages. For these templates, you can still map additional files and configure the files to display by site-language combination.
-
Only JSP files are supported in this context. If you map other types of files, for example image files, the Customer UI will not function properly.
-
File Mapping area, select a site from the Site LOV, using the following guidelines: Select All if you wish the source file to be used for this template in all sites. If you wish the source file to be used for a specific site, select the site from the Site LOV. Once you have selected either All or a specific site, the Language LOV will become active. The Language LOV will display only those languages which are supported by the site. If a language has been disabled in the site setup pages, it will still appear in the Language list. If you wish the source file to be used for all languages associated with the site chosen above, select All. To map the source file to specific language supported by the selected site, select a language mapping from the Language LOV.
Setting up Section Display Templates Text Messages
Two seeded Oracle iStore section Display Templates come with three non-usable FND_MESSAGES seeded as part of their display. If you use either of these section templates and their associated JSPs in a specialty site, you will want to change the seeded text messages.
The template gallery in the Sections pages display these templates as:
-
Product Multi-Select
-
Product Multi-Select with Section Links
If not altered, the seeded text messages will appear in these two templates as:
-
Enter product header 1 alternative 1 -
Enter product header 1 alternative 2 -
Enter product header 3 alternative 1
The following table summarizes the names of the template JSP source files, their programmatic access names, and their descriptions.
| Source File (JSP) | Programmatic Access Name | Description |
|---|---|---|
| ibeCCtdFSuStMs2I.jsp | STORE_CTLG_FSUBSCT_MULT_2COL_ INCL | Non-leaf section featured products with multiple select two columns |
| ibeCCtdFSuStMs3I.jsp | STORE_CTLG_FSUBSCT_MULT_3COL_ INCL | Non-leaf section featured products with multiple select three columns |
The following table summarizes the referenced source files (JSPs), the seeded message display text, and the seeded programmatic access names for the seeded messages.
| Seeded Message(s) Display Text | Source File (JSP) | Programmatic Access Name |
|---|---|---|
| Enter product header 1 alternative 2 (Displays at the top of the left-hand column.) |
ibeCCtdFSuStMs2I.jsp | IBE_PRMT_CT_PRODUCT_HDR1_ALT2 |
| Enter product header 1 alternative 1 (Displays at the top of the left-hand column.) |
ibeCCtdFSuStMs3I.jsp | IBE_PRMT_CT_PRODUCT_HDR1_ALT1 |
| Enter product header 3 alternative 1 (Displays at the top of the right-hand column) |
ibeCCtdFSuStMs3I.jsp | IBE_PRMT_CT_PRODUCT_HDR3_ALT1 |
Stored in Oracle Applications Message Dictionary, these messages are seeded in the FND_NEW_MESSAGES table. See the chapter, Implementing Messages and Prompts, for steps to modify the messages.
Using Product Relationships
Product relationships potentially allow you to increase sales by creating associations between products. You can use the seeded relationship type, Related, to offer a related product to a customer. In the Customer UI product detail pages, the relationships show up near the product they are related to.
Without customization, you can set up any combination of Related relationships between products, sections, and categories. To use any of the other relationship types, you must customize the JSPs. See the chapter, Advanced Display, for more information.
List View for Related Products
The List view allows the iStore user to view related products vertically. By default related products are displayed in the List view. The iStore user can perform the following actions in the List view:
-
Scroll up and scroll down to view the related product details
-
Click on the Add to Cart button to add a product to the shopping cart
-
Enter the Quantity for a product
Additionally based on the IBE: Enable Shopping List Management and the IBE: Enable Product Details Pop-up Dialog Profile Option, settings you can:
-
Use the Shopping List Management drop-down menu
-
Click on the Item Details icon to view the Item Details pop-up window
Note that when you create associations between products and sections or categories, you are actually relating only the products within these categories and sections, not the categories or sections themselves. For example, if you set up a relationship between Product A and Section 1, Product A will be related to all of the products within Section 1. Likewise, if you set up an association between Category A and Category B, then it is the products within these categories that are associated in the Customer UI, not the categories themselves. If you wish to exclude some of the products within a related category or section, then you must use the exclusion feature. See the section, "Using Relationship Product Exclusion/Inclusion Functionality", within this chapter, for more information.
Carousel View for Related Products
The Carousel view enables the iStore user to view related products horizontally. The Carousel view provides an alternate way of displaying long lists of related products by introducing a sliding carousel control. The user can toggle between the List view and the Carousel view. The Carousel view is available on the product detail page and the shopping cart page when there are items that have been set up to have a related relationship with one another.
Display Templates to Show the Related Products
You must use one of the following seeded product Display Templates to display the Related relationship type:
-
Product Detail Without Image
-
Product Detail With Image
See the section, "Product Templates", within this chapter, for more information.
How to Map the Relationships
You can map relationships using one of two methods:
-
Relationship rules created using the Oracle iStore rule builder --- See the section, "Creating Relationships Using Mapping Rules", below, for instructions.
-
SQL rules to define relationships by querying the database on particular fields --- See the "Advanced Display" chapter for instructions.
Note: You cannot use both methods in a single relationship. Additionally, if you set up an SQL rule with a relationship type, you cannot delete it. You can, however, remove any mapping rules that you have set up.
Using the Relationships pages within the Site Administration UI, you can accomplish the following:
-
Search for existing relationship types.
-
View a list of all relationship types which exist in your organization's implementation.
-
Access the Create Relationship page, where you can create a new relationship type.
-
Access the Relationship Details page, where you can update existing relationship types and their mappings.
-
Delete non-seeded relationship types.
Creating Relationships Using Mapping Rules
For the seeded Related relationship type, you can set up mapping rules.
To set up mapping rules, log in to the Site Administration Application and select Catalog, Relationships.
Guidelines
-
The mapping rules define relationships in a From - To form. The types of From and To objects can be: Oracle Inventory categories within the default category set; Oracle Inventory products within the default category set; Any type of Oracle iStore section
-
Oracle iStore evaluates each mapping rule you set up and then populates database table rows where the relationships are maintained. For example, if you have a category with two products assigned in your From list and a section with four products assigned in your To list, then Oracle iStore creates a total of eight product relationships.
-
Currently, only the Related relationship type is supported out-of-the-box.
-
In order to display the Related relationship type, products in the relationship must be mapped to one of the following seeded product Display Templates: Product Detail Without Image or Product Detail With Image.
-
To set up mapping with the Related relationship type, an SQL rule cannot have already been mapped to the seeded Related relationship type.
-
In the Add Rules page, in the From and To LOVs, you must select the desired category, product, and section mappings, using the information below as a guide:
-
Category --- Rule starts/ends at an Inventory category within the default category set. Use the flashlight icon to launch the Search and Select: Categories page.
-
Product --- Rule starts/ends at a product. Use the flashlight icon to launch the Search and Select: Products page.
-
Section --- Rule starts/ends at a section. Use the flashlight icon to launch the Search and Select: Catalog Sections page.
-
-
Remember, you are creating associations between only the products within the categories and sections, not the categories or sections themselves.
-
From the Relationship Details page, you also may select View Results to view a list of all product-to-product relationships that exist for the relationship type. In the Product Relationships page that appears, you can exclude specific products from the mapping or include products that have previously been excluded. See the section, "Using Relationship Product Exclusion/Inclusion Functionality", below, for more information.
Using Relationship Product Exclusion/Inclusion Functionality
Once you have set up a mapping rule for a relationship type, you may wish to exclude specific products from the rule.
To exclude product(s) from a rule, log in to the Site Administration UI and select Catalog, Relationships, Update icon, View Results, Include/Exclude.
Guidelines
-
Prerequisite: A mapping rule has been created in which multiple products are captured.
-
Example: You have set up a mapping from Product A to Category 1. Since the mapping will create relationships from Product A to all of the products in Category 1, you may wish to flag certain products as excluded from the relationship mapping rule.
Direct Punchout Catalog
This section describes the Direct Punchout Catalog functionality with Oracle iStore.
Additional Information: Oracle Procurement uses the term, zones, for catalogs.
Overview of Direct Punchout Catalog
Implementing Oracle iStore as a direct punchout catalog allows companies to use Oracle iStore as an online catalog accessible from Oracle iProcurement or other third-party procurement systems. The Oracle iStore administrator manages the direct punchout catalog independent of the procurement site. In this type of implementation, buyers navigate from their companies' procurement systems to the Oracle iStore Customer Application online catalogs, then browse for and select items for purchase. Buyers submit their requisitions, which can be tied to a purchase order, into the procurement system. Oracle iStore's support of multiple storefronts, built-in security mechanisms, and support for customer-negotiated pricing allow easy setup and administration of Direct Punchout Catalog.
Additional Information: Out-of-box integration is provided for Oracle iProcurement only, using OAG XML and CXML protocols. Alternatively, any other protocols can be supported by implementing the exposed interfaces and registering them with Oracle iStore.
User Roles
The following user roles for Direct Punchout Catalog will be used throughout this section:
-
Buyer (Procurement User): This is the user in the procurement system (a B2B user) who makes purchases from the Oracle iStore catalog and creates a requisition in the procurement system. Typically, this user will have a relationship with an organization defined in Oracle Trading Community Architecture (TCA). He will use the iStore Customer Application to select items for requisition, but will not place the order in iStore; instead, he'll add items to the requisition in his company's procurement system.
-
Procurement Administrator: This is the administrator of the procurement system at the buyer organization.
-
iStore Administrator: This is the Oracle iStore implementer or administrator who uses Oracle iStore to host the catalog.
Direct Punchout Process Flow
Following is the high-level process flow when using Oracle iStore Direct Punchout Catalog functionality:
-
A buyer logs into a procurement application and starts a new purchase requisition. The procurement system may or may not provide its own catalog, but will have links to one or more supplier catalogs.
-
When the buyer selects an Oracle iStore catalog link, the procurement application sends the login request document to Oracle iStore. Oracle iStore validates the user credentials and sends a login response document to the procurement system. If the login was successful, the procurement system redirects the buyer to the Oracle iStore catalog URL available in the login response document. If the buyer has access to only one site, he will be redirected to that site's catalog (this is standard, non-punchout behavior in Oracle iStore).
-
The buyer browses and/or searches the catalog and selects items to purchase. These items are temporarily stored in an Oracle iStore shopping cart.
-
When the buyer is finished shopping, he selects the Checkout button.
-
The items in the shopping cart are carried to the procurement application in real-time, and those items appear in the shopping cart in the procurement application. The shopping cart's quote status is updated to Store PunchedOut.
-
The buyer checks out with his shopping cart in the procurement application to complete a purchase requisition.
Oracle iStore Site Setup
In a typical implementation, the Oracle iStore administrator sets up one or more sites where buyers from one or more procurement systems may select products. These storefronts are invisible to "regular" customers. Conversely, sites accessible to regular customers are invisible to buyers from procurement systems. The supplier can, however, implement common sites for procurement users and regular customers.
Some features available in customer sites will be disabled in sites meant for procurement users (these changes are discussed later in this section).
Note: Although the Oracle iStore administrator can set up separate sites for procurement users, it is not a mandatory setup. User interface functionality and flows will vary for procurement users and regular customers, but it will be done programmatically, specifically by checking the user type in the session context (see "Procurement User Session", below).
Procurement User Account
In Oracle iStore, a proxy user account (one for each buyer organization) is used to display the catalog and conduct transactions. Therefore, there is not a one-to-one match between the buyers (procurement users) and the Oracle iStore users. The proxy user is set up by the Oracle iStore administrator. Self-service registration is disabled in punchout mode.
In the recommended setup, the proxy user is a standard B2B user. He has a "employee of" relationship with the organization in Oracle TCA and an entry in the FND_USER table in Oracle Applications. The proxy user is always a local user, even if integrating with Oracle Single Sign-On Server (SSO).
The buyer will see the site picker page as the start page in Oracle iStore. Of course if the buyer has access to only one site, he will be redirected to the site catalog, which is current behavior in Oracle iStore.
Setting up of the Punchout Session
Setting up of the punchout session works as follows:
-
The procurement user logs into the procurement system. When he chooses an Oracle iStore online catalog for shopping, a login request document is sent to Oracle iStore for authentication. If the credentials are correct, iStore generates a success login response document and sends it to procurement system. The procurement system obtains the catalog URL from this document and redirects the procurement user.
-
The supplier site returns a punchout setup response, in the form of an XML document, containing a URL that informs the procurement application of the start page for a browsing session on the supplier site.
-
If there is a login or authentication error, an appropriate message will be sent back in the punchout setup response. Since the procurement system is responsible for any error message shown, Oracle iStore doesn't seed a specific error to be displayed; the procurement system generic login failure error will display by default.
See "XML Documents", below, for more information on the documents.
User Session Behavior
Oracle iStore Customer UI behavior and the behavior of certain flows are different when the user is recognized as a procurement buyer. Oracle iStore uses the user type parameter in the session context to identify its standard users. The user type, procurement user, in the session context identifies buyers coming in from procurement systems.
Although only one proxy user account is stored in the database in the supplier site, multiple sessions are supported. Each session has a separate shopping cart, and the cart ID also is stored in the session context. The return URL will be stored in the session context.
In the event of Oracle Web Cache integration, different versions of pages will be cached for procurement users (the procurement user type is already added to the Web Cache version cookie).
Session time-out behaves similarly to any other user (customer, internal user, etc.) in the system. No special handling takes place for procurement users.
Oracle iStore recognizes the buyer's language (available in the punchout setup request), provided the language is supported by the site. If not, the default language of the supplier site will be used.
Customer Application Page Display
Following are the changes for the Customer Application display pages when the user is recognized as a procurement buyer.
-
The global links for Order Tracker, Profile, Login/Logout are removed throughout.
-
The Help link is removed.
-
Within the Cart menu, the links to Carts, Shopping Lists, and Quotes are removed.
-
A new navigation link, Return to Procurement, is enabled, allowing the buyer return to the procurement system without selecting any item. IBE_PRMT_PO_LOGOUT_G is the FND_MESSAGE code which is used to display Return to Procurement text.
-
The shopping cart actions -- Express Checkout, Share Cart, Save Cart, Save to List, Pricing Agreement, Additional Information, Attachments, and Request Assistance -- are removed.
-
The Checkout action in the shopping cart enables the buyer to return to procurement system with selected items.
-
Tips regarding cart expiration are removed.
-
No tax information or shipping/handling information displays in the cart.
-
The Welcome Bin links -- Login/Logout, Saved/Shared Carts, Quotes, Express Checkout, and Call Me Back -- are removed.
-
The person name in the Welcome Bin is replaced with the name of the procuring organization.
Support for Items
Oracle iProcurement currently does not maintain relationships between items; therefore, by default, certain restrictions exist on the types of items that can be purchased via catalog punchout, as shown below.
Supported Items
-
Configured items are supported. In this case, Oracle iStore sends the configuration reference of the configuration in the shopping cart to the procurement system during checkout. For cXML, the reference is stored at the supplierAuxillaryID field; for OAG XML, it's the supplierReferenceNumber field. The reference key is of the format,
:ConfigHeaderId-RevisionNumber. -
In the case of configured items, only the top model line is returned in the catalog and shopping cart.
Unsupported Items
-
Items that have a dependency on other items cannot be used in punchout. Examples of such items are: Extended warranties, bundles or kits, and promotional items (buy one get one free). See "Special Rules for Promotional Items", below, for additional information on promotional items.
-
Telecommunications service orders (so-called MACD) scenarios are not supported because the associated business processes (recurring billing, change/termination of service, etc.) are not supported by existing protocols.
Special Rules for Promotional Items
-
Oracle iStore does not maintain relationships between a qualifying promotional item and the free item in punchout flow (i.e., if the qualifying item is added and then later removed, iStore cannot detect this action and remove the free item). However, to accomplish a buy-one get-one-free setup, implementers can utilize pricing modifiers to avoid the automatic addition of the free item to the cart when the qualifying item is added. For example, a pricing qualifier attribute such as Quote Source Code can be used (e.g., Quote_Source_Code < > iStore Punchout), along with other qualification rules.
Note that programmatically, Oracle iStore does not enforce the restrictions on item types.
Send Shopping Cart
In a catalog punchout session, the checkout button in the shopping cart is a link to a processing page that creates an XML document with the shopping cart items and sends it to the procurement system. (See "XML Documents", below, for more information on the documents.) If there are two shopping carts in two different operating units in two different specialty sites, only the cart in the current operating unit will be sent. The shopping cart sender page is a status page that will temporarily appear on the browser and then automatically redirect to the procurement system. The message that appears is "Sending shopping cart to procurement system...". This message can be modified by modifying the following FND message: IBE_PRMT_PO_CHKOUT_WAIT.
If the buyer decides to return to the procurement system without selecting any item, he can do so by selecting the Return to Procurement global navigation link. In this case, an XML document with no items will be sent to the procurement system. Refer to the section, "Customer Application Page Display", above, for more information on the Return to Procurement global navigation link.
Hand-off from iStore happens when the shopping cart is sent to the procurement site. How the procurement system sends the purchase order to the order management system of the supplier site is determined by the implementer outside of the Oracle iStore implementation, as is the freezing of prices in the purchase order.
The shopping cart contains several attributes whose values are certain codes. These are unit of measure (UOM) codes, currency codes, categories, languages codes, etc. All of these codes, except language, will be sent in Oracle E-Business Suite-supported codes. Language will be sent in ISO language code.
Cart (Quote) Status Transitions
When a buyer creates a cart in Oracle iStore by adding an item to the cart, the Oracle Quoting source code will be iStore ProcPunchout, and the quote status will be Store Draft. When the buyer checks out, the quote status will change to Store Punchedout. The source code will remain iStore ProcPunchout.
Security and Privacy
Procurement users can access catalog pages (including the Specialty Site Page) and shopping cart pages only. Forced browsing to other pages is disallowed.
Note: If you use Oracle iStore as an online catalog from Oracle iProcurement, then Oracle iStore and Oracle iProcurement must be deployed on different application servers. Due to technical reasons, they cannot be deployed on the same application server. This restriction does not apply if you use third-party procurement systems with Oracle iStore.
XML Documents
The following table describes the Oracle Native XML document and cXML documents for the setting up of the punchout session and send shopping cart events.
| Document Purpose | Oracle Native XML Document | cXML Document | Comments |
|---|---|---|---|
| Setting up of the Punchout Session | loginRequest, loginResponse | PunchOutSetupRequest, PunchOutSetupResponse | Procurement system generates an XML document, which includes a base set of user details and the return URL for the procurement instance. The supplier generates an XML document accepting the requester's logon. |
| Send Shopping Cart | shoppingCart | PunchOutOrderMessage | iStore sends the shopping cart information to the procurement system in a URL-encoded XML document. |
Display Templates
The following Customer Application Display Templates are involved in the Direct Punchout Catalog functionality:
-
Punchout Login Page
-
Punchout Logout
-
Punchout Page
By default, these templates are mapped to supplied JSPs. For more information on these templates, see the Seeded Display Data, appendix.
Oracle iStore Implementation Tasks for Direct Punchout Catalog
This section describes the Oracle iStore implementation steps required for the functionality. Following are the steps:
-
Step 1 - Set Profile Options
-
Step 2 - Create Buyer Organization and User
-
Step 3 - Create Oracle iStore Sites
-
Step 4 - Send Information to Procurement Organization
For more information, see Oracle Procurement Buyer's Guide to Punchout and Transparent Punchout and theOracle Procurement Supplier's Guide to Punchout and Transparent Punchout.
Step 1 - Set Profile Options
Set the profile option, IBE: Merchant DUNS Number, to the supplier's DUNS number at site level. If supplier has multiple DUNS numbers, set at responsibility level.
Set the profile option, JTF_UM_MERCHANT_NAME, to the merchant name (e.g., Oracle iStore) at site level.
Step 2 - Create Buyer Organization and User
Create the buyer organization as a customer and create a proxy contact for the organization (if the buyer organization already exists, there is no need to create a new organization):
-
Log in into Oracle Forms and select Trading Community Manager responsibility.
-
Navigate to Customers, Standard.
-
Enter customer data:
-
Name: Enter procuring organization name
-
Address: Enter procuring organization address
-
Contact: Enter a customer contact
-
-
Save the changes.
Create a username and password for the buyer proxy contact:
-
Switch Responsibility to System Administrator.
-
Navigate to Security, User.
-
Enter user data:
-
User Name: Enter the proxy user's username.
-
Password: Enter the proxy user's password.
-
Customer: Bring up the LOV and search for the contact of the procuring organization; select the contact.
-
-
Save the changes.
Step 3 - Create Oracle iStore Sites
Create Oracle iStore sites where the buyer will purchase items. Dedicated sites can be created, or existing sites can be utilized.
To restrict a site to the procurement organization, you may use the organization access restrictions functionality and restrict the site to only the procurement organization (also disallow the buyer organization from all other sites). If a dedicated site is not required, this step is not required.
See the chapter Implementing Site Management, for more information.
Step 4 - Send Information to Procurement Organization
As the host of the Oracle iStore catalog, send the following information to the procurement organization:
-
Merchant Name: This is the same value set in the profile option, JTF_UM_MERCHANT_NAME.
-
DUNS Number: This is the same value set in the profile option, IBE: Merchant DUNS Number.
-
List of Item Categories: A list of item categories can be obtained by running the script, ibevpoctgrs.sql, which is shipped out-of-the-box.
-
List of UOMs implemented
If Using Oracle Native XML Protocol
If using Oracle Native XML protocol for the messaging, send the following:
-
Company Name: This is the proxy user's username.
-
Password: This is the proxy user's password.
-
URL: <scheme>//<hostname>:<port>/OA_HTML/ibeCPopLoginA.jsp?prtcl=OAG_XML
If Using cXML Protocol
If using cXML protocol for the messaging, send the following:
-
Domain: This is the proxy user's username.
-
Identity: This is the proxy user's username.
-
Password: This is the proxy user's password.
-
URL: <scheme>//<hostname>:<port>/OA_HTML/ibeCPopLoginA.jsp?prtcl=CXML
Oracle iProcurement Implementation Tasks for Direct Punchout Catalog
If using Oracle iProcurement for the procurement system, complete the implementation steps in this section. Following are the high-level steps:
-
Step 1 - Set up Data Mapping
-
Step 2 - Create Punchout Catalog
-
Step 3 - Publish Catalog
For more information, see Oracle Procurement Buyer's Guide to Punchout and Transparent Punchout and the Oracle Procurement Supplier's Guide to Punchout and Transparent Punchout.
Step 1 - Set up Data Mapping
Item categories and units of measure (UOM) used at the supplier site may not match those at the procurement site. Oracle iProcurement leverages Oracle XML Gateway's capability to transform this data when a shopping cart is received from supplier.
Define the mapping in Oracle XML Gateway:
-
Log in to Oracle Self Service Web Applications.
-
Select eCommerce Gateway, Vision Enterprises responsibility.
-
Navigate to Setup, Code Conversion, Define Code Conversion Values.
-
For each item category in the supplier's inventory database, enter the following:
-
Category: ITEM_CATEGORY
-
Direction: IN
-
Internal Value: Category value used in iProcurement
-
External: Category value returned in shopping cart by the supplier
-
-
For each UOM in the supplier inventory, enter the following:
-
Category: UOM
-
Direction: IN
-
Key1: Same key as above (“Supplier1”)
-
Internal Value: UOM value used in iProcurement
-
External: UOM value returned in shopping cart by the supplier
-
Step 2 - Create Punchout Catalog
Create the punchout catalog:
-
Log in to Oracle Self Service Web Applications.
-
Select the iProcurement Catalog Administration responsibility.
-
Navigate to Manage Content, Catalogs, Create.
-
Enter the following data for the catalog:
-
Type: Punchout catalog
-
Source: Supplier
-
Access Method: Direct punchout (Oracle native XML), or Direct punchout (cXML)
-
If Oracle Native XML, Company Name: The proxy user's username
If cXML, Domain: username; Identity: The proxy user's username
-
Catalog Name: Any Name
-
Key 1: Key entered in XML Gateway (“Supplier1”)
-
If cXML, Supplier Name: Supplier Name
-
If Oracle Native XML, Punchout URL: <scheme>//<hostname>:<port>/OA_HTML/ibeCPopLoginA.jsp?prtcl=OAG_XML
If cXML, Punchout URL: <scheme>//<hostname>:<port>/OA_HTML/ibeCPopLoginA.jsp?prtcl=CXML
-
Password: The proxy user's password
-
All prices are negotiated: Check
-
-
Submit the configuration.
Step 3 - Publish Catalog
In Oracle iProcurement, publish the catalog:
-
Navigate to Manage Content, Stores, Create Store (an existing store can also be used instead).
-
Enter the store information:
-
Store Name: Any Name
-
Store Type: Catalog
-
Add Catalog: Select the catalog created earlier
-
-
Submit.