Configure RAID in Legacy Boot Mode
Use this task to create a logical drive on an x86 system in Legacy Boot Mode, and to define it as bootable. This prepares the drive so that you can install an operating system onto it.
Note - To learn more about the RAID controller card referenced in this procedure, see https://docs.broadcom.com/docs/pub-005110.
In the following procedure, drives 2 and 3 are used to create a RAID 1 volume.
-
Power on or reset the host.
For example, to reset the host, do one of the following:
-
From the local server, press the Power button (approximately 1 second) on the front panel of the server to power off the host, then press the Power button again to power it back on.
-
From the Oracle ILOM web interface, select Host Management > Power Control, then select Reset from the Select Action list box.
-
From the Oracle ILOM CLI, type: reset /System
The boot messages appear.
-
-
Type CTRL+R during the boot process to launch the BIOS
Configuration Utility.
The LSI MegaRAID BIOS Configuration Utility appears.
-
Review the listed drives to determine which drives are available for logical
drive creation.
If this page includes a drive group where you want to install an OS, skip to Step 12. Otherwise continue.
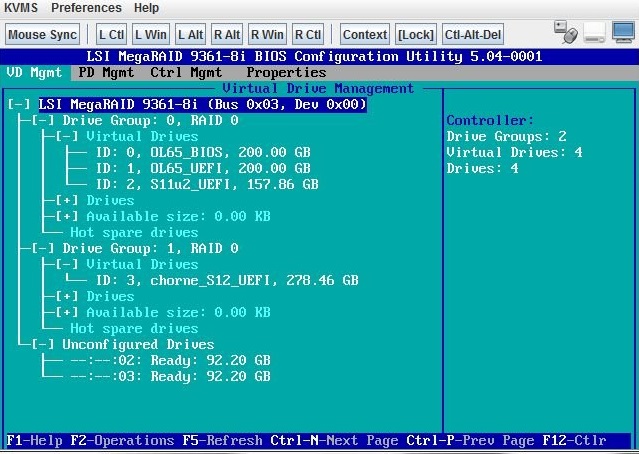
The following figure shows two unconfigured drives, drives 02 and 03. These can be used to create a virtual drive.
-
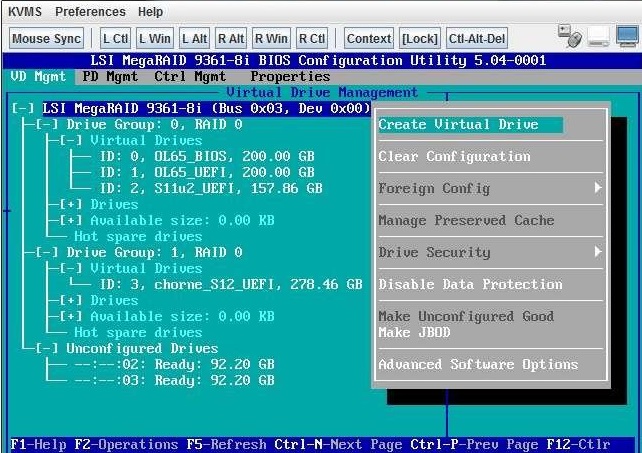
Use the arrow keys to navigate to the HBA, and then press F2.
The Operations menu appears.
-
Use the arrow keys to navigate to the Create Virtual Drive menu option, and
then press Enter.
-
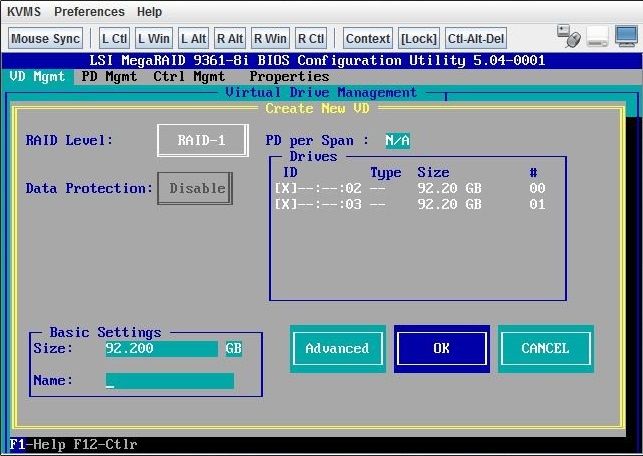
From the page that is displayed:
-
Press Enter on the RAID Level field.
A popup appears.
-
Use the arrow keys to select a RAID level.
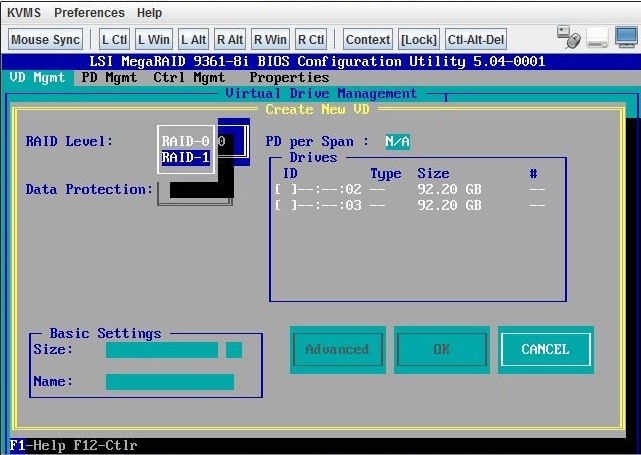
- Press Enter to exit the popup window.
-
Press Enter on the RAID Level field.
-
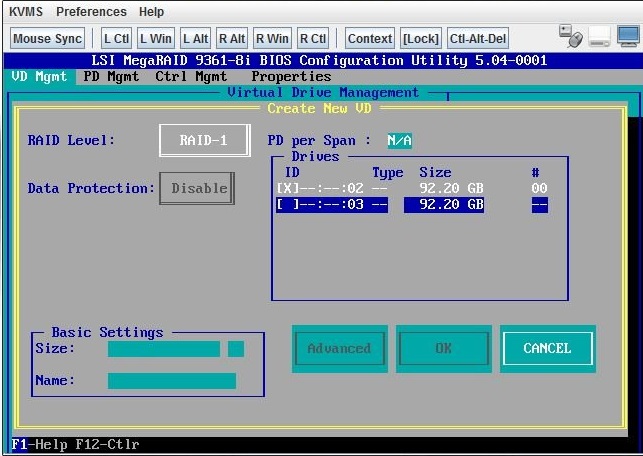
Use the arrow keys to navigate to the Drives box.
The Drives box displays a list of drives that are available to be configured in a logical drive.
-
For each drive that you want in the logical drive, navigate to the drive and
press Enter in its ID field to produce an X in the field.
This selects the drive to be included in the logical drive configuration.
-
After you select all the drives that you want to include in the logical drive,
use the arrow keys to navigate to the OK button, and then press Enter.
-
On the next page that is displayed, use the arrow key to move to the OK button,
and press Enter.
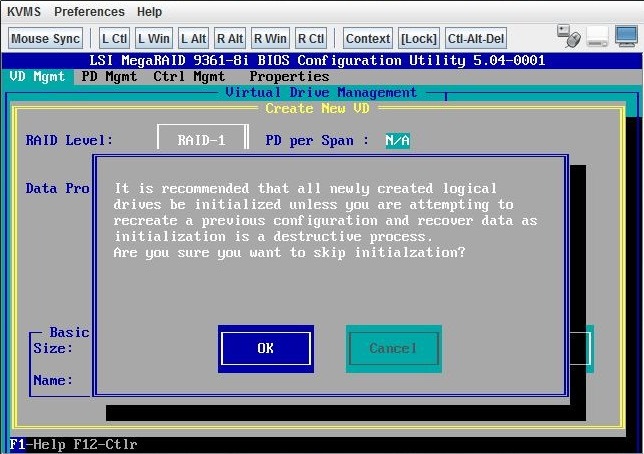
The logical drive is now created.
-
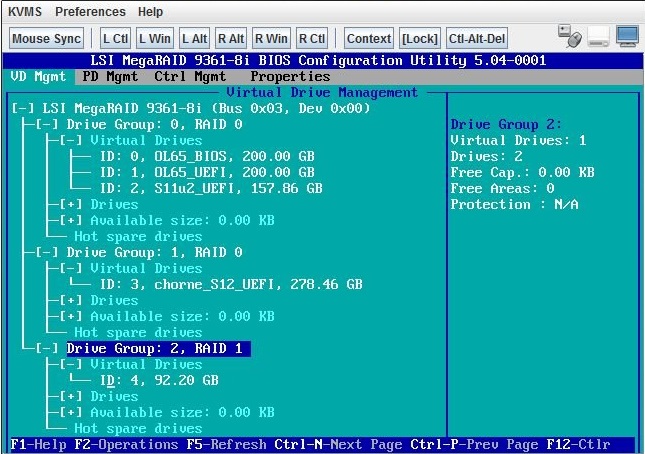
To verify the logical drive creation, review the drive groups on the main page
of the BIOS Configuration Utility and note the new drive group that is now
displayed on the page.
In this example, Drive Group 2, RAID 1 is created.
-
Use the following steps to make a drive bootable.
This places a boot sector on the drive so that you can install an operating system on it.
- Select Ctrl Mgmt to open the Control Management page.
-
From the Ctrl Mgmt page, use the arrow keys to navigate to the Boot
device field, and press Enter.
A boot device popup window appears.
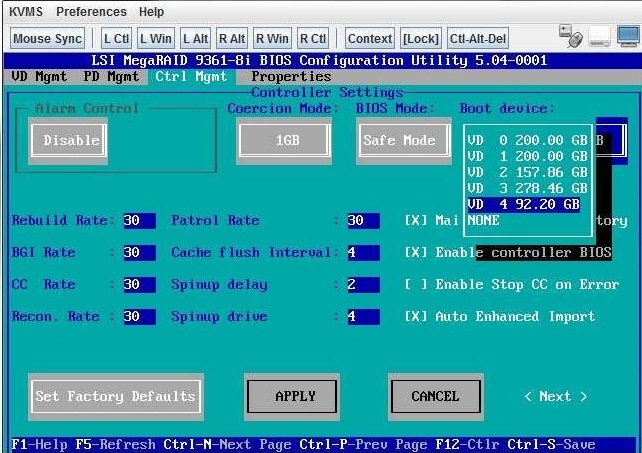
- Use the arrow keys to navigate to the logical drive you wish to make bootable, and then press Enter.
-
Use the arrow keys to navigate to the Apply button, and then press
Enter.
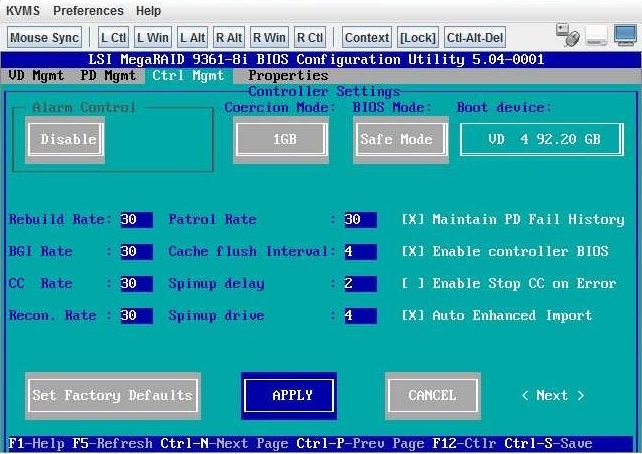
- Type CTRL+S to save the configuration.
The creation of a bootable logical drive is complete.