Release 8.0.4 for Windows NT
A55925-01
Library |
Product |
Contents |
Index |
| Oracle Parallel Server Getting Started Release 8.0.4 for Windows NT A55925-01 |
|
This chapter describes required pre-installation tasks.
Specific topics discussed are:
Because no true distributed file system support exists on Windows NT, the mechanism Oracle uses to allow nodes running different instances to access shared disks is to bypass the NT file system by using raw partitions. The shared disks are then a collection of unformatted raw devices.
A raw partition is a portion of a physical disk that is accessed at the lowest possible level. I/O to a raw partition offers approximately a 5% to 10% performance improvement over I/O to a partition with a file system on it.
A raw partition is created when an extended partition is created and logical drives are assigned to it without applying any formatting. The Windows NT Disk Administrator application allows you to create an extended partition on a physical drive.
An extended partition points to raw space on the disk that can be assigned multiple logical drives for the database files. An extended partition avoids the four-partition limit by allowing you to define large numbers of logical drives to accommodate applications using Oracle8 Enterprise Edition. Logical partitions can then be given symbolic link names to free up drive letters. We create an extended partition in this chapter and link the drive letters to symbolic link names in Chapter 5, "Configuring Oracle Parallel Server".
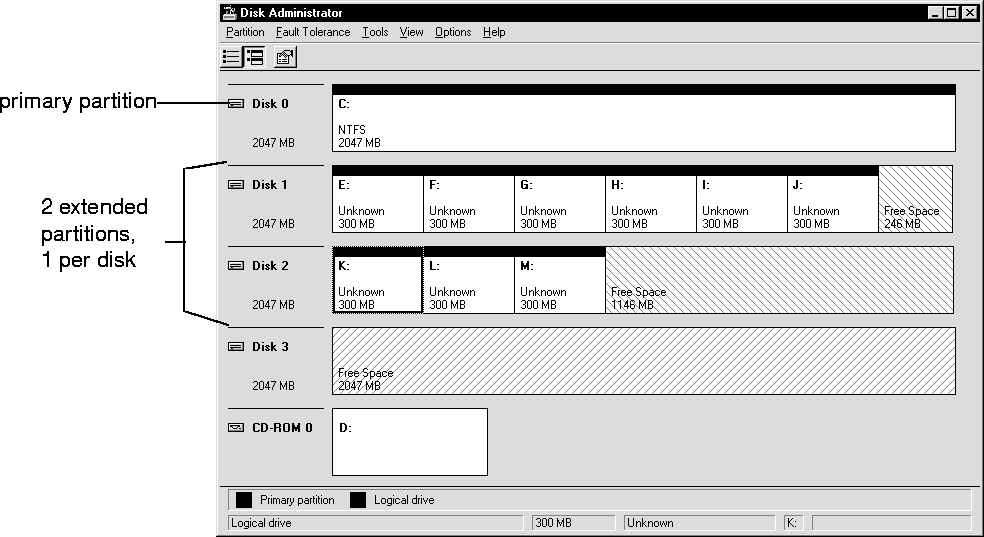
The Disk Administrator window shown below shows four disks, two of the disks having an extended partition:
Windows NT defines each disk drive found at startup with the following naming convention:
\Device\Harddiskm\Partitionn
where m is the number of the physical drive, and n is a drive number (logical drive number) as shown in the Disk Administrator's window (in Figure 3-1).
The first logical drive (E:) defined on the second physical drive in the section "Step 2: Create Logical Drives In an Extended Partition" has the following entry:
\Device\Harddisk1\Partition1
The first logical drive on a system (normally the C drive) has the following entry:
\Device\Harddisk0\Partition1
Partition0 has special meaning in that it has access to the whole disk.
Raw partitions are of two types:
Partition created by the Disk Administrator that points to a drive other than Partition0.
Partition that points to Partition0. Windows NT automatically creates a symbolic link name of \\.\PhysicalDrivex (where x is the physical drive number) to \Device\Harddiskx\Partition0. The x in \\.\PhysicalDrivex matches the x in \Device\Harddiskx\Partition0.
|
Note: Although you can use physical drives, Oracle Corporation recommends using logical drives and creating symbolic links (as described in section "Step 2: Assign Symbolic Links to Each Logical Drive" in Chapter 5, "Configuring Oracle Parallel Server"). |
Only one extended partition can be created per disk. You can use the free space in the extended partition to create multiple logical drives or use all or part of it when creating volume sets or other kinds of volumes for fault-tolerance purposes.
To create an extended partition:
The Disk Administrator window appears:
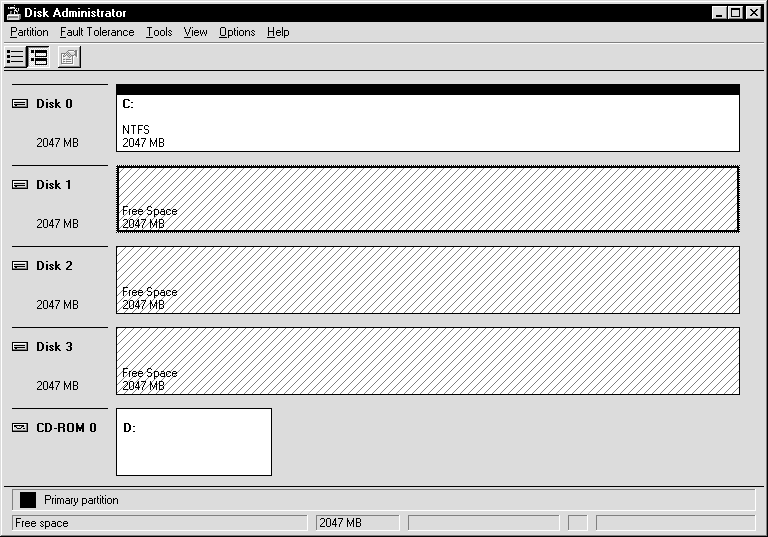
Note the lines display diagonally from top right to the bottom left, indicating unpartitioned devices.
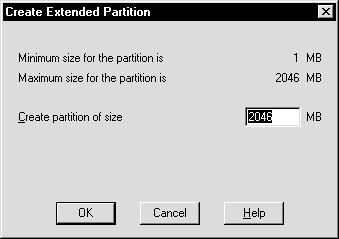
Oracle recommends you use the entire disk.
The Disk Administrator displays the minimum and maximum sizes for the extended partition:
|
Note: Changes you have made are not saved until you choose Commit Changes Now Commit Changes Now from the Partition menu or quit the Disk Administrator. |
The extended partition is created.
Note the lines now display diagonally from top left to bottom right, indicating the partition is an extended partition.
After an extended drive is created, you must assign logical drives to it. Logical drives are assigned letters of the alphabet.
To create logical drives in an extended partition:
The Disk Administrator window displays the minimum and maximum sizes for the logical drive:
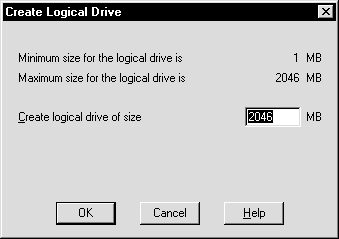
The size is dependent on how large you want your log files and data files to be. Add 2MB to this size for overhead. If you plan on using the default database OPS.SQL creation script (to be used later) located in ORACLE_HOME\OPS to create your database later, 300 MB is more than enough.
|
Additional Information:
See "Step 7: Create an Oracle Parallel Server Database" in Chapter 5, "Configuring Oracle Parallel Server", for more information about OPS.SQL. |
|
ATTENTION: A two-node cluster requires 9 drives, and each additional node requires 2 additional drives to accommodate log files. |
A confirmation dialog appears, informing you changes have been made to the disk.
A dialog box appears, informing you the disks have been updated successfully.
On all nodes except the primary node, a dialog box appears, informing you the disk configuration has been detected. If you do not see this dialog box, it does not mean the disk configuration has not changed.
The extended partition and the logical partitions are now seen by all of the nodes.
|
Note: The hard disks that access the shared area may be different from node to node. The logical drives, however, that reside on the hard disks must be identical on all nodes. |
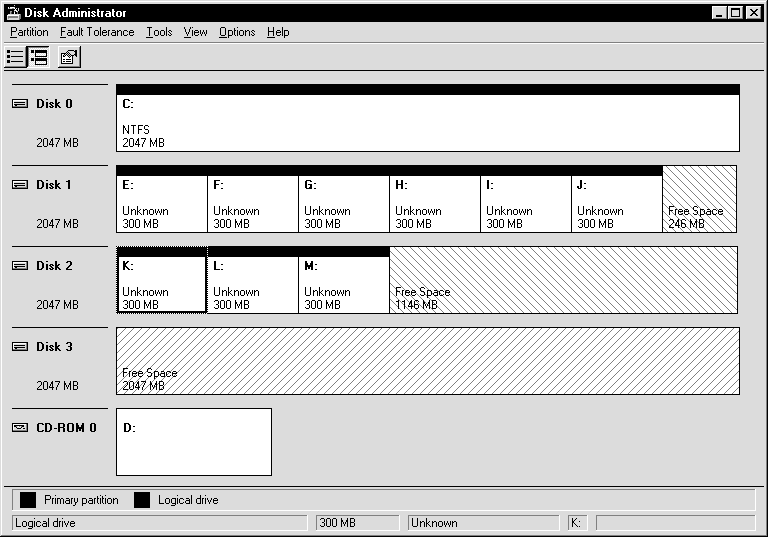
For example, Node 1 may look like:
Node 2 may look like:
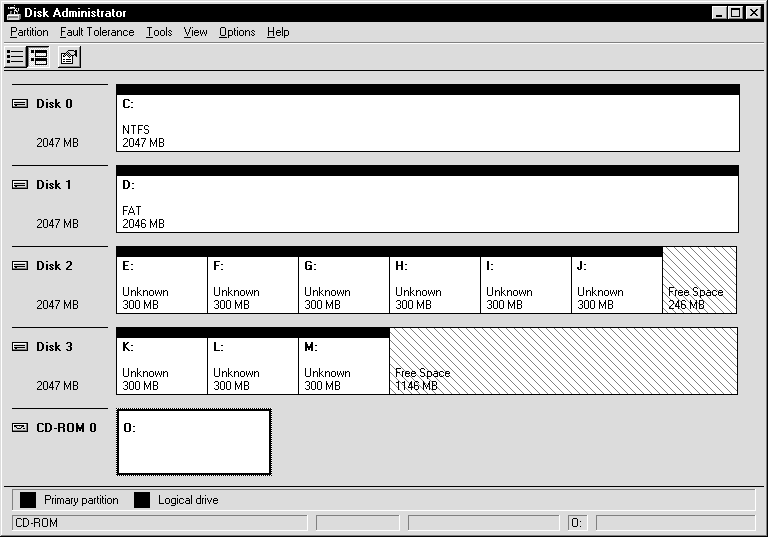
On Node 1, the logical drive E is defined as \Device\Harddisk1\Partition1. On Node 2, it is defined as \Device\Harddisk2\Partition1. Even though these map to different disks, they map to the same space on the shared disk.
To free up other drive letters for other purposes, such as mapping network drives, it is important to also unassign the drive letters from the logical partitions on each partition. Oracle Parallel Server does not need to access a partition through a drive letter
|
Note: A two-node cluster requires 9 logical drives, for example, with drive letters E through M. Each additional node requires two additional drives to accommodate the log files. |
|
Note: If your disks have been previously configured, the logical drives may already be unassigned. If this the case, you can skip to Step 6 of this procedure. |
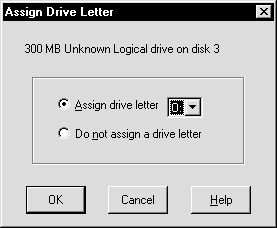
To unassign drive letters:
The Assign Drive Letter dialog box appears:
A confirmation dialog box appears.
|
Note: The hard disks that access the shared area may be different from node to node. The logical drives, however, that reside on the hard disks must be identical from node to node. |
Oracle Corporation recommends using a worksheet similar to the one below:
| Node 1 | Node 2 | Node 3 | Node 4 | |
|---|---|---|---|---|
|
Hard Diskx |
Partitions x-x |
Partitions x-x |
Partitions x-x |
Partitions x-x |
|
Hard Diskx |
Partitions x-x |
Partitions x-x |
Partitions x-x |
Partitions x-x |
For example, the worksheet for the Disk Administrator windows shown in Figure 3-2 and Figure 3-3 of this chapter would look like:
| Node 1 | Node 2 | |
|---|---|---|
|
Hard Disk1 |
Partitions 1-6 |
n/a |
|
Hard Disk2 |
Partitions 1-3 |
Partitions 1-6 |
|
Hard Disk3 |
n/a |
Partitions 1-3 |
The Disk Administrator application exits.