Oracle interMedia Annotator User's Guide
Release 9.0.1

Part Number A88784-01
Go To Documentation Library
Home
Go To Product List
Book List
Go To Table Of Contents
Contents
Go To Index
Index

Master Index

Feedback

Go to previous page Go to next page

3
Generating and Manipulating Annotations with the Annotator GUI

interMedia Annotator is packaged along with several sample multimedia files. They are included in the <ORACLE_HOME>\ord\Annotator\media_data directory. You can use interMedia Annotator on these files (or on files of your own choosing) to perform a number of operations. These operations include:

3.1 Creating an Annotation

To create an annotation, perform the following operations:

  1. Either select New from the File menu or click the New Annotation button.

    The Make a Selection window appears (Figure 3-1).
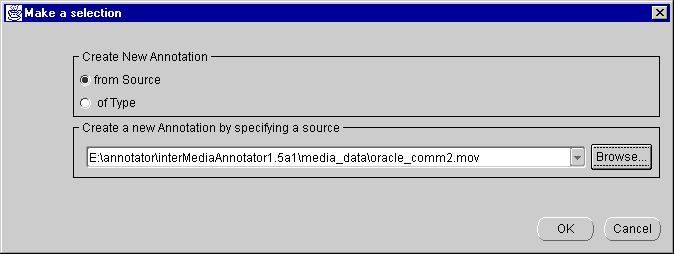
    Figure 3-1 Make a Selection Window


    Text description of selectme.gif follows.
    Text description of the illustration selectme.gif

  2. To create an annotation populated with metadata from a media file, click the from Source button and select a media file from the pull-down menu.

    If the media file does not appear in the pull-down menu, click the Browse button and select a media file in the Open window (Figure 3-2).
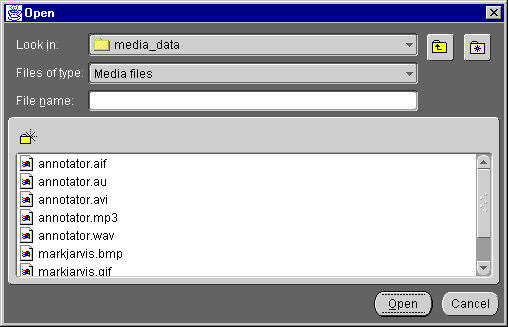
    Figure 3-2 Open Window


    Text description of browse.gif follows.
    Text description of the illustration browse.gif

  3. To create an empty annotation, click the Files of Type pull-down menu and select an annotation type from the pull-down menu. (This option will be used most often in conjunction with a user-defined annotation type. See Chapter 10 for more information on creating your own annotation types.)

  4. Click OK.

See Figure 1-1 for more information on how interMedia Annotator builds an annotation.

interMedia Annotator can parse media sources accessible through the URL protocols shown in Table 3-1.

Table 3-1 Available URL Protocols 
URL Protocol  Description 

file 

Access all the files on local or remotely mounted disks in your computer. 

http 

Access media available through an Internet Web server. 

cd 

Access audio compact discs in your local CDROM drive. 


Note:

The URL used to extract annotations from a compact disc is not a standard URL. The URL is defined as follows:

  • Windows NT: cd:<your Windows CD-ROM drive>#cdda

  • Macintosh: cd:#cdda


If you are parsing a local file or a file available over the Internet through the http protocol, interMedia Annotator extracts the time-independent attributes from the media file and inserts them into a logical annotation.

If you are parsing an audio CD, interMedia Annotator can connect to a CDDB, find the entry corresponding to your CD, and create a logical annotation.

If you are parsing a media source with multiple tracks, such as a video source or audio CD, an annotation is created for each track.

When the parsing is complete, the annotation type appears in the Annotation Tree View of the Annotations pane. The attribute names and values for the currently selected annotation are displayed in the Attributes tab of the interMedia Annotator window (Figure 2-1). The Annotations pane contains an expandable list, which shows the hierarchy of annotations and sub-annotations (Figure 3-3).
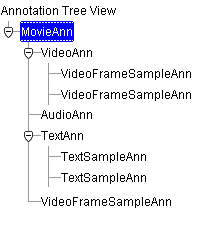
Figure 3-3 Annotations Pane with Expanded List


Text description of annotatt.gif follows.
Text description of the illustration annotatt.gif

In order to display the attributes of another annotation, select it in the Annotation Tree View.

Some JPEG files contain additional metadata in the Information Interchange Model (IIM) format. This metadata can optionally be extracted into an IpctIimAnn sub-annotation, which appears as a sub-annotation of your main annotation. In order to create an IpctIimAnn sub-annotation, perform the following operations:

  1. From the Edit menu, select Preferences and click the Parsers tab.

    The Parsers tab of the Preferences window appears (Figure 2-7).

  2. Click the plus sign (+) next to the JpgParser option.

  3. Select IPTC-IIM to create the IpctIimAnn sub-annotation.

  4. Click OK to confirm and save the changes.

3.2 Editing Attribute Values

You can edit the value that appears for each attribute by performing the following operations:

  1. Double-click the text in the right-hand column of the attribute.

    A solid outline will appear around the table cell and an I-beam cursor will appear.

  2. Edit the text.


    Note:

    interMedia Annotator cannot change the attribute values in the media itself; it can change only the attribute values in the extracted annotation. If you parse the media file again, your annotation will be overwritten and any attributes that you have edited will revert to their original values. 


You can save your changes to the annotation. See Section 3.6 for more information.

3.3 Adding and Deleting Attributes to the Annotation

interMedia Annotator defines a given number of attributes (see Appendix C for a complete list of attributes). However, not all media sources will provide values for every attribute. You can use interMedia Annotator to add a value to your annotation for any attribute that does not have a value.

interMedia Annotator cannot write any new attribute values back to the media sources. The current annotation will contain the value, but any annotations created later by interMedia Annotator will not contain the new value.

To add a value for an attribute that has not been automatically set, perform the following operations:

  1. From the Annotation menu, select Add Attribute.

    The Add Attribute submenu appears (Figure 3-4), listing the attributes that have no values.
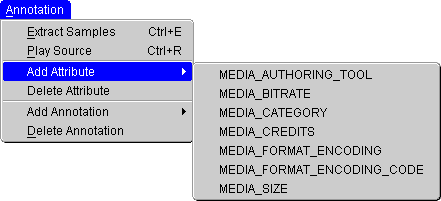
    Figure 3-4 Add Attribute Submenu


    Text description of addattri.gif follows.
    Text description of the illustration addattri.gif

  2. Select an attribute from the Add Attribute submenu.

    The new attribute appears in the Attributes tab with no value in the right-hand column.

  3. Enter a value in the right-hand column.

    Validation of the annotation type is done at this time.

To delete an attribute from your annotation, perform the following operations:

  1. Select the attribute to delete.

  2. From the Annotation menu, select Delete Attribute.

    The Please Confirm window opens (Figure 3-5).

    Figure 3-5 Please Confirm Window for Deleting Attributes


    Text description of confirm.gif follows.
    Text description of the illustration confirm.gif

  3. Click Yes.

The attribute and its value are deleted from the annotation.

3.4 Adding and Deleting an Annotation

An annotation will usually contain one or more sub-annotations, which contain the metadata associated with a portion of the media source, such as a text track or an audio track. In addition to these populated sub-annotations, you can create your own sub-annotations by adding an empty annotation and then populating it with your own values.

To create an empty annotation, perform the following operations:

  1. In the Annotations pane, select the annotation under which you will add a sub-annotation.

  2. From the Attribute menu, select Add Annotation.

    The Add Annotation submenu appears (Figure 3-6).
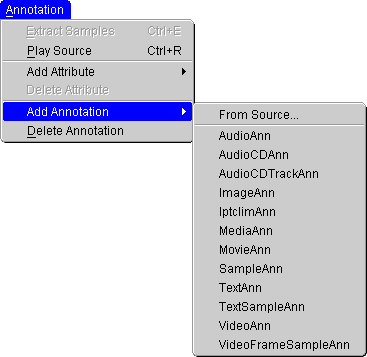
    Figure 3-6 Add Annotation Submenu


    Text description of addannot.gif follows.
    Text description of the illustration addannot.gif

  3. Select the type of annotation to create.

Your new annotation appears in the Annotation Tree View.

You can populate an empty annotation with attribute values in the same way you would add attribute values to a populated annotation. See Section 3.3 for more information.

You can delete annotations and sub-annotations. You can delete sub-annotations that you have created and sub-annotations that were created automatically in the parsing process. To delete an annotation, perform the following operations:

  1. Select the annotation or sub-annotation to be deleted.

  2. From the Attribute menu, select Delete Annotation.

    The Please Confirm window opens (Figure 3-7).
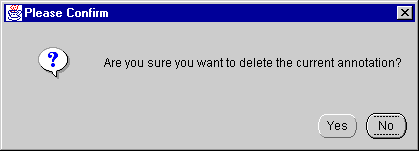
    Figure 3-7 Please Confirm Window for Deleting Annotations


    Text description of confirma.gif follows.
    Text description of the illustration confirma.gif

  3. Click Yes.

The selected annotation is removed from the Annotation Tree View.

3.5 Extracting a Sample

You can use interMedia Annotator to extract three types of samples: text selections (or tracks) from a QuickTime movie file, images from a QuickTime movie file, or audio tracks from a compact disc.

3.5.1 Text Tracks from a QuickTime Movie

To extract a text track from a QuickTime movie, perform the following operations:

  1. Annotate a QuickTime movie that contains a text track, such as oow_annotator.mov (included with interMedia Annotator). See Section 3.1 for more information on creating an annotation.

  2. Select TextAnn in the left-hand window pane.

  3. Either select Extract Samples from the Annotation menu or click the Extract Samples button on the toolbar.

View the extracted text information by clicking the Samples tab when the text annotation is selected (Figure 3-8).

Figure 3-8 Samples Tab with Audio Samples


Text description of audiosam.gif follows.
Text description of the illustration audiosam.gif

3.5.2 Video Tracks from a QuickTime Movie

To extract a video track from a QuickTime movie, perform the following operations:

  1. Annotate a QuickTime movie. See Section 3.1 for more information on creating an annotation.

  2. Select VideoAnn in the left-hand window pane.

  3. Set the amount of video data to be extracted by performing the following steps:

    1. From the Edit menu, select Preferences and click the Parsers tab.

      The Parsers tab of the Preferences window appears (Figure 2-7).

    2. Click the plus sign (+) next to the QT4JavaParser option.

    3. In the list that appears, select ExtractVideoSamples.

    4. If you want to specify the time interval to pass between frame extractions, then enter true in the Extraction by Time Interval field and enter the interval (in seconds) in the Extraction Parameter field.

    5. If you want to specify the number of frames to be extracted, then enter false in the Extraction by Time Interval field and enter the number of frames to be extracted in the Extraction Parameter field.

    6. Click OK to confirm and save the changes.

  4. Either select Extract Samples from the Annotation menu or click the Extract Samples button on the toolbar.

View the extracted video information by clicking the Samples tab when the video annotation is selected (Figure 3-9).
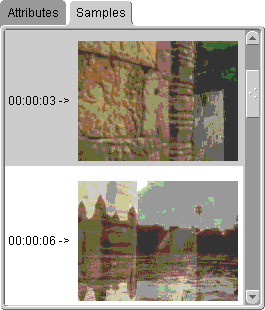
Figure 3-9 Samples Tab with Video Samples


Text description of videosam.gif follows.
Text description of the illustration videosam.gif

3.5.3 Audio Tracks from a CD

interMedia Annotator can extract audio data from a CD track. You can specify the start and end points of your extracted sample.

To extract samples from a CD, perform the following operations:

  1. Annotate an audio CD. See Section 3.1 for more information on creating an annotation.

  2. Select an audio CD track annotation in the Annotations pane.

  3. Set the amount of audio data to be extracted by performing the following steps:

    1. From the Edit menu, select Preferences and click the Parsers tab.

      The Parsers tab of the Preferences window appears (Figure 2-7).

    2. Click the plus sign (+) next to the Audio CD Parser option.

    3. In the list that appears, select ExtractAudioClipTrack.

    4. In the Audio Sample Start Time field, enter the time in seconds from which you want to start extracting.

    5. In the Audio Sample Length field, enter the duration of the sample to be extracted, in seconds.

    6. Click OK to confirm and save the changes.

  4. Click the Extract Media Samples button on the toolbar.

The audio sample is extracted and stored in the Sun AU sound file format.

After extraction, media source attributes will be modified in order to refer to the extracted sample. These attributes include file format, MIME type, file name, directory, and URL, among others.

See Section 3.8 for more information on playing back the extracted sample.

3.6 Saving an Annotation

Once you have parsed a media source, you can save the annotation as an XML document by performing the following operations:

  1. From the File menu, select Save.

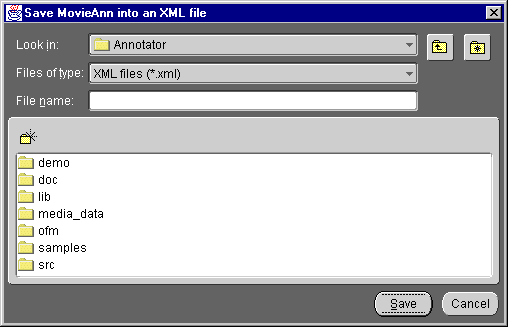
    The Save window opens (Figure 3-10).

    Figure 3-10 Save Window


    Text description of save.gif follows.
    Text description of the illustration save.gif

  2. Enter a file name in the File name: field and click Save.


Note:

interMedia Annotator does not automatically append the suffix .xml to the provided file name. You must manually enter the suffix. 


The XML document can be viewed through any text editor or through interMedia Annotator. See Section 3.7 for more information.

The default folder where interMedia Annotator will save annotations is set in the General tab of the Preferences window. To change the default folder, perform the following operations:

  1. From the Edit menu, select Preferences and click the General tab. The General tab of the Preferences window appears (Figure 2-6).

  2. Enter the name of the new default folder in the Open/Save Directory: field.

  3. Click OK to confirm and save the changes.

3.7 Opening a Saved Annotation

If you have a saved annotation, you can open it in interMedia Annotator by performing the following operations:

  1. Either click the Open button on the toolbar or select Open from the File menu.

    The Make a Selection window opens (Figure 3-11).

    Figure 3-11 Make a Selection Window


    Text description of open.gif follows.
    Text description of the illustration open.gif

  2. Click the Browse button.

    The Open window appears (Figure 3-2).

  3. Select an annotation file and click Open.

The annotation and its sub-annotations appear in the Annotation Tree View.

3.8 Playing Media Sources or Viewing Extracted Samples

You can use interMedia Annotator to play your media source and any text or video sample that you have extracted.

Before playing a media source or sample, check the Mime-Types tab of the Preferences window to ensure that each MIME type is paired with the correct path to the appropriate helper application. See Section 2.2.5 for more information.

3.8.1 Media Source

Play a media source or an extracted sample by performing the following operations:

  1. Select the annotation at the root of the Annotation Tree View.

  2. Either click the Play Source button on the Annotation toolbar or select Play Source from the Annotation menu.

    The appropriate media player opens and plays the media source.

3.8.2 Media Sample

Play an extracted media sample by performing the following operations:

  1. Extract a media sample. See Section 3.5 for more information.

  2. Select the sub-annotation associated with the sample you want to play.

  3. Either click the Play Source button on the Annotation toolbar or select Play Source from the Annotation menu.

    The appropriate media player opens and plays the media source.

3.8.3 Text Sample

You can view a text sample without opening a separate viewer.

After extracting the text sample, click the Samples tab in the right-hand window pane. The text sample appears, along with a time line indicating roughly where each piece of text appears in the video or song.


Go to previous page Go to next page
Oracle
Copyright © 1996-2001, Oracle Corporation.

All Rights Reserved.
Go To Documentation Library
Home
Go To Product List
Book List
Go To Table Of Contents
Contents
Go To Index
Index

Master Index

Feedback