| Oracle® Retail Point-of-Service User Guide Release 14.1 E54472-02 |
|


 Previous |
 Next |
This chapter contains introductory information for users of Mobile Point-of-Service. Not all of the functionality available at a register is supported on a mobile device. This chapter describes only the functionality that is available on a mobile device. To perform any other functionality, you need to use a register.
|
Note: Mobile Point-of-Service may have been customized for your company. If changes were made to the default configuration, the application may look or behave differently than described in this guide.For example, in this chapter, the steps to perform a price override include selecting a reason code. In your configuration, however, you may not select a reason code when overriding a price. |
Mobile Point-of-Service enables you to perform the following functionality on a mobile device:
Scan items or enter the item numbers manually. Scan or enter a serial number if required for an item.
Sell and activate gift cards. Look up a gift card balance.
Look up item availability.
Look up the item price on a gift receipt
Apply discounts and price overrides to items. Apply discounts to transactions.
Add pickup or shipping for an item.
Fill an order pickup.
Add and link a customer to a transaction.
Tender transactions using a credit card, debit card, or gift card.
Return items with or without a receipt.
Use item and customer extended data.
Print receipts and send receipts in email. Reprint receipts.
Suspend and resume transactions.
View notification messages.
If Mobile Point-of-Service is implemented with Oracle Retail Store Inventory Management, the following Oracle Retail Store Inventory Management functionality is supported:
Inventory lookup at the current store
Inventory lookup at buddy stores
Validation of serial numbers
Real-time quantity-on-hand
Mobile Point-of-Service supports the same locales and languages as Point-of-Service. For more information, see "Language and Locale Support" in Chapter 1.
Mobile Point-of-Service supports both handheld and tablet mobile devices. The same functionality is supported on both type of devices. For information on using each type of device, see the following sections:
This section describes using Mobile Point-of-Service on a handheld. For more information, see the following sections:
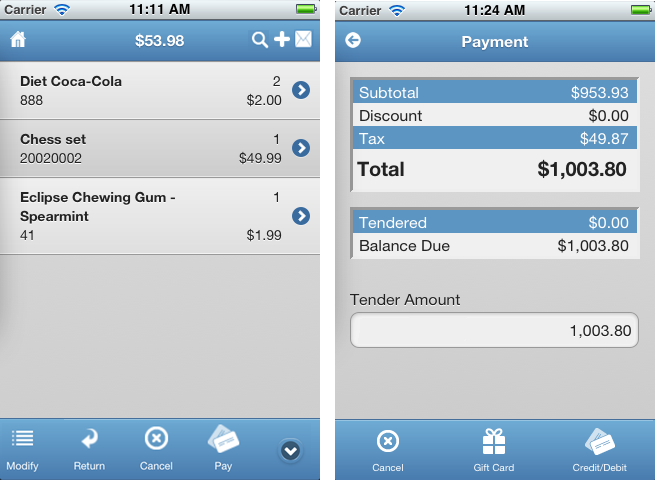
Figure 12-1 shows examples of pages on the handheld.
The content of the page is dependent on the available functionality. Pages have the following structure:
The top of the page shows page-specific information and icons.
The first example is the Scan Items page:
On the left is the Home icon. Tap it to go to the Home page. See Figure 12-3.
The subtotal of the items in the transaction is shown.
On the right is the icon to add items to the list. Tap it to add items.
The second example is the Payment page:
The arrow on the left is used to return to the previous page.
The title of the page is shown.
The Home icon and arrow are common to many of the pages.
The middle of the page is the work area of the page. It may contain information, input fields, and drop-down lists. In the second example, Tender Amount is an input field. For an example of a drop-down list, see Figure 12-19.
At the bottom of the page are the set of icons available for that page. If an icon is grayed out, it is not available. If additional icons are available, icons are available to move up and down through the list. For an example of these, see Figure 12-10.
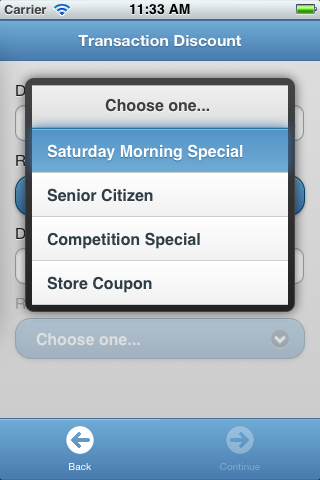
To use drop-down lists, tap the Choose one field. See Figure 12-26. The list of choices appears. See Figure 12-27.
If you need to enter information, tap the input field. A keyboard opens for you to enter the information.
After entering the information, close the keyboard to return to the page where the information was needed. The information you entered appears in the input field.
This section provides instructions on starting the Mobile Point-of-Service application and logging in and out.
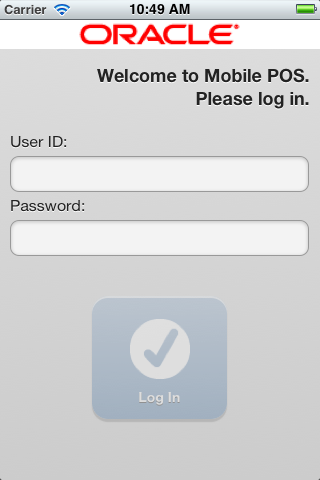
To start Mobile Point-of-Service, tap the Mobile POS icon. The Login page appears.
Enter a user ID and password. Tap Log In. After successfully logging in, the Home page appears. See Figure 12-3.
On the Home page, tap Log Out. You are logged out of the application. The Login page appears. See Figure 12-2.
|
Note: If you leave Mobile Point-of-Service while a transaction is in progress, the transaction is cancelled and you are logged out. |
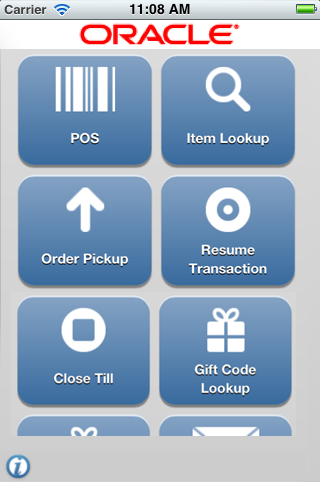
After logging in, the Home page appears.
On this page, you access the functionality of Mobile Point-of-Service:
The POS icon enables you to scan items and tender the transaction. For more information, see "Performing Transactions on the Handheld".
The Item Lookup icon enables you to search for items based on item number. For more information, see "Performing Item Lookup on the Handheld".
The Order Pickup icon enables you to fill an order for a pickup. For more information, see "Handling an Order Pickup on the Handheld".
The Resume Transaction icon enables you to resume a suspended transaction. For more information, see "Resuming a Suspended Transaction on the Handheld".
The Close Till icon enables you to close the till currently assigned to the handheld. For more information, see "Closing the Till on the Handheld".
The Gift Code Lookup icon enables you to look up the price of an item on a gift receipt. For more information, see "Performing a Gift Code Lookup on the Handheld".
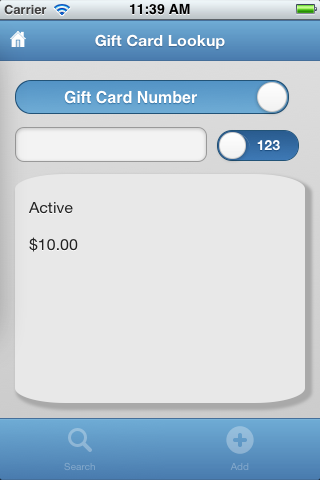
The Gift Card Lookup icon enables you to look up the balance on a gift card. For more information, see "Performing a Gift Card Lookup on the Handheld".
The Messages icon enables you to view any notifications for the store. For more information, see "Viewing Messages on the Handheld".
The Log Out icon enables you to log out of the application. For more information, see "Logging Out on the Handheld".
The Info icon, at the lower-left corner, enables you to view information about the Mobile Point-of-Service application and handheld. For more information, see "Viewing Application and Handheld Device Information".
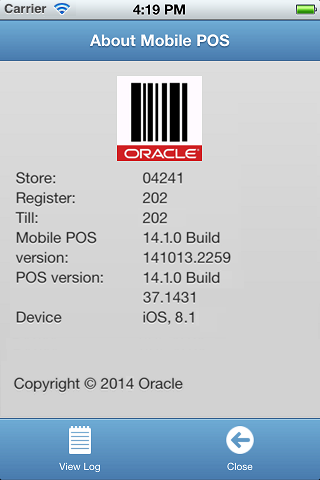
Information about the Mobile Point-of-Service application and the handheld appear on the About Mobile POS page. To access the page, tap the Info icon on the Home page.
Table 12-1 describes the information shown on this page.
Table 12-1 Fields on Mobile Point-of-Service About Page
| Field | Description |
|---|---|
|
Store |
ID of the store. |
|
Register |
ID of the register assigned to the handheld. |
|
Till |
ID of the till that is open on the handheld. |
|
Mobile POS version |
Version of Mobile Point-of-Service being used. |
|
POS version |
Version of Point-of-Service being used. |
|
Device |
Device type and software version. |
|
Model |
Model of the sled. |
|
Manufacturer |
Manufacturer of the sled. |
On this page, you can do the following:
To view the contents of the log, tap View Log. For information on the log, see "Viewing Handheld Log Information".
When done viewing this page, tap Close. You are returned to the Home page.
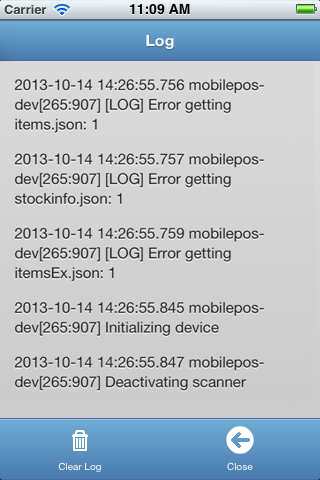
When errors occur on the handheld, information is saved in the log. The saved information can be used to help identify and correct the errors. To view the log, tap View log on the About page.
On this page, you can do the following:
To clear the contents of the log, tap Clear Log.
When done viewing the log, tap Close. You are returned to the About Mobile POS page.
To close the till currently open on the handheld, tap Close Till on the Home page. The till is closed. It must be reconciled at a register or Back Office. When you return to the Scan Items page, another till is opened.
You can view notification messages for the store. The messages, with the creation dates, are displayed. If a message is available, an indicator appears in the top right side of the page. For an example, see Figure 12-1.
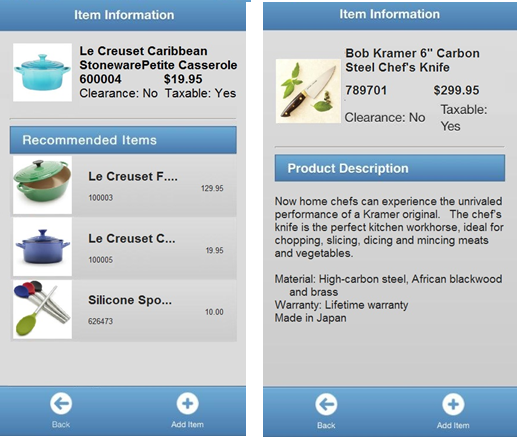
If available, you can view item data to provide additional information to the customer. Extended item data is retrieved from a data source external to Mobile Point-of-Service. Extended item data can include a detailed item description and recommended items.
On the Item Information page, items from the list of recommended items can be added to the transaction. To add a recommended item to the transaction:
Tap the item in the Recommended Items list. The Item Information page appears for that item.
To add that item to the transaction, tap Add Item. The item is added to the list on the Scan Items Page. You are returned to the Scan Items Page.
All transactions begin on the Scan Items page. A transaction is started when an item number is entered on the Scan Items page. You can enter an item number by scanning the bar code or entering the item number manually.
After all items have been added, the payment process begins. A customer can pay with multiple tenders. The transaction completes when the balance is zero. To tender a transaction on the handheld, two options are available:
Tender on the handheld using a credit card, debit card, or gift card.
If the customer wants to use any other tenders, suspend the transaction and complete the payment process at a register.
For more information on transactions, see the following sections:
To begin a transaction, tap POS on the Home page. The Scan Items page appears.
To add an item to a transaction:
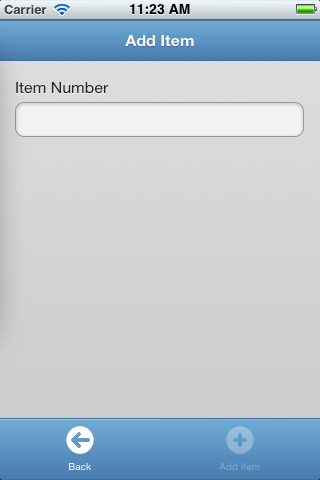
Scan the item number or enter the item number manually. To enter the item number manually:
Tap the plus sign (+) at the upper-right corner. The Add Item page appears.
Enter the item number and tap Add Item.
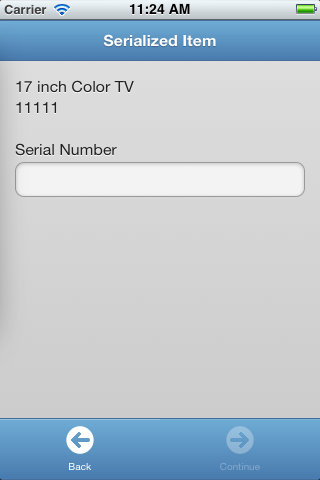
If the item being added to the transaction requires a serial number, the Serialized Item page appears.
Scan or enter the serial number and tap Continue.
If the serial number is valid, the item is added to the transaction.
If the serial number is not valid, the Add Serial Number page appears:
To add the serial number to the system, tap Add Serial Number. The item is added to the transaction.
To not add the serial number and not add the item to the transaction, tap Back.
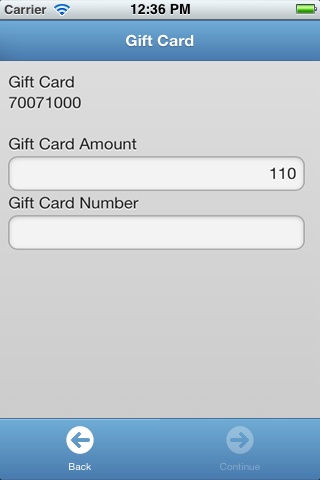
If the item is a gift card and a gift card number is needed, the Gift Card page appears.
Enter the gift card amount and number and tap Continue. The gift card item is added to the transaction. When the transaction is completed, the gift card is activated.
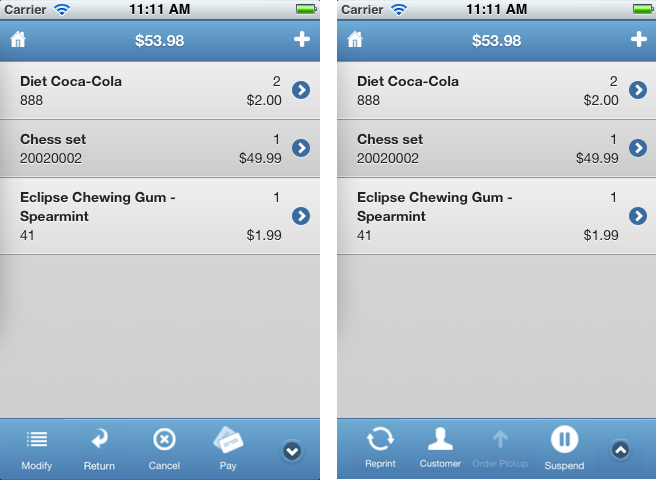
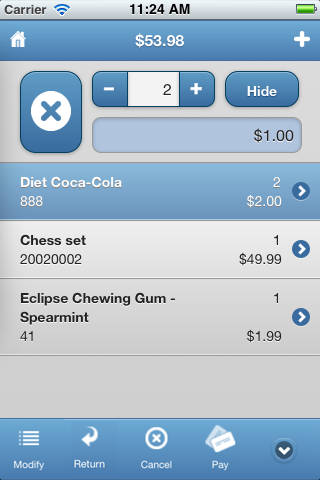
Figure 12-10 shows the Scan Item page with multiple items added.
Figure 12-10 shows both sets of icons at the bottom of the page. On this page, you can do the following:
To view detailed information for an item, tap the icon on the right side of the item entry. See "Viewing Detailed Item Information on the Handheld".
To modify an item, see "Modifying an Item on the Handheld".
To modify the transaction, tap Modify. See "Modifying the Transaction on the Handheld".
To process a return, tap Return. See "Performing a Return on the Handheld".
To cancel the transaction, tap Cancel. See "Cancelling a Transaction on the Handheld".
To tender the transaction, tap Pay. See "Tendering a Transaction on the Handheld".
To reprint the receipt for a transaction, tap Reprint. See "Reprinting a Receipt on the Handheld".
To link a customer to the transaction, tap Customer. See "Linking a Customer to the Transaction on the Handheld".
To fill an order pickup, tap Order Pickup. See "Handling an Order Pickup on the Handheld".
To suspend the transaction, tap Suspend. See "Suspending a Transaction on the Handheld".
To resume a suspended transaction, tap Resume. See "Resuming a Suspended Transaction on the Handheld".
Some aspects of a transaction, for example, special pricing, require a customer to be linked to the transaction. For information on the benefits and requirements for linking a customer, see Chapter 4.
To link a customer to the transaction:
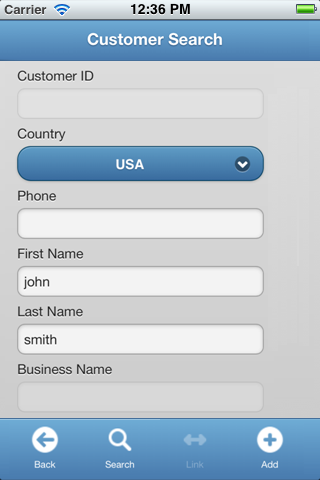
Tap Customer. The Customer Search page appears.
To search for a customer:
Enter the customer ID or customer information and tap Search. If one match is found, that customer is linked to the transaction. If more than one match is found, the Customer Search Results page appears.
Tap the customer you want to link to the transaction and tap Link.
To add a customer:
Enter the customer information and tap Add. If no customer matching the search information is found, the customer is added and linked to the transaction.
If matches are found for the customer information, the Customer Search Results page appears. Select a customer from the list. Tap the customer you want to link to the transaction and tap Link.
To view detailed information on the item, tap the icon on right side of the item line. The Item Detail page appears.
If an item image is available, the image appears. The name of the item, price, quantity, applied discounts, linked sales associate, and any item-level messages appear.
When you are done viewing the information, tap Close.
After all items for a transaction have been added, you can tender the transaction. To tender a transaction on the handheld, two options are available:
Tender on the handheld using a credit card, debit card, or gift card.
Suspend the transaction and tender at a register. To suspend the transaction, see "Suspending a Transaction on the Handheld".
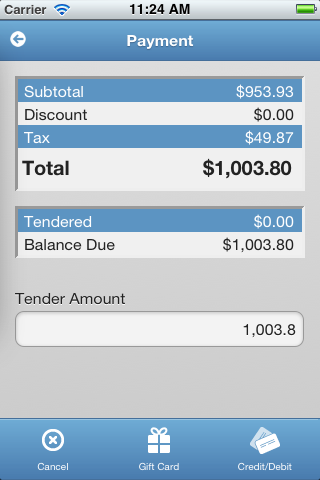
To tender a transaction:
Tap Pay on the Scan Items page. The Payment page appears.
Enter the tender amount.
To tender with a credit card or debit card, tap Credit/Debit. To tender with a gift card, tap Gift Card.
|
Note: A gift card has to be activated before it can be used as a tender. |
Swipe the card on the pin pad. The authorization process begins automatically.
Handle the result of the authorization:
|
Note: If the card is not approved, follow the prompts to handle the reason for the non-approval. |
If the authorization is approved for a credit card or debit card:
If the balance is zero for the transaction, the customer is prompted to provide a signature on the pin pad. When the customer completes providing the signature, the Receipt page appears. See "Printing a Receipt on the Handheld".
If there is a balance remaining for the transaction, the customer is prompted to provide a signature on the pin pad. When the customer completes providing the signature, the Payment page appears so you can process the next tender. See Step 2.
If the authorization is approved for a gift card:
If the balance is zero for the transaction, the Receipt page appears. See "Printing a Receipt on the Handheld".
If there is a balance remaining for the transaction, the Payment page appears so you can process the next tender. See Step 2.
To modify an item, tap Modify on the Scan Items page. Options open at the top of the page to modify the item.
To modify the item, you can do the following:
To increase the quantity, tap the plus sign (+). To decrement the quantity, tap the minus sign (-).
To remove the item on the transaction, tap the Delete icon on the left.
To change the price or other item options, tap the Price field. The Modify Item page appears. See Figure 12-17.
To close the options, tap Hide.
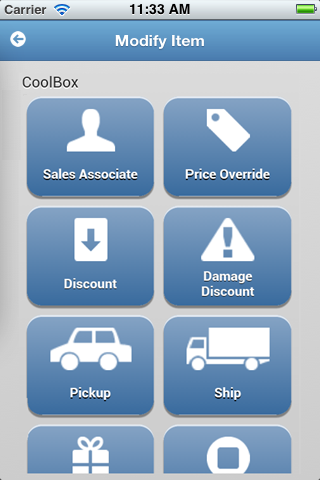
The Modify Item page enables you to change item options.
Tap the item option to be changed:
To change the sales associate linked to the item, see "Modifying the Sales Associate on the Handheld".
To override the current price of the item, see "Overriding the Price on the Handheld".
To apply a discount to the item, see "Applying a Discount to an Item on the Handheld".
To apply a damage discount to the item, see "Applying a Damage Discount to an Item on the Handheld".
To add pickup for an item, see "Adding Pickup for an Item on the Handheld".
To add shipping for an item, see "Adding Shipping for an Item on the Handheld".
To add a gift receipt for the item, tap Gift Receipt. An icon is added to the Scan Items page to indicate a gift receipt for the item is printed when the transaction is completed.
When you are done modifying the item, tap Done.
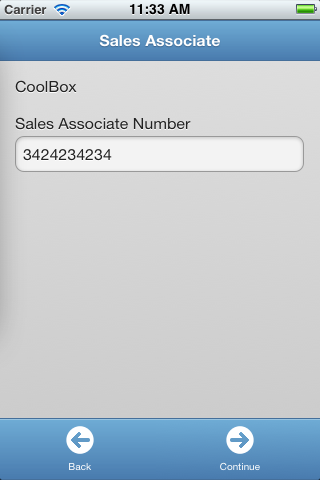
To change the sales associate linked to an item:
On the Modify Item page, tap Sales Associate. The Sales Associate page appears.
Enter the sales associate number and tap Continue. The linked sales associate is changed. You are returned to the Modify Item page.
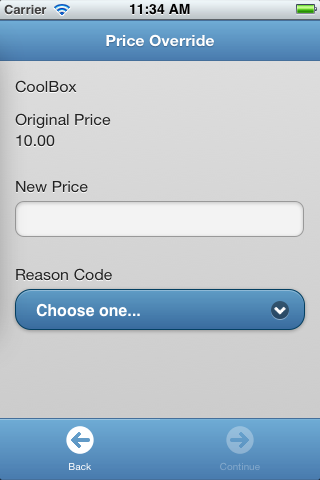
To override the current price of the item:
On the Modify Item page, tap Price Override. The Price Override page appears.
Enter the new price.
Tap the Reason Code field and select a reason code on the drop-down list.
Tap Continue. The price of the item is changed. You are returned to the Modify Item page.
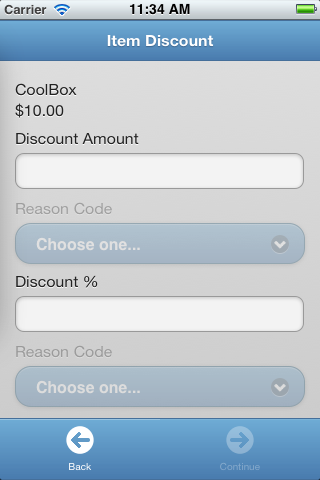
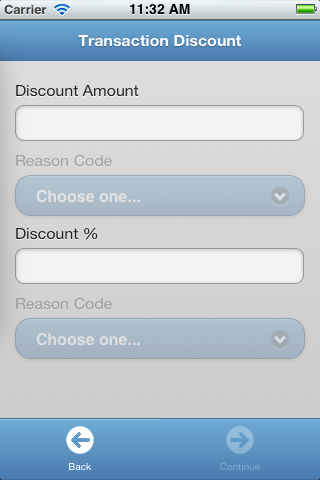
You can apply both a discount amount and percent. To apply a discount to an item:
On the Modify Item page, tap Discount. The Item Discount page appears.
To apply a discount amount, enter a discount amount. Tap the Reason Code field and select a reason code for the discount amount.
To apply a discount percent, enter a discount percent. Tap the Reason Code field and select a reason code for the percent.
Tap Continue. The price of the item is changed. You are returned to the Modify Item page.
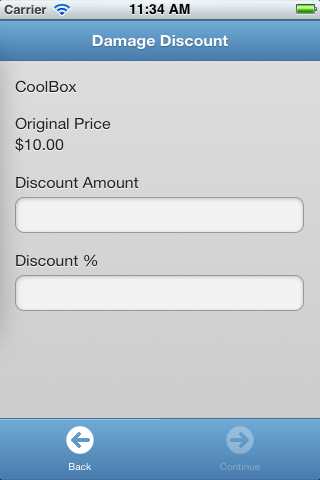
You can apply both a damage discount amount and percent. To apply a damage discount to an item:
On the Modify Item page, tap Damage Discount. The Damage Discount page appears.
To apply a discount amount, enter a discount amount.
To apply a discount percent, enter a discount percent.
Tap Continue. The price of the item is changed. You are returned to the Modify Item page.
A customer wants to arrange store pickup for an ordered item.
To add pickup for an item:
On the Modify Item page, tap Pickup. The Pickup Options page appears.
Select the store for the pickup:
To search for a store, tap Store Search. Enter the search criteria and tap Next. The Pickup Options page is updated with the stores matching the criteria.
Select a store from the list. Tap Next. The Customer Information page appears.
Collect the customer information:
Enter the customer information and tap Next.
To search for a customer, tap Search. For information on searching for a customer, see "Linking a Customer to the Transaction on the Handheld".
The Pickup Date page appears.
Enter the pickup date and tap Next. The Scan Items page appears. An icon is added to the item line to indicate it is a pickup item.
A customer wants to arrange shipment for an ordered item.
To add shipping for an item:
On the Modify Item page, tap Ship. The Shipping Information page appears.
Collect the customer information:
Enter the customer information and tap Next.
To search for a customer, tap Search. For information on searching for a customer, see "Linking a Customer to the Transaction on the Handheld".
To ship to a store, tap Ship to. The Ship to Store Options page appears:
To search for a store, tap Store Search. Enter the search criteria and tap Next. The Ship to Store Options page is updated with the stores matching the criteria.
Select a store from the list and tap Next.
The Shipping Method page appears.
Set the shipping method:
Select how the item is shipped. The shipping charge is updated.
If you manually change the shipping charge, select a reason code.
Enter any special instructions.
Tap Done.
If a tax ID needs to be selected, the Multiple Geo Codes page appears. Select the tax ID and tap Done. The Scan Items page appears. An icon is added to the item line to indicate shipping is selected for the item. An item is also added for the shipping charge.
Once items have been added to a transaction, you can modify the transaction.
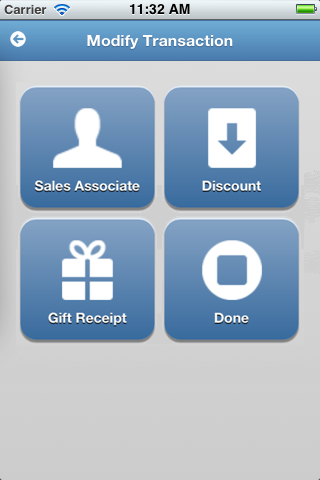
To make changes to the entire transaction, tap Modify on the Scan Items page. The Modify Transaction page appears.
Tap the transaction option to be changed:
To change the sales associate linked to the transaction, see "Modifying the Sales Associate on the Handheld".
To apply a discount to the transaction, see "Applying a Discount to the Transaction on the Handheld".
To add a gift receipt for the transaction, tap Gift Receipt. One gift receipt is printed for all the items in the transaction when the transaction is completed.
When you are done modifying the transaction, tap Done.
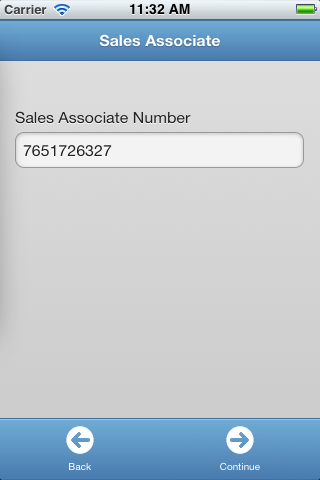
To change the sales associate linked to the transaction:
On the Modify Transaction page, tap Sales Associate. The Sales Associate page appears.
Enter the sales associate number and tap Continue. The sales associate linked to the transaction is changed. You are returned to the Modify Transaction page.
You can apply both a discount amount and percent. To apply a discount to the transaction:
On the Modify Transaction page, tap Discount. The Transaction Discount page appears.
To apply a discount amount, enter a discount amount. Tap the Reason Code field and select a reason code for the discount amount.
To apply a discount percent, enter a discount percent. Tap the Reason Code field and select a reason code for the percent.
Tap Continue. The discount is applied to the transaction. You are returned to the Modify Transaction page.
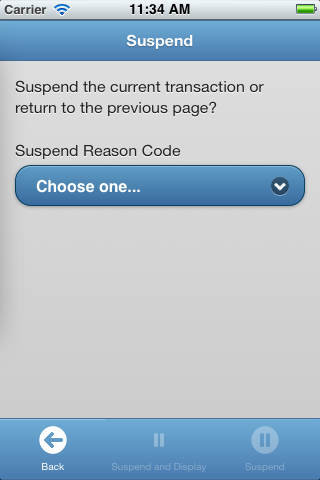
Suspend a transaction if it is interrupted or cannot be completed, such as when the customer offers a tender not supported on the handheld. A suspend transaction receipt prints, which the customer takes to a register to complete the transaction.
To suspend a transaction:
On the Scan Items page, tap Suspend. The Suspend page appears.
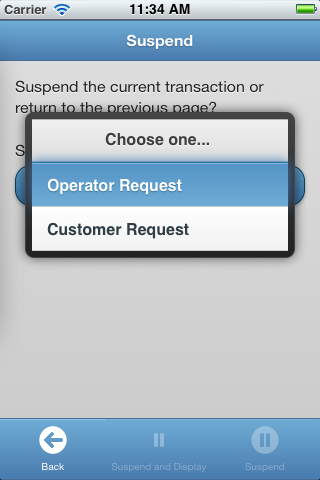
Tap the Suspend Reason Code field. The available reason codes appear.
Tap the reason code you want to choose.
Complete suspending the transaction:
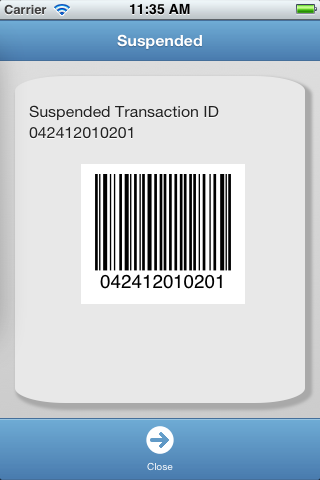
To suspend the transaction and display the transaction ID, tap Suspend and Display. The Suspended page appears. When done viewing the page, tap Close.
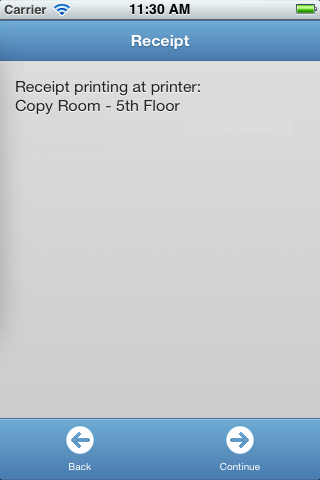
To suspend the transaction and print a receipt with the transaction ID, tap Suspend. A suspended transaction receipt prints. The Receipt page appears with the location where the receipt is printing. See Figure 12-32.
To return to the previous page without suspending the transaction, tap Back.
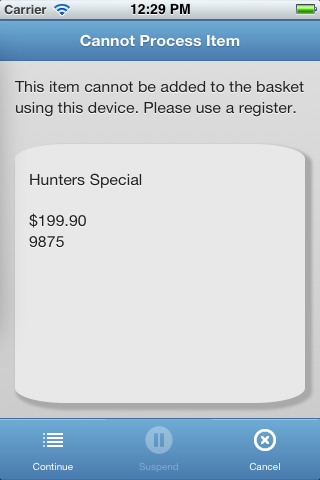
Some items cannot be handled on the handheld. For example, if an item has an age restriction, the age information must be entered at a register. If an item is scanned that requires processing at a register, the Cannot Process Item page appears.
To delete the item and continue with the transaction, tap Continue. The Scan Items page appears.
To suspend the transaction so the item can be processed at a register, tap Suspend. See "Suspending a Transaction on the Handheld".
To cancel the transaction, tap Cancel. See "Cancelling a Transaction on the Handheld".
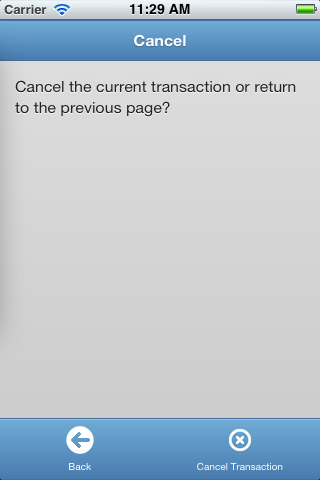
You can cancel the transaction in-progress from any page where the Cancel icon appears. To cancel a transaction, tap Cancel. The Cancel page appears.
To cancel the transaction, tap Cancel Transaction. The transaction is ended and the Home page appears.
To return to the previous page, tap Back. You can continue with the transaction.
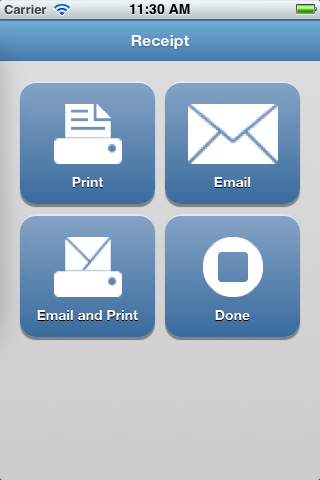
When payment for a transaction is completed, the Receipt page appears.
Select how you want to handle the receipt:
To print the receipt at a network printer, tap Print. The location where the receipt is printing is shown on the Receipt page. See Figure 12-32. To return to the Scan Items page, tap Continue. To return to the Receipt page to select another option, tap Back.
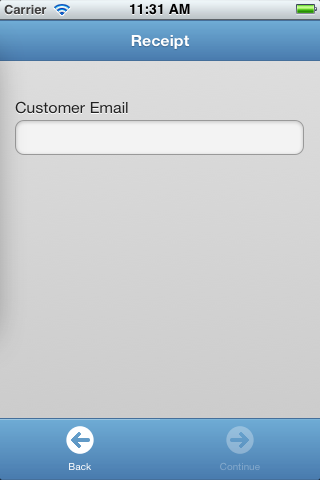
To send the receipt in an email to the customer, tap Email. The input field for the email address appears on the Receipt page. Enter the email address for the customer and tap Continue. If an invalid address is entered, an error message appears. You can enter another email address. To return to the Receipt page to choose another option, tap Back.
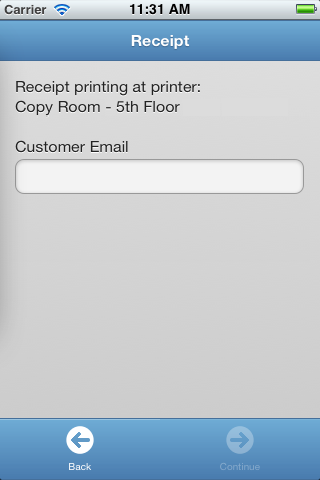
To both print the receipt an send it in an email, tap Email and Print. The location where the receipt is printing appears. Enter the email address for the customer and tap Continue. If an invalid address is entered, an error message appears. You can enter another email address. To return to the Receipt page to choose another option, tap Back.
When you are done handling the receipt, tap Done.
|
Note: You can only reprint the receipt for the last transaction. |
To reprint a receipt for the last transaction, tap Reprint on the Scan Items page. The Receipt page appears to enable you to reprint the receipt. See "Printing a Receipt on the Handheld".
Return enables the customer to return merchandise for an exchange or refund. Customer information and a personal ID may be required for the return.
Items can be returned without receipts. These returns can be done by using the item number or by searching for the transaction. Transactions in which the items were purchased can be searched by order ID, customer, purchase date, store number, credit/debit card number, gift card number, or serial number.
If Oracle Retail Returns Management was purchased and implemented, it may be used to authorize the return of the items the customer wants to return. When Oracle Retail Returns Management is used, only the following personal IDs are supported:
Driver's License
Passport
Military ID
State/Region ID
For more information on Oracle Retail Returns Management, see the Oracle Retail Returns Management User Guide.
On the Scan Items page, tap Return. The Return page appears. A return can be performed if a receipt is available, a receipt is not available, or a gift receipt is available. Each of these options is described in the following sections.
To perform a return transaction with a receipt available:
Enter the receipt information or scan the receipt barcode to enter the information. Tap Continue.
Tap each item to be returned and tap Continue. The Return Item Info page appears.
Enter the item return information. Select a return reason and item condition from the menus. Tap Continue.
If the item is not returnable, a dialog message appears and you are returned to the Scan Items page. See Step 3.
An item to be returned may have a restocking fee. To accept the restocking fee, select Yes. To decline the restocking fee, select No.
If a customer ID is required for the return, the Customer Options page appears.
Enter a customer ID to link to the transaction or choose a customer option.
If a personal ID is required for the return, the Personal ID Entry page appears.
Enter the customer name. If a customer is already linked to the transaction, that information appears on the page. Enter the ID number and select the ID type from the menu. Select the ID country and ID state from the menus. Tap Continue. You are returned to the Sell Item page.
Tap Tender. If returns are being authorized by Oracle Retail Returns Management and any items are not authorized for return, the Return Response page appears. Otherwise, the Refund Options page appears. See Step 12.
For each item, the following information is shown:
Table 12-2 Return Response Columns
| Column | Description |
|---|---|
|
Response |
The response returned from authorization and the reason for the response. The following responses may be displayed:
|
|
Description/Item |
Item description and number. |
|
Qty |
Quantity. |
|
Ext Price |
Extended price. This is the price for the total quantity being returned. |
Handle any items that were not authorized for return:
To approve the return of any items with a response of Manager Overridable Denial or Contingent Authorization, select the items and tap Manager Override. The response for the items is changed to Approved.
To accept the authorized and approved items for return, tap Continue. The Refund Options page appears.
Select a refund option and tap Continue. The Issue Refund page appears.
If eReceipt is enabled, you are prompted to select a receipt option. Otherwise, the receipt prints. You are returned to the Scan Items page.
You can perform a return by searching for the transaction. There are several search options available:
Search for a transaction using the order
Search for a transaction using the customer information
Search for a transaction using the purchase date
Search for a transaction using the store number
Search for a transaction using the credit, debit, or gift card number
Search for a transaction using the item serial number
When searching using the customer, the search can be done using the customer ID number or the Cust. Search Options page.
To return an item by searching for the transaction:
Tap Search on the Return Options page.
Choose the type of search. For more information, see the following sections:
A transaction can be searched for using the order ID for an item.
To search for a transaction using the order ID:
Tap Order. The Order Search page appears.
Enter an order number.
Enter the required information and tap Continue. If transactions are found for the order, the Return page appears. To complete the return, see Steps 2 through 12 in "Performing a Return with a Receipt on the Handheld".
This page has multiple options through which a transaction can be searched. They are Customer ID, Employee ID, Customer Information, Business Information, and Tax ID. Each of these options has a different flow.
If Cust. ID is tapped, the Search by Customer ID page appears. Enter the customer ID and tap Continue. The Customer Information page appears. Tap Link. The Display Trans page appears. Select a transaction number and tap Continue. The Return page appears. To complete the return, see Steps 2 through 13 in "Performing a Return with a Receipt on the Handheld".
If Emp ID is tapped, the Search By Emp. ID page appears. Enter the employee ID and tap Continue. The Customer Information page appears. To complete the return, see the previous section on searching using Customer ID.
If Cust. Info or Business Info is tapped, the Search By Customer Info page appears. Enter the required information and tap Continue. The Customer Information page appears. To complete the return, see the previous section on searching a transaction using Customer ID.
If Tax ID is tapped, the Search by Tax ID page appears. Enter the tax ID and tap Continue. The Customer Information page appears. To complete the return, see the previous section on searching a transaction using Customer ID.
Transactions can be searched for using the purchase date if no receipt is available. A customer must be linked to the transaction in order to complete a search by purchase date.
To search for a transaction using the purchase date:
Tap Purchase Date. The Purchase Date page appears.
Enter the start and end dates and tap Continue. The Customer Options page appears.
Tap Find. The Cust. Search Options page appears. See "Searching for a Transaction Using Customer Information" to complete the return.
Transactions can be searched for using the store number where it was purchased if no receipt is available. A customer must be linked to the transaction in order to complete a search by store number.
To search using the store number:
Tap Store Number. The Store Number page appears.
Enter the store number and Tap Continue. The Customer Options page appears.
Tap Find. The Cust. Search Options page appears. See "Searching for a Transaction Using Customer Information" to complete the return.
A transaction can be searched for using the credit or debit card that was used to tender the transaction.
|
Note: A transaction can also be searched for by the gift card used to tender the transaction. The Gift Card Search page appears instead of the Credit/Debit page. |
To search for a transaction using the credit/debit card number:
Tap Credit/Debit.
You are prompted to ask the customer to swipe their card. If the card is not successfully swiped, you are prompted to search by partial card number. If you select Yes, the Credit/Debit Search page appears.
Enter the required information and tap Continue. If transactions are found for the card, the Return page appears. To complete the return, see Steps 2 through 12 in "Performing a Return with a Receipt on the Handheld".
A transaction can be searched for using the serial number for an item.
To search for a transaction using the serial number:
Tap Serial Number. The Serial Number Search page appears.
Enter the required information and tap Continue. If transactions are found for the serial number, the Return page appears. To complete the return, see Steps 2 through 12 in "Performing a Return with a Receipt on the Handheld".
To return items without a receipt by using the item numbers:
Tap No Receipt on the Return Options page. The Return Without Receipt page appears.
Enter the item number to be returned and tap Continue.
If the item does not exist, you may be prompted to search the webstore for the item.
If the item is found, select the item and tap Continue.
The Return Item Info page appears. To complete the return, see Steps 3 through 12 in "Performing a Return with a Receipt on the Handheld".
Returns can also be performed using the gift receipt. To make a return using a gift receipt, tap Gift Receipt on the Return page. The Receipt Info page appears. To complete the return, see Steps 3 through 12 in "Performing a Return with a Receipt on the Handheld".
To perform an item lookup:
On the Home or Scan Items page, tap Item Lookup. The Item Lookup page appears.
To search for an item:
Enter the search criteria and tap Search:
To perform an Advanced Search, tap Advanced Search. The Advanced Search page appears. Enter the search criteria and tap Search.
Select the item from the list of items returned from the search:
If one item is found that matches the search criteria, the Item Information page appears. The page is updated with the available item information, such as, item number, description, price, available quantity at the current store, and buddy stores with available quantity. If you do multiple searches, drag your finger across the page to view previous results.
If multiple items are found, the Item Search Results page appears:
To display the information for a specific item, tap the item. The Item Information page appears.
To filter out items from the displayed list, tap Filter. The Filter page appears. Select the search criteria and tap Search. The Filtered Items page appears.
To display the information for a specific item, tap the item. The Item Information page appears. To filter the list further, tap Filter.
On the Item Information page, you can perform the following functions:
To add the item to the current transaction, tap Add. The Scan Items page appears with the item added to the transaction.
To return to the previous page, tap Back.
You can look up the price of an item on a gift receipt.
To look up the price of an item:
On the Home page, tap Gift Code Lookup. The Gift Code Lookup page appears.
Enter the gift code number of the item and tap Search. The gift price appears.
When you are done viewing the results, tap the Home icon to return to the Home page.
You can look up the balance remaining on a gift card.
To look up the balance on a gift card:
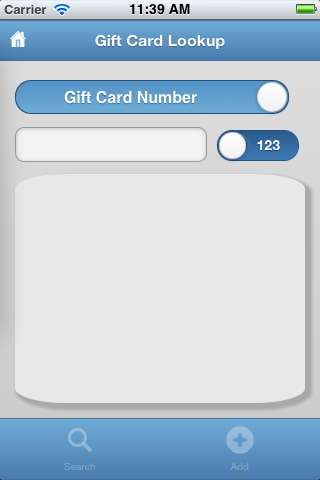
On the Home page, tap Gift Card Lookup. The Gift Card Lookup page appears.
Enter the gift card number and tap Search. The gift card balance appears.
When you are done viewing the results, tap the Home icon to return to the Home page.
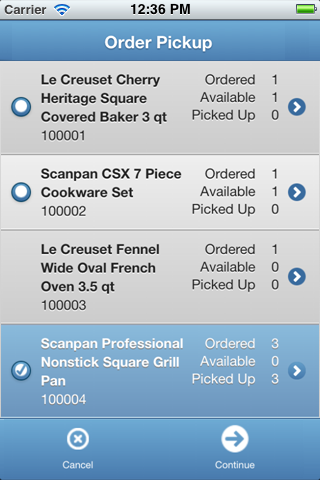
Orders for pickup of items, that have been placed at a register or created at a web site, can be filled on a mobile device. To fill an order to be picked up:
On the Home page, tap Order Pickup. The Order Search page appears.
Scan the order receipt, enter the order ID, or enter the customer information to search for the order. The Order Pickup page appears with the list of available orders matching the search information.
To select an order for pick up, tap the order. To change the picked up quantity, tap the right arrow icon. The Pickup Quantity dialog appears.
Enter the quantity for pickup and tap OK. Then entry for the order is updated on the Order Pickup page.
When you have completed filling orders, tap Continue. You are returned to the Scan Items page.
If the customer has additional items to purchase, add those items to the transaction.
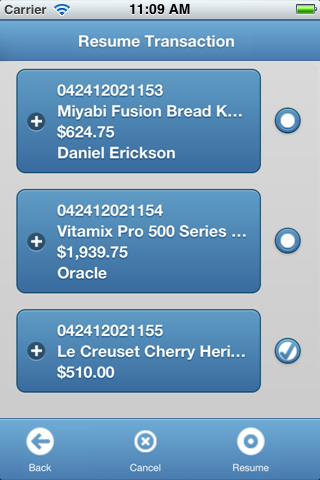
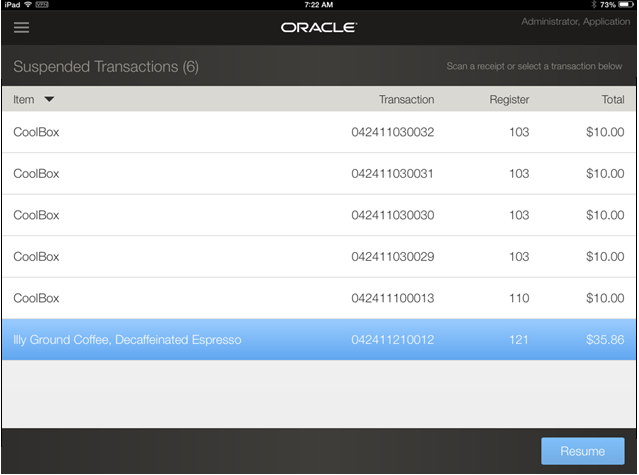
You can resume sale transactions that have been suspended on a mobile device or at a register. To resume a suspended sale transaction:
On the Home page, tap Resume Transactions. The Resume Transaction page appears.
Select the transaction:
Scan or enter the transaction number.
To select the transaction to be resumed, tap the entry. A check appears to indicate the transaction is selected.
To resume the selected transaction, tap Resume. The suspended transaction is resumed. The transaction details appear on the Scan Items page. You can complete, change, or cancel the transaction.
This section describes using Mobile Point-of-Service on a tablet. For more information, see the following sections:
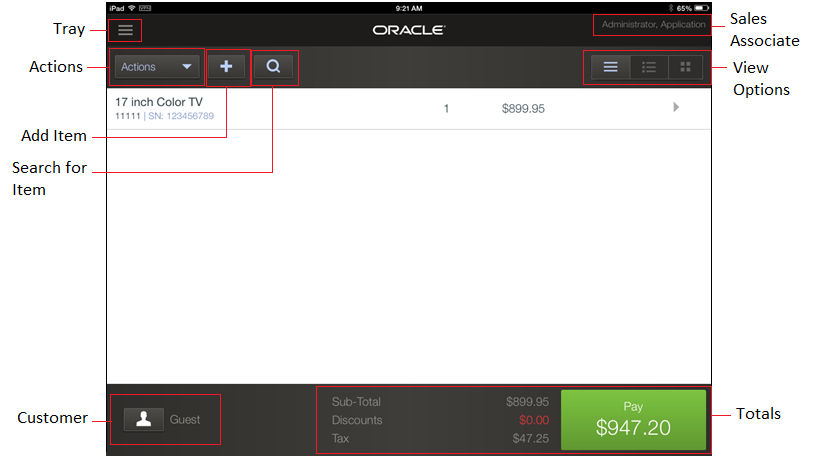
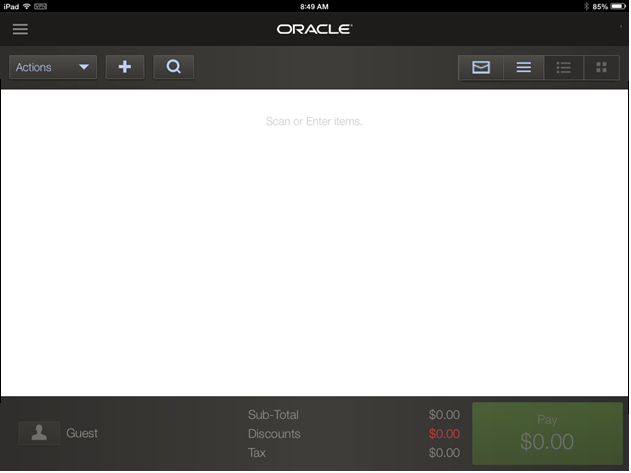
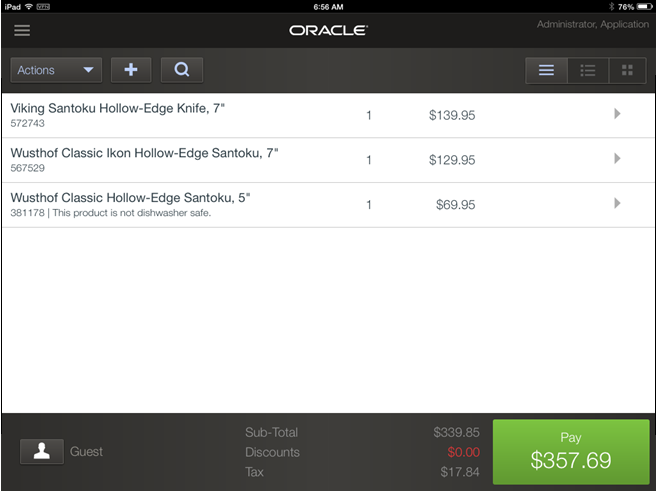
Figure 12-39 shows an example of a page on the tablet. This is an example of the Basket page.
Pages have the following structure:
The content of the top of the page is dependent on the page:
The tray shows the activities available on the page. For an example, see Figure 12-42.
The sales associate is shown at the top right.
Icons are shown for different available functionality. In this example, the following are shown:
Actions shows the list of activities for the current transaction.
The plus icon enables you to add items to the transaction.
The magnifying glass icon enables you to search for items.
There are three options at the right to select the view for the page. In this example, you can select to show the list, details, or tiles. For more information, see "Using the Tablet Home Page".
The middle of the page is the work area of the page. It may contain information, input fields, and drop-down lists.
If a customer is linked to the transaction, the customer name is shown in the bottom left of the page. Current totals for the transaction are also shown at the bottom of the page. Depending on the page, there may not be any information shown in this part of the page.
To use drop-down lists, tap the field. The list of choices appears. To select your choice, tap that entry.
If you need to enter information, tap the input field. A keyboard opens for you to enter the information. To see an example of a keyboard, see Figure 12-40. After entering the information, close the keyboard to return to the page where the information was needed. The information you entered appears in the input field.
This section provides instructions on starting the Mobile Point-of-Service application and logging in and out.
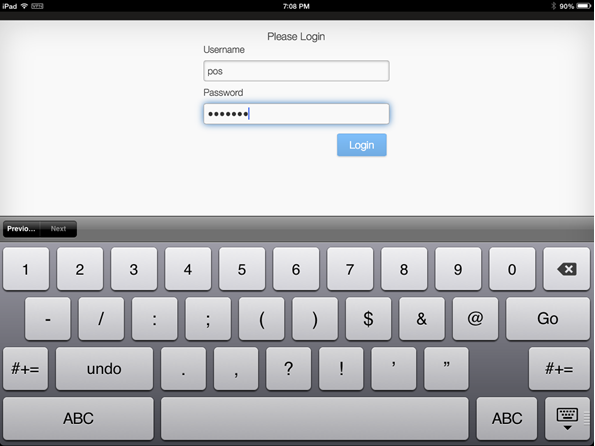
To start Mobile Point-of-Service, tap the Mobile POS icon. The Login page appears.
Enter a user name and password. Tap Login. After successfully logging in, the Home page appears. See Figure 12-41.
On the Home page, tap the user name link at the top right of the page and select to logout. You are logged out of the application. The Login page appears. See Figure 12-40.
|
Note: If you leave Mobile Point-of-Service while a transaction is in progress, the transaction is cancelled and you are logged out. |
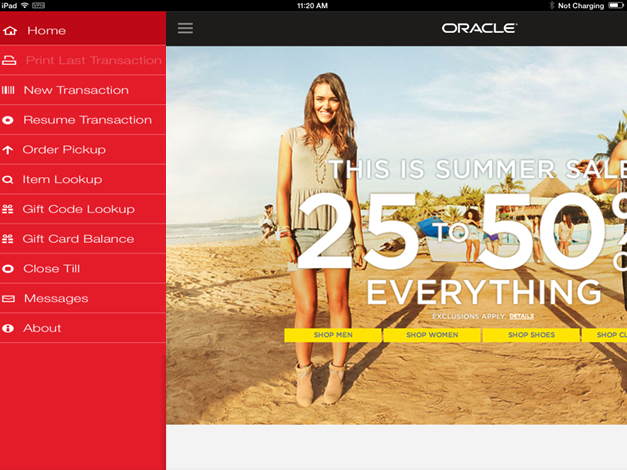
After logging in, the Home page appears.
To access the functionality of Mobile Point-of-Service, tap the tray. The menu of available activities appears.
On this page, you access the functionality of Mobile Point-of-Service:
Home displays the Home page.
Print Last Transaction reprints the receipt from the last transaction. For more information, see "Reprinting a Receipt on the Tablet".
New Transaction starts a new transaction on the tablet. For more information, see "Starting a Transaction on the Tablet".
Resume Transaction enables you to resume a suspended transaction. For more information, see "Resuming a Suspended Transaction on the Tablet".
Order Pickup enables you to set up customer pickup for an item. For more information, see "Handling an Order Pickup on the Tablet".
Item Lookup enables you to search for items. For more information, see "Performing Item Lookup on the Tablet".
Gift Code Lookup enables you to look up the price of an item on a gift receipt. For more information, see "Performing Gift Code Lookup on the Tablet".
Gift Card Balance enables you to check the available balance on a gift card. For more information, "Performing Gift Card Balance Lookup on the Tablet".
Close Till closes the till currently assigned to the tablet. For more information, see "Closing the Till on the Tablet".
Messages displays notification messages for the store. For more information, see "Viewing Messages on the Tablet".
About displays information about the application and table. For more information, see "Viewing Application and Tablet Device Information".
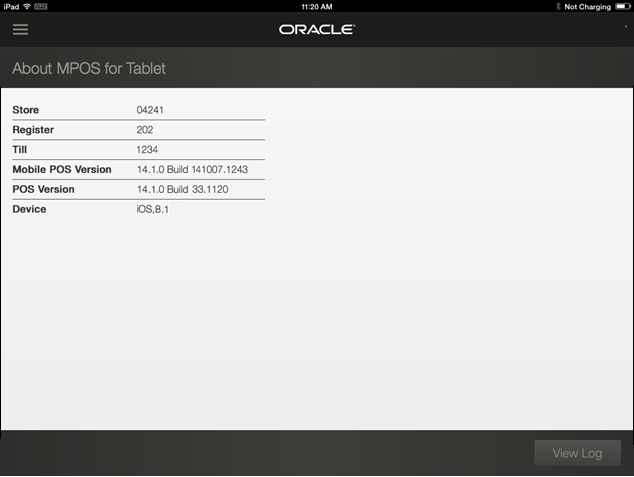
Information about the Mobile Point-of-Service application and the tablet appear on the About Mobile POS page. To access the page, tap About.
Table 12-3 describes the information shown on this page.
Table 12-3 Fields on About MPOS for Tablet Page
| Field | Description |
|---|---|
|
Store |
ID of the store. |
|
Register |
ID of the register assigned to the tablet. |
|
Till |
ID of the till that is open on the tablet. |
|
Mobile POS version |
Version of Mobile Point-of-Service being used. |
|
POS version |
Version of Point-of-Service being used. |
|
Device |
Device type and software version. |
|
Model |
Model of the sled. |
|
Manufacturer |
Manufacturer of the sled. |
When errors occur on the tablet, information is saved in the log. The saved information can be used to help identify and correct the errors.
To view the contents of the log, tap View Log. The Log page appears. For an example of log information, see Figure 12-5.
On the Log page, you can do the following:
To clear the contents of the log, tap Clear Log.
To send email with the contents of the log attached, tap Email Log.
When done viewing the log, tap Back. You are returned to the About MPOS for Tablet page.
To close the till currently open on the tablet, tap Close Till. The till is closed. It must be reconciled at a register or Back Office. When you return to the Basket page, another till is opened on the tablet.
You can view notification messages for the store. The messages, with the creation dates, are displayed. If a message is available, an indicator appears in the top right side of the page. For an example, see Figure 12-46.
If extended data is available, tabs are displayed to view the information for the customer. Table 12-4 describes the available tabs and the information displayed when the tab is selected.
Table 12-4 Extended Data Tab Descriptions
| Tab | Description |
|---|---|
|
Summary |
Summary of recent shopping done by this customer. |
|
Recent |
List of items recently purchased by this customer. |
|
Recommended Items |
List of items recommended for this customer based on the current list of items in the transaction. |
|
Gift Lists |
Sub-tabs are displayed based on the gift lists available for the retailer. Based on the sub-tab selected, the items available for that list appear. |
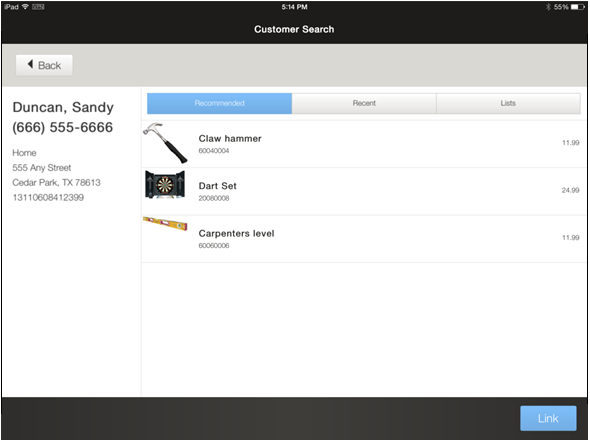
Figure 12-44 shows an example of the Customer Search page with tabs.
When available, Mobile Point-of-Service displays the following types of extended data:
If available, you can view supplemental customer data to better understand the customer's preferences, purchase history, gift lists, and so on. The customer extended data is retrieved from a data source external to Mobile Point-of-Service. Extended customer data could include recently viewed items, lists created by the customer such as gift or wish lists, or recent purchases.
If available, you can view supplemental item data to provide additional information to the customer. Extended item data is retrieved from a data source external to Mobile Point-of-Service. Extended item data can include a detailed item description and recommended items.
If available, you can view item recommendations for the linked customer. The list of items is built based on the items in the transaction. If the list of items is changed, the displayed list is updated based on the updated transaction.
On the Basket page, items from the list of recommended items can be added to the transaction. To add a recommended item to the transaction:
Select the item in the Recommended Items list. The Item Display dialog appears.
To add that item to the transaction, tap Add. The item is added to the list on the Basket Page. You are returned to the Basket Page.
All transactions begin on the Basket page. A transaction is started when an item number is entered on the Basket page. You can enter an item number by scanning the bar code or entering the item number manually.
After all items have been added, the payment process begins. A customer can pay with multiple tenders. The transaction completes when the balance is zero. To tender a transaction on the tablet, two options are available:
Tender on the tablet using a credit card, debit card, or gift card.
If the customer wants to use any other tenders, suspend the transaction and complete the payment process at a register.
For more information on transactions, see the following sections:
To begin a transaction, tap New Transaction. The Basket page appears.
To add an item to a transaction:
Scan the item number or enter the item number manually. To enter the item number manually:
Tap the plus sign (+) at the upper-right corner. The Add Item dialog appears.
Enter the item number and tap Add Item.
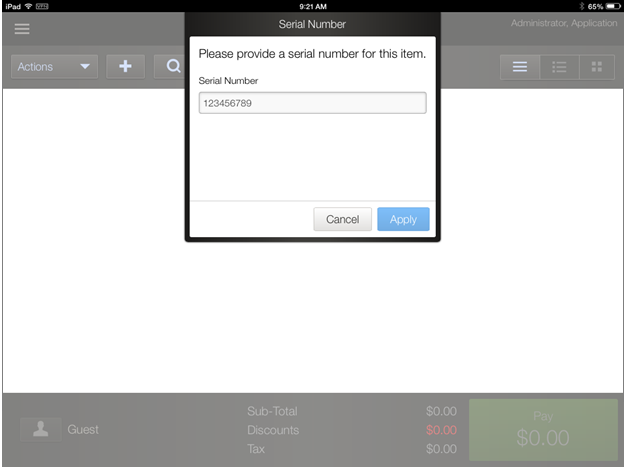
If the item being added to the transaction requires a serial number, the Serial Number dialog appears.
Scan or enter the serial number and tap Apply.
If the serial number is valid, the item is added to the transaction.
If the serial number is not valid, the Add Serial Number page appears:
To add the serial number to the system, tap Add Serial Number. The item is added to the transaction.
To not add the serial number and not add the item to the transaction, tap Back.
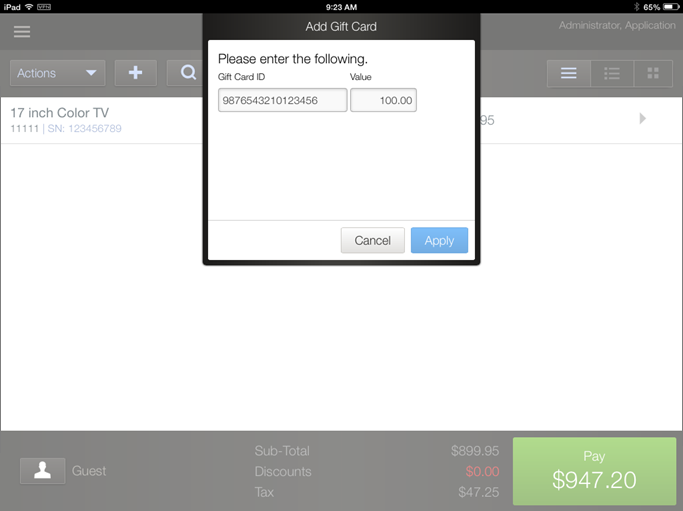
If the item is a gift card and a gift card number is needed, the Add Gift Card dialog appears.
Enter the gift card number and value. Tap Apply. The gift card item is added to the transaction. When the transaction is completed, the gift card is activated.
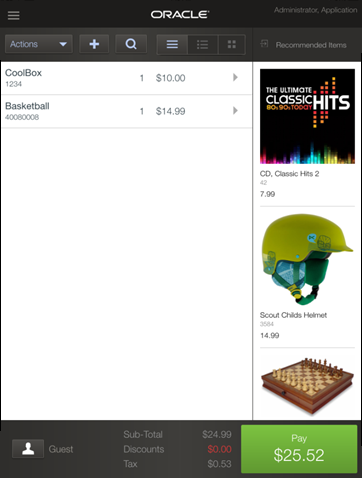
Figure 12-49 shows the Basket page with multiple items added.
For information on the functionality available on this page, see the following sections:
To view detailed information for an item, see "Viewing Detailed Item Information on the Tablet".
To modify an item, see "Modifying an Item on the Tablet".
To modify the transaction, see "Modifying the Transaction on the Tablet".
To tender the transaction, see "Tendering a Transaction on the Tablet".
To return items, see "Performing a Return on the Tablet".
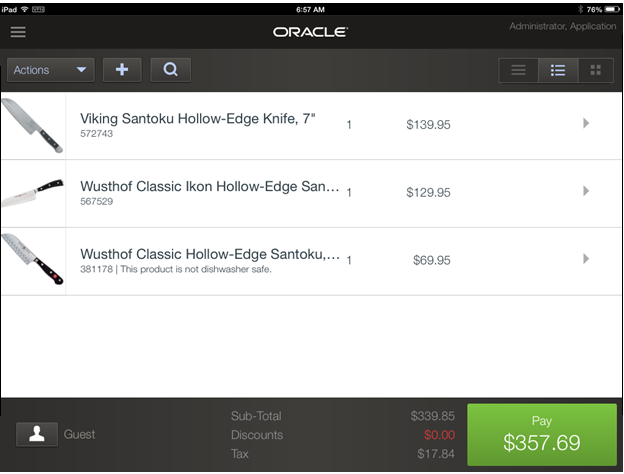
Three views are available for the items on the Basket page. To change the view, you tap the appropriate icon on the upper right side of the page:
The first icon shows the list of items as shown in Figure 12-49.
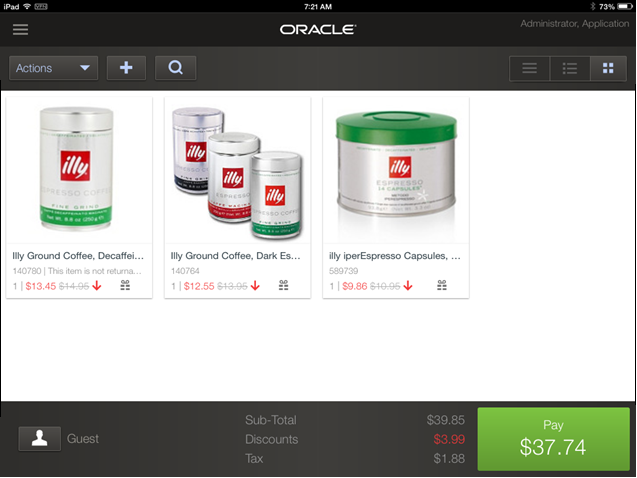
The second icon show the list of items that includes a tile with a picture of the item if a picture is available.
The third icon shows a detailed view of the items.
If an item image is available, the image appears. The name of the item, price, quantity, applied discounts, linked sales associate, and any item-level messages appear.
Some aspects of a transaction, for example, special pricing, require a customer to be linked to the transaction. For information on the benefits and requirements for linking a customer, see Chapter 4.
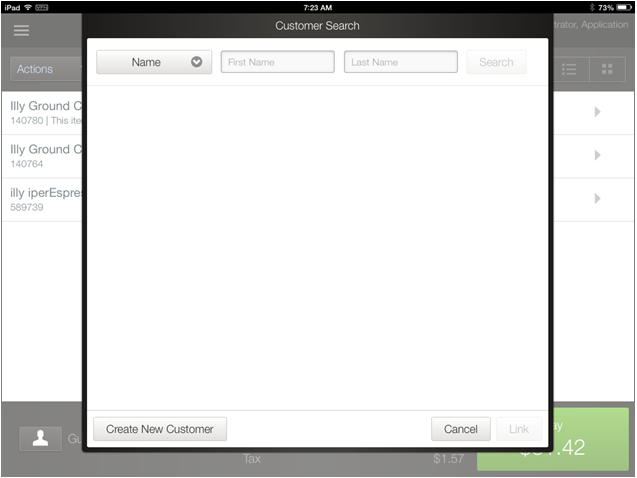
To link a customer to the transaction:
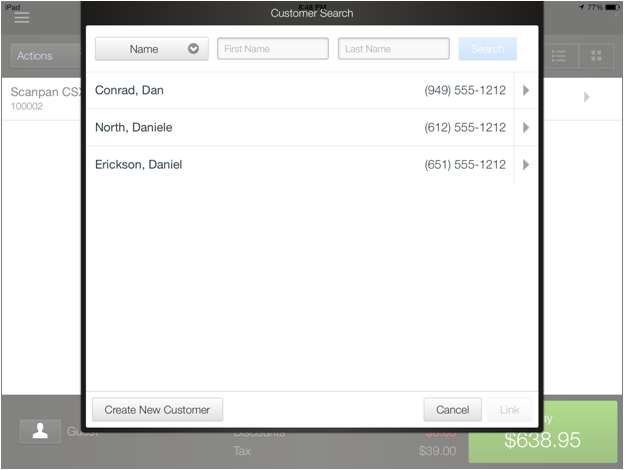
Tap the customer icon on the Basket page. The Customer Search dialog appears.
To search for a customer:
Enter the customer ID or customer information and tap Search. If one match is found, that customer is linked to the transaction. If more than one match is found, the Customer Search dialog is updated with the list of customers who match the search criteria.
Tap the customer you want to link to the transaction and tap Link.
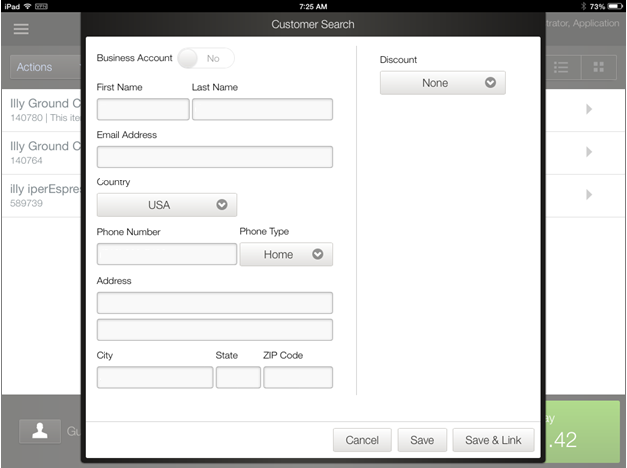
To add a customer:
Tap Create New Customer. The Customer Search dialog is updated with the input fields. Select whether this is a business account. Enter the customer information.
To save the customer, tap Save. To save and link the customer to the transaction, tap Save & Link.
If matches are found for the customer information, the Customer Search page appears with the list of customers that matched the customer information. Select a customer from the list. Tap the customer you want to link to the transaction and tap Link.
After all items for a transaction have been added, you can tender the transaction. To tender a transaction on the tablet, two options are available:
Tender on the tablet using a credit card, debit card, or gift card.
Suspend the transaction and tender at a register. To suspend the transaction, see "Suspending a Transaction on the Tablet".
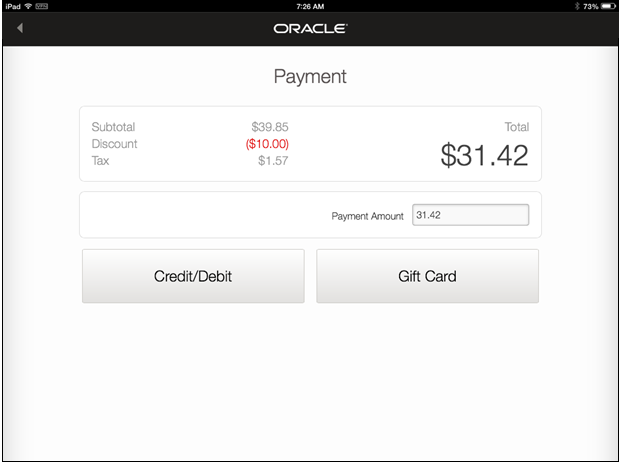
To tender a transaction:
Tap Pay on the Basket page. The Payment page appears.
Enter the payment amount.
To tender with a credit card or debit card, tap Credit/Debit. To tender with a gift card, tap Gift Card.
|
Note: A gift card has to be activated before it can be used as a tender. |
Swipe the card on the pin pad. The authorization process begins automatically.
Handle the result of the authorization:
|
Note: If the card is not approved, follow the prompts to handle the reason for the non-approval. |
If the authorization is approved for a credit card or debit card:
If the balance is zero for the transaction, the customer is prompted to provide a signature on the pin pad. When the customer completes providing the signature, the Receipt page appears. See "Printing a Receipt on the Tablet".
If there is a balance remaining for the transaction, the customer is prompted to provide a signature on the pin pad. When the customer completes providing the signature, the Payment page appears so you can process the next tender. See Step 2.
If the authorization is approved for a gift card:
If the balance is zero for the transaction, the Receipt page appears. See "Printing a Receipt on the Tablet".
If there is a balance remaining for the transaction, the Payment page appears so you can process the next tender. See Step 2.
To modify an item, tap the item on the Basket page. The Modify Item Page appears.
To modify the item, you can do the following:
To increase the quantity, tap the up arrow for the Quantity. To decrement the quantity, tap the down arrow.
To apply a discount to the item, see "Applying a Discount to an Item on the Tablet".
To link the sales associate to the item, see "Modifying the Sales Associate on the Tablet".
To apply a damage discount to the item, see "Applying a Damage Discount to an Item on the Tablet".
To override the current price of the item, see "Overriding the Price on the Tablet".
To include a gift receipt for the item, set the field to Yes. Otherwise, set the field to No.
To add pickup for an item, see "Adding Pickup for an Item on the Tablet".
To add shipping for an item, see "Adding Shipping for an Item on the Tablet".
To close the options, tap Back.
You can apply both a discount amount and percent. To apply a discount to an item:
On the Modify Item page, tap Item Discount. The Item Discount dialog appears.
To apply a price discount, enter a discount amount. Tap the Select Reason field and select a reason code for the discount amount.
To apply a percent discount, enter a discount percent. Tap the Select Reason field and select a reason code for the percent.
Tap Apply. The price of the item is changed. You are returned to the Modify Item page.
To change the sales associate linked to an item:
On the Modify Item page, tap Sales Associate. The Sales Associate ID dialog appears.
Enter the sales associate user name and tap Apply. The linked sales associate is changed. You are returned to the Modify Item page.
You can apply both a damage discount amount and percent. To apply a damage discount to an item:
On the Modify Item page, tap Damage Discount. The Damage Discount dialog appears.
To apply a discount amount, enter a discount amount.
To apply a discount percent, enter a discount percent.
Tap Apply. The price of the item is changed. You are returned to the Modify Item page.
To override the current price of the item:
On the Modify Item page, tap Price Override. The Price Override dialog appears.
Enter the new price.
Tap the Select Reason field and select a reason code for the override.
Tap Apply. The price of the item is changed. You are returned to the Modify Item page.
A customer wants to arrange store pickup for an ordered item.
To add pickup for an item:
On the Modify Item page, tap Pickup. The Pickup Options dialog appears.
Select the store for the pickup:
To search for a store, tap Store Search. Enter the search criteria and tap Next. The Pickup Options dialog is updated with the stores matching the criteria.
Select a store from the list. Tap Next. The Customer Information dialog appears.
Collect the customer information:
Enter the customer information and tap Next.
To search for a customer, tap Search. For information on searching for a customer, see "Linking a Customer to the Transaction on the Tablet".
The Pickup Date dialog appears.
Enter the pickup date and tap Next. The Scan Items page appears. An icon is added to the item line to indicate it is a pickup item.
A customer may want to arrange shipment for an ordered item.
To add shipping for an item:
On the Modify Item page, tap Ship. The Shipping Information dialog appears.
Collect the customer information:
Enter the customer information and tap Next.
To search for a customer, tap Search. For information on searching for a customer, see "Linking a Customer to the Transaction on the Tablet".
To ship to a store, tap Ship to Store. The Ship to Store Options dialog appears:
To search for a store, tap Store Search. Enter the search criteria and tap Next. The Ship to Store Options dialog is updated with the stores matching the criteria.
Select a store from the list and tap Next.
The Shipping Method dialog appears.
Set the shipping method:
Select how the item is shipped. The shipping charge is updated.
If you manually change the shipping charge, select a reason code.
Enter any special instructions.
Tap Done.
If a tax ID needs to be selected, the Multiple Geo Codes dialog appears. Select the tax ID and tap Done. The Scan Items page appears. An icon is added to the item line to indicate shipping is selected for the item. An item is also added for the shipping charge.
Once items have been added to a transaction, you can modify the transaction.
To make changes to the entire transaction, tap Actions on the Basket page. The modify transaction options appear.
Tap the transaction option to be changed:
To add a gift receipt for the transaction, tap Transaction Gift Receipt. One gift receipt is printed for all the items in the transaction when the transaction is completed.
To apply a discount to the transaction, see "Applying a Discount to the Transaction on the Tablet".
To change the sales associate linked to the transaction, see "Modifying the Sales Associate on the Tablet".
To suspend the transaction, see "Suspending a Transaction on the Tablet".
To cancel the transaction, see "Cancelling a Transaction on the Tablet".
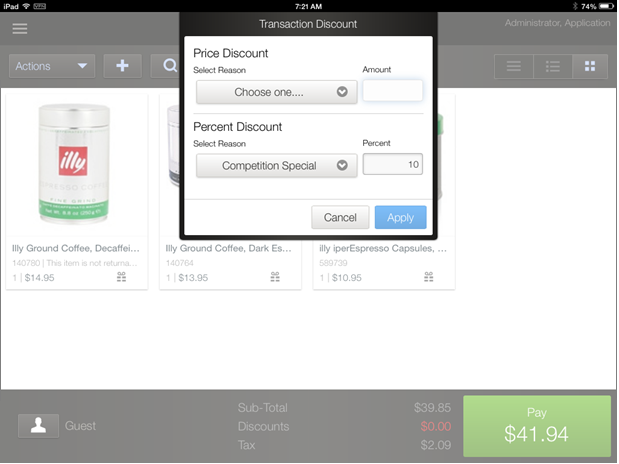
You can apply both a discount amount and percent. To apply a discount to the transaction:
On the Modify Transaction page, tap Transaction Discount. The Transaction Discount dialog appears.
To apply a price discount, enter a discount amount. Tap the Select Reason field and select a reason code for the discount amount.
To apply a percent discount, enter a discount percent. Tap the Select Reason field and select a reason code for the percent.
Tap Apply. The discount is applied to the transaction. You are returned to the Modify Transaction page.
To change the sales associate linked to the transaction:
On the Modify Transaction page, tap Change Sales Associate. The Sales Associate dialog appears.
Enter the sales associate number and tap Apply. The sales associate linked to the transaction is changed. You are returned to the Modify Transaction page.
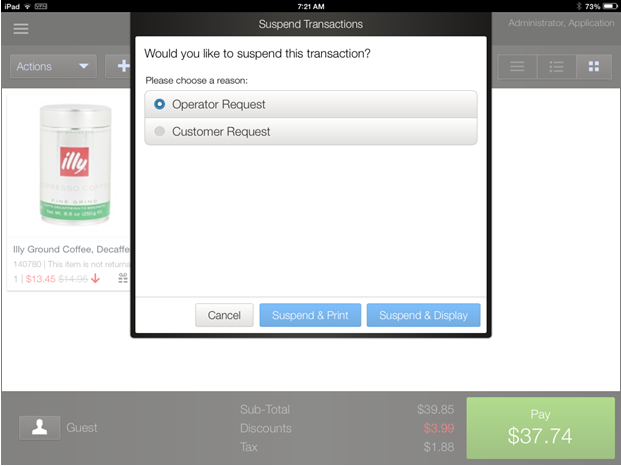
Suspend a transaction if it is interrupted or cannot be completed, such as when the customer offers a tender not supported on the tablet. A suspend transaction receipt prints, which the customer takes to a register to complete the transaction.
To suspend a transaction:
On the Modify Transaction page, tap Suspend Transaction. The Suspend Transaction dialog appears.
Tap the reason code you want to choose.
Complete suspending the transaction:
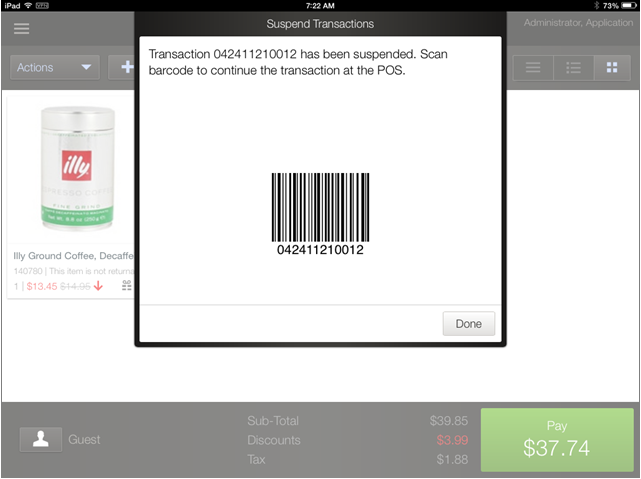
To suspend the transaction and display the transaction ID, tap Suspend & Display. The Suspended Transaction dialog appears. When done viewing the page, tap Done.
To suspend the transaction and print a receipt with the transaction ID, tap Suspend & Print. A suspended transaction receipt prints. The Receipt page appears with the location where the receipt is printing. See Figure 12-62.
To return to the previous page without suspending the transaction, tap Cancel.
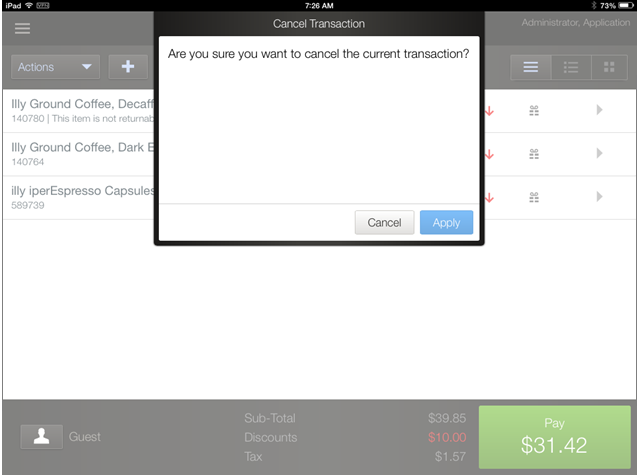
You can cancel the transaction in-progress from any page where the Cancel icon appears. To cancel a transaction, tap Cancel Transaction. The Cancel Transaction dialog appears.
To cancel the transaction, tap Apply. The transaction is ended and the Basket page appears.
To return to the previous page, tap Cancel. You can continue with the transaction.
Some items cannot be handled on the tablet. For example, if an item has an age restriction, the age information must be entered at a register. If an item is scanned that requires processing at a register, the Cannot Process Item page appears:
To delete the item and continue with the transaction, tap Continue. The Basket page appears.
To suspend the transaction so the item can be processed at a register, tap Suspend. See "Suspending a Transaction on the Tablet".
To cancel the transaction, tap Cancel. See "Cancelling a Transaction on the Tablet".
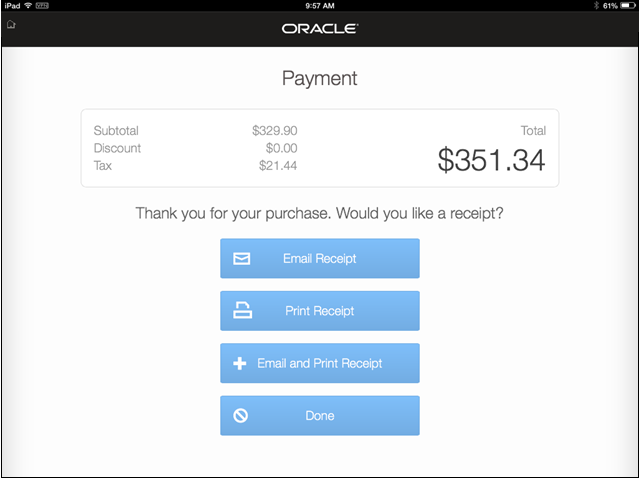
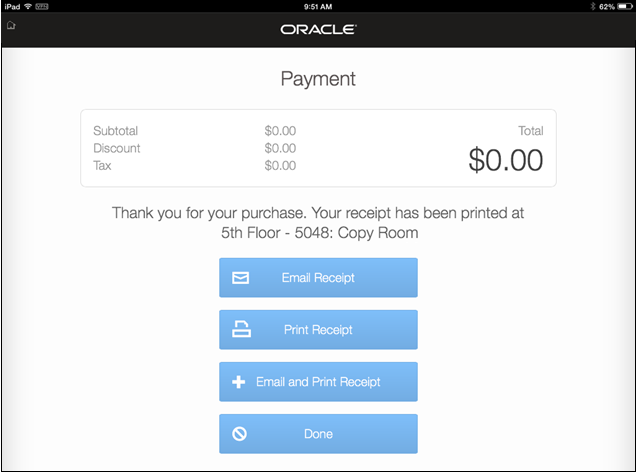
When payment for a transaction is completed, the Receipt page appears.
Select how you want to handle the receipt:
To print the receipt at a network printer, tap Print Receipt. The receipt is printed.
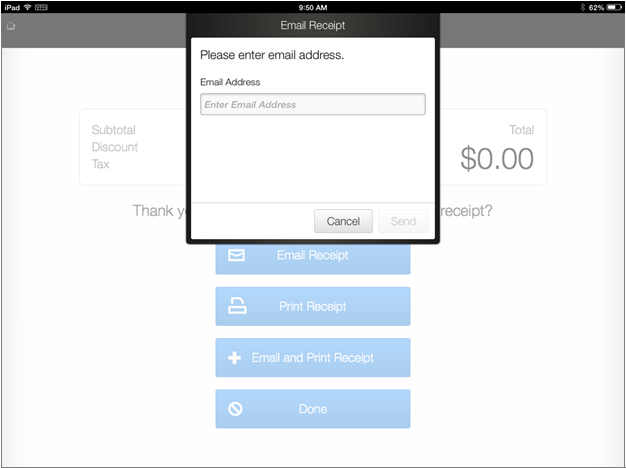
To send the receipt in an email to the customer, tap Email Receipt. The Email Receipt dialog appears. Enter the email address for the customer and tap Send. If an invalid address is entered, an error message appears. You can enter another email address. To return to the Receipt page to choose another option, tap Cancel.
To both print the receipt an send it in an email, tap Email and Print Receipt. The location where the receipt is printing appears. The Email Receipt page appears. Enter the email address for the customer and tap Send. If an invalid address is entered, an error message appears. You can enter another email address. To return to the Receipt page to choose another option, tap Cancel.
When you have completed processing the receipt, the page is updated:
If the receipt is printed, the location where the receipt was printed is shown.
If the receipt is sent in an email to the customer, the email address is shown.
If the customer does not want a receipt or you are done processing the receipt, tap Done.
|
Note: You can only reprint the receipt for the last transaction. |
To reprint a receipt for the last transaction, tap Print Last Transaction on the Basket page. The Print Last Transaction dialog appears. To reprint the receipt, tap Print Last Transaction. The location where the receipt printed is shown.
To perform an item lookup:
On the Home or Basket page, tap Item Lookup. The Item Lookup page appears.
To search for an item:
Enter the search criteria and tap Search:
To perform an Advanced Search, tap Advanced Search. The Advanced Search dialog appears. Enter the search criteria and tap Search.
Select the item from the list of items returned from the search:
If one item is found that matches the search criteria, the Item Information page appears. The page is updated with the available item information, such as, item number, description, price, available quantity at the current store, and buddy stores with available quantity. If you do multiple searches, drag your finger across the page to view previous results.
If multiple items are found, the Item Search Results page appears:
To display the information for a specific item, tap the item. The Item Information page appears.
To filter out items from the displayed list, tap Filter. The Filter dialog appears. Select the search criteria and tap Search. The Filtered Items page appears.
To display the information for a specific item, tap the item. The Item Information page appears. To filter the list further, tap Filter.
On the Item Information page, you can perform the following functions:
To add the item to the current transaction, tap Add. The Basket page appears with the item added to the transaction.
To return to the previous page, tap Back.
You can look up the price of an item on a gift receipt.
To look up the price of an item:
On the Basket page, tap Gift Code Lookup. The Gift Code Lookup dialog appears.
Scan, swipe, or enter the gift code number and tap Lookup. The price of the item appears.
When you are done viewing the result, tap Close to return to the Basket page.
You can look up the balance remaining on a gift card.
To look up the balance on a gift card:
On the Basket page, tap Gift Card Balance. The Gift Card Balance dialog appears.
Scan, swipe, or enter the gift card number and tap Lookup Balance. The gift card balance appears.
When you are done viewing the results, tap Close to return to the Basket page.
Return enables the customer to return merchandise for an exchange or refund. Customer information and a personal ID may be required for the return.
Items can be returned without receipts. These returns can be done by using the item number or by searching for the transaction. Transactions in which the items were purchased can be searched by order ID, customer, purchase date, store number, credit/debit card number, gift card number, or serial number.
If Oracle Retail Returns Management was purchased and implemented, it may be used to authorize the return of the items the customer wants to return. When Oracle Retail Returns Management is used, only the following personal IDs are supported:
Driver's License
Passport
Military ID
State/Region ID
For more information on Oracle Retail Returns Management, see the Oracle Retail Returns Management User Guide.
On the Basket page, tap Return. The Return page appears. A return can be performed if a receipt is available, a receipt is not available, or a gift receipt is available. Each of these options is described in the following sections.
To perform a return transaction with a receipt available:
Enter the receipt information or scan the receipt barcode to enter the information. Tap Continue. The Basket page appears.
Tap each item to be returned and tap Continue. The Return Item Info dialog appears.
Enter the item return information. Select a return reason and item condition from the menus. Tap Continue.
If the item is not returnable, a dialog message appears and you are returned to the Basket page. See Step 3.
An item to be returned may have a restocking fee. To accept the restocking fee, select Yes. To decline the restocking fee, select No.
If a customer ID is required for the return, the Customer Options dialog appears.
Enter a customer ID to link to the transaction or choose a customer option.
If a personal ID is required for the return, the Personal ID Entry dialog appears.
Enter the customer name. If a customer is already linked to the transaction, that information appears in the dialog. Enter the ID number and select the ID type from the menu. Select the ID country and ID state from the menus. Tap Continue. You are returned to the Basket page.
Tap Tender. If returns are being authorized by Oracle Retail Returns Management and any items are not authorized for return, the Return Response dialog appears. Otherwise, the Refund Options dialog appears. See Step 12.
For each item, the following information is shown:
Table 12-5 Return Response Columns
| Column | Description |
|---|---|
|
Response |
The response returned from authorization and the reason for the response. The following responses may be displayed:
|
|
Description/Item |
Item description and number. |
|
Qty |
Quantity. |
|
Ext Price |
Extended price. This is the price for the total quantity being returned. |
Handle any items that were not authorized for return:
To approve the return of any items with a response of Manager Overridable Denial or Contingent Authorization, select the items and tap Manager Override. The response for the items is changed to Approved.
To accept the authorized and approved items for return, tap Continue. The Refund Options dialog appears.
Select a refund option and tap Next. The Issue Refund dialog appears.
If eReceipt is enabled, you are prompted to select a receipt option. Otherwise, the receipt prints. You are returned to the Basket page.
You can perform a return by searching for the transaction. There are several search options available:
Search for a transaction using the order ID
Search for a transaction using the customer information
Search for a transaction using the purchase date
Search for a transaction using the store number
Search for a transaction using the credit, debit, or gift card number
Search for a transaction using the item serial number
When searching using the customer, the search can be done using the customer ID number or the Cust. Search Options dialog.
To return an item by searching for the transaction:
Tap Search on the Return Options dialog.
Choose the type of search. For more information, see the following sections:
A transaction can be searched for using the order ID for an item.
To search for a transaction using the order ID:
Tap Order. The Order Search page appears.
Enter an order number or select the type of order search:
To search by customer, tap Customer. The Order Search by Customer dialog appears.
To search by credit card, tap Credit Card. The Credit/Debit Search dialog appears.
Enter the required information and tap Continue. If transactions are found for the order, the Return dialog appears. To complete the return, see Steps 2 through 12 in "Performing a Return with a Receipt on the Tablet".
This page has multiple options through which a transaction can be searched. They are Customer ID, Employee ID, Customer Information, Business Information, and Tax ID. Each of these options has a different flow.
If Cust. ID is tapped, the Search by Customer ID dialog appears. Enter the customer ID and tap Continue. The Customer Information dialog appears. Tap Link. The Display Trans dialog appears. Select a transaction number and tap Continue. The Return dialog appears. To complete the return, see Steps 2 through 13 in "Performing a Return with a Receipt on the Tablet".
If Emp ID is tapped, the Search By Emp. ID page appears. Enter the employee ID and tap Continue. The Customer Information dialog appears. To complete the return, see the previous section on searching using Customer ID.
If Cust. Info or Business Info is tapped, the Search By Customer Info dialog appears. Enter the required information and tap Continue. The Customer Information dialog appears. To complete the return, see the previous section on searching a transaction using Customer ID.
If Tax ID is tapped, the Search by Tax ID dialog appears. Enter the tax ID and tap Continue. The Customer Information page appears. To complete the return, see the previous section on searching a transaction using Customer ID.
Transactions can be searched for using the purchase date if no receipt is available. A customer must be linked to the transaction in order to complete a search by purchase date.
To search for a transaction using the purchase date:
Tap Purchase Date. The Purchase Date dialog appears.
Enter the start and end dates and tap Next. The Customer Options dialog appears.
Tap Find. The Cust. Search Options dialog appears. See "Searching for a Transaction Using Customer Information" to complete the return.
Transactions can be searched for using the store number where it was purchased if no receipt is available. A customer must be linked to the transaction in order to complete a search by store number.
To search using the store number:
Tap Store Number. The Store Number dialog appears.
Enter the store number and Tap Continue. The Customer Options dialog appears.
Tap Find. The Cust. Search Options page appears. See "Searching for a Transaction Using Customer Information" to complete the return.
A transaction can be searched for using the credit or debit card that was used to tender the transaction.
|
Note: A transaction can also be searched for by the gift card used to tender the transaction. The Gift Card Search dialog appears instead of the Credit/Debit dialog. |
To search for a transaction using the credit/debit card number:
Tap Credit/Debit.
You are prompted to ask the customer to swipe their card. If the card is not successfully swiped, you are prompted to search by partial card number. If you select Yes, the Credit/Debit Search dialog appears.
Enter the required information and tap Next. If transactions are found for the card, the Return dialog appears. To complete the return, see Steps 2 through 12 in "Performing a Return with a Receipt on the Tablet".
A transaction can be searched for using the serial number for an item.
To search for a transaction using the serial number:
Tap Serial Number. The Serial Number Search dialog appears.
Enter the required information and tap Continue. If transactions are found for the serial number, the Return dialog appears. To complete the return, see Steps 2 through 12 in "Performing a Return with a Receipt on the Tablet".
To return items without a receipt by using the item numbers:
Tap No Receipt on the Return Options page. The Return Without Receipt dialog appears.
Enter the item number to be returned and tap Continue.
If the item does not exist, you may be prompted to search the webstore for the item.
If the item is found, select the item and tap Continue.
The Return Item Info dialog appears. To complete the return, see Steps 3 through 12 in "Performing a Return with a Receipt on the Tablet".
Returns can also be performed using the gift receipt. To make a return using a gift receipt, tap Gift Receipt on the Return page. The Receipt Info dialog appears. To complete the return, see Steps 3 through 12 in "Performing a Return with a Receipt on the Tablet".
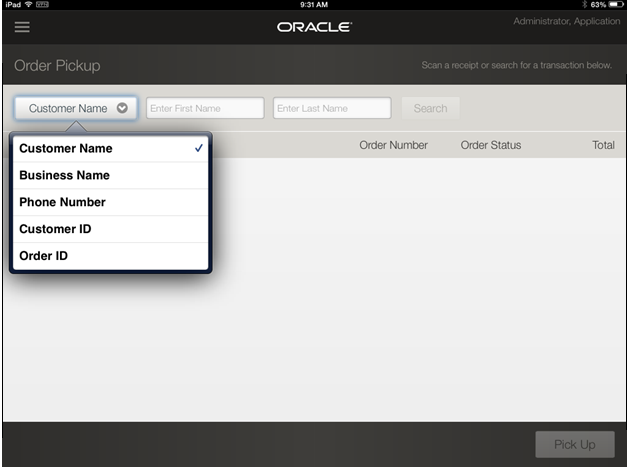
Orders that have been placed at a register or created at a web site, can be filled on a mobile device. To fill an order to be picked up:
On the Basket page, tap Order Pickup. The Order Pickup page appears.
Scan the order receipt, enter the order ID, or enter the customer information to search for the order. The Order Pickup page appears with the list of available orders matching the search information.
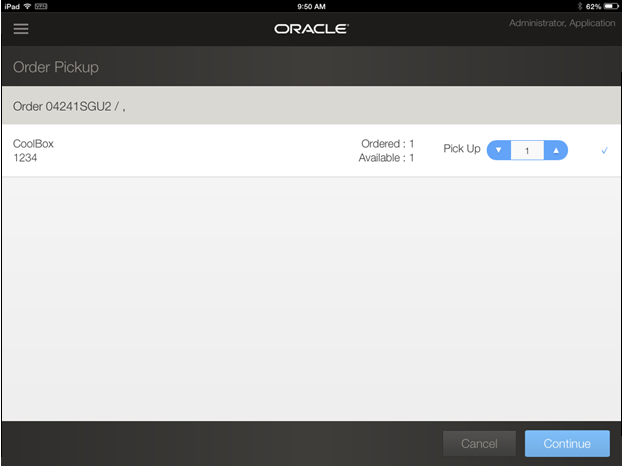
To select an order for pick up, tap the order.
Select the quantity in the Pick Up field. To increase the quantity, tap the up arrow. To decrease the quantity, tap the down arrow.
When you have completed filling orders, tap Continue. You are returned to the Basket page.
If the customer has additional items to purchase, add those items to the transaction.
You can resume sale transactions that have been suspended on a mobile device or at a register. To resume a suspended sale transaction:
On the Basket page, tap Resume Transaction. The Suspended Transaction page appears.
Select the transaction:
Scan or enter the transaction number and tap Resume.
If more than one transaction is listed, tap the transaction to be retrieved and tap Resume.
The suspended transaction is resumed. The transaction details appear on the Basket page. You can complete, change, or cancel the transaction.