3 Organizing Your WebCenter Spaces Environment
The WebCenter Spaces application provides many opportunities for changing its environment to suit your personal working style. These include changing the display language, managing your application password, and rearranging your view of page content. All of these options are personalizations, that is, they affect only your view of the application. All other users' views remain unchanged.
This chapter steps you through these and other personalizations. It contains the following sections:
This chapter is intended for users who want to optimize their WebCenter Spaces environment for their personal use. This includes selecting a display language, providing application login information, and arranging content on the page. This chapter is also intended for users who want a better understanding of the Sidebar.
The WebCenter Spaces application administrator has the authority to expose or hide a particular service's task flows. Tasks discussed in this chapter are not available to you if the relevant service is hidden.
3.1 What You Should Know About Organizing Your Environment
Personalizations are yours and yours alone. That is, the personalizations you set through the procedures described in this chapter affect only your view of WebCenter Spaces. No other users are affected by your changes.
For example, when you specify a default language, the language you select applies only to your view of the application. Other users may select different preferred languages, and their selections do not affect your view—only their own.
Note:
For more information about specifying a default language for your view of WebCenter Spaces, see Section 3.3.1, "Choosing Your Preferred Display Language."3.2 Viewing and Revising Personal Profiles
Personal profiles contain useful information about WebCenter Spaces users, including where they work, what they do, and how to contact them. Information for personal profiles comes from the back-end identity store that provides your WebCenter application, and likely your other enterprise applications, with user information management.
Depending on access granted by your application administrator, part or all of your personal profile is editable. Potentially you can upload a profile picture and revise the personal and business information that is exposed through your personal profile. This section describes how. It contains the following subsections:
3.2.1 Viewing Your Personal Profile
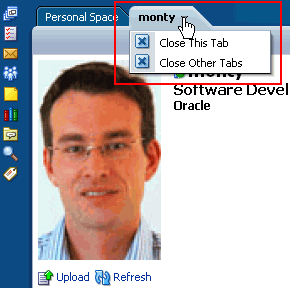
To view your personal profile, click your user name at the top of the application (Figure 3-1).
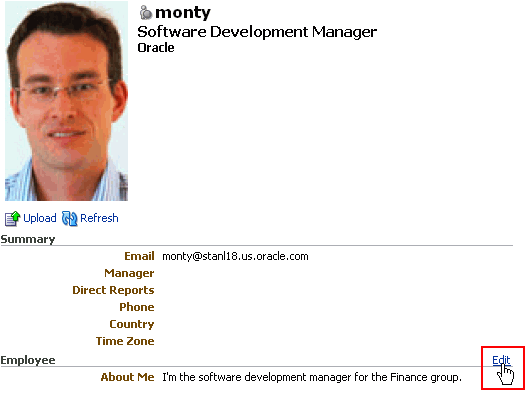
Your personal profile page opens (Figure 3-2).
To close your profile, select Close This Tab from the page's actions menu (Figure 3-3).
Note:
For information about the actions menu available on page tabs, see Section 2.5, "Initiating Actions from Tabs."3.2.2 Viewing Another User's Profile
To view another user's profile:
-
Log in to WebCenter Spaces.
For information about logging in, see Section 2.2.1, "Logging In to a WebCenter Application."
-
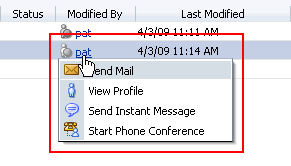
Within the application user interface, locate and click the user name or status icon of the user whose profile you want to view.
This opens the presence context menu (Figure 3-4).
Note:
For more information about user status icons and the presence context menu, see Section 22.2.1, "Viewing the Status of Other Users." -
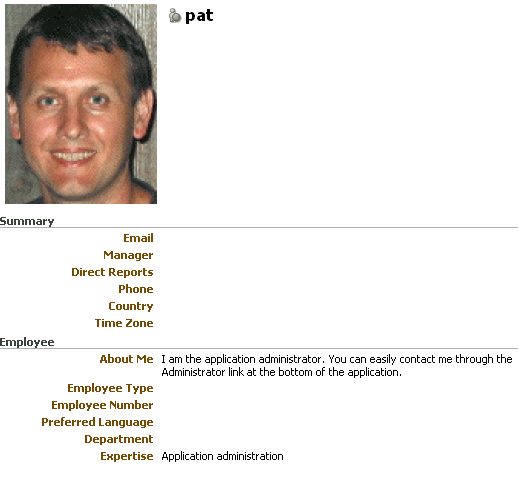
Select View Profile.
The selected user's profile opens (Figure 3-5).
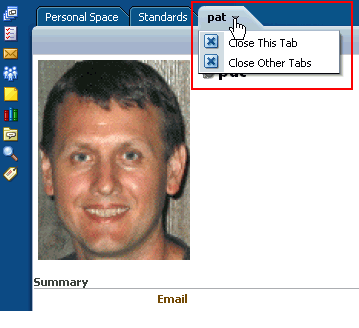
To close the profile, select Close This Tab from the page's actions menu (Figure 3-6).
3.2.3 Editing Your Personal Profile
WebCenter Spaces gives your application administrator discretion over how much of your personal profile you may revise. Wherever you have permission to revise a profile section, an Edit link displays to the right of the section name (Figure 3-7).
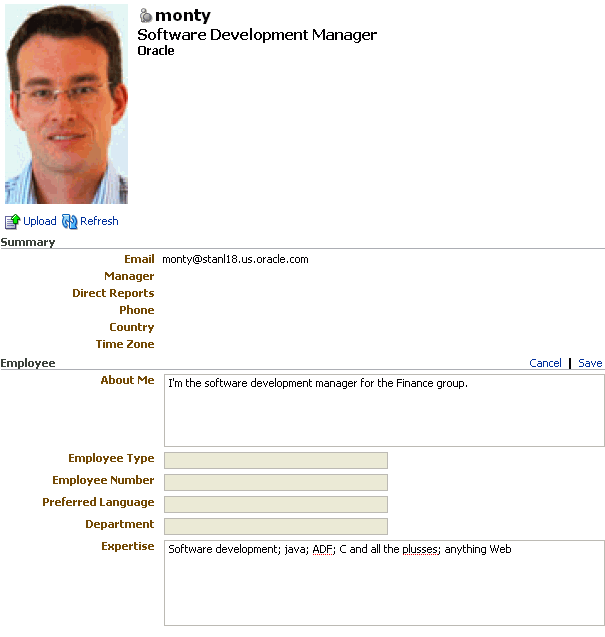
Click this link to open an edit view of your personal profile (Figure 3-8).
Make your changes, and click Save.
To close the profile, select Close This Tab from the page's actions menu (Figure 3-9).
3.2.4 Uploading and Updating a Personal Profile Picture
Any user with a personal profile can upload an image file to his or her own profile, or update an existing image. This section describes how.
Note:
The file must have the mime-type image, and cannot have the extension*.ico.To upload or update a personal profile image:
-
Click you user name at the top of the application (Figure 3-1).
Your personal profile page opens (Figure 3-11).
-
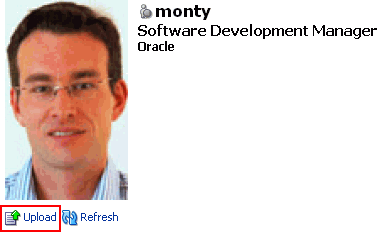
Click the Upload link in your personal profile (Figure 3-12).
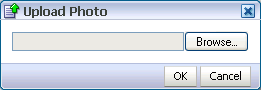
An Upload Photo dialog box opens (Figure 3-13).
-
Click the Browse button to locate and select a photo.
-
Click OK to compete the upload.
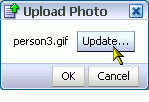
When you update your profile photo, additional dialog boxes come into play. When you click the Upload link, the Upload Photo dialog box opens, displaying the name of the current file along with an Update button (Figure 3-14).
Click Update to open the Upload Photo dialog box depicted in step 2. Follow steps 3 and 4, and then click OK in the Upload Photo (Update) dialog box.
To close your profile, select Close This Tab from the page's actions menu (Figure 3-3).
3.3 Setting Personal Preferences
WebCenter Spaces Preferences provide easy configuration settings for tailoring your application environment to your particular working style. These include settings for your preferred application display language; your preferred application look and feel; your WebCenter Spaces password; the passwords you use to access additional applications, such as your mail or useful enterprise software; and your preferred order for search results. Additionally, WebCenter Spaces Preferences provide an accessibility setting to optimize the application user interface for use with a screen reader, such as JAWS.
Preferences settings affect your view of the entire WebCenter Spaces application. For example, the preferences you set for search results affect all searches, and not just the searches you run from a particular group space. The preferences you set for language affect all translated strings in the application user interface.
This section describes how to specify your personal WebCenter Spaces Preferences. It contains the following subsections:
3.3.1 Choosing Your Preferred Display Language
The application display language controls the language in which application user interface (UI) elements are rendered in your browser. UI elements include such things as button and field labels, application links, screen text, and the like.
On the Internet, your browser settings normally control the display language used for the various Web sites you visit. Browser settings additionally control the display language used the first time you visit your WebCenter Spaces application. Even as a public user—that is, a user who is not logged in to WebCenter Spaces—you have a choice between staying with your browser display language or using a session language that you specify.
In addition to a session-specific language, WebCenter Spaces provides controls for setting an application-level default display language and a personal, preference-based default display language. The order of precedence for display language settings determines the display language the application uses. The order of precedence of application display language settings from weakest to strongest is as follows:
-
Browser setting
-
Application-level setting
-
Preference-level setting
-
Session-level setting
You set browser-level language setting according to your browser requirements. Your WebCenter Spaces administrator sets the application-level language default. This section provides information about preference- and session-level language settings. It contains the following subsections:
3.3.1.1 What You Should Know About Display Languages in WebCenter Spaces
WebCenter Spaces provides two types of application display language: default language and session language. A session language is retained for the life of the session cookie that is generated after you make a selection. If you clear browser cookies, the session language is also cleared and the default language takes over or, absent a default language, the application display language selected by your WebCenter Spaces administrator.
In contrast, a default language selection lasts until you specify a different default language. It can be overridden by a session language, but returns as the default when the session cookie is purged or expires.
You specify default and session language selections from different locations:
-
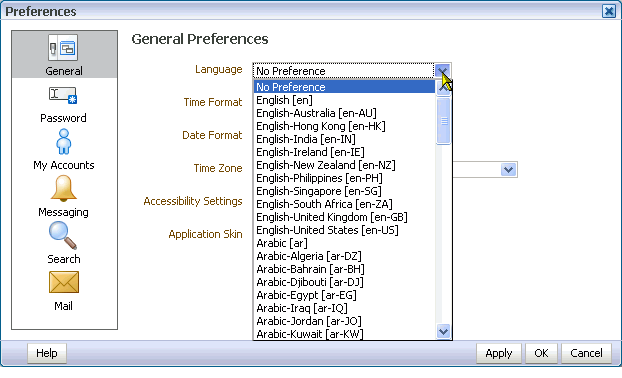
Set a default language using the General panel in the Preferences dialog box (Figure 3-16).
Figure 3-16 General Panel in the Preferences Dialog Box
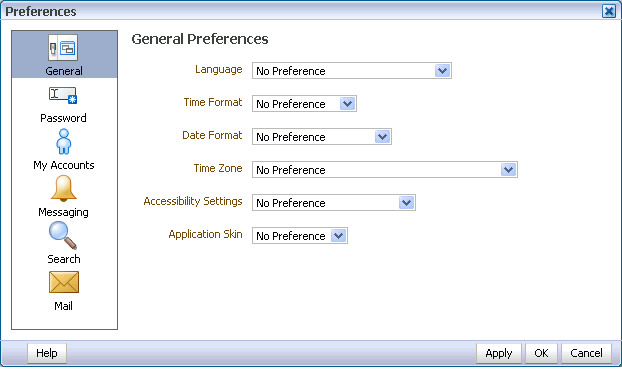
Description of "Figure 3-16 General Panel in the Preferences Dialog Box"
-
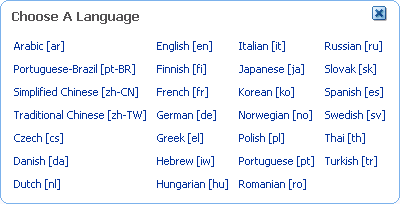
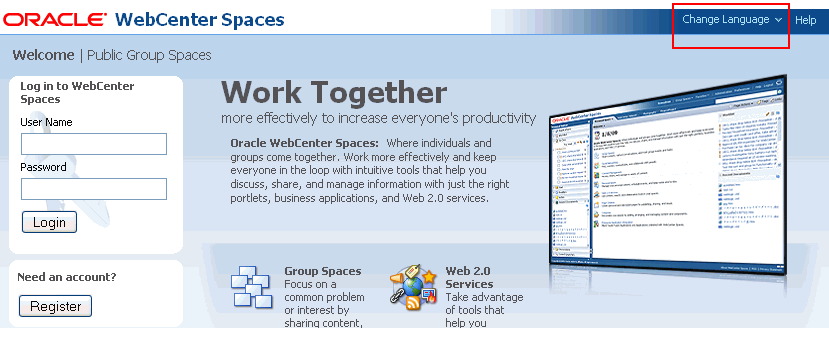
Set a session language using the Choose A Language popup on the application Welcome page (Figure 3-17).
The application Welcome page is on view when you first access WebCenter Spaces, before you log on.
When you set a language and your preferred locale in WebCenter Spaces, you are specifying the language and the locale to use for all elements of WebCenter Spaces' native user interface (UI). This includes application links, field labels, display text, message text, and dialog boxes.
WebCenter Spaces provides runtime translations for 27 languages and 100 different locales. For example, change your language to Arabic, and within that language group, select from 20 different locales, including Algeria, Bahrain, Djibouti, and so on. Table 3-1 lists the display language translations available for the WebCenter Spaces application.
Table 3-1 Display Language Translations Available for the WebCenter Spaces UI
| A to Fi | Fr to No | Po to Tu |
|---|---|---|
|
|
|
Note:
The administrative tier that offers services to WebCenter Spaces, including such tools as Oracle Enterprise Manager, provides a subset of the languages available to WebCenter Spaces. These include:-
English
-
Brazilian Portuguese
-
Chinese (Simplified)
-
Chinese (Traditional)
-
French
-
German
-
Italian
-
Japanese
-
Korean
-
Spanish
Out-of-the-box, the Jive application bundled with WebCenter supports English and Spanish. It does not support other languages listed in Table 3-1. However, Jive is open to your own translation files. For more information, see http://www.jivesoftware.com/builds/docs/latest/documentation/developer-guide.html#i18n. This applies to the Jive application user interface. Discussions task flow user interfaces are translated into the languages listed in Table 3-1
Information that users add to the WebCenter Spaces application—that is, information that is not a part of the native UI—appears in the language used by its author. Such information includes announcements, documents, discussion forum content, and the like.
3.3.1.2 Setting a Session Display Language
Opening your Web browser initiates a user session. When you select an application display language for your current user session, a session cookie is generated that keeps track of your selection.
The session language is retained for the life of the session cookie. If you clear browser cookies, the session language is also cleared and your default display language takes over or, absent a default, the application display language selected by your WebCenter Spaces administrator.
Note:
For more information about default and session display languages, see Section 3.3.1.1, "What You Should Know About Display Languages in WebCenter Spaces."To set a session display language for your WebCenter Spaces application:
-
Open your WebCenter Spaces application.
-
On the application Welcome page, click the Change Language link (Figure 3-18).
-
Select a language from the Choose A Language pop-up (Figure 3-19).
The application UI displays in the selected language for the life of the session cookie.
3.3.1.3 Setting a Default Display Language
Use WebCenter Spaces Preferences to select your preferred default display language. A default display language specified through WebCenter Spaces Preferences is retained across browser sessions. A default display language can be temporarily overridden by a Change Language selection, but a Change Language selection remains in effect only for the life of its associated session cookie.
To set a default language selection through WebCenter Spaces application Preferences:
-
Log in to WebCenter Spaces.
For information about logging in, see Section 2.2.1, "Logging In to a WebCenter Application."
-
Click the Preferences link at the top of the application (Figure 3-20).
The Preferences dialog box opens (Figure 3-21).
-
Click General to access general preferences.
-
From the Language pick list (Figure 3-31), select your preferred display language-locale.
Alternatively, select No Preference to accept the application-level default set by your WebCenter Spaces Administrator.
Note:
For information about setting the application-level default display language, see Oracle Fusion Middleware Administrator's Guide for Oracle WebCenter. -
Click OK to save your change and exit the Preferences dialog box, or click Apply to save your change without exiting.
Your change takes effect when you click OK.
3.3.2 Setting Date and Time Preferences
One way to make the WebCenter Spaces application your own is to set it up to reflect your local time zone and your preferred date and time formats. This section describes how to set application date and time preferences. It contains the following subsections:
3.3.2.1 Selecting Your Preferred Time Format
Use the time format setting to specify how you want time rendered in your view of WebCenter Spaces. Time is rendered in the Document Library, on the Events page, and in many other WebCenter Spaces locations.
Note:
Some services may be developed with an intrinsic time display format. In such cases, these services are not influenced by your Preference selection.To set your preferred time format:
-
Log in to WebCenter Spaces.
For information about logging in, see Section 2.2.1, "Logging In to a WebCenter Application."
-
Click the Preferences link at the top of the application (Figure 3-23).
The Preferences dialog box opens (Figure 3-24).
-
Click General to access general preferences.
-
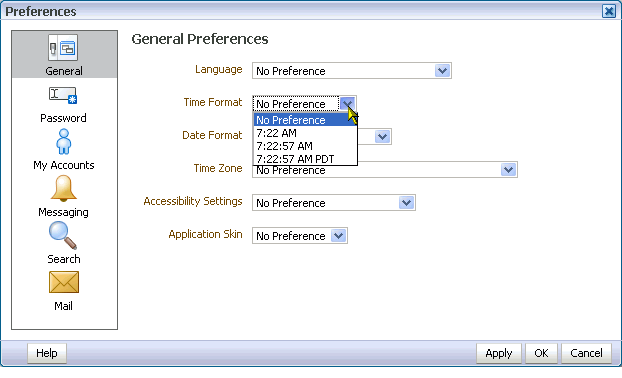
From the Time Format pick list (Figure 3-25), select your preferred time format.
Choose from the following formats (actual values reflect the current time):
-
No Preference—To display the default Time Format established by the WebCenter Spaces administrator
-
H:M AM/PM—To display hour, minutes, and AM or PM
-
H:M:S AM/PM—To display hour, minutes, seconds, and AM or PM
-
H:M:S AM/PM Time Zone—To display hour, minutes, seconds, AM or PM, and the abbreviation of the specified time zone
-
-
Click OK to save your change and exit the Preferences dialog box, or click Apply to save your change without exiting.
Alternatively, click Cancel to cancel your change and exit the Preferences dialog box.
3.3.2.2 Selecting Your Preferred Date Format
Wherever dates appear in the WebCenter Spaces user interface, the date format you select under Preferences is the format that is used. Dates appear in many task flows, for example Notes, Worklist assignments, Events, and the like.
Note:
Some services may be developed with an intrinsic date display format. In such cases, these services are not influenced by your Preference selection.To set your preferred date format:
-
Log in to WebCenter Spaces.
For information about logging in, see Section 2.2.1, "Logging In to a WebCenter Application."
-
Click the Preferences link at the top of the application (Figure 3-26).
The Preferences dialog box opens (Figure 3-27).
Figure 3-27 The General Panel in the Preferences Dialog Box

Description of "Figure 3-27 The General Panel in the Preferences Dialog Box"
-
Click General to access general preferences.
-
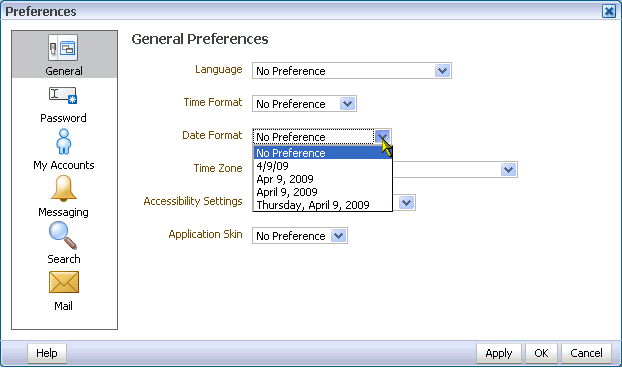
From the Date Format pick list (Figure 3-28), select your preferred date format.
Choose from the following formats (values reflect the current date):
-
No Preference—To use the default date format set by the WebCenter Spaces administrator
-
M/D/YY—To use a number format
-
MON D, YYYY—To use an abbreviation format and the full year
-
Month D, YYYY—To display the full month name and the full year
-
DAY, MONTH D, YYYY—To display the full month name, the full year, and include the day of the week,
-
-
Click OK to save your change and exit the Preferences dialog box, or click Apply to save your change without exiting.
Alternatively, click Cancel to cancel your change and exit the Preferences dialog box.
3.3.2.3 Selecting Your Preferred Time Zone
Use the time zone preference to tell WebCenter Spaces where in the world you are and the time associated with that place.
To set your preferred time zone:
-
Log in to WebCenter Spaces.
For information about logging in, see Section 2.2.1, "Logging In to a WebCenter Application."
-
Click the Preferences link at the top of the application (Figure 3-29).
The Preferences dialog box opens (Figure 3-30).
-
Click General to access general preferences.
-
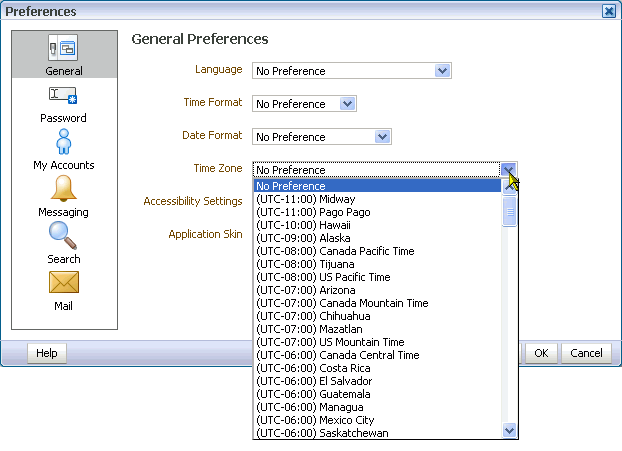
From the Time Zone pick list (Figure 3-31), select your preferred time zone.
Alternatively select No Preference to accept the application-level default set by your WebCenter Spaces Administrator.
-
Click OK to save your change and exit the Preferences dialog box, or click Apply to save your change without exiting.
Alternatively, click Cancel to cancel your change and exit the Preferences dialog box.
3.3.3 Enabling or Disabling Screen Reader Optimization
The General panel in the Preferences dialog box contains a list of options related to accessibility. You can use these options to optimize the application user interface (UI) for use with a screen-reader, such as JAWS. This section describes how to access accessibility options and explains the meaning of each option.
To optimize the application UI for use with a screen-reader:
-
Log in to WebCenter Spaces.
For information about logging in, see Section 2.2.1, "Logging In to a WebCenter Application."
-
Click the Preferences link at the top of the application (Figure 3-32).
The Preferences dialog box opens (Figure 3-33).
Figure 3-33 The General Panel in the Preferences Dialog Box

Description of "Figure 3-33 The General Panel in the Preferences Dialog Box"
-
Click General to access general preferences.
-
From the Accessibility Settings pick list (Figure 3-34), select your preferred accessibility setting.
Figure 3-34 Accessibility Setting Pick List
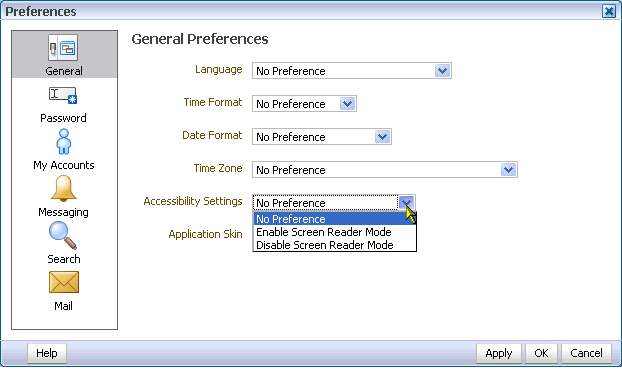
Description of "Figure 3-34 Accessibility Setting Pick List"
Choose from the following options:
-
No Preference—The UI is not optimized for a screen reader. Screen readers can still process the WebCenter Spaces UI, but the UI is not optimized for screen readers.
-
Enable Screen Reader Mode—The UI is optimized for screen readers.
-
Disable Screen Reader Mode—The UI is not optimized for screen readers. Screen readers can still process the WebCenter Spaces UI, but the UI is not optimized for screen readers.
-
-
Click OK to save your change and exit the Preferences dialog box, or click Apply to save your change without exiting.
Alternatively, click Cancel to cancel your change and exit the Preferences dialog box.
3.3.4 Changing Your Application Look and Feel
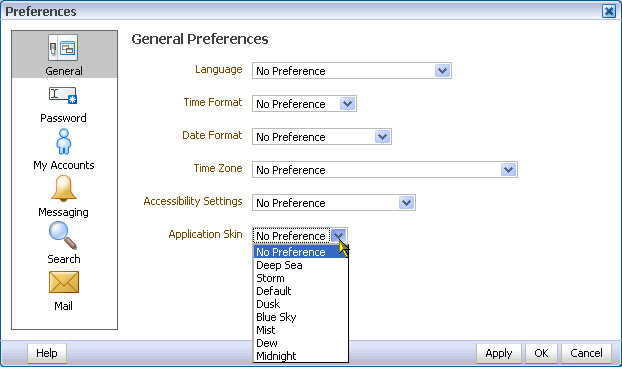
The General panel in the Preferences dialog box provides a pick-list of application skins for your WebCenter Spaces application. Application skins specify the application background color, screen fonts, and, with some skins, the shapes and images used for application buttons and icons.
To change your application skin:
-
Log in to WebCenter Spaces.
For information about logging in, see Section 2.2.1, "Logging In to a WebCenter Application."
-
Click the Preferences link at the top of the application (Figure 3-35).
The Preferences dialog box opens (Figure 3-36).
Figure 3-36 The General Panel in the Preferences Dialog Box

Description of "Figure 3-36 The General Panel in the Preferences Dialog Box"
-
Click General to access general preferences.
-
From the Application Skin pick list (Figure 3-34), select your preferred application skin.
Choose from the following options:
-
No Preference—To defer to the application's configured skin setting
-
<Skin_Name>—To select a predefined application skin from the list of skins available to you
-
-
Click OK to save your change and exit the Preferences dialog box, or click Apply to save your change without exiting.
3.3.5 Changing Your WebCenter Password
Once you self-register or receive login credentials from the WebCenter administrator, you can change your password. Changing your password on a regular basis is one way you can participate directly in securing your application software. This section describes how.
To change your WebCenter Spaces password:
-
Log in to WebCenter Spaces.
For information about logging in, see Section 2.2.1, "Logging In to a WebCenter Application."
-
Click the Preferences link at the top of the application (Figure 3-38).
The Preferences dialog box opens (Figure 3-39).
-
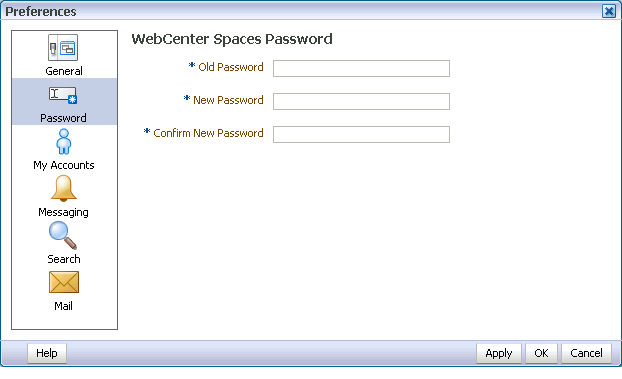
Click Password to open the Password panel (Figure 3-40).
Figure 3-40 The Preferences Password Panel
Description of "Figure 3-40 The Preferences Password Panel"
-
In the Old Password field, enter your current password.
-
In the New Password field, enter your new password.
Note:
The requirements for this password are driven by the identity store that manages WebCenter Spaces application users. For password requirements and restrictions, contact your application administrator. -
In the Confirm New Password field, enter your new password again.
-
Click OK to save your change and exit the Preferences dialog box, or click Apply to save your change without exiting.
Alternatively, click Cancel to cancel your change and exit the Preferences dialog box.
3.3.6 Providing Login Information for External Applications
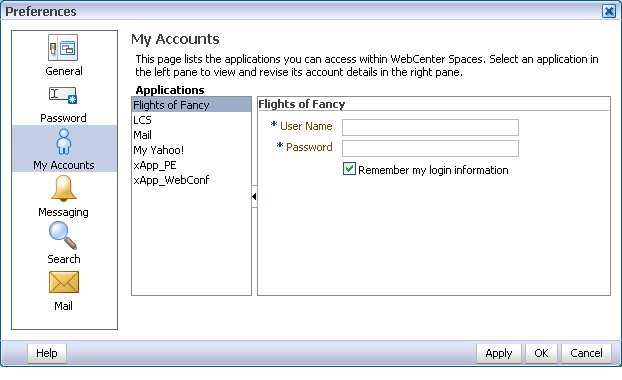
The My Accounts panel in the Preferences dialog box provides one-stop access to supply or revise credentials for all external applications in WebCenter Spaces. My Accounts provides a way to store application login credentials so that you provide them only once for the life of the credential. Once credentials are entered and stored, every time you access an external application within WebCenter Spaces the login credentials are provided automatically. This gives you a single-sign-on type of experience where one login (to WebCenter Spaces) provides access to multiple applications.
Note:
If you change the login credentials for an application, you must enter them again into WebCenter Spaces Preferences as described in this section.To provide login credentials for external applications:
-
Log in to WebCenter Spaces.
For information about logging in, see Section 2.2.1, "Logging In to a WebCenter Application."
-
Click the Preferences link at the top of the application (Figure 3-41).
The Preferences dialog box opens (Figure 3-42).
-
Click My Accounts to open the My Accounts panel (Figure 3-43).
-
In the left pane of the My Accounts panel, select an application.
Log-in credential fields and check boxes display in the right pane.
-
Enter log-in credentials as required for the selected application.
Login credentials vary from one application to another. For example, some applications may require user name and password, while others may require those values along with additional values, such as your mail address.
Fields requiring values are marked with an asterisk (*).
-
Select Remember My Login Information to enable automatic authentication to the selected application every time you log in to WebCenter Spaces.
When you do not select this option, the login information that you enter is used only for the current user session. The next time you log in to WebCenter Spaces, you must also log in to this application.
-
Click Apply to save your changes and remain in the Preferences dialog box.
Click OK to save your changes and exit the Preferences dialog box.
3.3.7 Setting Messaging Preferences
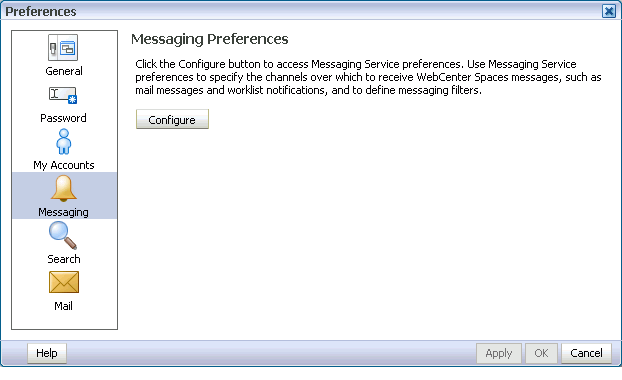
The Messaging panel in the Preferences dialog box provides a means of configuring messaging channels and defining messaging filters.
Messaging channels are the channels over which messages, notifications, and alerts are received. These include mail, voice over internet (VoIP), and the like. Messages, notifications, and alerts come from services registered with the Oracle User Messaging Service.
Messaging filters define sorting conditions for messages and specify the channels through which to send the messages that meet the conditions.
Messages, alerts, and notifications are sent to the Oracle User Messaging Service, which applies messaging filters, which in turn specify how messages, alerts, and notifications that meet different sets of conditions should be routed.
The Messaging panel in WebCenter Spaces Preferences (Figure 3-44) provides a Configure button for navigating to a messaging configuration page.
Click the Configure button to view the messaging tabs:
-
Messaging Channels—Configure the messaging channels (such as mail, voice, and so on) over which to deliver your notifications and alerts.
-
Messaging Filters—Define rules for filtering your notifications and alerts.
The online help available with the Oracle User Messaging Service provides configuration guidance. Additionally, see Oracle Fusion Middleware Developer's Guide for Oracle SOA Suite.
Note:
In environments where multiple BPEL connections are registered against the WebCenter Worklist component, the messaging preferences repository is shared by all. When you set messaging preferences for one connection, you set them for all.3.3.8 Setting Preferences for WebCenter Spaces Search Results
When you search content, you may find that the results from one service are more relevant to you than results from other services. Wouldn't it be useful to be able to exclude some services from a search and specify the order in which the results from selected services are listed?
WebCenter Spaces search preferences provide this capability. Use search preferences to select the services to search, specify the display order for search results, and choose the information you want to display with search results. This section describes how. It contains the following subsections:
Note:
For detailed information about searching in WebCenter Spaces, see Chapter 29, "Working with the Search Service." For information about a Document Library search, see Section 14.2.6, "Running Document Searches."3.3.8.1 Selecting the Services to Search
Your WebCenter Spaces administrator makes services available to the WebCenter Spaces application. Some of these services, while quite useful, may not often provide particularly useful search results. For example, if you frequently search for mention of a particular type of technology, a search through personal contacts is not useful.
By configuring the WebCenter Spaces search engine to search only those services you select, you can prevent the services most likely to return irrelevant search results from being searched. This section describes how.
To select the services to be searched:
-
Log in to WebCenter Spaces.
For information about logging in, see Section 2.2.1, "Logging In to a WebCenter Application."
-
Click the Preferences link at the top of the application (Figure 3-45).
The Preferences dialog box opens (Figure 3-46).
-
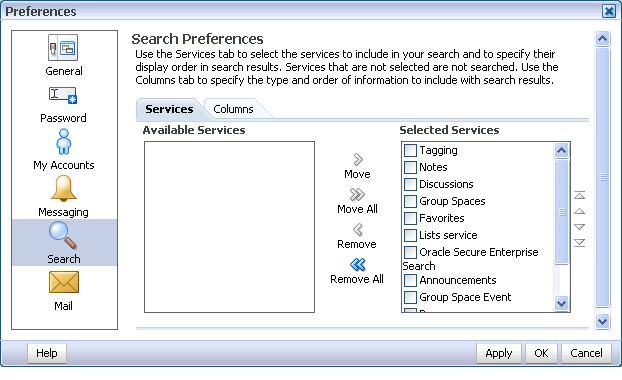
Click Search to open the Search Preferences panel (Figure 3-47).
-
Select one or more services on the Available Services list by checking their check boxes, and then click the Move icon to move them to the Selected Services list.
-
Click OK to save your changes and exit the Preferences dialog box.
Alternatively, click Apply to save your changes without exiting.
The services you add to the Selected Services list are included in future WebCenter Spaces searches. The services on the Available Services list are not searched.
3.3.8.2 Specifying a Display Order for Search Results
Of all the services you include in a WebCenter Spaces search, you may find that some services provide more relevant results than others. If this proves true, you can ensure that the results from those services display first. WebCenter Spaces Preferences provide controls for specifying the order in which services are listed in search results. This section describes how to use them.
To specify a display order for search results:
-
Log in to WebCenter Spaces.
For information about logging in, see Section 2.2.1, "Logging In to a WebCenter Application."
-
Click the Preferences link at the top of the application (Figure 3-48).
The Preferences dialog box opens (Figure 3-49).
-
Click Search to open the Search Preferences panel (Figure 3-50).
-
Select one or more services on the Selected Services list by checking their check boxes, and click the Move icons to the right of the list to move your selections higher or lower on the list.
The order you specify here determines the order each service is listed in search results.
-
Click OK to save your changes and exit the Preferences dialog box.
Alternatively, click Apply to save your changes without exiting.
3.3.8.3 Specifying the Type and Order of Information to Show with Search Results
You can use Search Preferences to specify the type of information to show with search results and the order in which that information is presented. Information types include Icon, Title, Person, Size, Date, and Type.
To specify the type and display order of information to show with search results:
-
Log in to WebCenter Spaces.
For information about logging in, see Section 2.2.1, "Logging In to a WebCenter Application."
-
Click the Preferences link at the top of the application (Figure 3-51).
The Preferences dialog box opens (Figure 3-52).
-
Click Search to open the Search Preferences panel (Figure 3-53).
-
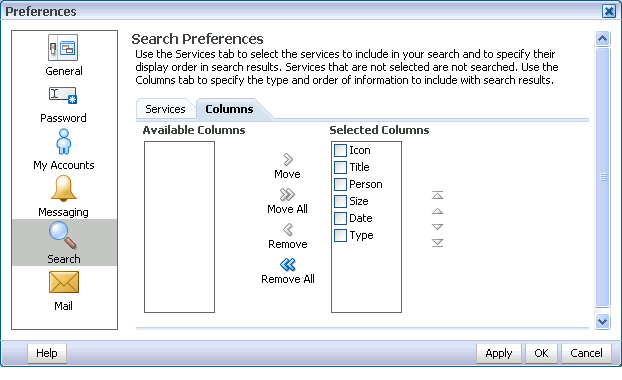
Click the Columns tab to bring it forward (Figure 3-54).
Figure 3-54 The Columns Tab in Search Preferences
Description of "Figure 3-54 The Columns Tab in Search Preferences"
-
To set the types of columns to display in search results, select one or more column titles on the Available Columns list by checking their check boxes and then click the Move icon to move your selections to the Selected Columns list.
Choose from:
-
Icon—An icon representing a result's item type.
-
Title—The linked title of the search result. For a file, this is the file name. Click this link to navigate to the result.
-
Person—The person who owns the result. For a file, this is the user who uploaded or last modified the file. Right-click the person listed to access a context menu with options for contacting the person (for more information, see Chapter 22, "Working with the Instant Messaging and Presence Service (IMP)").
-
Size—The size of the result, for example, the file size.
-
Date—The date the result was added to WebCenter Spaces. For a file, this is the date it was uploaded or last modified.
-
Type—The object type of the result. For example, for a graphic this is the type image.
-
-
To set the order in which search result information is displayed, select the check box of one or more column names in the Selected Columns list and then click the Move icons to the right of the list to rearrange column titles into the display order you prefer.
-
Click OK to save your changes and exit the Preferences dialog box.
Alternatively, click Apply to save your changes without exiting.
Search results display all of the information you specify here, in your preferred order.
3.3.9 Selecting Your Preferred Mail Connection
When your WebCenter Spaces application provides access to multiple mail connections, it also provides a way for you to select which connection to use. This section describes how.
To select your preferred mail connection:
-
Log in to WebCenter Spaces.
For information about logging in, see Section 2.2.1, "Logging In to a WebCenter Application."
-
Click the Preferences link at the top of the application (Figure 3-55).
The Preferences dialog box opens (Figure 3-56).
-
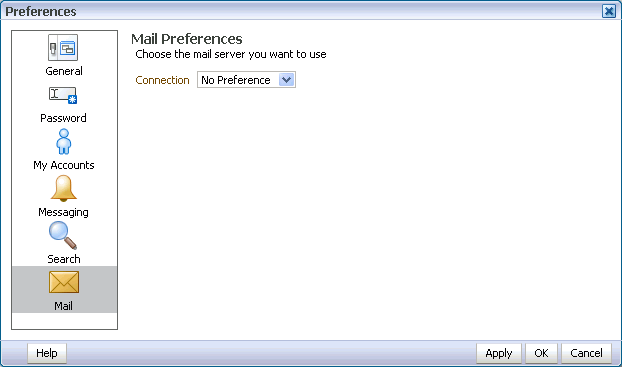
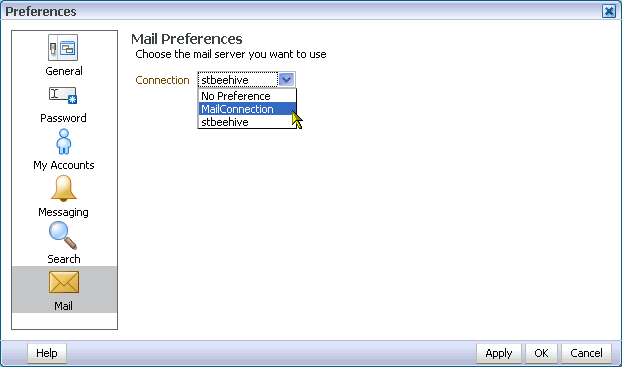
Click Mail to open the Mail Preferences panel (Figure 3-57).
-
From the Connections pick list, select the mail connection you want to use for accessing your mail through WebCenter Spaces (Figure 3-58).
The options available on this list depend on the connections your system administrator makes available to your WebCenter Spaces application. The No Preference option uses your system-level active mail connection.
-
Click OK to save your change and exit the Preferences dialog box.
-
Log out of WebCenter Spaces.
For information about logging out, see Section 2.2.2, "Logging Out of a WebCenter Application."
-
Log in to WebCenter Spaces.
-
If you previously saved your credentials for this mail connection to the WebCenter Spaces credential store, you are logged in to the new mail connection automatically.
If you have not previously saved your credentials, log in to this mail connection using Preferences (see Section 3.3.6, "Providing Login Information for External Applications") or using the login link in a Mail task flow (see Section 25.2.1, "Logging in to Mail").
3.4 Personalizing Your Page View
You can personalize your page view many ways in page view mode. For example you can reposition components, change your page layout, remove components from your view of a page, resize a component's height, and collapse components to display just their headers. These actions are called personalizations because the changes you make when you personalize a page affect only your view of that page. No one else sees your personalizations.
Note:
For more information about personalization, see Section 7.2, "Customizing and Personalizing Page Content."Whether you can personalize a page depends on permissions granted to you or your user role and on how personalizations are configured. You can tell if you have such permissions by the presence or absence of the controls discussed in this section. If you do not see these controls, contact your application administrator to ask for a higher-level of access or for a configuration change. For information about contacting your application administrator, see Section 2.7, "Contacting Your Application Administrator."
Note:
When you revise a component in page view mode while another user deletes the same component in page edit mode, a WebCenter error page opens. Simply navigate back to the original page. The deleted component does not appear, and you can continue working on other components.This section describes how to perform the personalizations rearrange, change layout, resize, minimize, and maximize. It contains the following subsections:
3.4.1 Rearranging Page Content
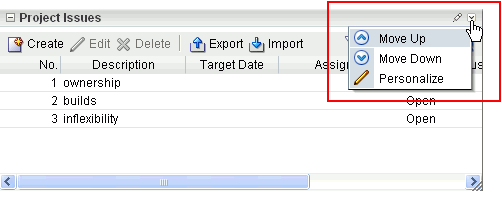
Using drag-and-drop or a component's Actions menu (Figure 3-59 and Figure 3-60), you can rearrange the positions of components on a page.
Components moved by drag-and-drop can be moved into any open position on a page. Components moved using their Actions menus can be moved within the layout box that contains them.
This section describes how to rearrange components on a page. It contains the following subsections:
3.4.1.1 Rearranging Components by Dragging and Dropping
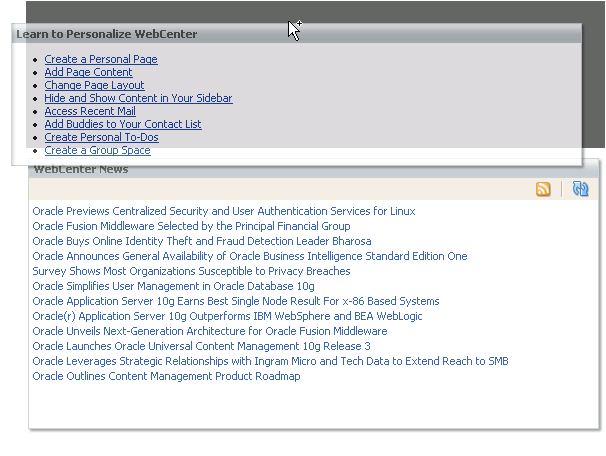
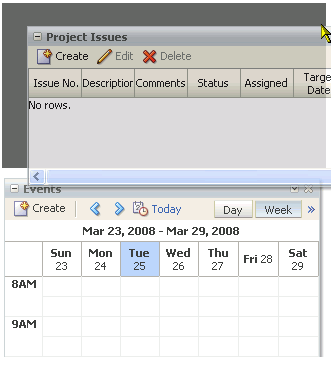
Dragging and dropping is arguably the easiest and least-restricted way to rearrange components on a page. Simply drag the component over the spot you want to place it. A solid box indicates a receptive drop location (Figure 3-61).
To rearrange components by dragging and dropping:
-
Log in to WebCenter Spaces.
For information on how to log in, see Section 2.2.1, "Logging In to a WebCenter Application."
-
Go to the page where you want to rearrange components by dragging and dropping.
For information about locating pages, see Section 2.4, "Hiding, Showing, Opening, and Closing Pages."
-
Click and hold on the header of the component you want rearrange, drag it to its target position, and drop it onto the page.
A solid box indicates where the component is placed when you drop it (Figure 3-62).
3.4.1.2 Rearranging Components Using the Actions Menu
Within a given layout box, the direction that components can move is determined by how the box is oriented. A box can be oriented vertically or horizontally. Vertical orientation allows for moving components higher or lower in the stack of components contained in the layout box. Horizontal orientation allows for moving components further left or right in the line of components contained in the layout box.
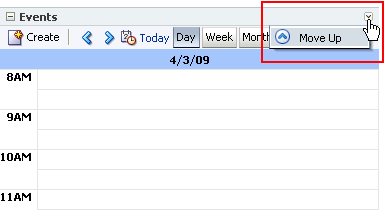
A component's Actions menu (Figure 3-63) provides a convenient way to reposition the component relative to other components contained in a given layout box. The Actions menu may display in the component header, or it may not display at all.
A component may be configured to hide its Actions menu, in which case, you cannot reposition the component through the Actions menu—though you may be able to reposition other components relative to it, provided those other components display their Actions menus.
To rearrange components using a component's Actions menu:
-
Log in to WebCenter Spaces.
For information on how to log in, see Section 2.2.1, "Logging In to a WebCenter Application."
-
Go to the page where you want to rearrange components using the Actions menu.
For information about locating pages, see Section 2.4, "Hiding, Showing, Opening, and Closing Pages."
-
Click the Actions icon on the menu bar in the component header.
-
Select a Move option:
The moves available on a component Actions menu depend on how the layout box that contains the components is oriented (vertically for Move Up/Move Down; horizontally for Move Left/Move Right). Additionally, the available moves depend on whether the component has any components left, right, above, or below it.
-
Move Up—Reposition over the component immediately above.
-
Move Down—Reposition over the component immediately below.
-
Move Right—Reposition to the right of the component to the right.
-
Move Left—Reposition to the left of the component to the left.
-
3.4.2 Changing Your Page Layout
Page designers can make a layout switcher available in page view mode so that you can change your view of a page to a different page layout. If you see a Change Layout button or link on a page, you can personalize your page view by selecting a different layout model. This section tells you how.
To change to a different page layout:
-
Log in to WebCenter Spaces.
For information on how to log in, see Section 2.2.1, "Logging In to a WebCenter Application."
-
Go to the page where you want to change your page layout.
For information about locating pages, see Section 2.4, "Hiding, Showing, Opening, and Closing Pages."
-
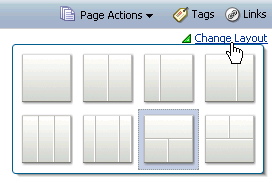
Click the Change Layout link (Figure 3-64).
The link's default position is in the upper-right corner of the page. This may vary in your application. Page designers can hide this control, so it may not be available to you. Additionally, they can change the link label, so it may be something other than "Change Layout."
-
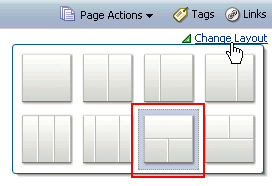
From the resulting pop-up, select a new page layout.
The currently-selected layout is highlighted (Figure 3-65).
The page is rerendered using your selection for the new layout.
Note:
For information about changing everyone's page layout, see Section 6.4.3, "Changing Everyone's Page Layout." For information about making the Change Layout link available in page view mode, see Section 6.5.3.9.3, "Working with Change Layout/Layout Customizable Properties."3.4.3 Removing Components from Your View of a Page
If you find a component, such as a task flow or portlet, is not useful to you and the component displays a Remove icon (Figure 3-66), you can remove it from your view of the page.
You can restore a removed component with the Reset Layout command on the Page Actions menu (see Section 3.5, "Removing Your Page Personalizations")—provided the component was seeded on the original page—and by editing the page and adding a new component instance (see Section 7.1, "Adding Content to a Page").
To remove a component from your view of a page:
-
Log in to WebCenter Spaces.
For information on how to log in, see Section 2.2.1, "Logging In to a WebCenter Application."
-
Go to the page where you want to remove a component from your page view.
For information about locating pages, see Section 2.4, "Hiding, Showing, Opening, and Closing Pages."
-
Click the Remove icon on the component header.
The component is removed from your view of the page.
3.4.4 Resizing Components
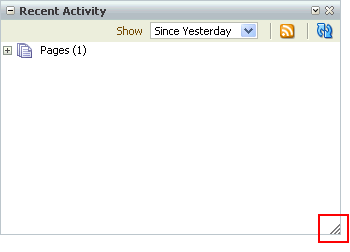
The border and header surrounding a component, such as a task flow or a portlet, is also known as chrome. Chrome not only delineates the component, but also provides an access point for component actions, such as those on the Actions menu and those embedded in the chrome itself. In the latter case, the chrome includes a Resize handle you can use to increase or decrease the height of the component (Figure 3-67).
Note:
The position of the resize handle differs for bidirectionally displayed components. Those components displayed in a right-to-left orientation display the resize handle on the opposite side depicted in Figure 3-67.To use this feature, click and hold the Resize handle and drag it up, to decrease the height of the component, or down to increase the height of the component.
3.4.5 Collapsing and Expanding Components
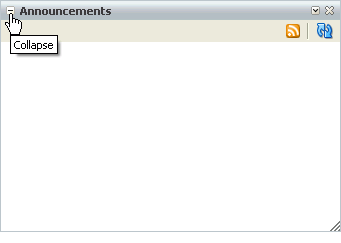
With one click, you can collapse some components, such as task flows or portlets, so that they roll up like a window shade, leaving only their headers in view (Figure 3-68).
With another click, you can expand a collapsed component.
Collapsing is useful for removing the visual noise of an unused component from your application view. Collapse is available when a component has a header on view.
To collapse and expand components:
-
Log in to WebCenter Spaces.
For information on how to log in, see Section 2.2.1, "Logging In to a WebCenter Application."
-
Go to the page you want to personalize.
For information about locating pages, see Section 2.4, "Hiding, Showing, Opening, and Closing Pages."
-
Click the Collapse icon on the component header to roll the component up like a window shade (Figure 3-69).
-
Click the Expand icon on the component header to restore the full component to view (Figure 3-70).
3.5 Removing Your Page Personalizations
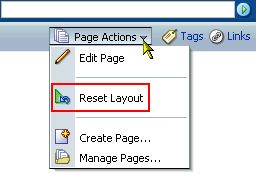
The Reset Layout command on the Page Actions menu removes all the personalizations you made to a page. Collapsed components are expanded; resized components are returned to their original dimensions; rearranged components are returned to their original positions; and removed components are restored to view.
Because personalizations are easy to do, resetting the page layout provides a safe, efficient way to undo try-outs, such as removing a rarely-used task flow or repositioning components for easier access. If a personalization does not work out, simply reset the page layout, and re-do the personalizations you like.
Caution:
It is important to understand that Reset Layout removes all of your page personalizations in one operation. It does not back out of them one-by-one.To reset a page layout:
-
Log in to WebCenter Spaces.
For information about logging in, see Section 2.2.1, "Logging In to a WebCenter Application."
-
Go to the page where you want to reset the page layout.
For information about locating pages, see Section 2.4, "Hiding, Showing, Opening, and Closing Pages."
-
From the Page Actions menu, select Reset Layout (Figure 3-71).
Note:
If the Page Actions menu does not display, it is likely that you do not have sufficient page access privileges. If this is the case, ask your application administrator for the privilege to edit pages. See Section 2.7, "Contacting Your Application Administrator." -
In the resulting confirmation dialog box, click the Reset button.
The page is refreshed with all of your personalizations removed.
3.6 Working with Favorites
Use Favorites to keep your own personal list of links to favorite WebCenter Spaces pages and to external Web sites. This section describes how to create, organize, and manage a list of personal favorites. It contains the following subsections:
3.6.1 What You Should Know About Favorites
The great advantage to WebCenter Spaces Favorites is their portability. They are not dependent on a particular Web browser, so any browser you use to access your WebCenter Spaces application provides access to your WebCenter Spaces Favorites. You can create favorite links to sites internal or external to WebCenter Spaces. This makes WebCenter Spaces the best choice for managing and tracking your favorites list.
Favorites are personal. The favorites you see on the Favorites menu are the favorites you create. No other user sees your favorites, and you do not see any other user's favorites. If you like, though, you can share favorites with other users, by making one or more of them discoverable in a search.
Favorites are not associated with the space that was open when you created them. That is, when you move from your personal space to a group space or from one group space to another, the favorites on the Favorites menu stay the same.
WebCenter Spaces provides a Manage Favorites window, which you can use to further personalize your favorites. Use the Manage Favorites window to:
-
Control the order of display of links on the Favorites menu
-
Specify a method for opening a favorite target
-
Create folders for organizing your favorites
-
Create, edit, or delete favorite links and folders
For more information about the Manage Favorites window, see Section 3.6.4, "Managing Favorites."
3.6.2 Adding Favorites
Add favorite links for quick access to your most frequently used Web sites and to WebCenter Spaces pages. If you like, you can share favorites with other users, by making one or more of them discoverable in a search. This section describes how to add new favorites and how to share them with other users.
Note:
This section describes how to add favorites through the Favorites menu. You can also add favorites through the Manage Favorites window. For more information, see Section 3.6.4.1, "Adding a Favorite Through the Manage Favorites Window."To add a favorite:
-
The way you obtain your favorite's URL differs depending on the circumstances:
-
For pages external to WebCenter Spaces, go to a favorite Web location and copy its URL.
-
For WebCenter Spaces pages, log in and go to the page you want to make a favorite. Skip step 2.
-
If you know the URL, enter it manually when the time comes.
-
-
Log in to WebCenter Spaces.
For information about logging in, see Section 2.2.1, "Logging In to a WebCenter Application."
-
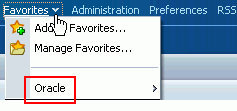
From the Favorites menu at the top of the application, select Add to Favorites (Figure 3-72).
-
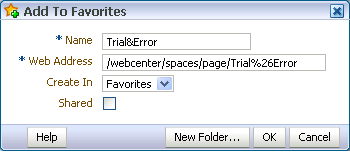
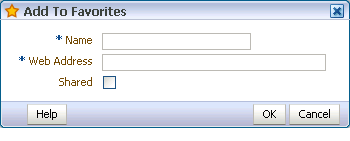
In the Name field of the Add To Favorites dialog box (Figure 3-73), enter a name for the favorite.
The value you enter for Name becomes the favorite's link text. The name of the current page is provided by default. You can change this or leave it as is.
-
In the Web Address field, enter the target URL for the favorite.
The default entry for this field is the URL of the current WebCenter Spaces page; you have three options:
-
Leave the default entry as is.
-
Paste the URL you copied in step 1.
-
Enter the URL manually.
-
-
From the Create In pick list, select the favorites folder in which to create the favorite.
WebCenter provides one top-level default folder: Favorites. You can also create your own folders by clicking the New Folder button. For more information, see Section 3.6.3, "Adding Favorites Folders."
-
To allow this favorite to be discovered by other users during a search, select the Shared check box.
Clear the Shared check box if you do not want other users to have any kind of access to this favorite.
-
Click OK to add the favorite to the Favorites menu and the Manage Favorites window.
3.6.3 Adding Favorites Folders
To keep your list of favorites manageable, you can organize them into folders. The folder hierarchy you create appears on the Favorites menu and in the Manage Favorites window. Because the favorite folders you create are personalizations, they display only in your application view and not in any other user's.
Note:
This section describes one way to create favorites folders. You can also create them in the Manage Favorites window. For more information, see Section 3.6.4.3, "Editing Favorites and Favorites Folders."To add a favorites folder:
-
Log in to WebCenter Spaces.
For information about logging in, see Section 2.2.1, "Logging In to a WebCenter Application."
-
From the Favorites menu at the top of the application, select Add to Favorites.
The Add To Favorites dialog box opens (Figure 3-74).
-
Click the New Folder button.
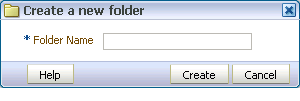
The Create a new folder dialog box opens (Figure 3-75).
-
In the Folder Name field, enter a name for the new folder.
-
Click OK to save the new folder and close the Create a new folder dialog box.
The new folder appears as a selection in the Add To Favorites dialog box on the Create In pick list.
-
Click OK to close the Add To Favorites dialog box.
Alternatively, before exiting the Add To Favorites dialog box, add a new favorite to the new, selected folder. For more information, see Section 3.6.2, "Adding Favorites."
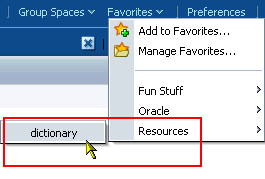
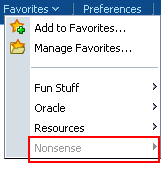
The new folder now appears as a selection on the Favorites menu (Figure 3-76).
3.6.4 Managing Favorites
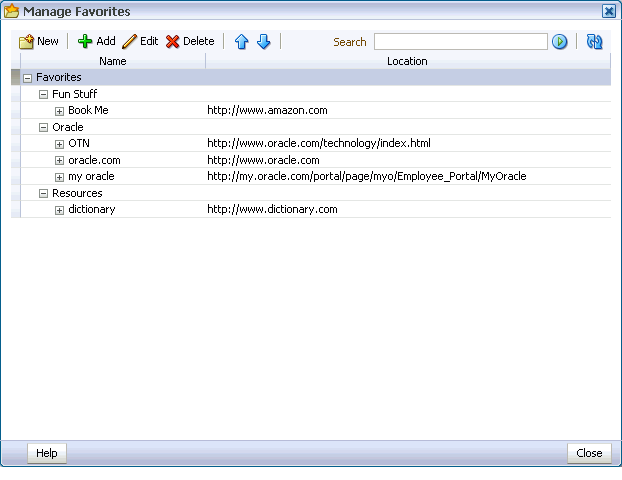
The WebCenter Spaces Manage Favorites window (Figure 3-77) provides a convenient, one-stop location for creating, editing, and deleting favorite links and folders and rearranging their display order on the Favorites menu.
This section describes how to use the controls available in the Manage Favorites window. It contains the following subsections:
3.6.4.1 Adding a Favorite Through the Manage Favorites Window
When you want to add multiple favorites, the best place to do this is in the Manage Favorites window. This is because the Manage Favorites window remains open until you close it, saving you steps in the creation process.
To add favorites through the Manage Favorites window:
-
Go to the Web page you want to make a favorite, and copy its URL.
You can skip this step if you plan to enter the URL manually.
-
Log in to WebCenter Spaces.
For information about logging in, see Section 2.2.1, "Logging In to a WebCenter Application."
-
Open the Favorites menu at the top of the application, and select Manage Favorites.
The Manage Favorites window opens (Figure 3-78).
-
In the Manage Favorites window, select the folder where you want to add the favorite.
Select a folder by clicking in its row.
-
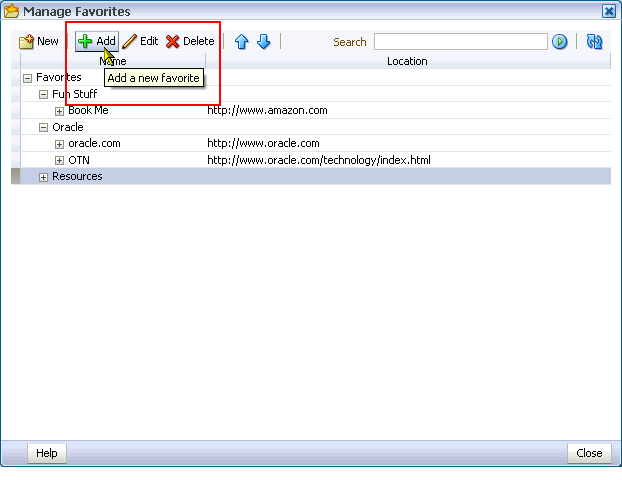
Click the Add button in the toolbar at the top of the window (Figure 3-79).
The Add To Favorites dialog box opens (Figure 3-80).
-
In the Name field, enter a display name for the favorite.
-
In the Web Address field, paste the URL you copied in step 1, or enter a URL manually.
-
To enable the sharing of this favorite in other users' search results, select Shared.
-
Click OK.
The new favorite appears in the Manage Favorites window and on the Favorites menu (Figure 3-81).
-
Click Close to exit the Manage Favorites window.
3.6.4.2 Adding a Favorites Folder Through the Manage Favorites Window
To keep your list of favorites manageable, you can organize them into folders. The folder hierarchy you create appears on the Favorites menu and in the Manage Favorites window. Because the favorite folders you create are personalizations, they display only in your application view and not in any other user's.
In addition to adding favorites folders through the Add To Favorites dialog box (see Section 3.6.3, "Adding Favorites Folders") you can add them through the Manage Favorites window. This section describes how.
To add a favorites folder through the Manage Favorites window:
-
Log in to WebCenter Spaces.
For information about logging in, see Section 2.2.1, "Logging In to a WebCenter Application."
-
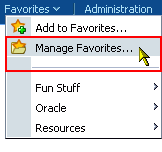
Open the Favorites menu at the top of the application, and select Manage Favorites (Figure 3-82).
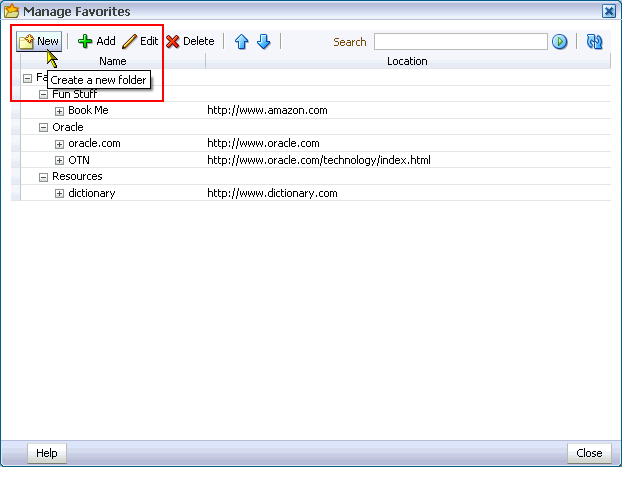
The Manage Favorites window opens (Figure 3-83).
-
Select the folder in which to create the new folder, and click the New button in the toolbar at the top of the window (Figure 3-84).
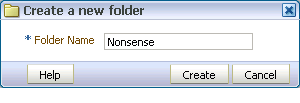
The Create a new folder dialog box opens (Figure 3-85).
-
In the Folder Name field, enter a display name for the favorite. folder
-
Click Create.
The new folder appears in the Manage Favorites window and on the Favorites menu (Figure 3-86).
-
Click Close to exit the Manage Favorites window.
3.6.4.3 Editing Favorites and Favorites Folders
The Manage Favorites window provides controls for editing favorites and favorites folders. Use this feature to revise a folder or favorite name, a favorite target URL, or a favorite open behavior.
Open behavior determines how a favorite target URL opens from the Favorites menu or the Manage Favorites dialog box. Choose from opening a favorite target in the current browser window, in a new browser window, or on a new WebCenter Spaces tab.
Note:
The open behavior you specify for a Favorite does not apply to Favorites returned in a search. To control the open behavior of Favorites returned in a search, right-click the search result and select an open behavior from your browser's context menu.To edit a favorite or favorite folder:
-
Log in to WebCenter Spaces.
For information about logging in, see Section 2.2.1, "Logging In to a WebCenter Application."
-
From the Favorites menu at the top of the application select Manage Favorites.
The Manage Favorites window opens (Figure 3-87).
-
If necessary, expand favorites folders to access the favorite or folder you want to edit.
To expand a folder, click the Expand icon to the left of the folder.
-
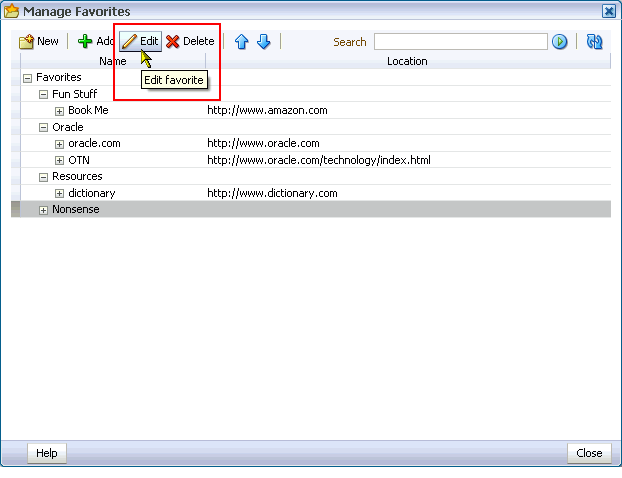
Select the favorite or favorite folder you want to edit, and click the Edit button in the toolbar (Figure 3-88).
To select a favorite or a folder, click in its row.
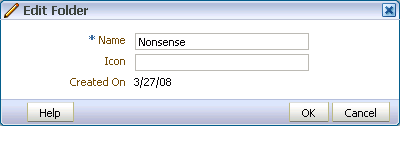
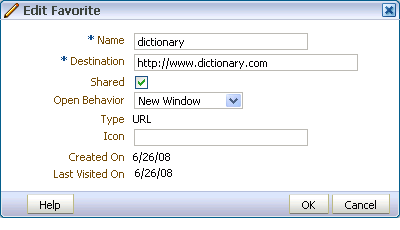
Depending on your selection, the Edit Folder (Figure 3-89) or Edit Favorite (Figure 3-90) dialog box opens.
Table 3-2 lists and describes the types of values you can enter for either dialog box.
Table 3-2 Values Taken By Edit Favorite and Edit Folder Dialog Boxes
Label Applies To Value Name
Favorite and Folder
The display name of the favorite or folder. This is the name that appears on the Favorites menu and in the Manage Favorites window.
This field is editable.
Destination
Favorite
The favorite target URL.
This field is editable
Shared
Favorite
Specify whether to allow other users to discover this favorite through their search results.
Checked means yes, cleared means no.
This check box is editable.
Open Behavior
Favorite
An option for specifying how a favorite opens. Choose from:
-
New Window—The favorite opens in a new browser window.
-
WebCenter Tab—The favorite opens on a new WebCenter Spaces tab. For information about how to close the tab, see Section 2.4.5, "Closing Group Spaces and Other Top-Level Tabs."
-
Current Window—The current browser window redraws, displaying the favorite target.
This field is editable.
Note: The open behavior you specify for a Favorite does not apply to Favorites returned in a search. To control the open behavior of a Favorite returned in a search, right click the search result and select an open behavior from your browser's context menu.
Type
Favorite
The link type, always URL.
This field is read-only.
Icon
Favorite and Folder
An option for providing an icon to display along with the display name shown in the Favorites menu.
Enter the full URL to the icon.
This field is editable.
Created On
Favorite and Folder
The date the favorite or folder was created.
This field is read-only.
Last Visited On
Favorite
The date the favorite was last visited using the favorites link.
This field is read-only.
-
-
Make your changes to the fields and pick lists.
-
Click OK to save your changes and close the window.
3.6.4.4 Rearranging Favorites and Favorites Folders
The Manage Favorites window provides controls for moving a favorite or a favorite folder higher or lower on the Favorites menu. You can accomplish a move by clicking icons or by dragging and dropping. Use this feature to arrange your view of the Favorites menu exactly to your liking.
To rearrange favorites and favorites folders:
-
Log in to WebCenter Spaces.
For information about logging in, see Section 2.2.1, "Logging In to a WebCenter Application."
-
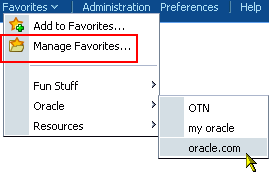
Open the Favorites menu at the top of the application, and select Manage Favorites (Figure 3-91).
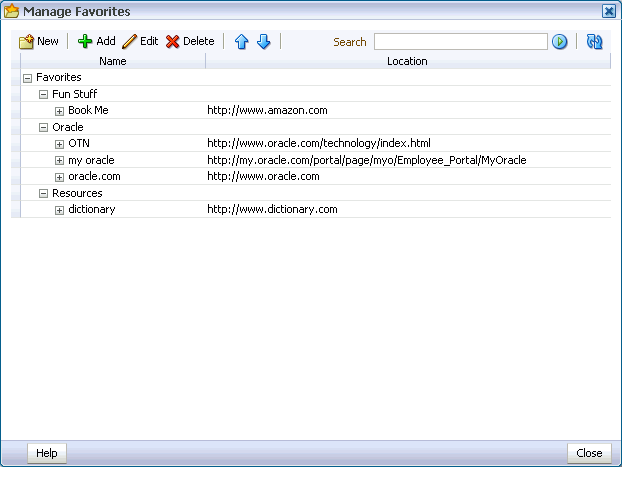
The Manage Favorites window opens (Figure 3-92).
-
If necessary, expand favorites folders and then select the favorite or folder you want to rearrange.
To select a favorite or a folder, click in its row.
-
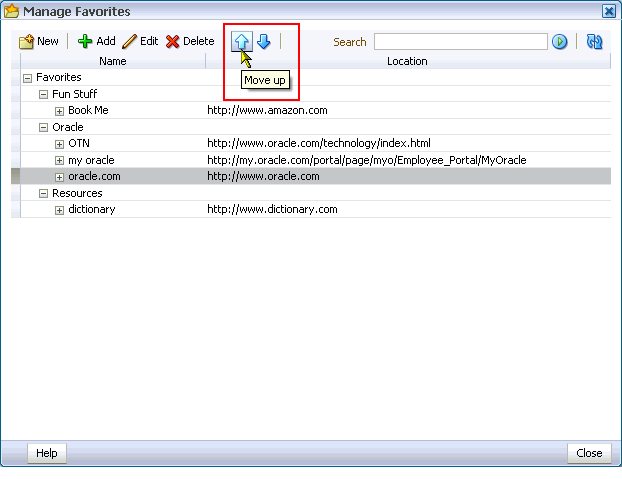
Click the Move Up or Move Down icon in the Manage Favorites toolbar to rearrange the selected favorite or folder (Figure 3-93).
Alternatively, drag the favorite or folder to its target position.
-
Click Close to exit the Manage Favorites window.
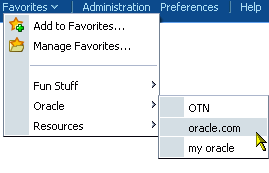
The favorite or folder is repositioned in the Manage Favorites window and on the Favorites menu (Figure 3-94).
3.6.4.5 Searching for Favorites
The Manage Favorites window includes a search feature that enables you to locate favorites. You can use the favorites search feature to search for favorite display names or target URLs. This search feature does not search for favorite folder names. Search results display in the Manage Favorites window.
Note:
The open behavior you specify for a Favorite does not apply to Favorites returned in a search. To control the open behavior of Favorites returned in a search, right-click the search result and select an open behavior from your browser's context menu.To search for favorites:
-
Log in to WebCenter Spaces.
For information about logging in, see Section 2.2.1, "Logging In to a WebCenter Application."
-
Open the Favorites menu at the top of the application, and select Manage Favorites (Figure 3-95).
The Manage Favorites dialog box opens (Figure 3-96).
-
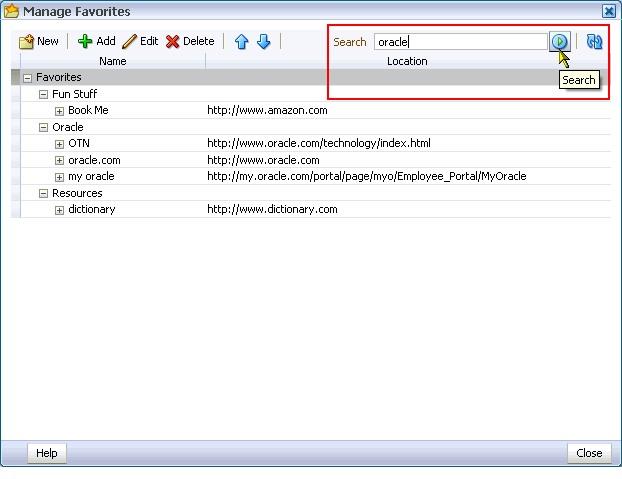
Enter a search term in the Search field, and click the Search icon (Figure 3-97).
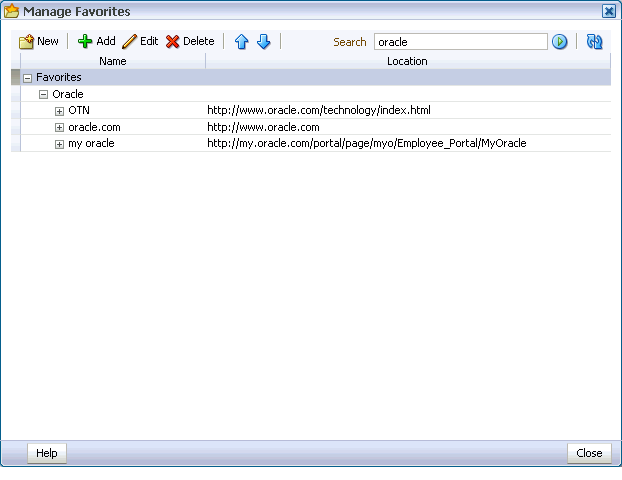
Results display in the Manage Favorites dialog box (Figure 3-98).
To exit search results, you must exit the Manage Favorites window. Alternatively, you can delete the search term from the Search field and click the Search icon. A search without a search term returns the Manage Favorites window to its default view.
-
Click Close to close the Manage Favorites dialog box.
3.6.4.6 Deleting Favorites and Favorites Folders
When you delete a favorite or a favorites folder, it is permanently removed from both the Favorites menu and the Manage Favorites window. Additionally, when you delete a favorites folder all the favorites it contains are also deleted.
To delete favorites and favorites folders:
-
Log in to WebCenter Spaces.
For information about logging in, see Section 2.2.1, "Logging In to a WebCenter Application."
-
Open the Favorites menu at the top of the application (Figure 3-99), and select Manage Favorites.
The Manage Favorites window opens (Figure 3-100).
-
Select the favorite or favorite folder you want to delete.
To select a favorite or favorite folder, click in its row.
-
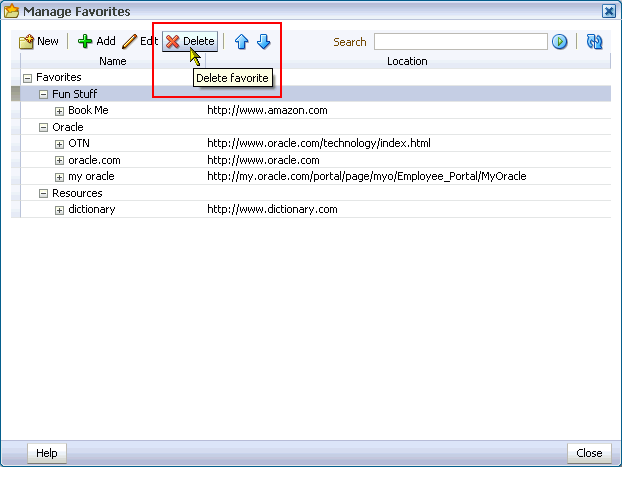
Click the Delete button on the Manage Favorites toolbar (Figure 3-101).
The selected favorite or favorite folder and any favorites the folder contained are permanently removed from the Manage Favorites window and the Favorites menu.
3.7 Working with the WebCenter Spaces Sidebar
The WebCenter Spaces Sidebar provides easy access to many useful services. This section provides information about the Sidebar and describes what you can do with it and what it can do for you. It contains the following subsections:
3.7.1 What You Should Know About the Sidebar
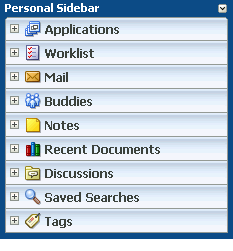
The Sidebar offers quick access to your WebCenter Spaces mail, watched discussion topics and forums, worklist assignments, personal contacts, recent documents, enterprise applications, and other useful functions.
Note:
Your WebCenter Spaces administrator has control over what task flows display in the Sidebar and in what order. Accordingly, your view of the Sidebar may vary from the examples presented here.Everything that appears in the WebCenter Spaces Sidebar is personal. Your view of the Sidebar is unique to you.
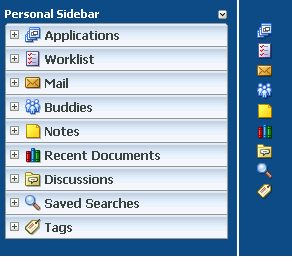
You can view the Sidebar as an expandable list of task flows or as a set of individual task flow icons (Figure 3-102). Additionally, you can hide the Sidebar from view (see Section 3.7.2, "Toggling Sidebar Views").
Table 3-3 lists the Sidebar icons and briefly describes the purpose of the task flow or application each icon represents.
| Icon | Name | Provides Easy Access to … |
|---|---|---|
|
|
Applications icon |
External applications and custom task flows registered with WebCenter and accessible to you For more information about external applications, see Section 3.8, "Working with External Applications." |
|
|
Worklist icon |
The Worklist, which contains notifications and action items assigned to you For more information about the Worklist, see Chapter 30, "Working with the Worklist Service." |
|
|
Personal mail inbox icon |
Your e-mail For more information about WebCenter Mail, see Chapter 25, "Working with the Mail Service." |
|
|
Personal contacts icon |
Your personal contacts list (your chat buddies) For more information about the Buddies list, see Section 22.2.5, "Working with the Buddies List." |
|
|
Personal notes icon |
Your personal notes, which are somewhat comparable to electronic post-it notes. For more information about Notes, see Chapter 26, "Working with the Notes Service." |
|
|
Recent documents icon |
The last documents you accessed, created, or interacted with in some way Click a document link to open the document. For more information about the Document Library, see Chapter 14, "Working with the Documents Service." |
|
|
Discussion forums icon |
The discussion forums and forum topics on your Watch List For more information about discussion forums and watch lists, see Chapter 21, "Working with the Discussions Service." |
|
|
Saved searches icon |
Your saved searches For more information about WebCenter Search, see Chapter 29, "Working with the Search Service." |
|
|
Personal tags icon |
Tags you have added or the items you have tagged For more information, see Chapter 18, "Working with the Tags Service." |
The Sidebar is personal. How you choose to display the Sidebar (as a list, as icons, or hidden) stays the same from login to login. The information that appears in the panes of the different task flows is relevant to you and your personal working day. No one else shares the same view.
3.7.2 Toggling Sidebar Views
The WebCenter Spaces Sidebar provides three views: a list of expandable panes, a column of icons, and hidden. This section describes how to move between each of these views:
To toggle between the Sidebar list, Sidebar icons, and a hidden Sidebar:
-
Log in to WebCenter Spaces.
For information about logging in, see Section 2.2.1, "Logging In to a WebCenter Application."
-
Assuming you are starting with the Sidebar icon view (Figure 3-103), to the lower right of the Sidebar, click the Expand icon (Figure 3-104).
Note:
See Table 3-3 for more information about Sidebar icons.The Sidebar list appears instead of the Sidebar icons (Figure 3-105).
-
Click the Collapse icon to return to icon view.
-
Click the Collapse icon (Figure 3-106) to hide the Sidebar.
-
Click the Expand icon to return the Sidebar to icon view (Figure 3-107).
3.7.3 Hiding and Showing Task Flows in the Sidebar
Although your application administrator determines the task flows that appear by default in your Sidebar, you have the power to hide or show any task flow that is available to you. At different times, you may find some task flows more useful than others. WebCenter Spaces provides the means to place the ones that are not currently useful to you out of view.
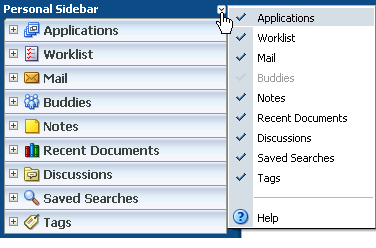
It is easy to hide or show task flows in your Sidebar. Toggle to Sidebar list view (see Section 3.7.2, "Toggling Sidebar Views"), and select or deselect the task flows you want to hide or show from the Hide or show Sidebar panels list (Figure 3-108).
When you toggle back to the Sidebar's icon view, the task flows you hid in list view remain hidden.
To hide or show task flows in the Sidebar:
-
Log in to WebCenter Spaces.
For information about logging in, see Section 2.2.1, "Logging In to a WebCenter Application."
-
Toggle the Sidebar to list view (Figure 3-109).
For more information about toggling to different Sidebar views, see Section 3.7.2, "Toggling Sidebar Views."
-
Expand the list of task flows at the top of the Sidebar (Figure 3-110), and click a task flow to select it for display (checked), or deselect it from display (unchecked).
3.7.4 Opening Task Flows from the Sidebar
The task flows that display in the Sidebar may be in a state that requires a simple step to move from closed to open. They might be collapsed, they might be displayed as icons, or they might be displaced by other open task flow panels. This section describes how to open a task flow from the Sidebar.
To open task flows from the Sidebar:
-
Log in to WebCenter Spaces.
For information about logging in, see Section 2.2.1, "Logging In to a WebCenter Application."
The Sidebar appears on the left side of the application (Figure 3-111).
Note:
For more information about the WebCenter Spaces Sidebar, see Section 3.7.1, "What You Should Know About the Sidebar." -
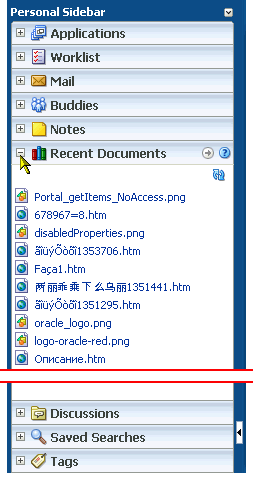
If the Sidebar is rendered as a list, go to the task flow you want to view, and, if necessary, expand it by clicking its Expand icon (Figure 3-112).
The task flow opens in the Sidebar (Figure 3-113).
If the Sidebar is rendered as icons (Figure 3-114), click the icon associated with the task flow you want to view (for a description of task flow icons, see Table 3-3).
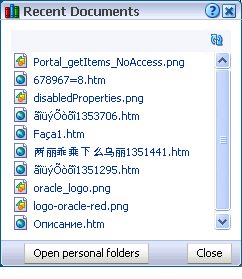
The task flow opens in its own, undocked view (Figure 3-115).
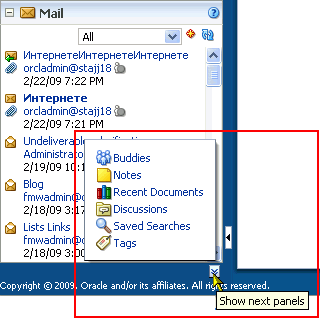
If the task flow is displaced by other open task flow panels, click the Show next panels icon to open and select from a list of displaced task flows (Figure 3-116).
3.7.5 Jumping to a Task Flow Main View from the Sidebar
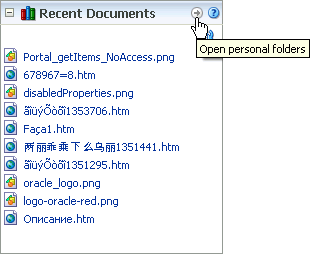
Some Sidebar task flows provide instant navigation to a main task flow view. When the Sidebar is shown as a list of expandable panels, an icon may appear in the header of an expanded panel. Click the icon to jump to a main view of the task flow.
For example, Figure 3-117 shows the Open personal folders icon on the Recent Documents panel in the Sidebar.
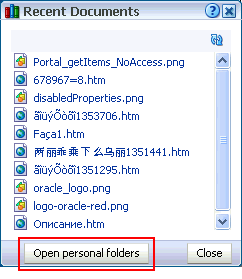
With an undocked view of a Sidebar task flow, the navigation appears as a button (Figure 3-118).
By default, the following task flows provide navigation to main task flow views from the Sidebar:
3.8 Working with External Applications
The WebCenter Spaces administrator may expose different enterprise applications in the Sidebar's Applications pane. This provides login management and convenient access through WebCenter Spaces to your frequently used enterprise applications.
This section provides information about the Applications pane in the Sidebar. It contains the following subsections:
3.8.1 What You Should Know About External Applications
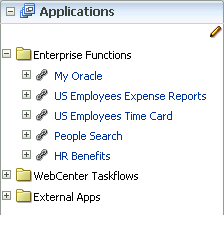
The Applications pane in the Sidebar (Figure 3-119) provides quick access to your most frequently-used enterprise applications.
These can include such applications as your enterprise expense reporting system, human resources-related request applications, time-reporting, company directory, and the like.
The Applications pane is personal. The applications that display within the pane are applications you can access using an application login.
External applications require login credentials, such as your user name and password. You can supply login credentials each time you access an application, or you can let WebCenter Spaces store and manage your login credentials (see Section 3.3.6, "Providing Login Information for External Applications"). After your credentials for a particular application are stored, you are logged in to that application automatically when you log in to WebCenter Spaces.
Your WebCenter administrator manages the presentation and range of applications available in the Applications pane. If an application you access frequently is not listed, ask your WebCenter administrator to add it for you.
Note:
For more information about adding applications to the Applications pane, see Oracle Fusion Middleware Administrator's Guide for Oracle WebCenter.For more in-depth information about external applications, see Oracle Fusion Middleware Developer's Guide for Oracle WebCenter.
For information about contacting your application administrator, see Section 2.7, "Contacting Your Application Administrator."
3.8.2 Logging In to an External Application
To access and log in to an external application:
Note:
Due to browser limitations, automated login is not supported for external applications using BASIC authentication.Login to external applications that do not support UTF8 encoding is not supported.
-
Log in to WebCenter Spaces.
For information about logging in, see Section 2.2.1, "Logging In to a WebCenter Application."
-
In the Sidebar, either expand the Applications pane or click the Applications icon (Figure 3-120).
Note:
For information about the Sidebar, see Section 3.7, "Working with the WebCenter Spaces Sidebar." -
Click the application link you require.
-
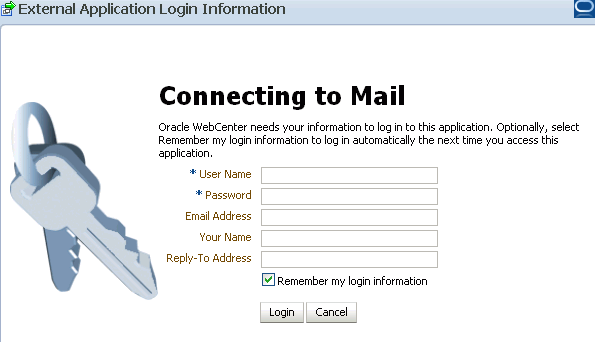
If a login form opens (similar to that shown in Figure 3-121):
-
Enter your login credentials using the fields provided.
-
Select Remember my login information to save your user name, password, and any other login credentials you have entered.
The next time you launch the application from the Applications pane you login automatically.
If you do not select the option Remember my login information, the login information you enter here is used for this session only. The next time you access this application through the Applications pane, you'll be required to reenter your login credentials.
Note:
If you change your application account information—for example, change your application password—you can update the login credentials you entered here through your WebCenter Spaces preferences. For more information, see Section 3.8.4, "Managing Your External Application Login Credentials." -
Click Login to log in.
-
3.8.3 Personalizing the Applications Pane
You may not want to see all the task flows and applications offered through the Applications pane. If this is the case, you can personalize your view by showing only the applications you use and hiding the applications you do not use. This section describes how.
To personalize the Applications pane:
-
Log in to WebCenter Spaces.
For information about logging in, see Section 2.2.1, "Logging In to a WebCenter Application."
-
In the Sidebar, either expand the Applications pane, or click the Applications icon (Figure 3-122).
Note:
For information about the Sidebar, see Section 3.7, "Working with the WebCenter Spaces Sidebar." -
In the Applications pane, click the Personalize icon (Figure 3-123) at the top of the pane.
If you accessed Applications with the Sidebar in icon view, select Personalize applications from the resulting menu (Figure 3-124).
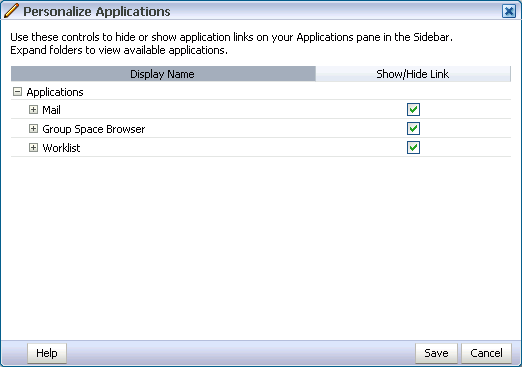
The Personalize Applications window opens, listing all external applications available to you (Figure 3-125).
-
The next step you take depends on what you want to accomplish:
-
To hide an application link, clear its Show/Hide Link check box.
-
To show an application link, select its Show/Hide Link check box.
Note:
You cannot hide links to applications that your WebCenter administrator has locked. Locked applications always display, and their Show/Hide Link check boxes cannot be selected (they're grayed out). -
-
Click Save to save your changes and return to the Applications pane.
The applications you cleared no longer display. The applications you checked now display.
3.8.4 Managing Your External Application Login Credentials
WebCenter Spaces Preferences provide a central place for you to manage and store login credentials for all the enterprise applications you access through the WebCenter Spaces. You need only enter credentials for your password-protected applications once. WebCenter Spaces stores your login details; so the next time you access the application through the Sidebar, you login automatically.
If you prefer, you can provide login credentials before you ever launch the application in WebCenter Spaces. You can also change your stored login credentials if you change them in the original application.
For more information, see Section 3.3.6, "Providing Login Information for External Applications."

