|
|
This section describes how to continue the installation program in the graphical mode on following platforms:
Before you start the installation of the AquaLogic Service Bus in the graphical mode, you should start the installation in graphical mode as described in Starting the Installation in Graphical Mode .
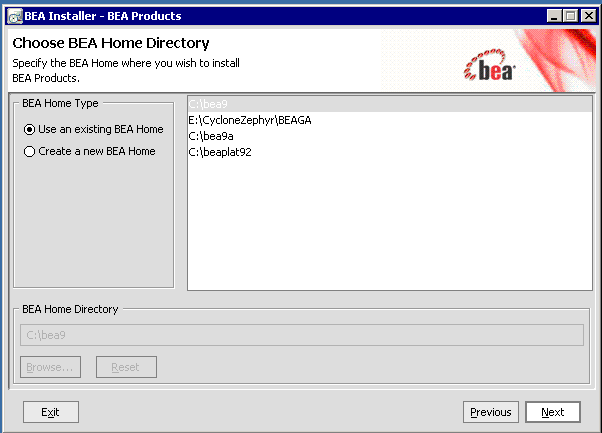
Yes to accept and click Next to proceed. The Choose BEA Home Directory (see Figure 3-3) window is displayed.| Note: | You must accept the licence agreement before you can proceed. |
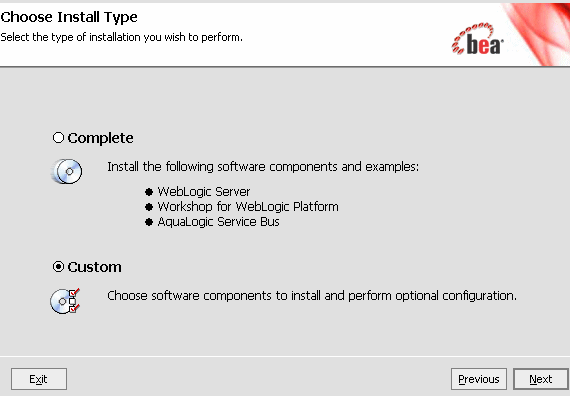
Click Next to proceed. The Choose Install Type (see Figure 3-4) window is displayed.
| Note: | If you choose to use the existing directory and you have the products installed in it, you must uninstall the product before you can proceed with the installation. |
| Note: | You must select Custom installation to install the Web Server Plug-ins or to add components to an existing installation. For more information, see Choosing the Type of Installation |
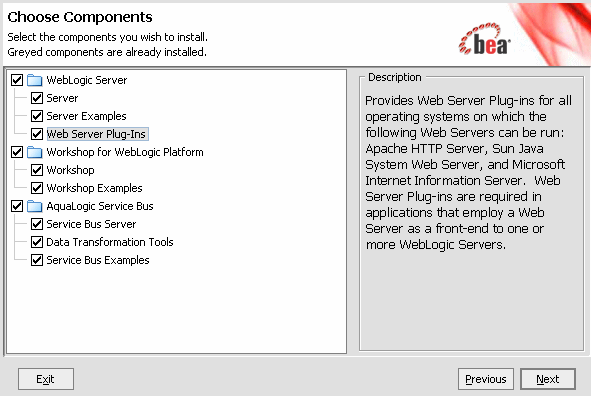
Click Next. The Choose Components (see Figure 3-5) window is displayed. This displayed only if you select Custom installation type.
This window displays a tree-view of all the components available for installation. Specify the components to be installed by selecting or clearing the appropriate check boxes.
| Note: | In an initial installation, only the Web Server Plug-ins are not selected; all other components are selected by default. You must select the Web Server Plug-ins check box if you want the plug-ins to be installed on your system. |
When you select or clear a component at the folder level, all subcomponents are selected or cleared accordingly. If any components are already installed on your system, the check boxes for them are grayed out.
| Note: | When you select or deselect components to install, the installation program checks for dependencies between components and automatically modifies the list of selected components accordingly. For example, if you clear the WebLogic Server component check box, the boxes for the remaining components are cleared because the other components cannot be run without WebLogic Server. |
For details about the components available for installation on your system, see Installable Product Components.
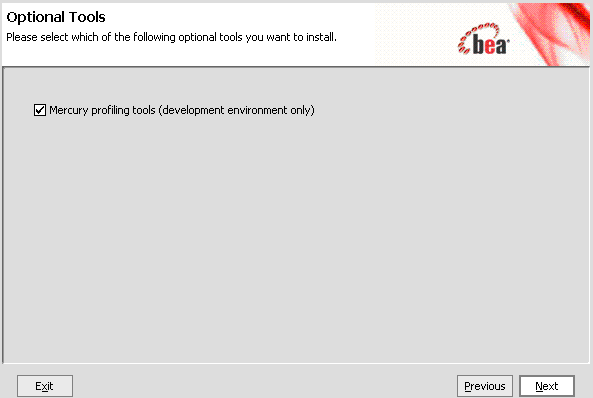
Click Next to continue. The installer displays the Optional Tools (see Figure 3-6) window.
| Note: | This window is displayed only on platforms that support BEA JRockit. |
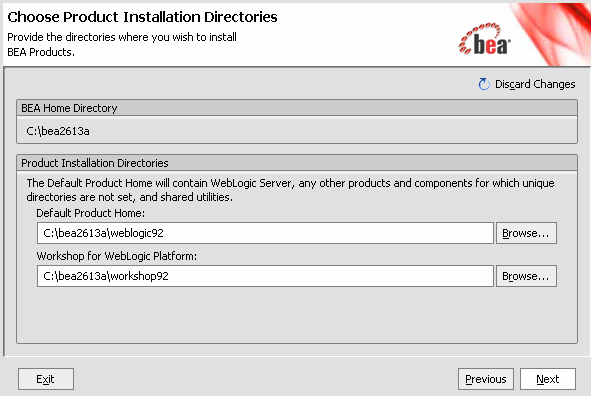
Next to continue. Choose Product Directory window (see Figure 3-7) is displayed.
Click Next to continue. The Install Windows Service window is displayed (see Figure 3-8).
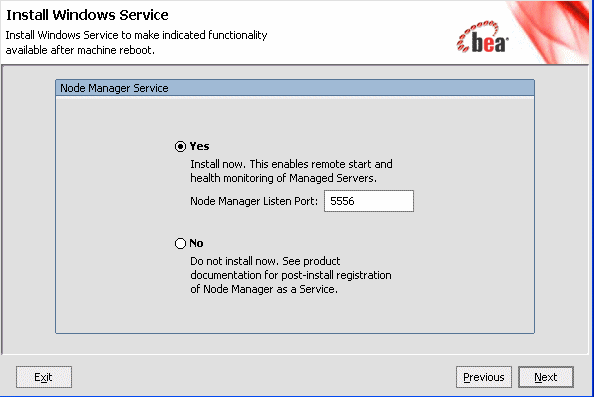
5556.| Note: | This window is displayed only if you have Administrator privileges on Windows platform you are performing an initial installation. |
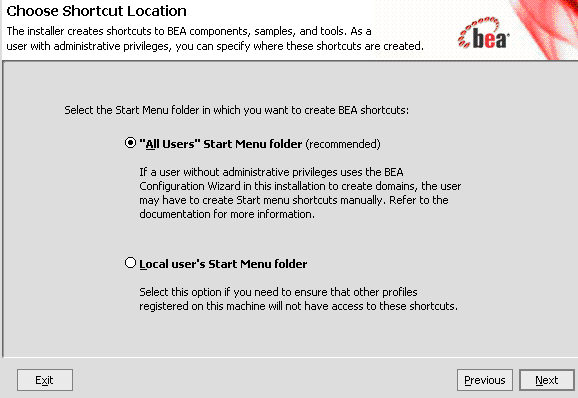
Click Next to go the Choose Shortcut Location window.
| Note: | This window is displayed only under the following if you have Administrator privileges on the Windows Platform and you are performing an initial installation. |
Click Next to start the installation.
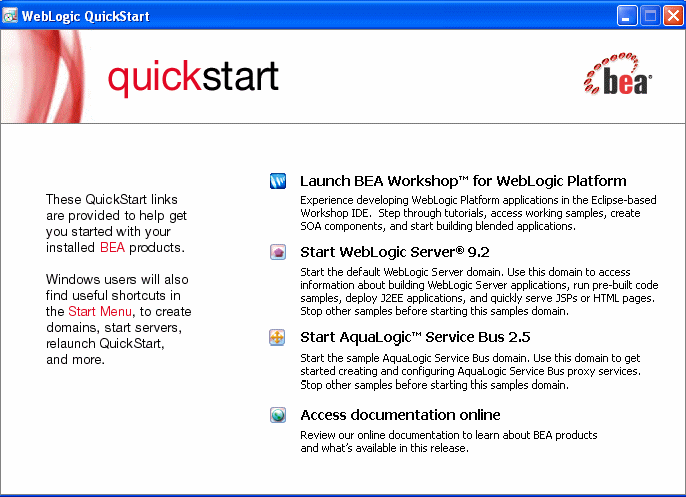
After a successful installation you can specify whether you want to run the QuickStart (see Figure 3-10) application. QuickStart is designed to assist first-time users in evaluating, learning, and using the software, provides quick access to the sample domains, information for upgrading your applications, and the online documentation. Clear the check box for this option if you do not want to launch QuickStart.
Click Done to exit the installation program and launch QuickStart, if selected.
This section describes the installation using the graphical mode on UNIX platforms. The following sections describe the installation using:
Complete the pre-installation tasks as described in section Using Installers with Filenames Ending in .bin.
To start the installation, complete the steps as described in Starting the Installation in Graphical Mode
By default, the installation in the graphical mode begins. For details on the installation of the product, see step 1 to step 7 of Installing Using the Graphical Mode
Complete the pre-installation tasks as described in section Using Installers with Filenames Ending in .jar of Starting the Installation Program.
To start the installation, complete the procedure as described in Starting the Installation in Graphical Mode
By default the installation in the graphical mode begins. For details on the installation of the product, see step 1 to step 7 of Installing Using the Graphical Mode
| Notes: | For both .bin and .jar file installers: |
Once the installation is successful you can specify whether you want to run the QuickStart application. QuickStart is designed to assist first-time users in evaluating, learning, and using the software. It provides quick access to the sample domains, information for upgrading your applications, and the online documentation.
Clear the check box for this option if you do not want to launch QuickStart.
BEA recommends that you run the QuickStart application to familiarize yourself with the software, and execute the samples provided. For additional information, see Post-Installation Information.
QuickStart is not invoked automatically for console-mode or silent-mode installations. You can launch QuickStart from the Start Menu (Windows) or from the command line (Windows and UNIX). For instructions, see Using QuickStart.
For specific information about your software release, see the appropriate release notes:
http://download.oracle.com/docs/cd/E13222_01/wls/docs92/notes/index.html
http://download.oracle.com/docs/cd/E13171_01/alsb/docs26/relnotes/index.html
http://download.oracle.com/docs/cd/E13179_01/common/docs92/relnotes/index.html


|