


|
|
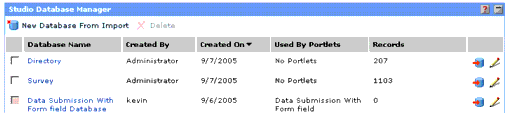
Studio centralizes database management in the Studio Database Manager portlet. It displays only database tables to which users have access privileges and lets them import database tables, as well as modify, update, and delete them. Administrators can view and mange all Studio database tables. Users can restrict access to the database tables that they created. For information on controlling access to database tables, see Securing the Database Tables.
This chapter includes the following sections:
If you have a data file that you created outside of Studio or one that you exported from Studio then edited, you can use the Studio Database Manager to convert it into a Studio database table. Studio Database Manager includes the Import Wizard, which will guide you through the entire process of importing an existing file and converting it into a format that Studio portlets can use.
To create a new database table by importing a file:
| Note: | If the New Database From Import button is grayed out, clear the check boxes to the left of the Database Name column. |
The Choose file dialog box displays.
Character encoding is a method of displaying characters. For example, the ISO-8859-1 encoding is best for documents in English and most other Western European languages.
| Caution: | Selecting the wrong encoding might corrupt the data. |
| Note: | If you want to import all the cells, do not enter or select a cell range. |
The XML object tag is the wrapper tag that surrounds a unit of data or a set of property tags. Property tags are tags for elements and identify the nature of the data.
The expected XML tag structure appears on the preview pane.
| Note: | The wizard flattens the XML structure. |
If you have a lot of data to import, you can stop the import process while it is in progress. Once Studio imports all data, the Import Data page of the wizard is no longer available.
You can use the Import Wizard to add entries to an existing database. For example, rather than manually entering contact information in a Phone Directory portlet each time your company hires a new employee, you can upload an Excel spreadsheet to the Phone Directory database table periodically. Studio adds the data in the spreadsheet as new rows in the existing database table.
To add data to an existing Studio database:
This launches the Import Wizard. For detailed instructions on the Import Wizard, see Importing a New Database Table.
If the database table you are importing has problems, the Fix Import Error page in the Import Wizard displays. This page flags data errors such as data type mismatch, column discrepancies, misplaced delineators, and invalid data values. It also lets you fix data errors.
Data type mismatch errors occur when you try to add data of a particular data type to a database column with a different data type (such as inserting text into a number column). Column discrepancy errors occur when the number of columns in an imported file does not match the number of columns in the existing database table. Misplaced delineator errors occur when data separators (such as tab spaces and commas) are not at their expected places. An example of this error is a missing comma in between two data fields. Invalid data value errors occur when the data value exceeds the maximum length, which is 1,000 characters, or the required fields have missing data.
You cannot import or update the database table if you exceed the maximum number of bad records allowed in the configuration file in Studio. Either fix the bad records or change PTStudioConfig.xml. The configuration file is installed in C:\bea\alui\ptstudio\2.2\settings\config\ by default.
You can do the following in the Fix Import Errors page:
To make changes to database tables, either click the database name or ![]() at the end of the portlet row in Studio Database Manager. You can change the database description, database columns and their default values and number formats, as well as database access privileges. For more information on database columns, see Defining the Columns in the Database Table; for more information on database access privileges, see Securing the Database Tables.
at the end of the portlet row in Studio Database Manager. You can change the database description, database columns and their default values and number formats, as well as database access privileges. For more information on database columns, see Defining the Columns in the Database Table; for more information on database access privileges, see Securing the Database Tables.
To delete a database table, select the check box next to the database table that you want to delete, then click Delete on the action bar. You cannot delete a database table that is being used by a portlet. You must delete the portlet from portal and Studio Administrator first. For more information on deleting portlets, see Deleting Portlets.
If you want to remove just a data column and not an entire database table, see Removing Database Columns.
You can change the database or database driver that you are using through the Studio Administrator portlet. When you click Edit Studio Config, the Studio Administration Editor displays with two pages: one page sets the portal database settings, and the other sets the Studio database settings. The portal database stores user data such as portal user names, passwords, and locale settings of each user; while the Studio database stores data collected from Studio portlets or data uploaded to the Studio Import wizard.

To change the settings of your database:
| Note: | Changing the portal database settings only affects Studio, not the portal. |


|