

|
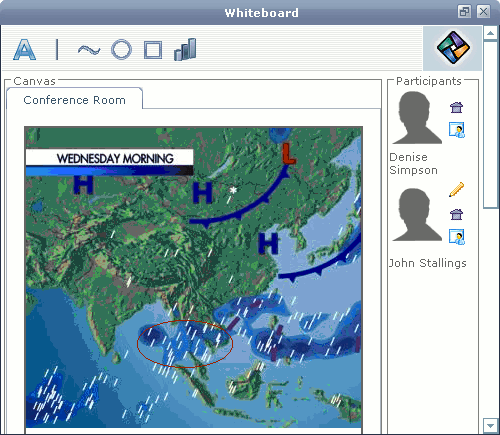
The CollabraSuite, BEA Edition Whiteboard component is a multi-user interactive tool that allows users to review, create, and update graphic information in real-time. Whiteboards can have tabs allowing users to switch between multiple views in a single session. The whiteboard background can easily be changed to display a variety of color-coded graphical data. Whiteboard backgrounds can consist of images and HTML web pages. All whiteboard activity is recorded in the database and may be searched for repeated use or as a context for discussion history.
The Whiteboard window will display.

Whiteboard backgrounds allow several users to view and annotate graphics, web pages, photographs, and near real-time images. Once a background is in place, users can add annotations and communicate information directly over the background. All users viewing the whiteboard can add, change, or clear the backgrounds.
Whiteboard annotation features make it possible for each user to add annotations to the whiteboard.
Users may add annotations including shapes, text, and colors by using the drawing tools found on the left side of the whiteboard.
 The text tool creates a text line in the whiteboard.
 The line tool creates straight lines.
 The freehand tool creates drawn lines in any shape.
 The ellipse tool creates any size or shape of ellipse.
 The rectangle tool creates any size or shape of rectangle.
 The line color tool allows users to choose the color of each annotation, text, shape, or line.
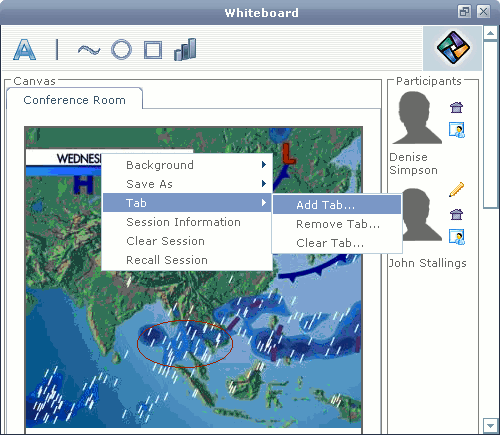
Users may create a new whiteboard within a session without deleting an existing whiteboard by simply adding a new tab. When the session is recalled, all tabs will be viewable. During the session, users may switch back and forth between tabs in order to see all canvasses without having to clear the existing whiteboard and starting a new one. Tabs may also be cleared from the session without deleting an entire session.
The contents of the canvas will be deleted but the tab will remain.
The tab will be removed from the session while any other tabs will remain.
| Note: | See clear session to delete an entire session whiteboard. |

During a whiteboard session, user icons display in a users panel. Each user in the session will be represented by the icon they have selected for themselves, and additional icons next to each user will define each user's status in the room. These icons will indicate if the users have participated in the session, are viewing the whiteboard, are currently in the same room, or have made annotations to the canvas. Users appear in this list if they are currently viewing the whiteboard or have made annotations during the history of this whiteboard session.
The whiteboard session saves automatically once all users have exited the room. Whiteboard sessions are saved using the default information available including the room, start date/time, and end date/time. However, more detailed session information, including a session name and description, may be added in order to aid in recalling and searching whiteboard sessions.
Every whiteboard session is saved once the session has been closed. However, if users would like the contents of a whiteboard permanently erased, they may clear the contents of the whiteboard before closing it. To start a new session without clearing the contents of the current whiteboard, users may close the current whiteboard or open a tab. Clearing the whiteboard will clear the contents of the current session and start a new session.
The contents of the canvas will be deleted and cannot be retrieved.
You may want to save and export a whiteboard as an image for use outside of the room or as a background for a new whiteboard.
| Note: | Once saved, a whiteboard image can be retrieved and used as a background in a new whiteboard using the Change Background feature. A saved image may also be printed. |
When a whiteboard session is closed, it is saved and may be recalled. Users with remote campus access may recall whiteboard sessions across multiple campuses. Whiteboard sessions are saved using the default information including the campus, start date and time, and end date and time. More detailed information, including a session name and description, may have been added. When a whiteboard session is recalled, users will see the state of the whiteboard at the end of the session.
 from the toolbar.
| Note: | You can use as many or as few search criteria as desired. |
| Note: | Recalled sessions are read-only. Users can not draw new annotations in these sessions. |


|