


|

|
|
|
|
Setting Up Conversations
The following sections provide key concepts and procedures for configuring and working with conversations on the C-Hub Administration Console:
For introductory information about conversations, see Overview in BEA WebLogic Collaborate Getting Started. For information about developing trading partner applications that initiate and participate in conversations, see the BEA WebLogic Collaborate Developer Guide.
What Is a Conversation?
A conversation is a series of predefined message exchanges between collaborators/trading partners that take place in a c-space in the context of a predefined business model. Each message in the conversation may cause any number of back-end transactions to occur depending on the actions implemented by the trading partner in its local business protocol definition. Trading partners interact with each other in conversations.
For a complete explanation of conversations and other related concepts, see BEA WebLogic Collaborate Getting Started, particularly the Overview.
Setting Up a Conversation
Setting up a new conversation on the c-hub consists of the following tasks:
Step 1. Name and Describe the Conversation.
Figure 15-1 Conversations Configuration
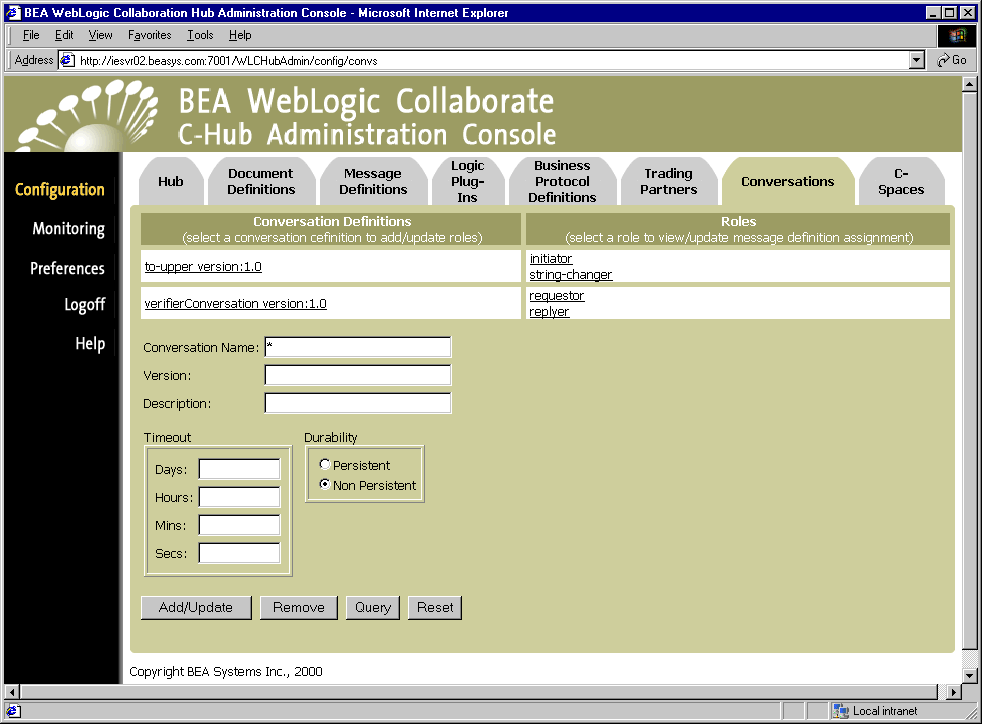
(You can also click Reset to discard your current changes and start again.)
The next step is to assign roles.
Step 2. Assign Roles to a Conversation.
To assign roles to a conversation, click on the role under the Roles list on the main screen. (If you haven't assigned a role, you can click on [NONE], which shows up under Roles for that conversation.)
This brings up the screen where you can assign roles to the selected conversation.
Figure 15-2 Assigning Roles to a Conversation
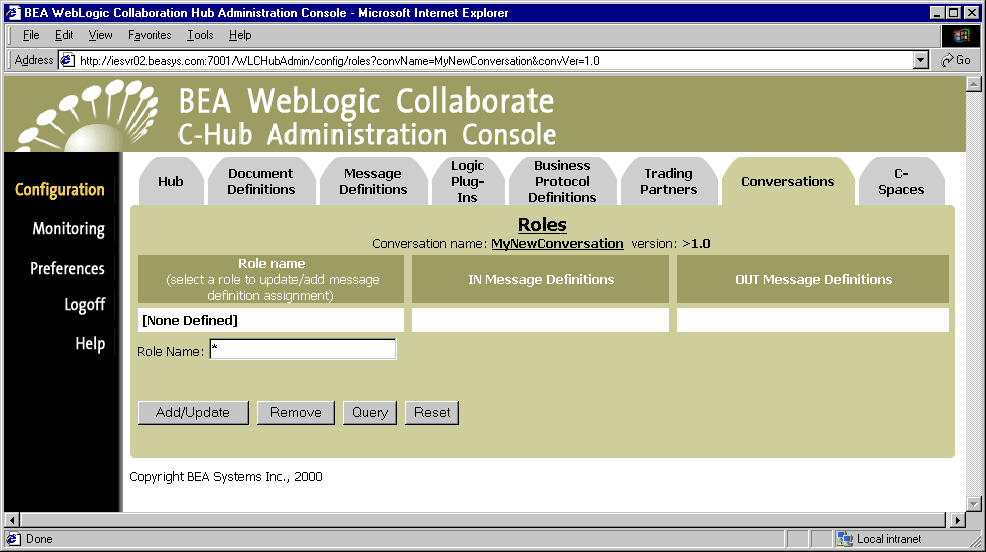
This screen shows a list of roles and related message definitions currently assigned to the selected conversation. From here you can remove or update the roles currently assigned (if any) and also assign new roles to a conversation.
To assign a new role:
|
Field |
Description |
|---|---|
|
Role Name |
Enter the name of the role you want to create. (Limit is 256 characters.) |
You will be returned to the main Roles screen for the selected conversation and your new role will show up in the listing of roles. When you add a new role to a conversation, the IN and OUT message definitions lists will display [NONE] for that role.
Figure 15-3 Newly Added Role
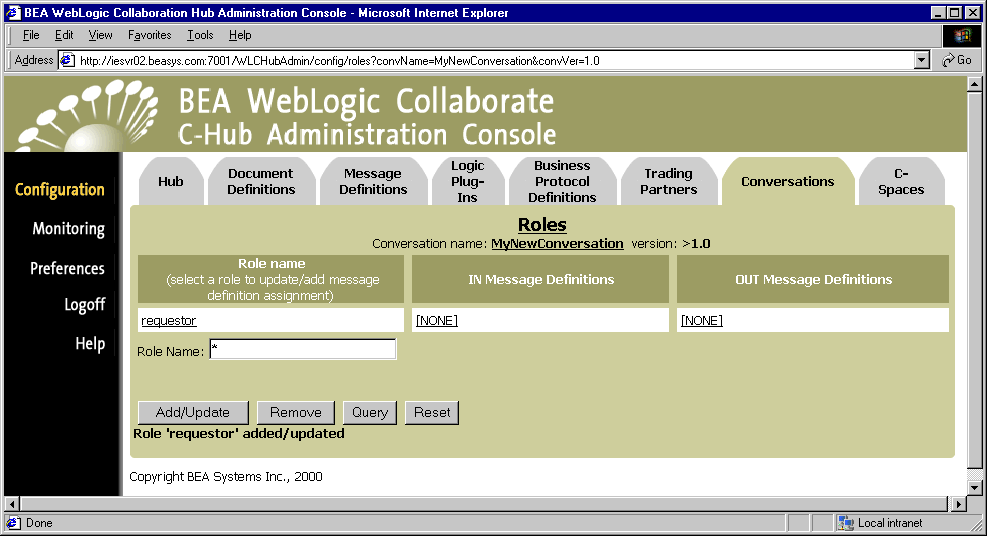
The next step is to assign message definitions to the role.
Note: To update an existing role, simply click on the role name in the Role name column.
Step 3. Assign Message Definitions to Roles.
You can bring up the Roles screen for a particular conversation by clicking on a role name in the Roles list for that conversation (in the Conversations configuration tab shown on Figure 15-1). You can also click on the [NONE] under the Message Definitions lists if no message definitions are defined yet for that role.
Figure 15-4 Assigning Message Definitions to Roles in a Conversation
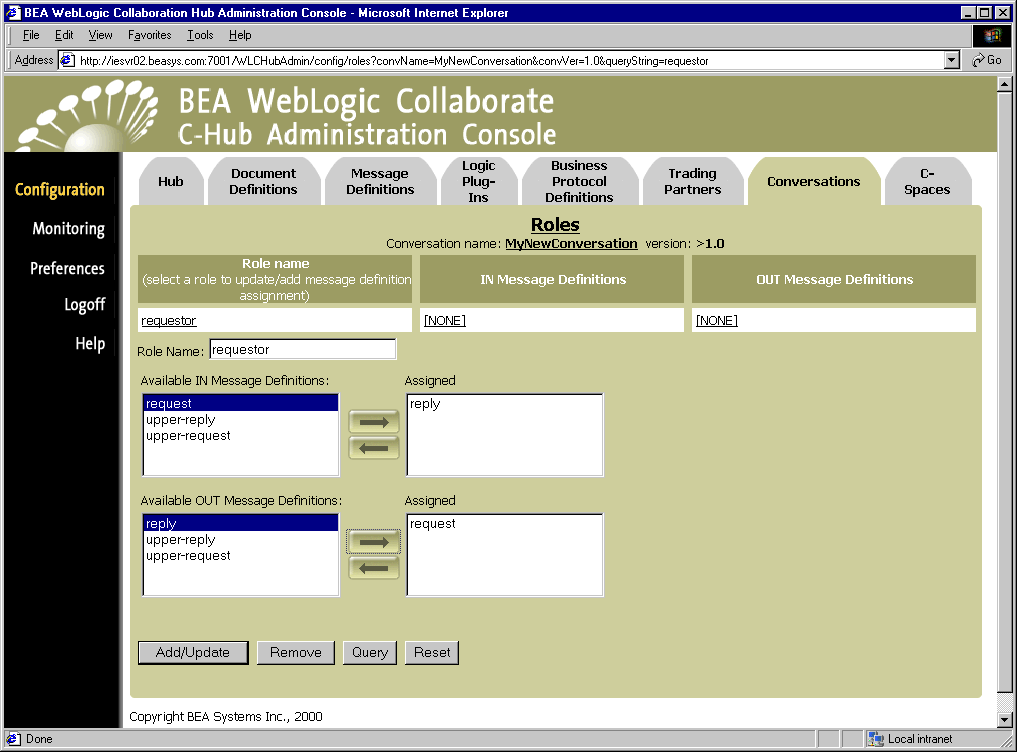
This screen shows the message definitions (defined in the Message Definitions tab) that are currently (if any) assigned to a role.
The Role Name field below the columns shows the role you just selected and to which you will assign message definitions.
Make sure you have the roles for the conversation you want to work with. The conversation name shows at the top of the screen.
Use the arrow buttons to move the message definitions you want to assign to the selected conversation into the Assigned lists for both IN and OUT message definitions. An IN message definition is a message definition the trading partner in this role will receive. An OUT message definition is one that the trading partner in this role will send. (The IN and OUT Message Definitions show the list of available message definitions. The Assigned list represents the message definitions that are actually assigned to the selected role.)
When you have the appropriate message definitions listed in the Assigned lists, click Add/Update to assign the message definitions to the selected role in the conversation.
The new role and message definition assignments you added for that conversation are displayed.
Figure 15-5 Role/Message Definition Assignments for a Conversation Succeeded
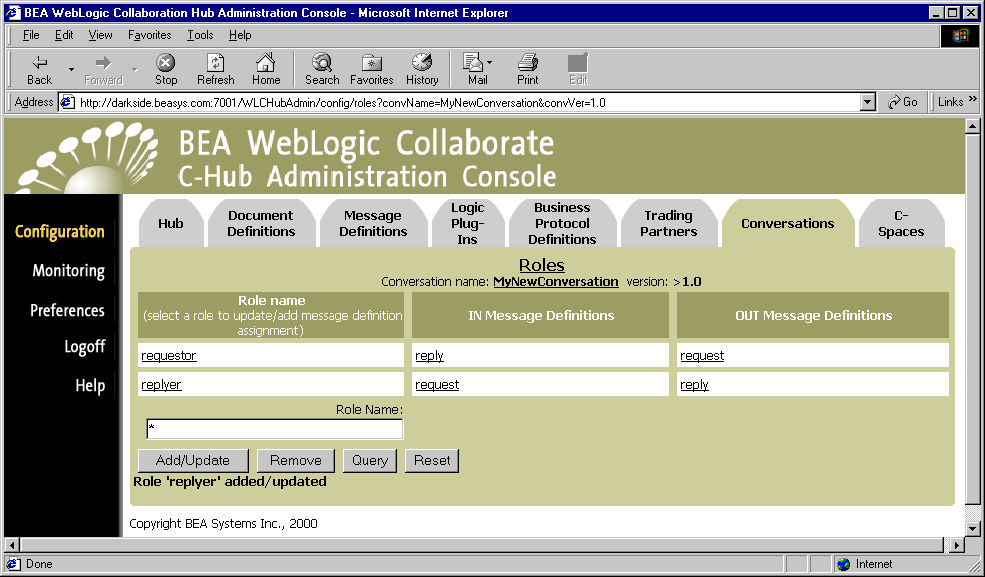
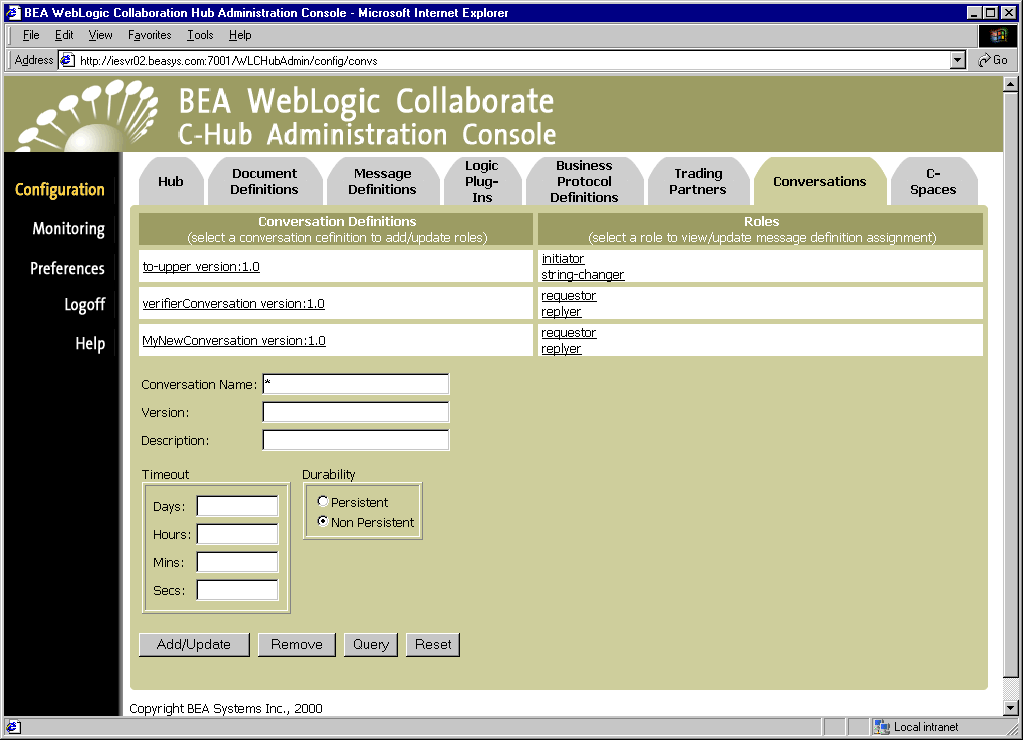
You will also see your changes reflected in the full list of conversations on the main Conversations tab. (To see this, click the Conversations tab.)
Figure 15-6 New Role with Message Definitions Shown on Main Conversations Tab
Viewing Conversations on a C-Hub
To view the conversations on a c-hub:
Figure 15-7 Viewing Conversations

The conversations configuration screen shows a table of conversations currently defined in the c-hub and the roles that are set up to participate in those conversations.
Using the Query Feature to Find Conversations
Notice the * in the Conversation Name field. This is a special wildcard character used for queries. In the above screen, the table shows all the conversations on the c-hub. You can type text strings in the Conversation Name field and do queries on them to refine the table display. For instance, to display just conversations that start with "Co", you can input Co* in the Conversation Name field and click Query. (The query is case-sensitive.) To display information just for Conversation1, you can enter Conversation1 in the Conversation Name field and 1.0 in the version field and click Query, or just click on the Conversation1 name in the Conversation Definitions list.
Removing Conversations and Roles
You can remove a role in a conversation, or remove the entire conversation at once, including its roles:
Removing a Role from a Conversation
Roles are always associated with a particular conversation. To remove a role from a conversation:
This brings up the detail configuration screen for the selected role associated with a particular conversation, as indicated at the top of the screen.
If the object you are about to remove is referenced by other object configurations (for example, if a c-space is using a conversation containing the role you are about to remove), then the confirmation dialog indicates this and asks if you want to continue. Click OK if you want to continue with the Remove.
The specified role is removed, and you are returned to the main Roles configuration screen for the particular conversation you are working with. Other roles may still be listed for that conversation.
Removing a Conversation
Roles exist within conversations, so keep in mind that if you remove a conversation, you automatically remove any roles that are included in (assigned to) that conversation.
To remove a conversation:
or
Click on the conversation you want to remove to display the configuration details for that conversation. On this screen, click Remove.
A confirmation dialog is displayed. If you click OK, the specified conversation is removed and you are returned to the main Conversations configuration screen.
Note: If the object you remove references or is referenced by other objects (for example, if a c-space is using the conversation you are about to remove), those references will be removed. If the object you remove contains other objects, those objects will be removed. See Table 8-2 for details on relationships and dependencies that can exist among configured c-hub objects.
Monitoring Conversations
For information on how to view and monitor detailed information on existing conversations, see Monitoring Conversations on the C-Hub in Monitoring the C-Hub.

|

|

|
|
|
|
Copyright © 2001 BEA Systems, Inc. All rights reserved.
|