


|

|
|
|
|
Working with C-Spaces
The following sections provide key concepts and procedures for configuring c-spaces on the C-Hub Administration Console:
For introductory information about c-spaces, see Overview in BEA WebLogic Collaborate Getting Started. For information about developing c-space monitoring applications, see Developing Management Applications in the BEA WebLogic Colaborate Developer Guide.
What Is a C-Space?
A collaboration space (c-space) is a container for predefined trading partners that conduct and coordinate conversations with each other. A collaboration space supports the following:
An e-market owner (who hosts a c-hub) can support any number of collaboration spaces on the Web concurrently. Each c-space can support any number of trading partners. Each trading partner can subscribe to business messages, which are communicated through a mediated messaging system, and can define local workflow and actions to execute upon receipt of business events (which are messages or documents).
For a complete explanation of c-spaces and other related concepts, see BEA WebLogic Collaborate Getting Started, particularly the Overview.
Creating a New C-Space
Creating a new c-space on a c-hub consists of the following tasks:
Step 1. Name and Describe the C-Space.
To create a new c-space on a c-hub:
Figure 16-1 C-Spaces Configuration
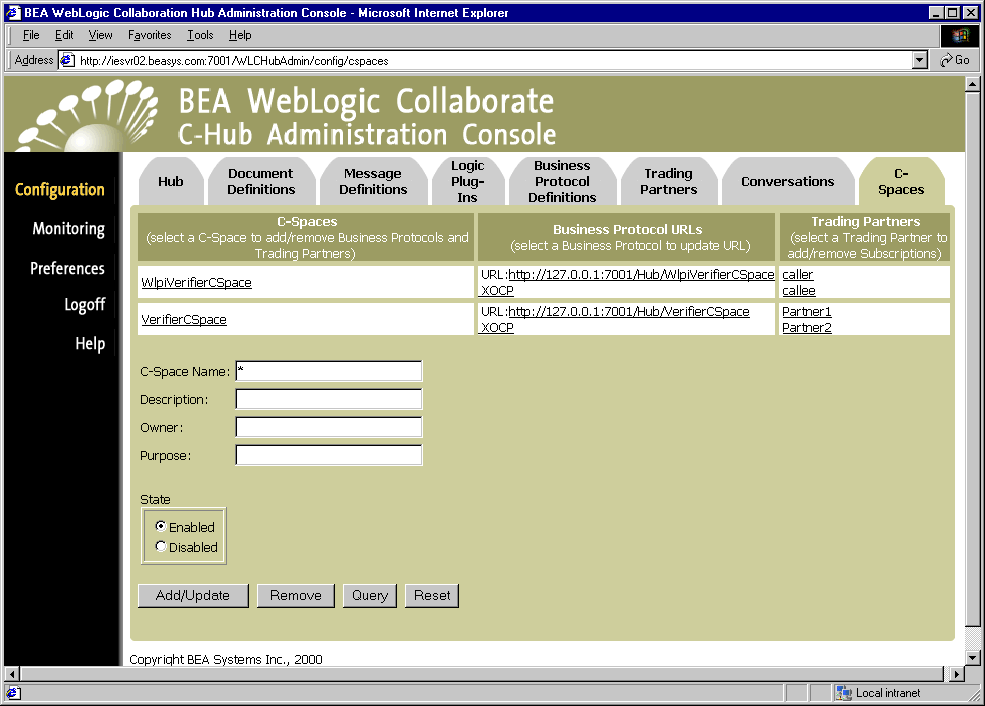
Your new c-space should show up in the C-Spaces list.
(You can also click Reset to discard your current changes and start again.)
Figure 16-2 New C-Space Added
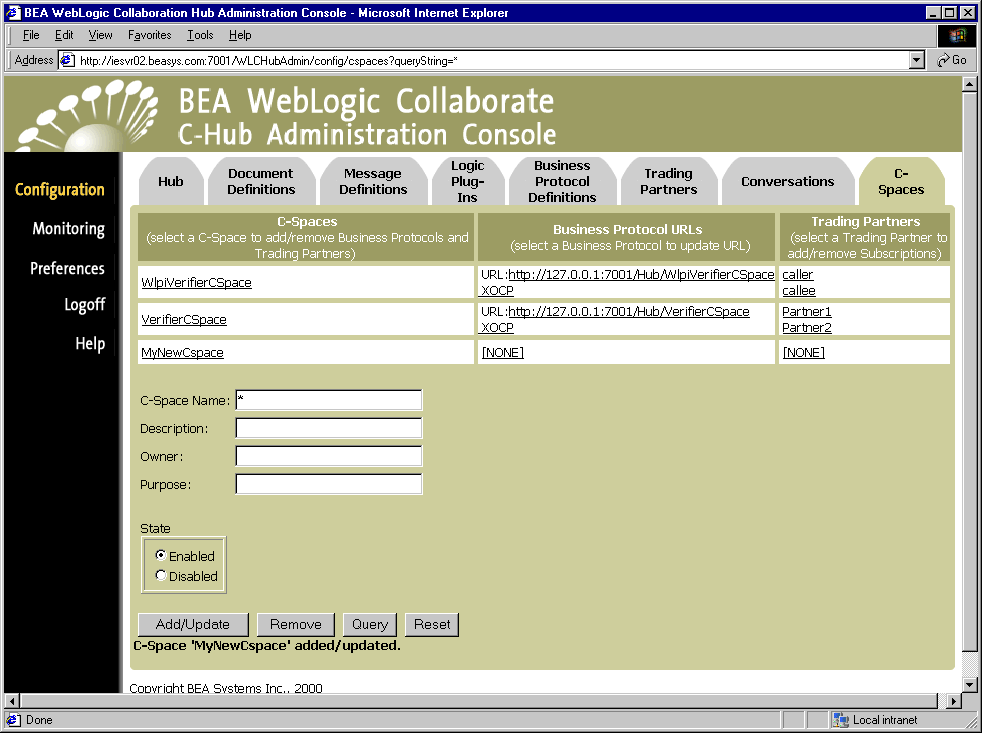
When you first add a new c-space, [NONE] will show up under both the Business Protocol URLs and the Trading Partners lists for that c-space. You need to assign both of these. The next step is to assign a business protocol to use in the new c-space.
Step 2. Assign a Business Protocol for a C-Space.
Assigning a business protocol to a c-space entails the following:
Each c-space/business protocol combination has a unique URL. A trading partner uses this URL to access a particular c-space using a particular business protocol.
Warning: A URL for a c-space/business protocol combination can be used only by the c-hub and c-enablers. If customer-supplied software uses one of these URLs, messages will not be processed correctly.
To assign a business protocol for the c-space:
This brings up the Business Protocol configuration screen for the selected c-space.
Figure 16-3 Assigning a Business Protocol for a C-Space
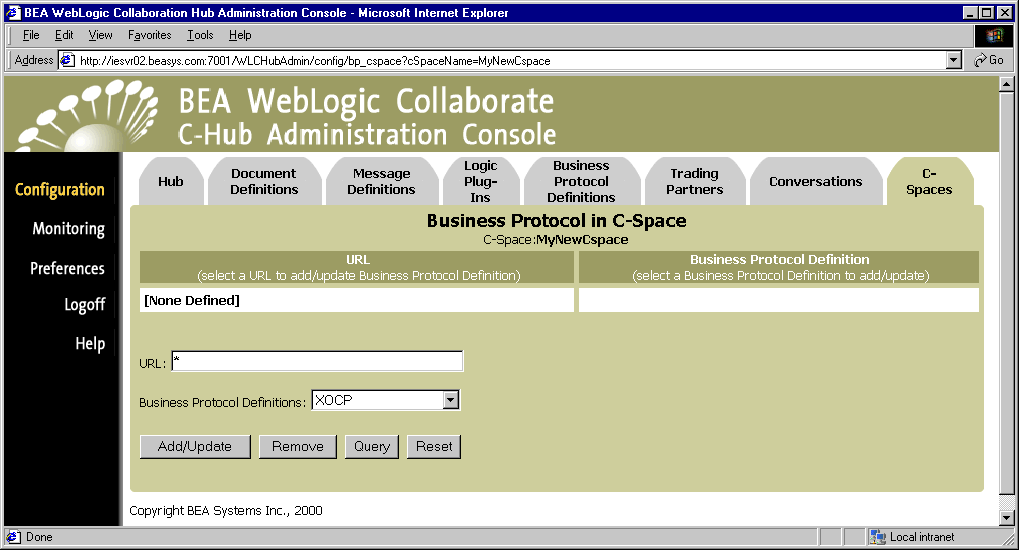
Figure 16-4 Business Protocol Definition Added to a C-Space
Notice that now only the Trading Partners list shows [NONE] for the new c-space. The final step is to add trading partners to the c-space.
Step 3. Add Trading Partners to a C-Space.
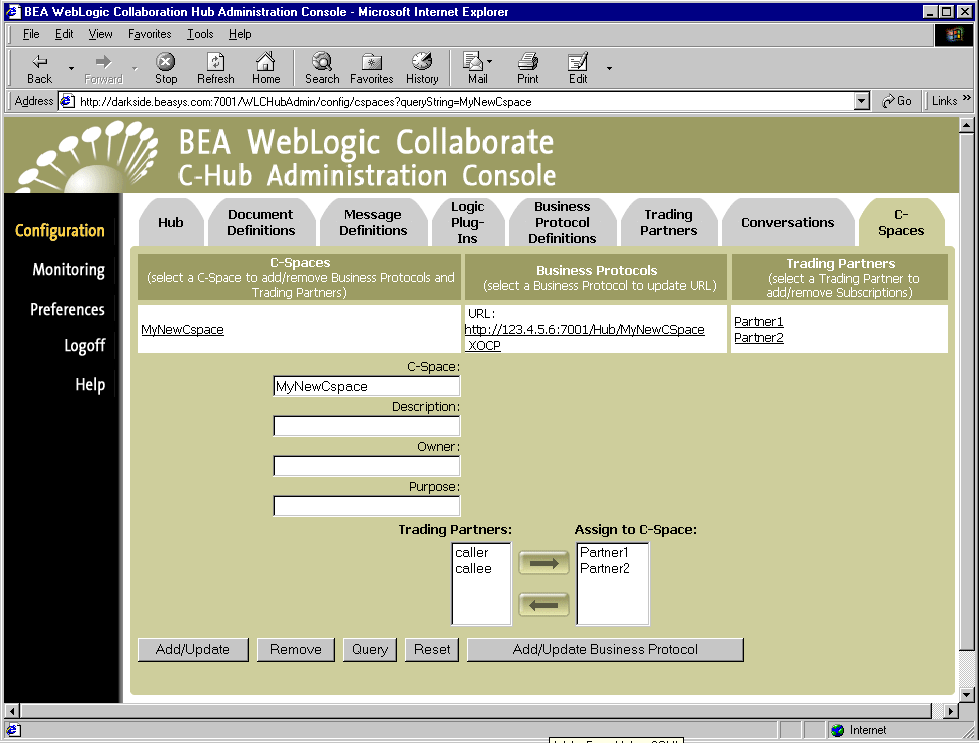
To add trading partners to a c-space, make sure you are on the C-Spaces configuration tab, then click on the name of the c-space in the C-Space list. (You can also click on the [NONE] under Trading Partners for the c-space you want to modify.) A detailed configuration screen for that c-space is displayed.
Figure 16-6 Adding Trading Partners to a C-Space
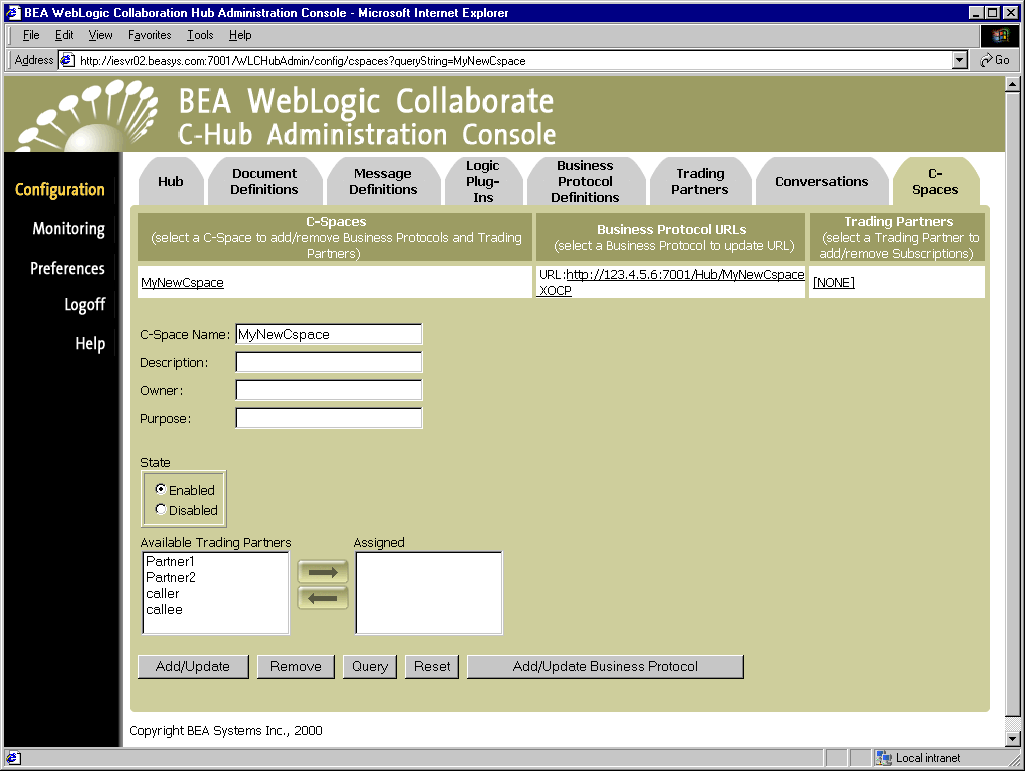
You can assign trading partners to the selected c-space by using the arrow keys to move the desired partners into or out of the Assign to C-Space list. (The Trading Partners list provides a list of available trading partners. The Assign to C-space list represents the trading partners assigned to the selected c-space.)
When you have the appropriate trading partners listed under Assign to C-space, click Add/Update to assign the partners to the c-space.
The selected partners should show up under Trading Partners assigned to the appropriate c-space on the main C-Spaces configuration screen.
Figure 16-7 Trading Partners Added to C-Space but Not Yet Subscribed to a Conversation
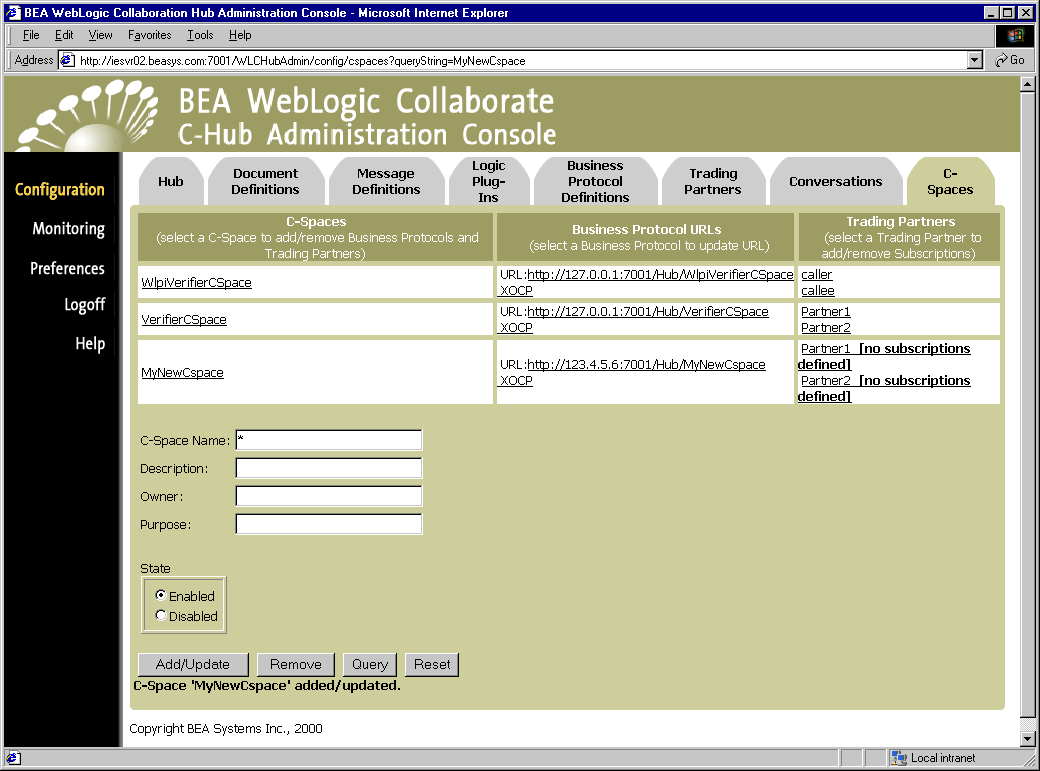
Note that the trading partner definition is not complete at this point, as indicated by the [no subscriptions defined] message next to the trading partner name in the Trading Partners list. The next steps are to create some roles and then subscribe the trading partners to play defined roles in specific conversations.
Step 4. Assign Subscriptions (Roles and Conversations) to a Trading Partner.
To assign a subscription to a trading partner, make sure you are on the C-Spaces configuration tab, then click on the name of the trading partner in the Trading Partners list. The C-Spaces "Subscriptions" information for the selected trading partner is displayed. Here, you can assign subscriptions to that trading partner. (At the top of the screen, notice the name of the c-space and the name of the trading partner for which you are about to modify subscriptions.)
Figure 16-8 Subscriptions for a Trading Partner in a C-Space
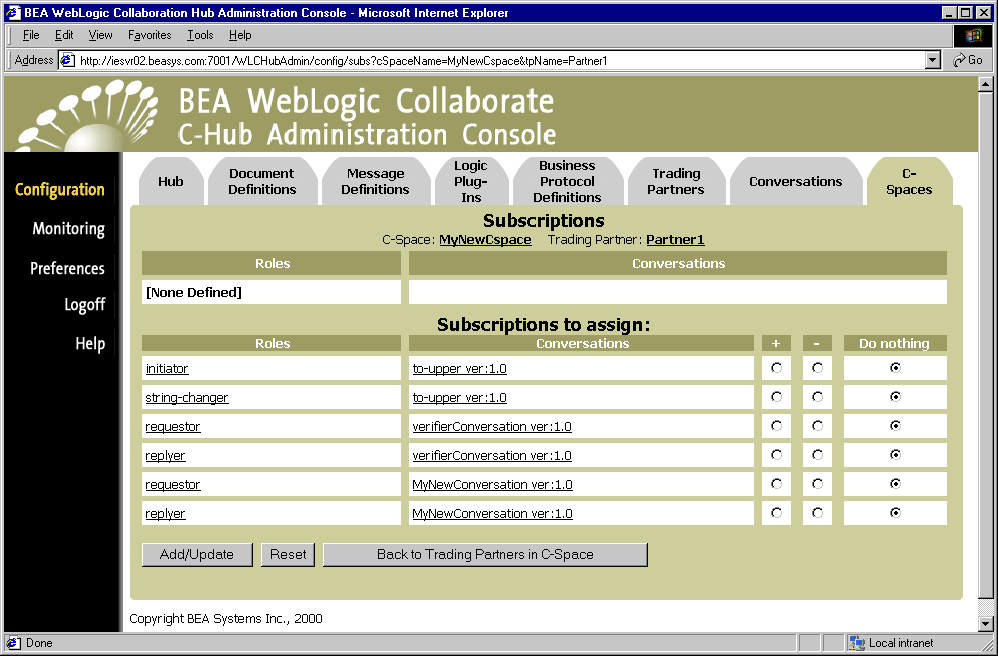
This screen allows subscriptions to be assigned. The bottom table, labeled Subscriptions to assign, are possible subscriptions available (based on the conversation defined earlier). These are not subscriptions that exist in the c-space, only the possible choices. They only exist when assigned to a trading partner (shown in the top table, labeled Subscriptions).
The first table shows the subscriptions currently assigned (if any) to the trading partner.
The second table shows the possible subscriptions that may be assigned to the trading partner. The possible subscriptions are based on information that was entered for the conversation definition (in the Conversation tab). The radio buttons are:
When you have selected the appropriate role/conversation subscription you want to assign to this trading partner, click Add/Update to apply it. You should see your change reflected in the Subscriptions list at the top of the screen (the first table).
(For example, to assign the roles of requestor in this c-space to the selected trading partner, you would select the '+' radio button for requestor and click Add/Update to see the assignment to take effect.)
Figure 16-9 Trading Partner Subscribed to a Role in a Conversation
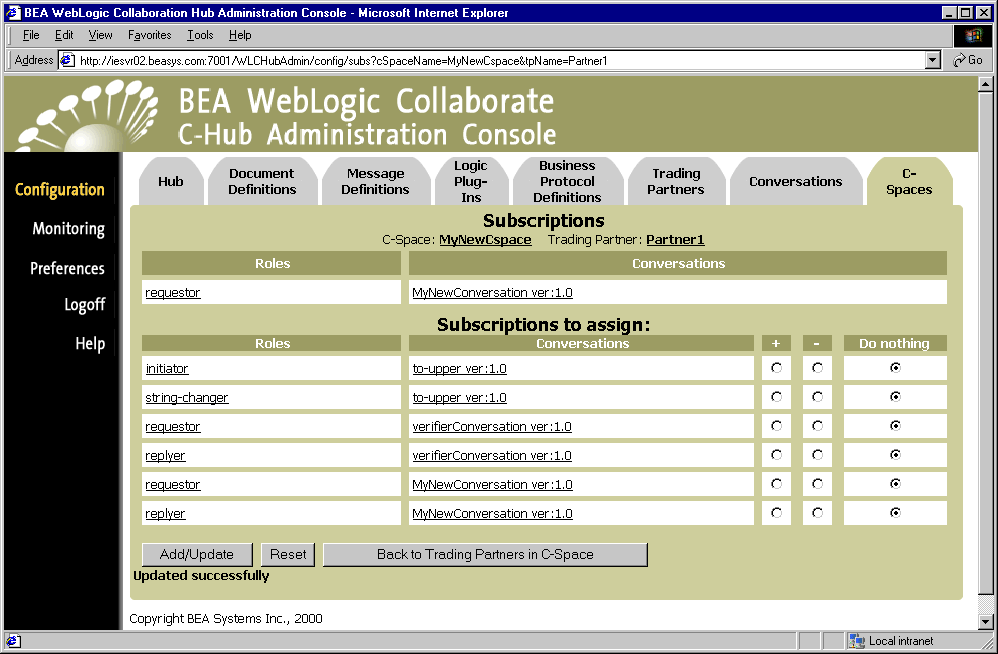
To return to the trading partners screen for this c-space, click the Back to Trading Partners in C-Space button. If you subscribed the first partner to a c-space, you should see the subscription show up on the Trading Partners screen.
You can now click on the name of the next trading partner you want to subscribe to a c-space and follow the procedure of adding roles as needed (described above).
To return back to the trading partners screen for this c-space, click the Back to Trading Partners in C-Space button. If you subscribed the second partner to a c-space, you now should see the subscription show up on the Trading Partners and the C-spaces screens.
Figure 16-10 Trading Partners Successfully Added to a C-Space and Subscribed to Roles in a Conversation
If you click on the C-Spaces tab again to see the main C-Spaces screen, the new c-space you added should show up with its subscribed trading partners next to it. (The [NONE] and [no subscriptions defined] messages should be gone now if you have added trading partners and subscribed them to conversations.)
Figure 16-11 C-Spaces Main Screen Showing New C-Space Added
Adding New Roles
An explanation for how to add new roles is included in Step 3. Assign Message Definitions to Roles. as a part of Setting Up Conversations.
Viewing C-Spaces on a C-Hub
To view the existing c-spaces on a c-hub:
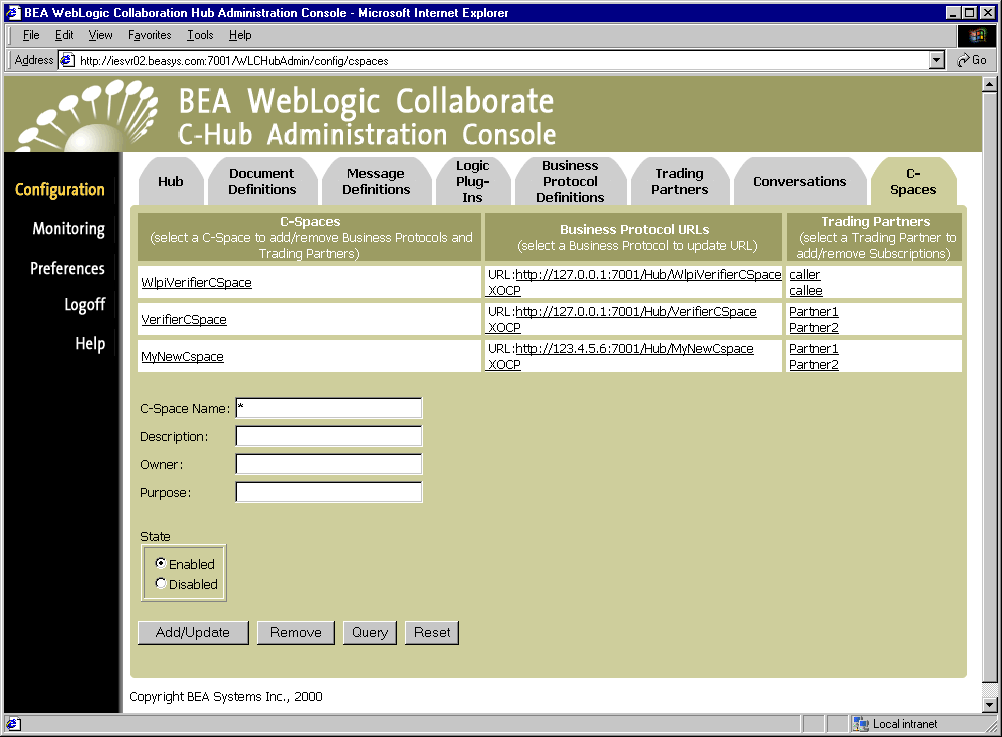
Figure 16-12 C-Spaces Configuration

The C-Spaces configuration screen shows the c-spaces currently defined in the c-hub, the business protocols assigned for the c-spaces, and the trading partners that exist in each of the c-spaces.
Using the Query Feature for C-Spaces
Notice the * in the C-Space field. This is a special wildcard character used for queries. In the above screen, the table shows all the c-spaces on the c-hub. You can type text strings in the C-Space field and do queries on them to refine the table display. For instance, to display just c-spaces that start with "CS", you can input CS* in the C-Space field and click on Query. (The query is case-sensitive.) To display information just for CSpace1, you can enter CSpace1 in the C-Space field and click Query, or just click on the CSpace1 name in the C-Space list.
Modifying an Existing C-Space
To modify an existing c-space, make sure you are on the C-Spaces configuration tab, then click on the name of a particular c-space in the C-Space list. To update the subscriptions, click on the trading partner in the Trading Partners list to get to the Subscriptions information.
Removing a C-Space
Warning: Keep in mind, if you remove a c-space you are removing the definition from the WebLogic Collaborate repository. This data is not automatically backed up and therefore may not be recoverable.
To remove a c-space:
or
Click on the c-space you want to remove to display the configuration details for that c-space. On this screen, click Remove.
A confirmation dialog is displayed. If you click OK, the specified c-space is removed and you are returned to the main C-Spaces configuration screen.
Note: If the object you remove references or is referenced by other objects (for example, if a trading partner is assigned to the c-space you are about to remove), those references will be removed. If the object you remove contains other objects, those objects will be removed. See Table 8-2 for details on relationships and dependencies that can exist among configured c-hub objects.
Monitoring C-Spaces
For information on how to view and monitor detailed information on existing c-spaces, see Monitoring C-Spaces on the C-Hub in Monitoring the C-Hub.

|

|

|
|
|
|
Copyright © 2001 BEA Systems, Inc. All rights reserved.
|