
|
|
|
|
|
|
Installing BEA WebLogic Application Integration
This section provides information you need to run the BEA WebLogic Application Integration installation program on a Windows or UNIX system. It includes the following topics:
About the BEA WebLogic Application Integration Installation Program
The BEA WebLogic Application Integration installation program guides you through the process of installing Application Integration.
The installation detects whether WebLogic Server 6.0 is installed and prompts you to specify an installation location and other information required to perform basic Application Integration configuration. It then unpacks and installs the software. The installation program requires a graphics (windowing) terminal or workstation. Refer to Using the Console-Mode to Install Application Integration on UNIX Systems for procedures on using a console-mode installation.
The Application Integration installation procedure installs the following components:
To install the Application Integration software, complete the following steps:
Step 1: Starting the Installation Program
Step 2: Reviewing the License Agreement
Step 3: Specifying the BEA Home Directory
Step 4: Specifying the Product Directory
Step 5: Selecting the Database for the Custom Domain
Step 6: Completing the Installation
Step 7: Installing Your Software License
Step 8: Starting WebLogic Server
Step 9: Verifying Your Software Installation
Step 10: Starting Application Integration
Step 1: Starting the Installation Program
You can install Application Integration from the WebLogic Integration CD-ROM included in the product package, or you can download the software from the BEA Web site http://www.bea.com.
The following section provides instructions for Windows platforms. If you are installing Application Integration on a UNIX system, see Starting the Installation Program on a UNIX System.
Starting the Installation Program on a Windows System
To start the Application Integration installation program on a Windows system:
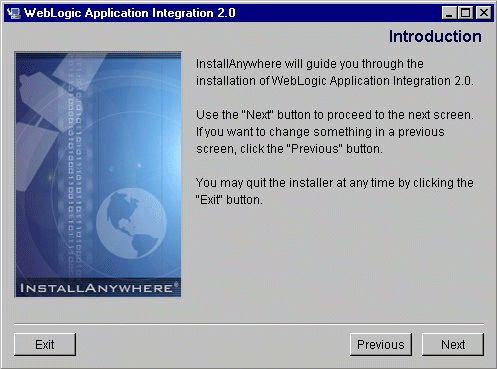
The Application Integration splash screen briefly displays followed by the Introduction dialog box.
Starting the Installation Program on a UNIX System
To start the Application Integration installation program on a UNIX system:
Consult your UNIX documentation for information about mounting and unmounting CDs. If you download the distribution from the web, make sure that you have execute permission on the distribution file (chmod 755 install.bin).
cd wlai
For the GUI-based installation, enter install.bin at the prompt. For the Console-mode installation, enter ./install.bin -i console at the prompt. For the GUI-based installation the Application Integration Splash screen briefly displays followed by the Introduction dialog box. For the Console-mode installation, see Using the Console-Mode to Install Application Integration on UNIX Systems.
Using the Console-Mode to Install Application Integration on UNIX Systems
After you have started the Application Integration installation as described in Step 1: Starting the Installation Program, refer to Table 2-1 for steps to guide you through the installation.
Table 2-1 Text-Based Installation Steps
Step 2: Reviewing the License Agreement
After you have clicked Next in the Introduction dialog box, the License Agreement displays as shown in Figure 2-1.
Figure 2-1 License Agreement Dialog Box
Complete the following procedure: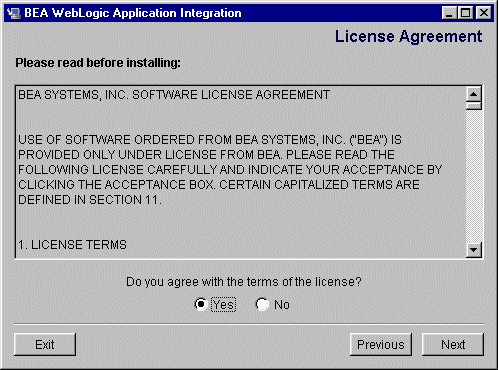
Step 3: Specifying the BEA Home Directory
Figure 2-2 shows the BEA Home Directory Dialog box.
Figure 2-2 Choose BEA Home Directory Dialog Box
The BEA Home directory serves as a central support directory for all the BEA products installed on your system. Although it is possible to create more than one BEA Home directory, we recommend that you avoid doing so. In almost all situations, a single BEA Home directory is sufficient. To specify the BEA Home directory and installation location: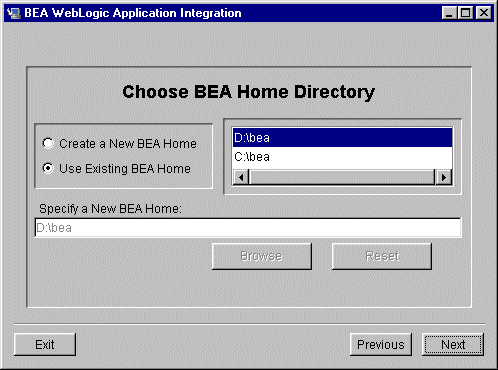
Note: This is the same directory that should be used for all WebLogic Integration components. It is recommended that you choose an existing BEA Home directory.
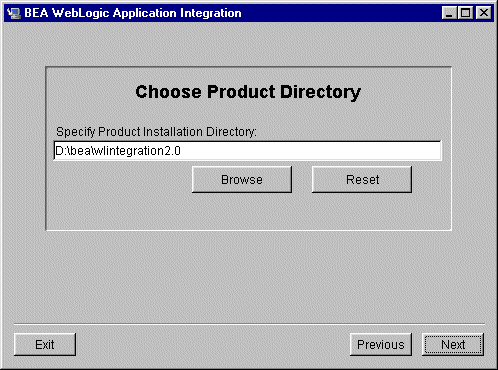
Step 4: Specifying the Product Directory
After you have selected the BEA Home directory, the Choose Product Directory dialog box displays as shown in Figure 2-3.
Figure 2-3 Choose Product Directory Dialog Box
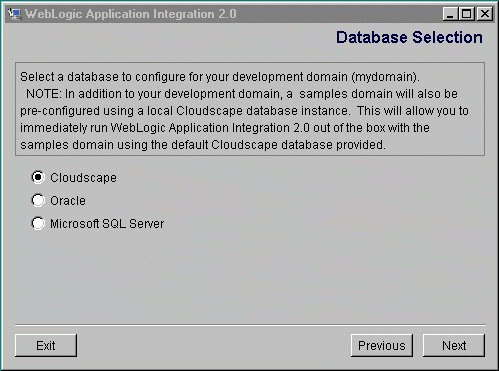
Step 5: Selecting the Database for the Custom Domain
After you have selected the Product directory, the Database Selection dialog box displays as shown in Figure 2-4. With this initial installation, BEA WebLogic Application Integration components are installed and deployed in the default samples domain. The samples domain uses the Cloudscape database by default. The system uses these two default parameters no matter what you select on the Database Selection window. For information about this initial installation and out-of-the-box demonstration environment, see Installed Components in the Installing BEA WebLogic Application Integration section.
The database that you select in the Database Selection window and connection parameters that you choose in the Database Configuration window will be saved and used when you rerun the setup program to customize your environment. These parameters are also used by the installer to set up mydomain. For information about customizing your environment after this initial installation, see Creating New Server Environments.
This step has two parts:
Step 5a: Selecting a Database
Because a common database is used by all WebLogic Integration components, you should specify the same database and provide the same access information that you provided for any previously installed component. For example, if you plan to use the BEA WebLogic Application Integration plug-in for Process Integrator, you must provide the same database information here as you did when you installed Process Integrator.
Figure 2-4 Database Selection Dialog Box
Step 5b: Configuring the Custom Domain for a Selected Database
If you select Oracle or Microsoft SQL Server for your custom domain, you will be prompted for the information required to establish access to your database. Scripts are provided for your use to create the tables required by BEA WebLogic Application Integration on your database server.
The sections that follow provide the information you need to configure a database or custom domain. Refer to the section appropriate to your configuration:
Configuring the Custom Domain to Use Cloudscape
To configure the custom domain to use Cloudscape:
Configuring the Custom Domain to Use Oracle
To configure the custom domain to use Oracle:
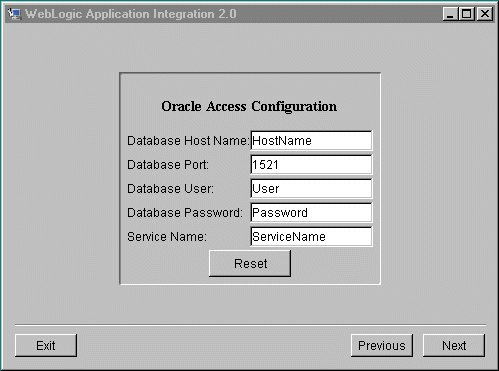
Note: Clicking Reset clears all of the fields.
Configuring the Custom Domain to Use Microsoft SQL Server
To configure the custom domain to use Microsoft SQL Server:
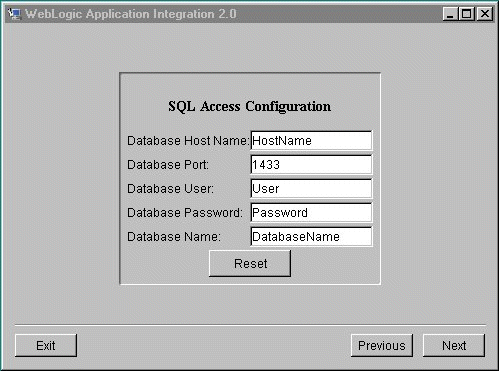
Note: Clicking Reset clears all of the fields.
Clicking Exit exits the installation program.
Step 6: Completing the Installation
After you have provided the database information for your custom domain, the Confirm Database dialog box, shown in Figure 2-5, appears so that you can verify your database information. When you have verified the database information, you are ready to complete the installation. When the installation program has completed copying the required files, the Install Complete dialog box displays as shown in Figure 2-7.
To complete the installation:
Figure 2-5 Confirm Database Dialog Box
or If it is incorrect, click Previous to return to the Oracle/SQL Access Configuration dialog box to modify the information Figure 2-6 Configuration Screen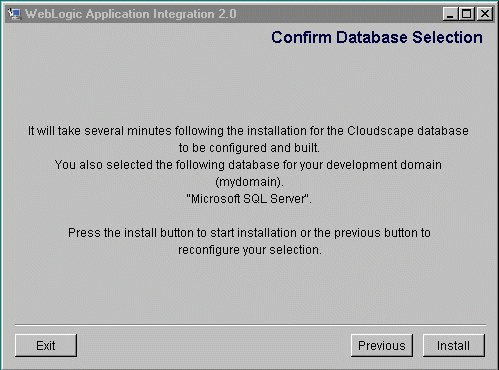
Note: The Configuring dialog box displays while the application is installing. When the installation is complete, the Install Complete dialog box displays. Figure 2-7 Install Complete Dialog Box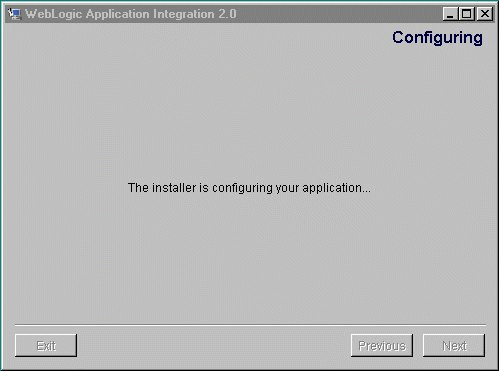
Note: If errors occur during installation, an error message appears, and a log file will be created in <BEA_HOME>/logs.
Step 7: Installing Your Software License
The components of WebLogic Integration cannot be used without a valid software license. If you purchased the software on CD-ROM, the WebLogic Integration license is provided on a diskette in the product box. If you purchased a license for an evaluation version of the product downloaded from the BEA Web site, you receive the license as an e-mail attachment. If you have already installed the WebLogic Integration license for a previously installed WebLogic Integration component, you may skip the following procedure and go to Step 8: Starting WebLogic Server.
To install the WebLogic Integration software license:
Warning: Do not overwrite the existing license.bea file.
set PATH=.\jdk130\bin:%PATH%
export PATH=./jdk130/bin:$PATH
UpdateLicense license_update_file
sh UpdateLicense.sh license_update_file
Although no one else can use your license file, you should save this information in a place protected from either malicious or innocent tampering by others.
Step 8: Starting WebLogic Server
Before you can begin verifying the BEA WebLogic Application Integration installation, you must start WebLogic Server.
To start WebLogic Server, follow one of these procedures:
OR
Notes: The server will start and indicate that it is listening on its HTTP port (7601).
The server may take several minutes to start the first time. Subsequent starts will be considerably faster.
The samples server will use the demonstration Cloudscape database even if you chose Oracle or MS SQL Server during the installation.
Step 9: Verifying Your Software Installation
After the installation is complete, it is recommended that you test the installation.
To test the installation, follow one of these procedures:
OR
Note: <WLI_HOME> is the directory where you installed Application Integration. This is normally located in <BEA_HOME>/wlintegration2.0.
Notes: This will run the EndToEndTest to verify your install of Application Integration.
If the test does not report that it has succeeded, proceed to the "Uninstalling BEA WebLogic Application Integration" for Windows or UNIX, depending on your system.
<WLI_HOME>/applinteg/config/samples
Step 10: Starting Application Integration
Once you have verified the installation of Application Integration, you need to start the application. To start Application Integration, complete the following:
Note: The username and password are automatically set when you install WebLogic Integration components. The adapter group, which is used for the samples domain, is also automatically added during the installation.
If the username and password are changed, you may have problems accessing Application Integration. If you need to change the username or password, refer to WebLogic Server documentation at http://www.oracle.com/technology/documentation/index.html.
Uninstalling BEA WebLogic Application Integration
This section contains instructions for the following subjects:
Uninstalling from Windows
To uninstall BEA WebLogic Application Integration on Windows, follow one of these procedures:
OR
Note: Another way to uninstall Application Integration is to use the "Add/Remove Programs" utility located in the Control Panel for Windows NT.
Figure 2-8 Install Anywhere Uninstaller Dialog Box
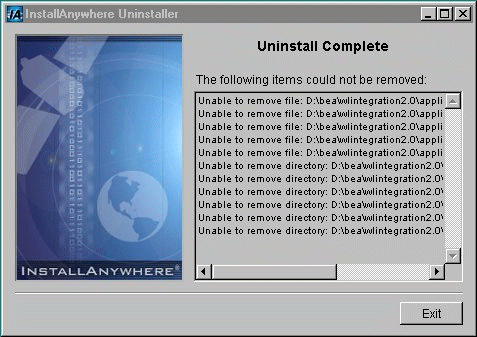
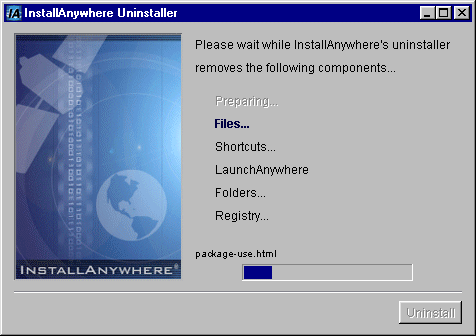
Note: A list of files and folders that cannot be removed will be listed on the Uninstall Complete dialog box after the Uninstaller utility completes. Files modified in Creating New Server Environments will not be automatically removed. Figure 2-9 Uninstall Complete Dialog Box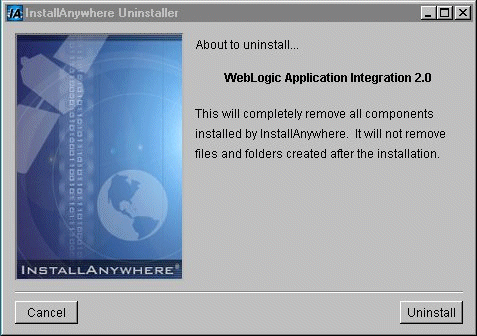
Uninstalling from UNIX
To uninstall BEA WebLogic Application Integration on UNIX, follow these steps:
Installing Your Software License
The components of BEA WebLogic Integration cannot be used without a valid software license. A 30-day license file is automatically installed when you install the first WebLogic Integration component. When you purchase the software, a permanent WebLogic Integration license file will be provided to you by BEA. Follow the directions below to update your license file on the target system.
To update the WebLogic software license:
Troubleshooting Your Software Installation
If the installation does not correctly install the software, you may want to check the following.

|

|

|
|
|
|
Copyright © 2001 BEA Systems, Inc. All rights reserved.
|