

|

|
|
|
|
Working with Plug-Ins
BEA WebLogic Process Integrator provides a plug-in framework that developers can use to extend the functionality provided by BEA WebLogic Process Integrator. The following sections explain plug-ins and how to work with them:
What Is a Plug-In?
A plug-in is a group of Java classes that extend the functionality provided in selected workflow components. Plug-ins provide a way to customize existing BEA WebLogic Process Integrator features so they are more appropriate for your environment, and to add functionality that is specific to your environment.
You access the functionality defined by a plug-in through existing Studio dialog boxes that have been modified to include a selection for the plug-in. For example, BEA WebLogic Process Integrator provides several default methods in the Start node to trigger the start of a workflow: timed, manual, called, and event. You select the trigger method using the Start Properties dialog box.
To extend the default methods, a developer can create a plug-in that specifies a custom event to trigger a workflow, such as receiving an e-mail message. This might be the preferred method for starting workflows in your environment. For you to be able to select the custom event, the developer also modifies the Start Properties dialog box so it contains a selection for the custom event.
A plug-in can extend the functionality of the following workflow components:
If a plug-in is developed for any of these workflow components, the Studio dialog box for these components is also modified to include a way for you to access the functionality provided by the plug-in.
Once a plug-in is developed and is deployed on WebLogic Server, it is available for use by BEA WebLogic Process Integrator. When BEA WebLogic Process Integrator starts, it checks WebLogic Server to see if any plug-ins are available on the server.
Before you can use an available plug-in, you must load it in BEA WebLogic Process Integrator to activate it. You might also need to specify some configuration settings for the plug-in before you can use it.
Note: To load or configure a plug-in, you must have the necessary permission. For details about permission levels, see About Levels of Permission.
Viewing Plug-Ins
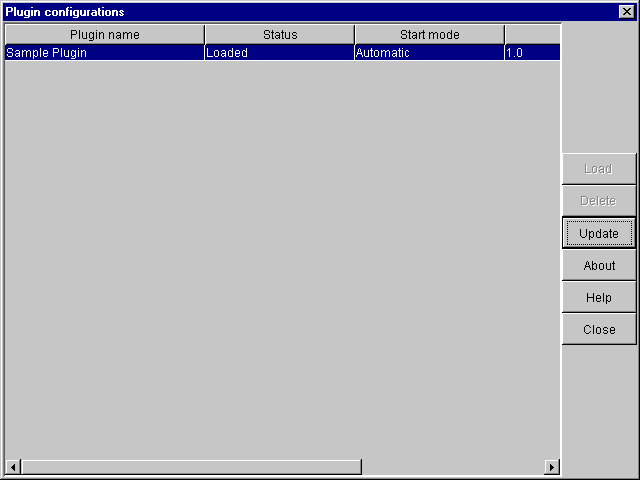
To view a plug-in, choose Configuration
Figure 3-1 Plugin Configurations Dialog Box
The information displayed for each plug-in is explained in the following table. Plugin Name The name for the plug-in as specified by the plug-in software. Status Start mode Version The software version for the plug-in Vendor The company that supplied the plug-in You can also obtain information about a plug-in by selecting the plug-in from the list and clicking About.
Loading Plug-Ins
To load a plug-in:
The status of the plug-in changes to Loaded in the list.
You can configure the plug-in as described in the following section.
Configuring Plug-Ins
To configure a plug-in:
Note: The start mode does not become effective until the next time the server is started.
For details about defining configuration settings for a plug-in, see the online help for that plug-in. To access plug-in help, press the F1 key (for context-sensitive plug-in help), or choose Help->Plugin Help from the main menu in the Studio and select the appropriate plug-in help from the menu.
Deleting a Configuration
You can delete a configuration for a plug-in if you no longer need the configuration. When you delete a configuration, you do not delete the plug-in itself. You just delete its registered configuration.
To delete a configuration:
Note: You cannot delete the configuration of a plug-in unless the status of that plug-in is Missing.
The following table describes the actions that occur when you restart the server after a plug-in configuration has been deleted.

|

|

|
|
|
|
Copyright © 2001 BEA Systems, Inc. All rights reserved.
|