

|
|
|
|
|
|
Defining the Start Order Processing Workflow
The Start Order Processing workflow contains only one task, which, upon execution, creates an XML document that in turn triggers the Order Processing workflow.
The following sections describe the process of creating and defining the Start Order Processing workflow:
Creating the Start Order Processing Workflow Template
Create a new workflow template called Start Order Processing by following the procedure in Creating a New Workflow Template in Defining the Order Processing Workflow. This workflow template will serve as the container into which you will import the Start Order Processing workflow template definition.
Importing the Start Order Processing Workflow Template Definition
You import the Start Order Processing workflow template definition from the Examples sub-directory found in the Studio directory, which you loaded onto your computer from the BEA WebLogic Process Integrator CD. All workflow template definitions can be exported and imported as XML documents.
To import the Start Order Processing workflow template definition:
Figure 3-1 Select Import Template Definition

The Open dialog box is displayed.
Figure 3-2 Open Dialog Box
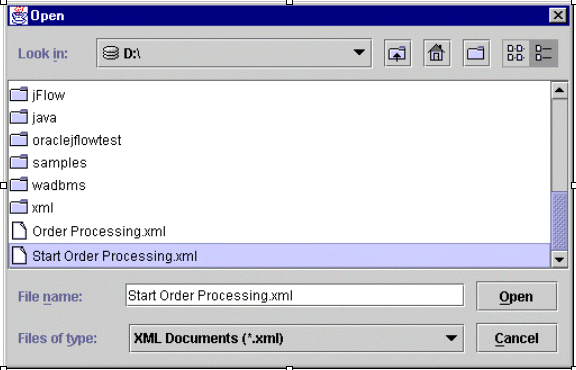
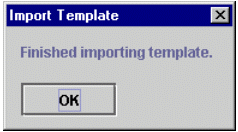
Figure 3-3 Import Template Dialog Box
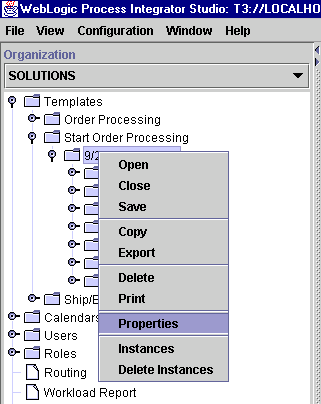
An imported workflow is marked as inactive. You must mark it as Active before executing the workflow; an inactive workflow cannot be started.
Figure 3-4 Select Properties from Menu
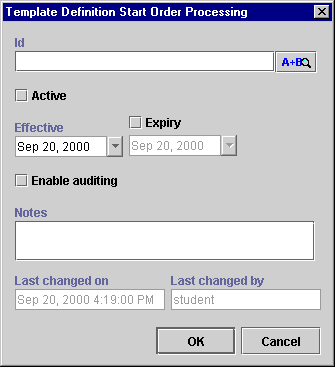
The Template Definition dialog box is displayed.
Figure 3-5 Template Definition Dialog Box
Defining the Start Order Processing Workflow Template Definition
Because the workflow template definition for the Start Order Processing workflow was already defined before you imported it, you do not have to perform the tasks discussed in this section for the purpose of this tutorial. However, for your reference, screen shots of dialog boxes that already contain the setup information are provided, as well as an overview of what was involved in defining the Start Order Processing workflow.
For details on procedures for creating and setting up a workflow, see Defining the Order Processing Workflow.
Figure 3-6 Start Order Processing Workflow
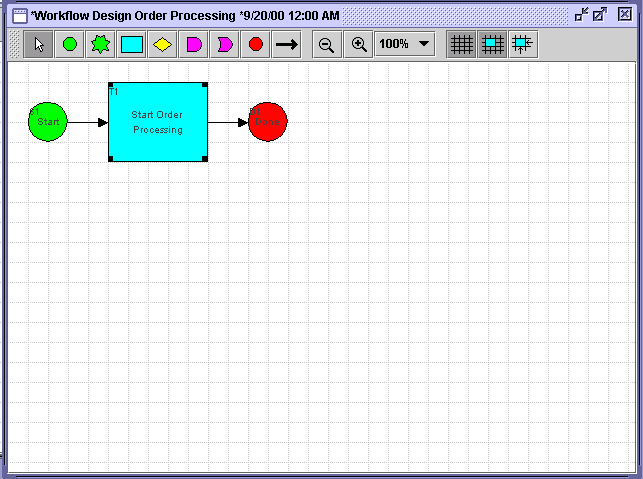
The Start node within the Start Order Processing workflow is set to a Manual start and must be started by a user from the Worklist application. Upon instantiation of this workflow, the first and only task, Start Order Processing, is displayed on the task list of the user who started the workflow. Upon the user's execution of the task, an XML document is created that triggers the Order Processing workflow.
In the workflow drawing area, double-click on the Start Order Processing task node to observe its task properties.
Figure 3-7 Task Properties: Start Order Processing
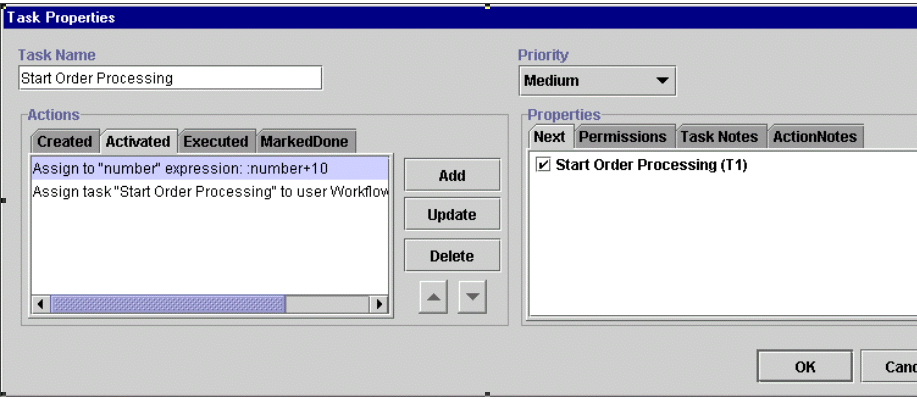
Under the Activated tab, the variable number is incriminated and the task is assigned to the workflow initiator. Note that the successor to this task is itself. This workflow does not contain a done node and will actually never complete. Because we are using this workflow to start the entire ordering process, the recursive aspect of the Start Order Processing task allows you to start multiple instances of the Order Processing workflow by double-clicking the task in the drawing area (Figure 3-6).
Each time you double-click the task, the ID of the Order Processing workflow is incriminated by 10, which produces a different instance. However, the details of the order contained in the XML document defined by the Post XML Event action will not change, and you will have to modify that action manually if you want to modify the details of the order.
Figure 3-8 Task Properties: Post XML Event Action
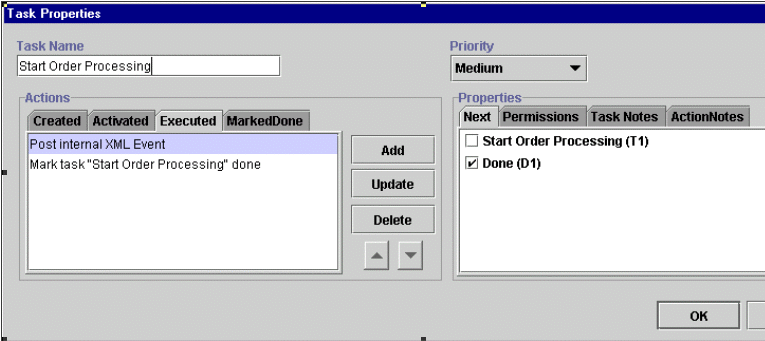
Under the Executed tab, you define the Post XML Event action, which sends the XML document to start the Order Processing workflow. In the Post XML Event dialog box, you create the XML document structure. Refer to Defining Events in Defining the Order Processing Workflow.
Select the Post Internal Event action and click Update to display the Post XML Event dialog box.
Figure 3-9 Post XML Event Dialog Box
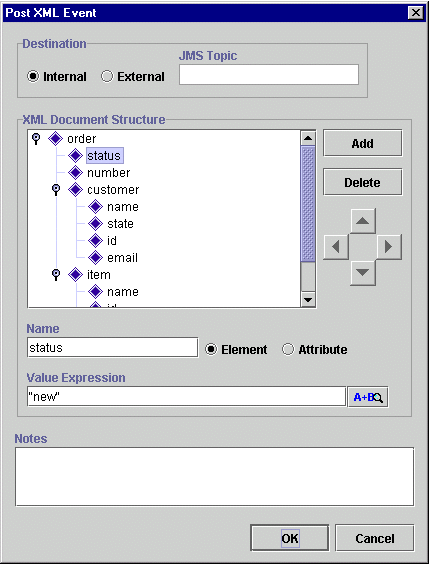
The Post XML Event dialog box shows the following XML document:
Listing 3-1 XML Document
<Order>
<status>new</status>
<number>10</number>
<customer>
<name>John</name>
<id>1234</id>
<email>joe@workflow.ca</email>
<state>CA</state>
</customer>
<item>
<name>disk</name>
<id>1314</id>
<quantity >2</quantity >
<price>24.5</price>
</item>
<Order/>
Finally, you add a Mark Task as Done action to the Executed tab. This action completes this workflow because the successor to the task is the done node.

|

|

|
|
|
|
Copyright © 2000 BEA Systems, Inc. All rights reserved.
|