


|

|
|
|
|
Defining the ShipBill Workflow
The ShipBill workflow handles the shipping and billing of the ordered item.
Import the ShipBill workflow template definition by using the procedure described in Importing the Start Order Processing Workflow Template Definition in Defining the Start Order Processing Workflow.
Once you import the workflow template definition for the ShipBill workflow, you do not have to perform the tasks discussed in this section for the purpose of this tutorial. However, for your reference, screen shots of dialog boxes that already contain the setup information are provided, as well as a brief overview explaining what was involved in defining the Ship/Bill workflow.
For details on procedures for creating and setting up a workflow, see Defining the Order Processing Workflow.
Opening the ShipBill workflow template displays the following flow.
Figure 4-1 Drawing Area: ShipBill Workflow Diagram
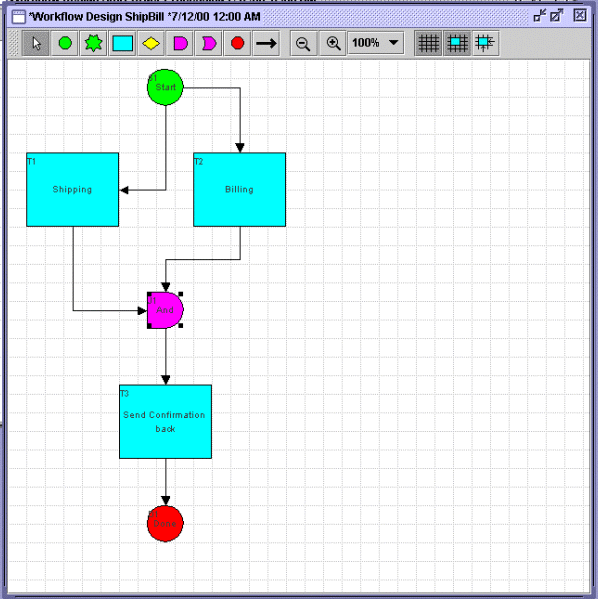
The ShipBill workflow is called by the Order Processing workflow, as defined in the C2 Decision node of the Order Processing workflow in Defining Decisions of Defining the Order Processing Workflow. ShipBill is a sub-workflow to Order Processing. The value of the following variables are transferred from the Order Processing workflow to the ShipBill workflow:
The Billing task calls the JavaBean POBean, which calculates the final price of the ordered item including tax and returns the value to the variable: TotalPrice.
Figure 4-2 Task Properties Dialog Box: Billing Task
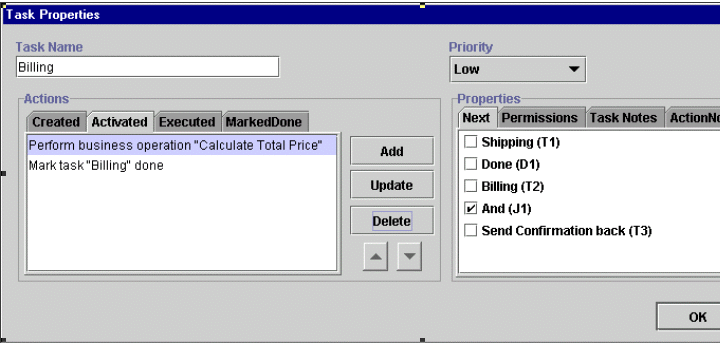
The Perform Business Operation action is set up in the Activated tab as follows:
Figure 4-3 Perform Business Operation Dialog Box
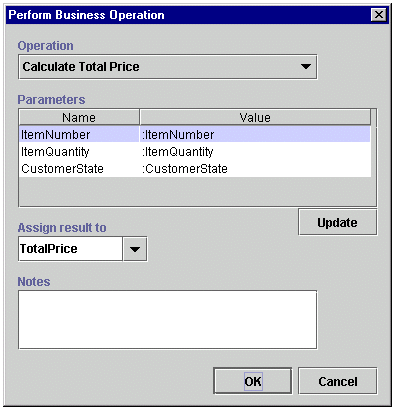
The TotalPrice variable is then sent back to the Order Processing workflow by way of an XML message that is created and sent upon execution of the Send Confirmation Back task.
Note the use of the AND join in this workflow, whereby both tasks, Shipping and Billing, have to be marked as done before the flow moves on.
In the workflow diagram, double-click the Send Confirmation Back task to display the task properties.
Figure 4-4 Task Properties Dialog Box: Activated Tab
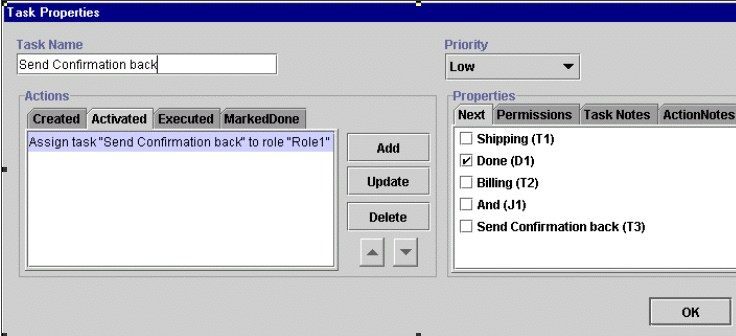
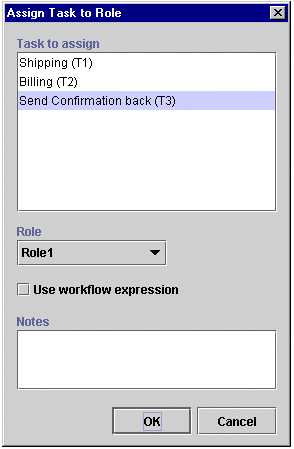
The Send Confirmation Back task is assigned to the role: Role1 by use of the Assign Task to Role action, as illustrated in the following dialog box.
Figure 4-5 Assign Task to Role Dialog Box
Select the Executed tab of the task.
Figure 4-6 Task Properties Dialog Box: Executed Tab
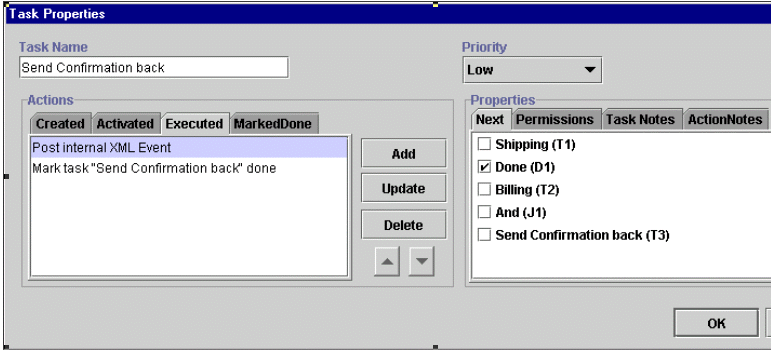
Upon execution of this task, an internal XML message is posted to the WebLogic Process Integrator server that will trigger the event in the Order Processing workflow and complete the entire process. Click Update on the Post Internal XML Event action.
Figure 4-7 Post XML Event Action Dialog Box: Internal XML Event
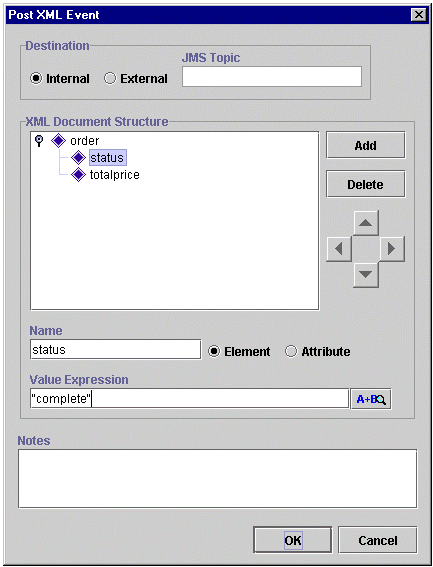
The XML document has the root element order and the status as complete. The value of the variable TotalPrice is also sent and will be read by the Order Processing workflow.

|

|

|
|
|
|
Copyright © 2000 BEA Systems, Inc. All rights reserved.
|