Modifiers
Overview of Modifiers
Modifiers enable you to set up price adjustments (for example, discounts and surcharges), benefits (for example, free goods and coupons), and freight and special charges that can be applied immediately to pricing requests or accrued for later disbursement. Using modifiers, you can:
-
Set up a modifier list with multiple modifier lines that define the terms of the price adjustment.
-
Create eligibility rules for modifiers by assigning list and line level qualifiers.
-
Define modifiers that are incompatible with other modifiers.
-
Create exclusive modifiers.
-
Create cascading modifiers.
-
Accrue monetary and nonmonetary benefits.
-
Create monetary or usage limits that a customer can receive for a promotion, deal, or other modifier.
-
If you use the multicurrency feature with price lists and modifiers, see Creating a Multicurrency Conversion List.
-
You can only view or update a modifier in your pricing transaction entity. The profile QP: Pricing Transaction Entity must match the pricing transaction entity of the modifier. You can only view or update a modifier in your source system. The profile QP: Source System Code must match the source system of the modifier. Otherwise, the modifier is view-only.
-
Using the HTML User Interface with Modifier Lists and Modifier
Oracle Advanced Pricing provides an HTML-based user interface (UI) that features guided steps, user-friendly pages, and shortcut links for setting up and maintaining modifiers, price lists, and qualifiers.
You can use this HTML format for many tasks that were previously available only using the Oracle Forms-based interface. Tasks that can be completed in HTML are identified with the words HTML Interface in the task title, for example, Creating a Modifier List (HTML Interface).
Related Topics
Using Modifiers in the HTML User Interface
Modifier Concepts
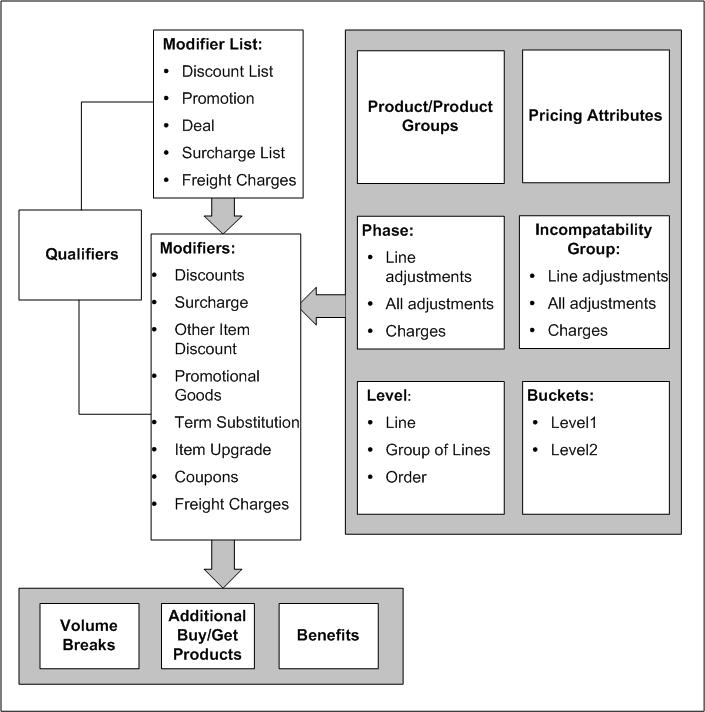
Using modifiers, you can set up price adjustments, benefits, freight and special charges, and promotional limits to control spending or usage. You can define simple discounts and surcharges as well as more advanced deals and promotions. The following list describes the main modifier concepts and related entities:
-
Modifier lists contain one or more modifiers. Modifiers have list level and line level components. Each list level must have one or more lines associated with it.
-
By defining qualifiers at the list and line levels, you define a customer's eligibility for the modifier.
-
Control features that influence modifiers are products and product groups, pricing attributes, phases, incompatibility groups, levels, and buckets.
-
The use of modifiers can result in volume breaks, additional buy/get products, and benefits.
The following diagram provides an overview of modifiers and related concepts, such as modifiers, modifier lists, and qualifiers:
Modifier Overview
Modifier Lists and Lines
Using modifier lists, you can create groupings of price adjustments, benefits, and freight and special charges that you offer and report together to meet various business needs. At the header level of the modifier list, you define criteria that is common to the modifier lines.
Create modifier lines for a modifier list to define the type of price adjustments, benefits, or freight and special charges that the pricing engine applies to pricing requests.
Adjustment Method
The adjustment method (also known as the application method in the forms-based UI) determines how the modifier applies the price adjustment. You can select from the following adjustment methods:
-
Percent: Creates a percentage price adjustment on each unit based on the percentage entered in the Value field. For example, to apply a 10 percent discount, select percent as the adjustment method.
-
Amount: Creates a fixed price adjustment on each unit using the amount entered in the Value field.
-
Lumpsum: Creates a price adjustment for this lump sum amount on the entire line.
-
New price: Overrides the selling price of this item and makes the new price (defined in the Value field) the new selling price. Creates a price adjustment for the difference between the list price and the new price.
The following table shows examples of how the pricing engine uses the adjustment method to calculate the extended selling price of an order line:
| List Price | Item | Quantity Ordered | Adjustment Method | Value | Price Adjustment | Extended Selling Price |
|---|---|---|---|---|---|---|
| 10 | Item A | 200 | Amount | 5 | 5 per unit | 1,000 |
| 10 | Item A | 200 | Percent | 5 | 5% per unit | 1,900 |
| 10 | Item A | 200 | New Price | 5 | 5 | 1,000 |
| 10 | Item A | 200 | Lumpsum | 5 | 5 off for the entire line | 1,995 |
The adjustment method for a modifier line depends on the level selected for that modifier line: Order, Line, or Group of Lines. The following tables show the adjustment methods available for each level: Order Level, Line Level, or Group of Lines. The Formula column shows if you can use a formula for the value of the modifier:
| Level | Modifier Type | Adjustment Method Available | Use with Formula? |
|---|---|---|---|
| Order Level | Discount | Percent | Yes |
| Order Level | Surcharge | Percent | Yes |
| Order Level | Freight/Special Charges | Lumpsum | Yes |
| Line Level | Discount | Percent, Amount, New Price, or Lumpsum | Yes |
| Line Level | Surcharge | Percent, Amount, New Price, or Lumpsum | Yes |
| Line Level | Freight/Special Charges | Percent, Amount, Lumpsum | Yes |
| Line Level | Other Item Discount (Get) | Percent, Amount, New Price, or Lumpsum | No |
| Line Level | Price Break | Percent, Amount, New Price, or Lumpsum | Yes |
| Line Level | Promotional Good (Get) | Percent, Amount, New Price, or Lumpsum | No |
| Group of Lines Level | Discount | Percent, Amount, New Price, or Lumpsum | Yes |
| Group of Lines Level | Surcharge | Percent, Amount, New Price, or Lumpsum | Yes |
| Group of Lines Level | Other Item Discount (Get) | Percent, Amount, New Price, or Lumpsum | No |
| Group of Lines Level | Price Break | Percent, Amount, New Price, or Lumpsum | Yes |
| Group of Lines Level | Promotional Good (Get) | Percent, Amount, New Price, or Lumpsum | No |
Lumpsum Adjustment Method with Group of Lines
When Lumpsum is selected as the adjustment method for a modifier line, the pricing engine creates a price adjustment for the defined lumpsum amount. The lumpsum can be based on group quantity (sum of item quantities) or an item amount (a monetary amount).
Note: When the modifier is automatic, the lumpsum is treated as a lumpsum for the entire order. When the modifier is manual, the lumpsum is applied to the line. If the manual modifier is applied to the next line on the order, then an additional lumpsum is applied to the order.
For example, consider a lumpsum modifier of 1000 that is applied to an order with two lines. When the modifier is automatic, the order has a total discount of 1000. When the modifier is manual and applied to the first line, then a lumpsum discount of 1000 is applied. Now apply the lumpsum modifier to the second line, and a discount of 1000 is applied to the second. Therefore, the order has a lumpsum discount of 2000; whereas, when the modifier is automatic, no matter how many order lines, the order has a lumpsum discount of 1000.
Two examples are provided to compare how the lumpsum amount is calculated if either 1) Group Quantity or 2) Item Amount is selected.
The following Discount list modifier is used in each example.
| Level | Modifier Type (line level) | Product Attribute | Product Attribute Value | Value | Adjustment Method |
|---|---|---|---|---|---|
| Group of Lines | Discount | All Items | All | 1000 | Lumpsum |
Lumpsum calculations (Group Quantity Selected)
The following example demonstrates how the adjustment amount is calculated when the Lumpsum modifier is applied against the group quantity of an order:
| Line | Item | Quantity | Price | Adjustment Amount Calculated when Lumpsum Modifier Applied |
|---|---|---|---|---|
| 1 | AS54888 | 10 | $80 | $20 * 10 qty |
| 2 | AS54999 | 40 | $20 | $20 * 40 qty |
The pricing engine calculates the adjustment amount as follows:
-
The pricing engine calculates the Group Quantity value, which is the sum of all item quantity lines. Therefore, the Group value is 50 (10 + 40).
Group value for Line 1: 50
Group value for Line 2: 50
-
To obtain the adjusted amount, the value (from the Value field of the modifier - in this case, 1,000) is divided by the group value (50):
-
Line 1: 1,000/50 = 20
-
Line 2: 1,000/50 = 20
The adjustment amount per quantity is $20. The total adjusted amount for the entire order is $1,000: Line 1 is $200, and Line 2 is $800.
-
Lumpsum Calculations (Item Amount Selected)
The following example demonstrates how an adjustment for lumpsum modifier is calculated based on the item amount (the monetary amount for each item). Suppose the Lumpsum modifier is applied against the following items on a sample sales order:
| Line | Item | Quantity | Price | Adjustment Amount |
|---|---|---|---|---|
| 1 | AS54888 | 10 | $80 | 50 |
| 2 | AS54999 | 40 | $20 | 12.5 |
The engine calculates the lumpsum based on item amount as follows: value divided (/) by group value:
-
Group value is calculated as follows:
Group value = Sum of all lines' unit price * quantity/unit price per line:
Total group value= $80*10 + $20*40 = 1600
-
Group value for Line 1 = 1600/80 = 20
-
Group value for Line 2 = 1600/20 = 80
-
-
To obtain the adjusted amount per unit, the value (from the Value field of the modifier, in this case, 1,000) is divided by the group value for each line:
-
Line 1: 1,000/20 = 50
-
Line 2: 1,000/80 = 12.5
Therefore, the adjustment amount for the first line is 50 and for the second line 80.
-
Using Modifiers with Negative Unit Selling Prices
A Discount or Surcharge modifier can be used to adjust the final unit selling price, regardless of whether the item list price is a positive or negative value.
Example 1: Positive priced item
If a product is $100 and the customer gets a 40 percent discount, then the customer gets a $40 discount, which means the price would be $60.
The following calculations are used to get this result:
List price * modifier percent = line discount amount
List price - line discount amount = line price
Example 2: Negative priced item
If a product is <-$100> and the customer gets a 40 percent discount, then the customer gets a <-$40> discount, which results in a price of <-$60>.
Note: The brackets (<>) indicate a negative price.
The following calculations are used to get this result:
<list price> * modifier percent = <line discount amount>
<list price> - <line discount amount> = <list price> + line discount amount = <line price>
Example 3: Surcharge with negative-priced items
The following example shows the results when a Surcharge modifier is applied to a price list line with a negative price:
-
Create a simple modifier (ABC-MN) with type = Surcharge of 10 percent.
-
Create a price list line (ABC-N) with a value of <-$100>.
-
Enter a sales order with price list ABC-N and the item of the price list ABC-N.
-
Save the order.
-
The surcharge is applied, and the unit selling price is <$-110.00>.
Incompatibility Processing
When a customer is eligible for more than one modifier, you can use incompatibility processing to determine which of the modifiers the pricing engine should select and apply to an order or order line. For more information, see Changing Modifier Incompatibility.
Buckets
When setting up a modifier, you can assign a modifier line to a particular bucket, such as Bucket 1, 2, or 3, to define cascading price adjustments. This setup controls how discounts and other benefits are calculated.
Manual Modifiers
For manual modifiers, the modifier adjustment is not applied automatically. Rather, you must manually select the adjustment to be applied to an order line. The following modifier types can be manual:
-
Discounts
-
Freight and special charges
-
Price breaks
-
Surcharges
Manual modifiers can also be used with price break lines. You can set manual modifiers at the order, line, and group of lines levels, and can override them.
Pricing Buckets with Manual Modifiers
Pricing buckets can be used with manual modifiers at the line or group of line level for the discounts, surcharges, freight and special charges, and price break modifiers. You can use this feature if the profile option QP: Allow Buckets for Manual Modifiers is set to Yes.
Once created, the manual modifier can be selected from the View Adjustments window in Order Management or the Price Adjustments window in Oracle Quoting. If a manual modifier is applied in an earlier bucket, then all subsequent adjustments will be recalculated. Alternately, when you overtype the selling price on the order line in Order Management, you can only apply manual adjustments in the null bucket. See the Oracle Order Management User's Guide, Pricing chapter and the Oracle Quoting User's Guide for more information on using manual modifiers.
Events
Events are points in the process flow when the calling application sends a pricing request to the pricing engine (similar to a workflow event). The information that the pricing engine returns, for example, base prices, price adjustments, promotions, or freight charges, depends on the pricing phases of the event.
For example, if you need to price sales orders at shipment, use the Reprice Line event and insert the Reprice Line workflow activity into the order process workflow to invoke the repricing. The pricing engine uses the price list and modifiers that are in effect at order entry to meet booking requirements such as credit check.
Accruals
You can create monetary and non-monetary accruals. For example, a customer accrues 10 airline frequent flyer credits for each item they purchase. The pricing engine uses the accruals in price calculations and passes them to the calling application.
Accruals:
-
Do not affect the selling price of an order line.
-
Do not appear as chargeable items on invoices.
-
Create an adjustment record in the database.
You can:
-
Assign expiration dates to accruals.
-
Mark accruals as redeemed.
-
Assign monetary accruals to buckets. Since accruals do not affect the selling price of an order line, the pricing engine does not include them in bucket calculations. However, it uses bucket numbers to determine the price from which to calculate the accrual value.
The following table shows how accruals are calculated using buckets. In this table:
-
The Price Adjustment column shows the value of each modifier.
-
The Bucket Subtotal column shows the total value of all modifiers for the bucket.
-
The Selling Price column shows the price at the beginning of the calculation and after the application of each bucket subtotal.
-
The value Null in a cell means that the cell has no value; the value Null Bucket means that the modifier is grouped in the null bucket:
| Bucket | Modifier | Price Adjustment | Bucket Subtotal | Selling Price |
|---|---|---|---|---|
| Null | Null | Null | Null | 100.00 |
| Null | Null | Null | Null | Null |
| 1 | Null | Null | (7.00) | 93.00 |
| 2 | Null | Null | (5.00) | 88.00 |
| 3 | Null | Null | (6.80) | 81.20 |
| Null Bucket | Null | Null | (15.00) | 66.20 |
| Null | Null | Null | Null | Null |
| 1 | 10% accrual | (10.00) | Null | Null |
| 1 | 5% accrual | (5.00) | Null | Null |
| 2 | 10% accrual | (9.30) | Null | Null |
Example of Nonmonetary Accruals
The following is an example of a setup for a non-monetary accrual.
If an accrual conversion rate is used, then the value equals the monetary value of the points. The value in the Accrual Value field is calculated using the Benefit Quantity value * the Accrual Conversion Rate value:
-
5 * 0.5 = 2.5
Field Value Volume Type Item Quantity Break Type Recurring Operator Between UOM EA Value From 2 Value to 99999999 Adjustment Method Lumpsum Accrual Value 2.5 Benefit Quantity 5 Benefit UOM PN (for Points) Accrual Conversion Rate 0.5
Qualifier Groups and Grouping Numbers
When qualifiers are assigned to qualifier groups, all the qualifiers in the qualifier group are attached to the modifier. Before you attach multiple qualifier groups, you must indicate how the process should coordinate the grouping numbers.
Cross Order Volume
You can provide extra benefits to customers after they place a certain amount of business with you. The cross order volume feature allows you to create modifiers that are qualified across an accumulation of orders and applied when a customer meets certain volume levels. It accumulates and sums order amount, item quantity, and item amount across the orders of each customer.
Cross Order Volume Load concurrent program
Using Qualifier Grouping Numbers across Qualifier Groups
Creating a Modifier List
Using modifier lists, you can create groupings of price adjustments, benefits, and freight and special charges that you offer and report together to meet various business needs. At the list level, you define criteria such as the modifier currency that applies to the modifier and any modifier lines you add to the modifier list.
Note: Oracle Advanced Pricing also provides an HTML-based UI for setting up and maintaining most modifier and modifier line types. For information on using the HTML UI with modifiers, see Using Modifiers in the HTML User Interface.
You can create the following modifier list types:
-
Deal
-
Discount list
-
Freight and special charge list
-
Promotion
-
Surcharge list
To create a modifier list
-
Navigate to the Advanced Pricing-Define Modifier window.
Note: If you cannot query or update the modifier after saving it or exiting, consult your Pricing Administrator for access privileges. Your security privileges may not allow you to access this window.
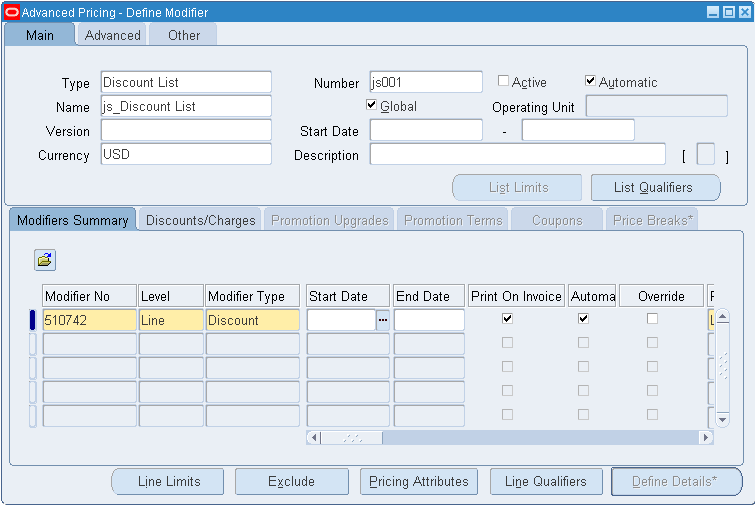
Advanced Pricing - Define Modifier window
-
On the Main tab, select the a Modifier Type.
-
Enter a modifier list value in the Number field.
-
Select or clear the Active check box. The pricing engine evaluates the modifier only if the Active check box is selected (inactive modifiers are not evaluated further by the pricing engine). The pricing engine performs more effectively if the Active check box is cleared for expired modifiers. You can query inactive modifier lists.
-
Select or clear the Automatic check box:
-
If selected, the Automatic check box is also selected at the line level, and the pricing engine automatically applies the modifier.
-
If cleared, then the modifier is considered a manual modifier and the adjustment must be applied manually rather than automatically.
Note: If the Automatic option is enabled at the modifier list level, you can still manually apply line types of Discount, Surcharge, and Freight/Special Charges by clearing the Automatic check box at the line level.
-
-
Enter a value in the Name field to identify the modifier.
The modifier name should be unique across all Pricing Transaction Entities (PTEs), otherwise an error occurs. For example, if a modifier named Corporate is created in the Order Management PTE, an error message appears if you create a Corporate modifier in the Purchasing PTE.
-
A Global check box appears if the Pricing Security Control Profile is set to ON. If the check box is selected, the modifier list can be used by all operating units for pricing transactions. If cleared, the modifier's use is restricted to the operating unit of the user creating the modifier list.
-
Enter a version if the modifier Type is Promotion or Deal.
-
Enter the Start and End Date range for the modifier.
-
When a qualifier is attached to a price list or modifier header, the effective dates of that qualifier determine the effective dates for the price list or modifier list, not the effective dates defined in the price list or modifier list window. For example, suppose you create a price list with an effective start date of 23-NOV-2005 and no end date; then you create a qualifier at the header level with effective dates of 10-NOV-2005 and 12-NOV-2005 for customer Computer Service and Rentals. However, after 12-NOV-2005, the price list will not be valid for Computer Service and Rentals or any other customer.
-
If you do not enter dates and select Active, the list is effective from the creation date.
-
-
Choose one of the following:
-
Select a currency. If a currency is selected such as US dollars (USD), the sales order must match the modifier currency to determine pricing for the order.
-
Optionally, select Optional Currency to leave the Currency field in the modifier list blank. This option can be selected for modifiers where currency is not used as a criteria to select modifiers for the order. For more information, see Optional Currency.
-
-
Enter a description for the modifier list. If the modifier list Type is Promotion or Deal, select the Advanced tab.
-
Save your work.
On the Advanced tab
-
If the modifier list Type is Promotion or Deal, select the Advanced tab.
Advanced Pricing - Define Modifier window: Advanced tab
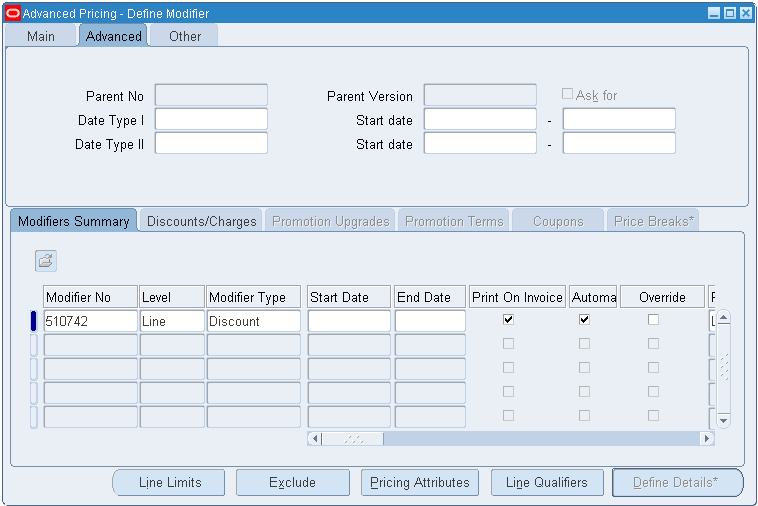
Note: The modifier list types of Promotion and Deal have a parent-child relationship for reporting purposes. A Deal modifier list must be associated with a parent Promotion by providing the promotion name and version. Since this association is for reporting purposes, information that you define on the promotion is independent of and does not affect the information on the Deal modifier.
-
Enter the Parent Number and Parent Version to specify the promotion to which the deal is associated.
-
Select the Ask for box to create an Ask for modifier. This means the customer must specifically request that the modifier benefit be applied (for example, by providing a special discount number), otherwise it will not be applied. The Ask for box is only available for modifier list types of Deal and Promotion.
Note: If the pricing engine selects multiple modifiers to apply to an order line, Ask for promotions receive a higher preference than other modifiers.
-
In the Date Type I field, specify Order Date and a date range.
-
In the Date Type II field, specify Scheduled Ship Date and a date range. The Order Date and Scheduled Ship Date are passed by Order Management and cannot be changed. If you enter dates for both Order Date and Scheduled Ship Date, the sales order must meet both dates to be eligible for the modifier
-
Save your work.
Note: The same results can be achieved by creating qualifiers for Order Date and Ship Date and attaching them to the modifier. These qualifiers are sourced and the user can override the mapping rules for these qualifiers.
On the Other tab
-
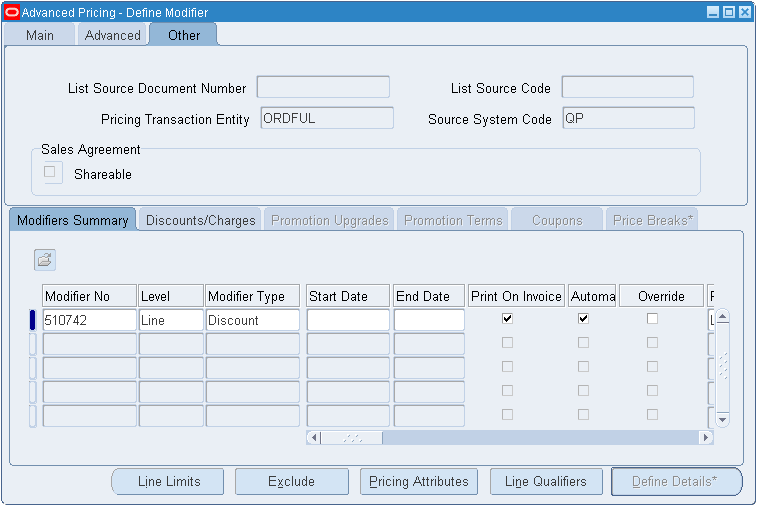
This tab displays the following information including details about any related sales agreement:
Advanced Pricing - Define Modifier window: Other tab
-
List Source Document Number: This is the number of the sales agreement associated with the modifier.
-
List Source Code: Displays the code associated with the modifier source. For example, BSO indicates sales agreement.
-
Pricing Transaction Entity (PTE): Displays the pricing transaction entity associated with the modifier. The Pricing Transaction Entity value defaults from the PTE that created the modifier. This field cannot be updated.
-
Source System Code: Displays the source system code of the modifier, such as QP for pricing.
Note: The values for the Pricing Transaction Entity and Source System Code fields are provided by default based on the PTE and Source System profile options. For more information on profile options, see the Oracle Advanced Pricing Implementation Guide. The Pricing Transaction Entity and Source System fields appear for all modifiers, regardless of whether a related Sales Agreement is available.
-
Shareable box: Indicates if the modifier is shared or not. If non-shareable (the default), then this modifier is specific to that sales agreement and cannot be used with other sales agreements. If shared, the modifier is not exclusive to the sales agreement and can be selected for use with other agreements. You cannot update this value.
-
Related Topics
Creating List Level Qualifiers
Overview of Promotional Limits
Creating List-Level Qualifiers
You can create qualifiers to determine the eligibility of who can receive modifiers at the list level. If an order is not eligible for a modifier list, it is not eligible for the line-level modifiers of that list even if the lines have qualifiers for which the order is eligible.
Warning: The effective dates defined for the qualifier determine the effective dates for the price list or modifier list, not the effective dates defined in the price list or modifier list window (when the qualifier is attached to the price list or modifier). For example, suppose you create a price list with an effective start date of 23-NOV-2007 and no end date. Then you create a qualifier at the header level with effective dates of 10-NOV-2007 and 12-NOV-2007 for customer Computer Service and Rentals. However, after 12-NOV-2007, the price list will not be valid for Computer Service and Rentals or any other customer.
To create list-level qualifiers
-
Navigate to the Advanced Pricing - Define Modifier window.
-
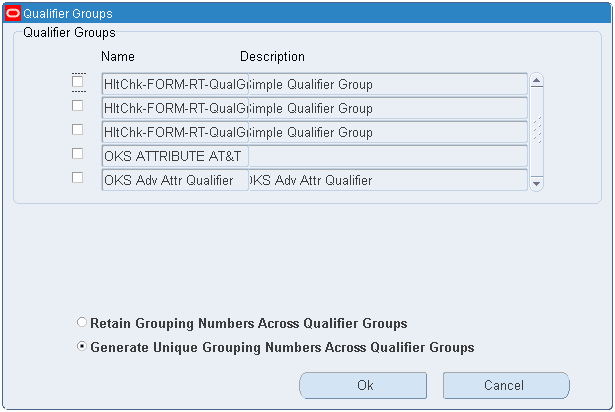
On the Main tab, click List Qualifiers to display the Qualifier Groups window. If qualifiers are associated with the modifier list, then the Qualifier Groups window does not display.
Qualifier Groups window
-
If you do not want to add qualifiers from qualifier groups, click Cancel. Alternately, to add qualifiers from qualifier groups, select one or more qualifier groups that you want to attach.
-
Select one of the grouping options (Retain Grouping Numbers Across Qualifier Groups or Generate Unique Grouping Numbers Across Qualifier Groups). For more information, see: Using Qualifier Grouping Numbers across Qualifier Groups.
-
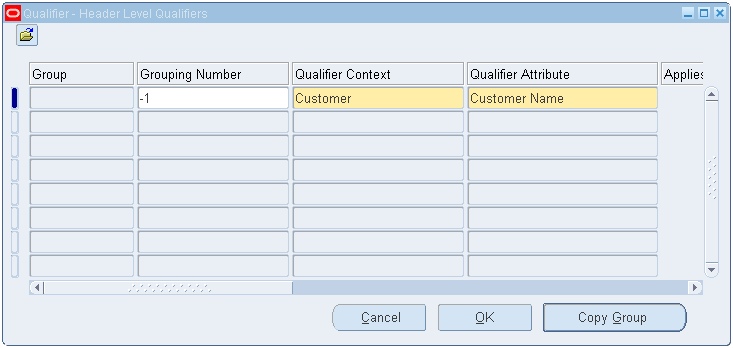
Click OK for the system to display the Qualifier window. In this window, the qualifiers associated with the qualifier groups are listed.
QUALIFIER - Header Level Qualifiers
-
You can add, change, and delete individual qualifiers and change the grouping numbers or dates. If you have attached qualifier groups, verify that the grouping numbers in the window display the correct combination of and and or conditions.
-
Enter the Grouping Number. Qualifiers with the same grouping number generate an and condition, and qualifiers with different grouping numbers generate an or condition. If -1 is used as a qualifier grouping number, the qualifier is used as an and condition for each qualifier group so you do not have to manually add it to each qualifier group. For more information, see: Using Qualifier Grouping Numbers.
-
Enter the Qualifier Context and Qualifier Attribute.
Note: After you save a qualifier with Qualifier Context of Modifier List and Qualifier Attribute of Coupon Number, you cannot modify or delete it because the pricing engine has generated coupons and a qualifier for each coupon.
-
Enter the Operator, Value From, and Value To.
-
If you define a Value From/To range using negative numbers, enter the range from lowest to highest value. For example, to define a Volume Order Amount between -99999 to -1, enter the Value From = -99999 and the Value To = -1.
-
Enter Value To only when the Operator is BETWEEN.
-
-
The Value From Meaning field provides additional details about the selected qualifier. For example, if the qualifier context is CUSTOMER and the attribute is Ship To, the Value From displays the customer name and Value From Meaning displays the site use location for the customer. If the context/attribute combination has no additional details, Value From and Value From Meaning are identical.
-
The Applies To Party Hierarchy check box is enabled only for attributes that are based on Oracle TCA (Trading Community Architecture) Parties and for which the Party Hierarchy Enabled flag was selected for this attribute on attribute management setups. Select the Applies To Party Hierarchy check box to use the party hierarchy functionality for the qualifier attribute. See the Oracle Advanced Pricing Implementation Guide for more details.
Hierarchies consist of tiered relationships wherein one party ranks higher than another; for example, a corporate hierarchy where different companies are related as parent, subsidiary, headquarters, division, and so on. If Applies To Party is selected, then the modifier adjustment or price list (depending on what the qualifier is set up for) would be available to the parent party specified in the Attribute Value field and its subsidiaries. This setting saves you time from creating multiple qualifiers, one for each subsidiary or division.
Note: The Applies To Party Hierarchy check box is not available in Basic Pricing. The profile option QP: Pricing Party Hierarchy Type enables the use of TCA hierarchy-enabled attributes.
-
Click Copy Groups to add qualifiers from other qualifier groups, and enter Start and End dates of the qualifier. For more information on qualifiers, see Oracle Advanced Pricing User's Guide, Qualifier Groups.
-
View and, if necessary, adjust the precedence numbers that default from the qualifier definition.
The pricing engine uses the Precedence to resolve incompatibility. If multiple modifiers are eligible within the same phase and incompatibility level, the modifier with the lowest precedence is applied.
-
Click OK and save your work.
Note: The start and end dates of the list qualifiers must be within the start and end date of the modifier list.
Creating Modifier Lines
You can add modifier lines to a modifier list to define the type of price adjustments, benefits, or freight and special charges that the pricing engine applies to pricing requests.
Note: Oracle Advanced Pricing also provides an HTML-based user interface (UI) for setting up and maintaining most modifier and modifier line types. For more information, see Using Modifiers in the HTML UI.
For each list type that you define, you can select certain modifier line types. The following modifier types can be selected at the modifier line level:
-
Coupon Issue: Issues a coupon on one order that the customer can redeem for a price adjustment or benefit on a later order.
-
Discount: Creates a negative price adjustment, such as a 10 percent discount.
-
Freight/Special Charge: Applies a freight charge.
-
Item Upgrade: Replaces a specific item ordered with another item for the same price.
Note: The Item Upgrade modifier type supports standard items only.
-
Other Item Discount: Gives a price adjustment or benefit to a specified item on an order when the customer orders one or more other items on the same order.
-
Price Break Header: Applies a variable discount or surcharge price adjustment to a pricing request based meeting the condition of a break type. You can use both point and range type breaks.
-
Promotional Goods: Adds a new item with a price adjustment or benefit when the customer orders one or more other items on the same order.
-
Surcharge: Creates a positive price adjustment.
-
Term Substitution: Replaces freight charges, shipping charges, and payment terms with typically more favorable charges.
The following table details the modifier line types that can be used with a selected modifier list type. The modifier line types are listed in the left column, and the modifier list types are listed in the top row. A Yes in a row indicates that you can use the modifier line type with a particular list type, and a No indicates that you cannot:
| Modifier Line Type (listed in column below) | Deal | Discount List | F&S Charge List | Promotion | Surcharge List |
|---|---|---|---|---|---|
| Coupon Issue | Yes | No | No | Yes | No |
| Discount | Yes | Yes | No | Yes | No |
| Freight/Special Charge | No | No | Yes | No | No |
| Item Upgrade | Yes | No | No | Yes | No |
| Other Item Discount | Yes | No | No | Yes | No |
| Price Break Header | Yes | Yes | No | Yes | Yes |
| Promotional Goods | Yes | No | No | Yes | No |
| Surcharge | Yes | Yes | No | Yes | Yes |
| Terms Substitution | Yes | No | No | Yes | No |
After you have created and saved a modifier line, you cannot edit or change the Product Attribute Value (or primary buy item) for the line. To change the Product Attribute Value for a line, you should end date the existing modifier and create a new modifier.
This following section describes general setup information common to most modifier line types. For information on setting up specific modifier line types, see the following tasks:
To create general modifier line information
-
Navigate to the Advanced Pricing - Define Modifier window.
Advanced Pricing - Define Modifier window

-
On the Modifiers Summary tab, in the Modifier No field, a default modifier number identifies the modifier line. You can change this value; however, the Modifier No for each modifier line must be unique within the modifier list.
-
Select the level at which the modifier is applied:
-
Order: If the line is eligible to receive the modifier, the pricing engine applies the modifier at the order level.
-
Line: If the line is eligible to receive the modifier, the pricing engine applies the modifier at the line level.
-
Group of Lines: If the pricing request is eligible to receive the modifier, the pricing engine considers the item quantity or item amount consumed for a group of order lines. The following table displays the available modifier types and volume types that can be selected for a modifier line when Group of Lines is selected:
Level Modifier Types that Can Be Created with Group of Lines Volume Types that Can be Used with Group of Lines Group of Lines Discount, Item Upgrade, Other Item Discount, Price Break Header, Promotional Good, and Surcharge Item Quantity, Item Amount Note: When Group of Lines is selected as the modifier level, then the Volume Type, Product Attribute, and Product Attribute Value fields become mandatory fields. This condition is true regardless of the modifier type selected, such as (Discount, Surcharge, PBH, and so on).
-
-
Select a modifier type.
-
Enter the Start/End Dates for the modifier line.
Note: The start and end date for the modifier line must be between the start and end date on the modifier list. The pricing engine confirms that the dates for the modifier line are valid so that the modifier line can be applied.
The Print On Invoice field is reserved for future use.
-
Select or clear the Automatic box:
-
Select Automatic to have the pricing engine automatically apply this modifier. The Automatic box for each modifier line also becomes selected.
-
Clear the Automatic box if you want the modifier to be manually applied. For more information on manual modifiers, see Manual Modifiers.
For Promotional Limits: If you are using promotional limits with the modifier, the Automatic check box must be selected and remain selected at both the modifier header and line levels. Limits do not function with a modifier that is applied manually.
Note: In the Advanced Pricing - Define Modifier window, you can deselect the Automatic check box for these line-level modifiers: Discount, Surcharge, and Freight/Special Charges.
-
-
Select Override to enable the modifier adjusted price to be manually overridden. If not selected then the modifier adjusted price cannot be overridden.
-
Enter the Pricing Phase for this modifier line. Only valid phases for this modifier level appear in the list of values.
Note: If you attach a phase with a PRICE event to the following promotional modifier types - Promotional Goods/Other Item Discount/Item Upgrade/Terms Substitution/Coupon Issue - and save the modifier line, then the following error message appears:
The pricing phase for this modifier is attached to a PRICE event and cannot be used for this modifier type. Please change the pricing phase or remove a PRICE event for this phase from the Event Phases form.
-
Select an Incompatibility Group. For more information about incompatibility groups, see Changing Modifier Incompatibility .
-
Enter a Bucket value.
Note: The Proration Type field is reserved for future use.
-
Enter a numeric Comparison Value. The pricing engine uses this value to compare modifier types of Item Upgrade, Other Item Discount, and Term Substitution to resolve incompatibilities and determine which modifiers to apply. This value is used when the pricing phase incompatibility resolution is Best Price.
-
Best Price processing cannot be used for order-level modifier list types of Discount and Surcharge.
-
For Freight and Special charges, if an Incompatibility Group is not selected for the modifier line, the pricing engine will apply BEST_PRICE regardless of the Incompatibility Resolve Code set for the event phase. In these cases, the best price is the higher charge, not the lower charge.
-
-
Select a Product Attribute value such as Item Number, Item Category, or All Items. Use All Items to define a modifier that applies to all items in your product hierarchy.
-
Select a Product Attribute Value. If you select ALL_ITEMS for Product Attribute, the Product Attribute Value is ALL.
If you do not enter values for Product Attribute and Product Attribute Value, the Pricing Engine applies the modifier line as if you selected ALL_ITEMS for Product Attribute.
-
The Precedence value will appear by default based on the precedence value defined with the product attribute. For example, the precedence value for item number is 220. This value can be updated.
If precedence processing cannot be resolved for two or more modifiers, then the engine uses best price processing to resolve the issue without going below the established precedence.
-
Enter a Volume Type, such as Item Quantity and Item Amount, to instruct the pricing engine which volume attribute to use when qualifying for a modifier.
-
Select either Point or Recurring as the break type.
-
Example: If RECURRING is selected where Value from = 1 and Value to = 10, then for every quantity of 1, the discount is applied up to a quantity of 10. Therefore, if a sales order is created with order quantity 10, then the (lumpsum) discount is applied to all 10 quantities.
The break type is optional for the following modifier types:
-
Discount
-
Surcharge
-
Freight Charge
-
Promotional Goods
-
Coupon Issue
Example of Point Break Setup
The following table provides an example of the setup for a point break.
Field Value Break Type Point Modifier Line Type Discount Product Attribute Item Product Attribute Value Item A Volume Type Item Quantity Operator Between UOM Cases Value From 100 Application Method Amount Value 2 The pricing engine interprets this point setup as follows:
-
If you order 100 cases of item A, you get a 2 currency unit discount.
-
If you order 200 cases of item A, you get a 2 currency unit discount.
Example of a Recurring Discount Setup
The following table details an example setup for a recurring discount (recurring is not supported for price break):
Field Value Break Type Recurring Modifier Line Type Discount Product Attribute Item Product Attribute Value Item A Volume Type Item Quantity Operator Between UOM Cases Value From 100 Application Method Lumpsum (Application method will be always Lumpsum when break type is Recurring.) Value 2 The pricing engine interprets this recurring setup as follows:
-
If you order 100 cases of item A, you get a 2 currency unit discount.
-
If you order 200 cases of item A, you get a 4 currency unit discount.
-
-
Select a volume type to calculate the volume break.
-
Select an Operator value such as = or BETWEEN; for example, item quantity = 5 or item quantity BETWEEN 5 and 20. If you select Recurring for the Break Type, you must select BETWEEN.
-
Select the unit of measure (UOM) for the item or item category. If the line type is Promotional Goods, Other Item Discount, Item Upgrade and Volume Type is Item Quantity, then the UOM is mandatory.
Note: For promotional limits:
-
If no product UOM is defined for a modifier line, line limits with a basis of Item Quantity will not be created.
-
If no benefit UOM is defined for a modifier line, line limits with a basis of Accrual Units will not be created.
-
If no benefit or product UOM is defined, neither Item Quantity nor Accrual Units appears in the Basis list of values (LOV) to prevent line limits from being created.
-
-
To create greater than and less than conditions, leave From Value and To Value blank, as follows:
-
From Value = 5 and To Value is blank creates the condition Value > 5
-
From Value is blank and To Value = 100 creates the condition Value < 100
-
From Value = 5 and To Value = 100 creates the condition Value >= 5 and value <= 100. Enter the Value From/To.
-
To create a Discount modifier line
Creates a negative price adjustment, such as a 10 percent discount.
-
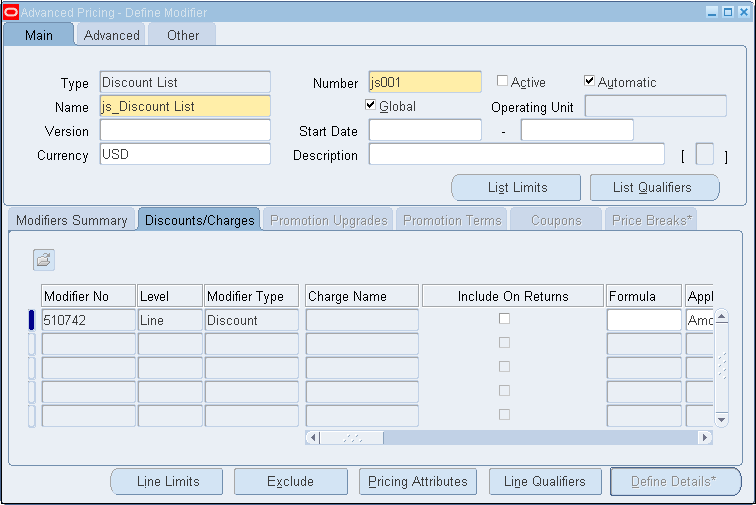
Navigate to the Define Modifier window, Discounts/Charges tab.
In the Discount/Charges tab
-
Complete your entries in the Discounts/Charges tab:
-
Modifier Type: Select Discount.
-
Include on Returns check box: The Include on Return check box is only applicable to modifiers of type Freight and Special Charge. This modifier type is selected by default so that the freight charges are also included with returns. Alternately, if Include on Returns is cleared, then pricing will not apply the charge automatically on the return line.
-
Formula: Optionally, select a formula for the following modifier types: Discount, Surcharge, or Freight Charge. If the Modifier Type is Price Break Header, click the Define Details button when setting up a price break line to select a formula.
If the formula includes a Modifier Value (MV) in its equation, then this value is derived from the Value field on the Discounts/Charges tab. If a formula does not have an MV component, then the Value field is not used during the formula calculation when the final discount is returned.
For example, consider a formula with the following equation:
List Price * MV = Final Discount
Formula List Price (LP) Modifier Value (MV) Final Discount LP *MV=Final Discount 20 3 60 At order entry, when the modifier is selected and the formula LP *MV is applied, the list price of the item on the order (LP) is multiplied by the value that is entered in the modifier's Value field. In this case, the value is 3; therefore, the final discount is 20*3=60.
A formula without an MV component can be attached to a modifier even if a value is entered on the modifier line. In this case, the formula takes precedence and the MV is not used. Instead, the number returned by the formula is considered as the final discount.
-
Value: Select an Application Method and a numeric value. The Application Method selected determines how the value is applied. For example, if the application value is Percent, then the value such as 10 is applied as a percent.
-
Accrual: Complete the remaining fields to enter an accrual:
-
Accrue: Select the Accrue check box to enter accrual information.
-
Benefit Qty and Benefit UOM: Enter values for the Benefit Qty and Benefit UOM of the benefit to be accrued. Use the benefit columns to define nonmonetary accruals.
-
Expiration Date: Define when the accrued transactions expire.
-
Expiration Period and Period Type: The pricing engine calculates the expiration date. The Expiration Period begins when an item begins to accrue.
-
Accrual Redemption Rate: You can enter or modify the redemption rate after the Accrue box is selected.
-
Accrual Conversion Rate: Defines the conversion of the Benefit UOM to the primary currency. For example, if one air mile is 0.50 currency units, the accrual conversion rate is 0.50.
-
-
To create a Freight/Special Charge modifier line
-
Enter the following information in the Modifiers Summary tab:
-
Level: Use Line or Order
-
Modifier Type: Use Freight/Special Charge
-
Phase: If Level is Line: use Line Charge or Line Manual Charge. If level is Order, select Charges Header: All Lines.
Typically, you select one of the following pricing phases for a Freight and Special charge:
-
50 - Line Charges
-
60 - Line Charges - Manual
-
70 - Charges Header: All Lines
However, you typically would not select the pricing phase 40 - Header Level Adjustments, which is a header level adjustment, because when Order Management or a similar calling application passes the Calculate Price Flag value as Partial Price, only those freight charges in phases 50, 60, and 70 are applied (but not those in pricing phase 40). However, users can still override the Calculate Price Flag to enable modifiers assigned to other phases to be applied.
-
-
Bucket
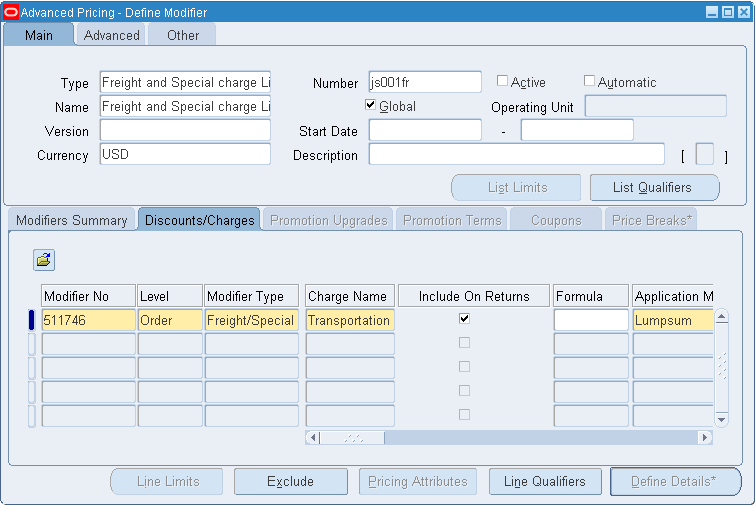
Advanced Pricing - Define Modifier window: Discounts/Charges tab
-
-
On the Discounts/Charges tab, select a Charge Name such as Transportation Charge.
-
The Include on Returns check box is only relevant for modifiers of type Freight and Special charge List. The Include on Returns box is selected by default so that freight charges are included with returns. Alternatively, if Include on Returns is cleared, then pricing will not apply the charge automatically on the return line.
When you create a return order (and the price on the original order for which the return line is being created is retained), Oracle Order Management copies all the adjustments and only those freight charges that have the Include on Returns check box selected. If a return line is repriced , then all the charges are evaluated and applied. To have certain charges applied to a return line when the line is repriced, create a qualifier with a not= condition.
-
Enter a Formula name to use a formula to calculate a discount, surcharge, or freight charge.
-
Select an Application Method that defines how the modifier is applied. For more information, see Application Method.
Note: For Freight/Special Charge modifiers, you must select Lumpsum as the Application Method.
-
Enter a Value unless you are using a formula.
-
Save your work.
Notes
-
For Freight/Special Charges, if an Incompatibility Group is not selected for the modifier line, then the pricing engine will use BEST PRICE incompatibility processing instead of Precedence. Precedence is defined as the Incompatibility Resolve Code in the Event Phases window.
-
When defining a freight charge modifier, select a seeded pricing phase whose Freeze Override Flag value is set to Yes. For example, the Freeze Override Flag is set to Yes for the Line Charges phase, but not for the List Line Adjustment phase. When you set up a freight charge modifier, and select the Line Charges phase instead of the List Line Adjustment phase, then your Return Merchandise Authorization (RMA) line with the Calculate Price Flag of Partial Price would qualify for the freight charge modifier.
-
To create an Item Upgrade modifier
In the Promotion Upgrades tab, you can define an Upgrade Item that replaces a specific item ordered for the same price. The item upgrade item is applied on the same order.
Note: Item upgrade is supported for standard items only.
-
Navigate to the Define Modifier window, Modifiers Summary tab.
Advanced Pricing - Define Modifier window: Promotion Upgrades tab
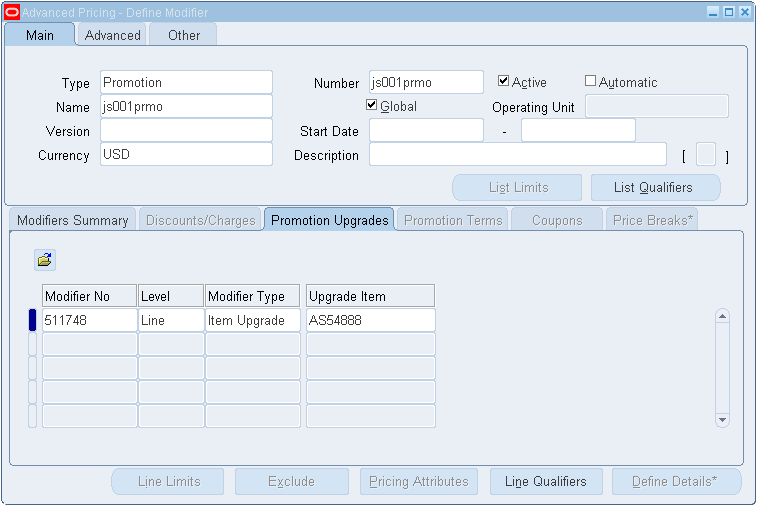
-
Select Item Upgrade as the Modifier Type.
-
In the Promotion Upgrades tab, define the Upgrade Item that replaces a specific item ordered for the same price.
-
The upgrade relationship between the original item and the upgrade item must be set up in Oracle Inventory (the Relationship Type is Promotional Upgrade). When the relationship is set up, the related item appears in the list of values. When the item is upgraded, the UOM is retained from the original item.
-
When the pricing engine applies the qualifying item on the order line, the original item is replaced with the upgraded item and the price of the original item is retained.
-
To create a Term Substitution modifier line
Create a Term Substitution modifier line in the Promotion Terms tab to replace freight charges, shipping charges, and payment terms with typically more favorable charges. When the Operating Unit field appears:
-
If multi-org access is not enabled, the operating unit appears by default from profile MO: Operating Unit. You cannot update the Operating Unit field.
-
If multi-org access is enabled, the operating unit appears by default from profile MO: Default Operating Unit. You can override this value and select an available operating unit that you can access, as defined by the profile option MO: Security Profile.
-
Navigate to the Define Modifier window.
Advanced Pricing - Define Modifier window: Promotion Terms tab
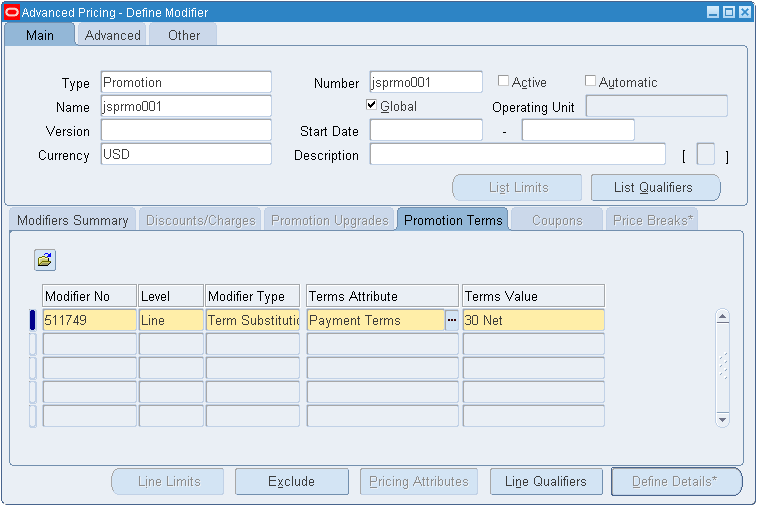
-
In the Modifiers Summary tab, select Term Substitution as the Modifier Type.
-
On the Promotion Terms tab, enter the new terms in the Terms Attribute and Terms Value fields. The pricing engine substitutes the terms on the order or order line with the terms that you specify.
To create a Coupon Issue modifier line
You can issue a coupon for an order that a customer can redeem for a price adjustment or other benefit on a later order. When setting up a coupon issue, two modifier lines must be set up: the first defines the benefit or price adjustment, such as a 10 percent discount, and the second defines the coupon issue details, such as the coupon name and expiration date. The following steps outline how to create a coupon issue modifier.
Note: Both the coupon issue and coupon benefit lines must be defined on the same modifier list.
To define the coupon benefit
-
On the Modifiers Summary tab, create a modifier line to define the benefit or adjustment issued when the coupon is redeemed. For example, a 10 percent discount or $6 off the order. Select a modifier line type of Discount or Promotional Goods to define the benefit.
The modifier number (Modifier No) on the modifier line generates a unique number series for the coupon, and the coupon number is passed to the calling application. The customer must quote the coupon number to redeem the coupon in the calling application.
When the customer redeems the coupon, the pricing engine validates the coupon number against the qualifier. It also validates the qualifiers for the discount or promotional goods benefit.
Note: Typically, the coupon is issued for an order and the actual discount line (the benefit the coupon applies) is applied to a subsequent order when the coupon is redeemed. However, if you set up a line-level qualifier for the discount line with the following settings, then both the discount line and coupon line can be applied to the same order:
-
Grouping Number = -1
-
Grouping Number = Any of the coupon modifier numbers
If you intentionally include a line-level qualifier on the discount line that has a grouping number not equal to any of the coupon modifier numbers and not equal to –1, it means that you actually want the discount to be applied independent of coupon redemption.
All qualifier conditions with grouping number = -1 must also be met in order to redeem the coupon benefit modifier.
-
To define the coupon issue details
In a second modifier line, you define the coupon details, such as the coupon name and its expiration date. This line is the Coupon Issue line. After you define the coupon details, you link the benefit line to the coupon issue line:
-
Select Coupon Issue as the Modifier Type.
-
Enter a Redemption Rate to specify the percentage probability that customers might redeem this coupon.
-
Enter the Expiration Date, which is the last date that the customer can redeem the coupon.
Alternatively, if you enter values for the Expiration Start Date, Expiration Period, and Expiration Period Type, the pricing engine automatically calculates the Expiration Date. For example, for the following coupon setup, the pricing engine calculates an expiration date of 20 July:
-
Expiration Period Start Date: 20 April
-
Expiration Period: 3
-
Expiration Period Type: Month
If you do not enter an Expiration Period Start Date, the pricing engine will use the date when the calling application issued the coupon.
-
-
Enter the Coupon Modifier Number (from the coupon benefit line) to link the Coupon Issue modifier line to the benefit modifier line.
Note: The Benefit Quantity, Benefit UOM, and Coupon Conversion Rate fields are not supported for a coupon issue line.
To create a Promotional Goods and Other Item Discount modifier lines
To reward a customer who orders one or more specified items in the same order, you can create a Promotional Goods modifier line to add a new item to an order and provide a price adjustment or benefit for the item. The reward item does not need to be in the original order. Even if the item is in the order, the pricing engine creates a new line for the item.
You must specify a quantity, and you can use any UOM set up on your system.
-
For the scenario Buy X and Y, get Z as free, list line adjustments (Event phase 10) are not applicable for promotional modifiers unless the Save event is added to the list-line adjustments phase.
-
When you create or duplicate a modifier, you can change the primary buy item, additional buy items, and get items. However, once the modifier is saved, the additional buy or get items cannot be changed or deleted. You can still add additional buy and get items.
-
Deleting and reapplying a Promotional Goods modifier line: If you apply a modifier line of type Promotional Goods to an order and then delete the modifier line, you cannot reapply the deleted Promotional Goods modifier line.
When the customer orders one or more other specified items (the buy items) on the same order, the Other Item Discount modifier provides a price adjustment or benefit to another item (the get item) on the order. The buy item (including additional buy) and get items must all be on the same order for the benefit to apply. The Other Item Discount modifier must be applied at the Group of Lines level.
Note: Recurring other item discounts are not supported.
To enter promotional goods
Complete the following fields to create promotional goods:
-
On the Modifiers Summary tab, define the required buy product (or category) that the customer must order to get the benefit. For example, buy a toothbrush and get a free bottle of mouthwash.
-
Modifier Type: Promotional Goods
-
Pricing Phase: To have a PRG modifier applied in conjunction with an order-level modifier, then select All Lines Adjustment as the Pricing Phase for the PRG modifier. This selection enables both the PRG modifier and the order-level modifier to be applied in conjunction to an order.
Tip: To prevent changes to the quantity of a free promotional good added to the order line (for example, to prevent changing the quantity of the free good from 1 to 2), select Pricing Phase 30 (All Lines adjustment) when you create the promotional modifier.
-
Product Attribute/Product Attribute Value: Select the required buy product (or category) that the customer must order to get the benefit.
-
-
Click Define Details to display the Define Modifier Details window. In the Products tab > Additional Buy Products region, define any additional products that the customer must buy in addition to the original product defined in the Modifiers Summary tab:
Additional Buy Products Region
-
Group No: Defines the and or or condition of the buy side of the modifier. To join lines with and, use the same group number on each line. To join lines with or, use a different group number on each line
-
Pricing Attribute: This is a volume pricing attribute; use either item quantity or item amount.
-
-
In the Get region, define the get product that the customer receives. For promotional modifiers (such as buy one, get one), when you define the Get Product, the Get Price field does not display lines for service items with formulas, block price, percent price, or price break lines.
Get Region
-
Get Product Attribute: Item Number is the default value. Benefit items in the Get region can only be defined at the item level.
You should not define a Get Line for a PRG using price list lines with the following setups:
-
Dynamic formulas.
-
Arithmetic operator of Block price or Percent price.
Note: Once you save the Promotional Goods or Other Item Discount line, you cannot update the Primary Buy, Additional Buy, or Get Product attributes.
If you manually delete or change a free good line for an order or a quote line on the order (for example, change the number of free good items from three to two on the Sales Order pad), for subsequent repricing calls, the overridden manual entry is retained.
For example, suppose a customer buys Item A and gets two of Item B free. If you manually change the quantity of free goods that the customer gets from two to one on the Sales Order pad, then on subsequent repricing, the manually overwritten amount is retained and the customer gets the one free good.
Examples of Promotional Goods Modifiers
You can create as many must buy items as desired and as many get items as required. Here are some sample scenarios of must buy and get promotional modifiers:
-
Customer must buy A to get B
-
Customer must buy A and B to get C
-
Customer must buy A and B and C to get D
However, you cannot create a combination of must buy products or get products where the promotional goods modifier must evaluate multiple items. For example, the customer receives 20 units free of the following products or a combination of products A, B, C if the customer buys at least 20 units from the specified products (X or Y) or a combination.
Instead you must specify explicit must buy and get amounts; for example, the customer must buy 10 of Product X and 10 of Product Y to get 20 free units of Product A.
Note: If you are using Promotional Good (PRG) type of Modifier Line with Multi-Currency, see Using Promotional Good type of Modifier Line.
Using a Promotional Modifier as a Qualifier for Another Modifier
You need to consider the following when setting up a promotional modifier as a qualifier for another modifier:
Situation: Suppose you want to apply two automatic, promotional modifiers named XXXX and YYYY using the following setups:
-
Promotion Modifier 1: XXXX
-
Promotion Modifier 2: YYYY
-
Qualifier = Promotional Number with value as XXXX
-
In this setup, the second modifier YYYY will not get applied to the order because the qualifier attribute of Promotional Number is not mapped at runtime. (Its attribute mapping method is User Entered, and will not be evaluated during the pricing call.)
To ensure that you can use the Promotional Number as a qualifier in another modifier, you need to complete the following steps:
-
Create a custom qualifier attribute by writing a function to source the attribute: its values will be TRUE or FALSE based on if the modifier XXXX is applied to that particular line or not.
-
Use this custom qualifier attribute in the modifier YYYY.
-
Attach the modifier XXXX to the pricing phase List Line Adjustments and attach modifier YYYY to the pricing phase All Lines Adjustments.
When the order line is entered, the modifier XXXX will get applied first and then, while saving the order line, modifier YYYY will get applied because the modifier XXXX has already been applied while entering.
-
To enter other item discount
-
On the Modifiers Summary tab, define the required buy product (or category) that the customer must order to get the benefit. For example, buy a toothbrush and get a discount on a bottle of mouthwash.
-
Modifier Type: Other Item Discount
-
Product Attribute/Product Attribute Value: Select the required buy product (or category) that the customer must order to get the benefit
-
-
Click Define Details to display the Define Modifier Details window.
Define Modifier Details window
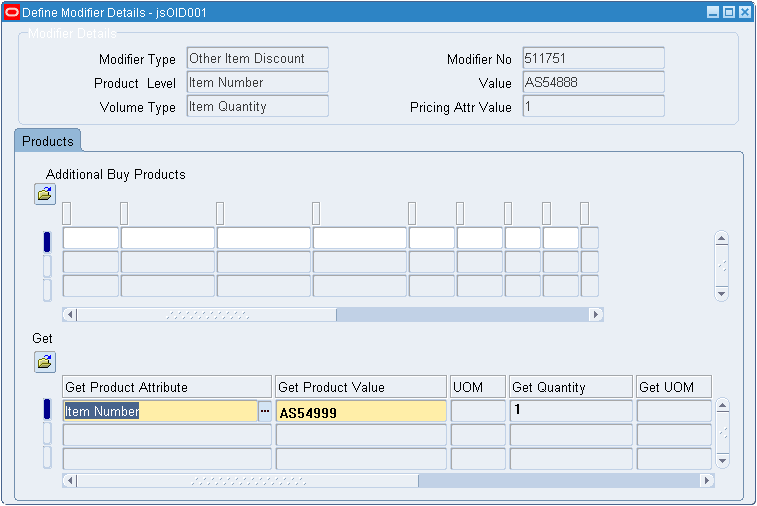
-
In the Products tab - Additional Buy Products region, define any additional products that the customer must buy in addition to the original product defined in the Modifiers Summary tab:
-
Group No: Defines the and or or condition of the buy side of the modifier:
-
To join lines with and, use the same group number on each line.
-
To join lines with or, use a different group number on each line.
-
-
Pricing Attribute: This is a volume pricing attribute; use either item quantity or item amount.
-
-
In the Products tab - Get region, define the other item discount product (the get item) that the modifier provides a price adjustment or benefit for on the order:
-
Get Product Attribute: Item Number is the default value. Benefit items in the Get region can only be defined at the item level.
-
Get Product Value: Select an item. Product Description is the default based on the product selected.
Note: After you save the Promotional Goods or Other Item Discount line, you cannot update the Primary Buy, Additional Buy, or Get Product attributes.
-
To create a price break modifier line
Create a price break modifier line to apply a variable discount or surcharge price adjustment to a pricing request based on the price breaks.
-
Complete the following fields:
-
Level: Group of Lines or Line.
-
Break Type:
-
Point: The pricing engine charges each unit of volume at the price of the break within which the total falls.
-
Range: The pricing engine charges each unit of volume at the price of the break within which it falls.
-
-
Product Attribute and Product Attribute Value
-
UOM
-
Volume Type
-
-
Select the Price Breaks tab.
Advanced Pricing - Define Modifier window: Price Breaks tab
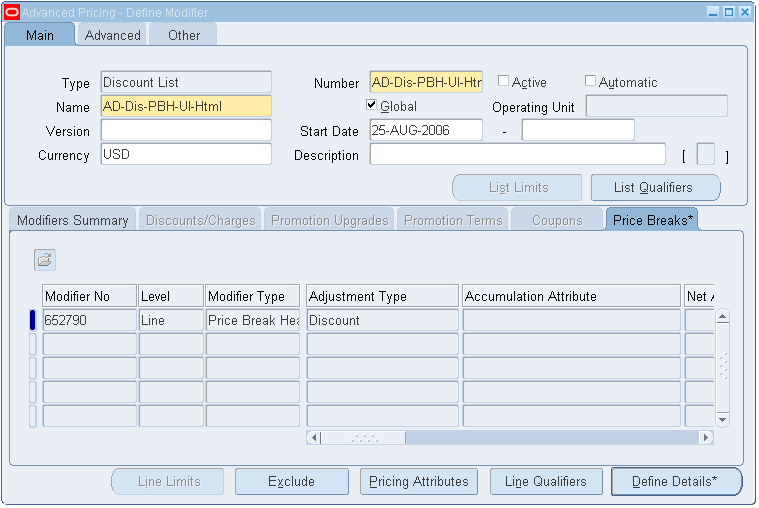
-
Select an adjustment Type such as Discount or Surcharge.
-
Select an Accumulation Attribute if you are setting up range price breaks that accumulate across orders. This option is available for Range breaks only. See Using Accumulated Range Breaks for more information.
-
The Net Amount Calculation field enables you to calculate the selling price based on the net amount (bucketed amount). You can select from the following values:
-
When the For matching products option is selected, the order lines that match the modifier Product criteria (such as the Item Number or Item Category) are selected and grouped. The sum of the amounts from these order lines is selected and then used as the group amount for the net amount calculations.
-
When the For all matching attributes option is selected, the order lines that match all the criteria (not just the Product criteria) defined in the price break modifier are selected and grouped. The sum of the amounts from these order lines is then used as the group amount for the net amount calculations.
Note: To use net amount, the following values must also be selected:
-
If Line is selected as the modifier line level, then you can only select For All Matching Attributes from the Net Amount Calculation field.
-
Level: Line or Group of Lines level (select Group of Lines to select For matching products from the Net Amount Calculation field.)
-
Modifier Type for the modifier line must be Price Break Header, and related price breaks must be set up.
-
Automatic check box for the modifier line must be selected.
-
Override check box must be cleared.
-
Volume Type: Amount
Promotional Goods and Net Amount Calculation
Promotional goods amounts will not be included in the net amount calculation. For example, if an order line gets a promotional good (buy A, get B free or discounted), the new line will not contribute to any net amount calculation of any modifier in the order.
For examples, see Examples of using net amount in price breaks.
-
-
To use the price break to calculate an accrual, select Accrue.
Note: The Accrual box can only be used if Discount is selected as the Adjustment Type.
-
If using accruals, enter an Expiration Date to specify when the accrued transactions expire.
-
Enter Expiration Start Date, Expiration Period, and Period Type. The pricing engine calculates expiration date. The expiration period begins when the item begins to accrue.
Credit Memo, which is the Rebate Transaction Type default, is reserved for future use.
-
-
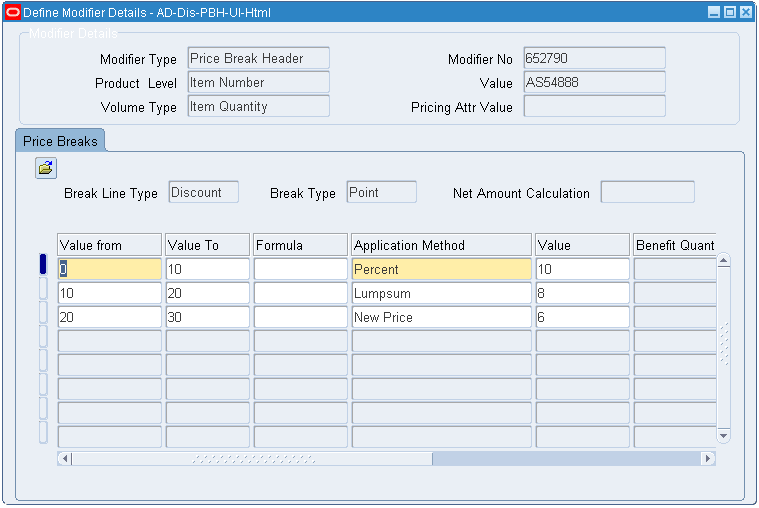
Click Define Details to display the Define Modifier Details window.
Define Modifier Details window
-
The values for Break Line Type, Break Type, and Net Amount Calculation are provided by default from the modifier line.
-
Enter Value From and Value To values.
Note: If you leave Value To of the last break blank, a value of 99999.. (15 digits) automatically defaults. This value is hidden from the end-user and does not display in the Value To field.
-
Optionally, select a Formula.
-
Select an Application Method. For more information, see Application Method.
-
For nonmonetary accruals, enter the Accrual Conversion Rate to specify the conversion of Benefit UOM to the modifier primary currency. For example, if 1 air mile is 0.50 currency units, the Accrual Conversion Rate is 0.5.
-
If applicable, enter the Benefit Quantity and Benefit UOM.
-
Save your work.
Examples of Using Net Amount in Price Breaks
The Net Amount Calculation field enables you to calculate the selling price based on the net amount (bucketed amount). For example, suppose you create a price break modifier line with the following setup:
-
Product: Item Number = AS54888
-
Net Amount Calculation: For matching products selected
-
Pricing Attribute: Red
If this modifier is applied to the following order, then all order lines that match the product defined in the price break modifier line (for example, Item Number = AS54888) are grouped together for the net amount calculation (regardless of other qualifying criteria):
Order Line Product Pricing Attribute 1 Item Number: AS54888 Red 2 Item Number: AS54888 Blue 3 Item Number: AS54888 Red The item amount is based on the item amount for all three lines, but the discount will be applied to lines 1 and 3:
-
Lines used for Net Amount Calculations: All order lines with Product Item Number = AS54888 are grouped together.
-
Lines that get discount: The modifier adjustment (such as a discount) are only applied to Lines 1 and 3 because they match the modifier's remaining qualifying criteria (pricing attribute must be Red.)
The following table displays a modifier setup that will calculate the net amount for an order using a break range type of Point:
Modifier Setup Bucket Discount Break Ranges Line 1: Discount A 1 40% n/a Line 2: Discount B 1 30% n/a Line 3: Price Break Header (PBH) C 2 5% $0-1,000 - - 7% $1,000-2,000 - - 10% $2,000-9,999 Suppose this modifier were applied to the following order:
Order Item List price Order quantity AS54888 $2,000 each (per unit) 2 If the modifier were applied to this order, the Net Amount selling price would be calculated as follows:
-
First Discount A (40 percent) is applied resulting in the unit adjusted amount of $800.
-
Then Discount B (30 percent) is applied resulting in a unit adjusted amount of $600.
-
The unit selling price at the end of Bucket 1 is $2,000 - ($800+$600) = $600. This amount becomes the unit selling price for the next bucket.
-
For PBH C to apply: the Net Amount Calculation is ($2,000*2) - (800*2) - (600*2) = $1,200. This amount qualifies for the second break of C, which is 7 percent.
-
PBH C applied: the unit adjustment amount is 7 percent*600 = $42. This amount is applied to the unit selling price of the previous bucket.
The final unit selling price is $600 - 42 = $558.
-
Using Accumulated Range Breaks
Setting up modifiers with accumulated range breaks provides additional flexibility to existing price break processing. Using accumulated range breaks, you can set up range price breaks that accumulate within and across orders based on some attribute value (for example, quantity) that is accumulated from previous orders or order lines.
The pricing engine uses the accumulation value as the starting point of the break calculation. Oracle Advanced Pricing does not store these accumulated values. The value is passed by the calling application in the engine request or the engine dynamically sources the attribute from a customer API.
Values can be accumulated across different orders or within an order. For example, suppose a customer places the following two orders:
-
Order A: 2 of Item Shampoo
-
Order B: 3 of Item Shampoo
Under regular range price break processing, each order would be evaluated independently of the other. However, with accumulated range price breaks, the accumulated quantity value from Order A is the starting point for evaluating the range break for Order B.
The value of the accumulation attribute is sourced from the pricing request when evaluating accumulated range price breaks for modifiers. Customers are responsible for accumulating and maintaining the values from previous transactions in any manner they choose. This value is the starting point for range price breaks in subsequent transactions that are passed to the pricing engine.
Setting the Profile Option and Volume Attribute
To begin using the accumulation attribute feature, the profile QP: Accumulation Attributes Enabled must be set to Yes. Typically, this value is set by the System Administrator. The profile option also enables the Accumulation Attribute field in the Price Breaks tab on the Define Modifier window. Complete the following steps to set up this feature (no seeded attributes are provided for this feature).
-
You can create two types of accumulation volume attributes in Attribute Management to use this feature:
-
Use the mapping method of Attribute Mapping to source the accumulation value from the pricing request.
-
Use the new attribute mapping method Runtime_Sourced to enable the pricing engine to source the attribute and accumulation values from a custom API. A new package has been created, QP_RUNTIME_SOURCE, containing a specification for the custom API. Customers are required to write a corresponding body to this package. See the Advanced Pricing Implementation Guide for more information.
-
-
Set the profile QP: Accumulation Attributes Enabled to Yes at Site, Application, or both levels. The profile enables the Accumulation Attribute field in modifier lines. Price break details are defined in Define Details.
-
Define a modifier line with the following setup:
-
Line type: Price Break Header (or Price Break in HTML)
-
Break type: RANGE
-
Select Accumulation Attribute from the list of values.
-
Using Accumulated Range Break Across Orders
When using accumulated range breaks, the accumulation total must be passed as the starting point for each pricing request. For example, suppose the following discount is set up to give a discount across orders.
| Volume Attribute From | Volume Attribute To | Adjustment Amount |
|---|---|---|
| 0 | 5 | 5% |
| 5 | 10 | 10% |
| 10 | 15 | 15% |
If a customer then places three separate orders for five items each, then the adjustment amount is calculated as follows:
| Order No. | Quantity | Accumulated Value | Adjustment Amount |
|---|---|---|---|
| 1 | 5 | 0 | 5% |
| 2 | 5 | 5 | 10% |
| 3 | 5 | 10 | 15% |
The adjustment calculations for the preceding example are as follows:
-
For the first order, the accumulated value is 0. A discount of 5 percent is given because the order quantity of 5 satisfies the first quantity range break of 0 to 5.
-
For the second order, the accumulated value passed to the pricing engine is 5 (5 from Order 1). A discount of 10 percent is given, because the break is evaluated starting with quantity 6, which satisfies the range of 5 to 10.
-
Finally, for the third order, the accumulated value passed to the pricing engine is 10. A discount of 15 percent is given, because the break is evaluated starting with quantity 11, which satisfies the range of 10 to 15.
Using Accumulated Range Breaks Within an Order
Accumulated range price breaks can be used to evaluate the volume of order lines within the same order.
For example, if a customer orders three lines of the same item that is eligible for a discount, then each line is priced based on the accumulated value of the previous qualifying line for the same product.
Suppose a price break modifier is set up with the following volume ranges and adjustment amounts:
| Volume Attribute From | Volume Attribute To | Adjustment Amount (Percent) |
|---|---|---|
| 0 | 5 | 5% |
| 5 | 10 | 10% |
| 10 | 15 | 15% |
When this discount is applied, the accumulated values and adjustment amounts are calculated as follows:
| Line No. | Quantity | Accumulated Value | Adjustment Amount |
|---|---|---|---|
| 4.1 | 3 | 0 | 5% |
| 4.2 | 6 | 3 | 8.33% |
| 4.3 | 4 | 9 | 13.75% |
The accumulation value and discounts are evaluated as follows:
-
The first line is given a discount of 5 percent because an accumulation value of 0 is passed and the order quantity of 3 satisfies the range 0 to 5.
-
Line 4.2 is evaluated with starting at the accumulated value of 3. Two of the ordered quantity 6 fall within the range of 0 to 5, and 4 falls within the range 5 to 10, resulting in an 8.33 percent adjustment.
-
Line 4.3 is evaluated with a starting point of (3+6) = 9 passed by the calling application and an order quantity of 4. One of quantity 4 falls within the range 5 to 10 and 3 fall within the range of 10 to 15, resulting in a 13.75 percent adjustment.
Attaching Pricing Attributes to Modifier Lines
You can attach attributes to the items and item categories that you define for modifier lines. When the pricing engine determines eligibility for a modifier, it validates the pricing attributes along with the item number or item category.
Note: Pricing attributes apply only to the primary items that you define in the Modifiers Summary tab. They do not apply to items that you define for additional buy items and get items.
To attach pricing attributes to modifier lines
-
Navigate to the Advanced Pricing - Define Modifier window.
-
Select the Modifiers Summary tab and select a modifier line.
-
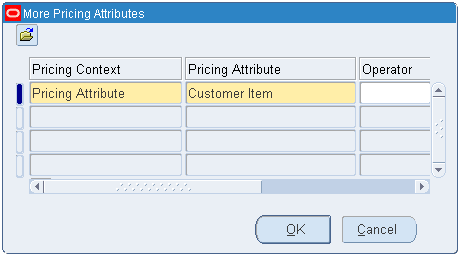
Click Pricing Attributes to display the More Pricing Attributes window.
More Pricing Attributes window
-
Enter a Pricing Context.
-
Enter a Pricing Attribute.
-
Enter an operator value such as = or BETWEEN.
-
Enter a Value From and a Value To.
Note: Enter Value To only when the Operator is BETWEEN.
-
Click OK and save your work.
Excluding Items from a Modifier
Use this process to exclude items from a modifier. When the pricing engine evaluates order lines, if an order line contains an item or item category that is defined as an excluded item or item category, then these lines are considered ineligible and will not be evaluated for the modifier.
The following example shows the difference between a modifier defined without an excluded item and one defined with an excluded item.
Example of a Modifier Without an Excluded Item
The following example shows the effects of applying a modifier when no excluded item is defined for the modifier. The modifier, Modifier_Shampoo1, is set up with the following criteria:
-
Level: Group of Lines
-
Item Category: Shampoo
-
Quantity: > 100 quantity
To be eligible for the modifier, the item category of the ordered items must be Shampoo and the total item quantity of the eligible order lines must be greater than 100.
Suppose a customer then places the following order for two shampoo items and one conditioner item:
| Order Line ID | Qty | Item | Category |
|---|---|---|---|
| 1 | 100 | Shampoo1 | Shampoo |
| 2 | 20 | Shampoo2 | Shampoo |
| 3 | 30 | Conditioner1 | Conditioner |
The modifier will be applied because the item total for the eligible group of lines is 120 (the sum of 100 + 20).
Example of a Modifier with an Excluded Item
The following modifier, Modifier_Shampoo2, has been set up, and the item Shampoo1 is defined as the excluded item:
-
Level: Group of Lines, Item Category: Shampoo
-
Quantity: > 100 quantity
-
Excluded Item: Shampoo1
Suppose a customer then places the following order for two shampoo items and one conditioner item, as in the previous order:
| Order Line ID | Item | Quantity (Qty) | Category |
|---|---|---|---|
| 1 | Shampoo1 | 100 | Shampoo |
| 2 | Shampoo2 | 20 | Shampoo |
| 3 | Conditioner1 | 30 | Conditioner |
To be eligible for this modifier, the item category of the ordered items must be Shampoo and the item quantity of the eligible order lines must be greater than 100. However, the item Shampoo1, which is defined as an excluded item for this modifier, will not be evaluated. The group of lines from the order is evaluated against the modifier requirements as follows:
-
Order Line 1: Rejected because it contains the excluded item (Shampoo1).
-
Order Line 2: Accepted because the Category is Shampoo.
-
Order Line 3: Rejected because the Category is not Shampoo.
Then, the modifier evaluates the total quantity of the eligible order lines. If the total item quantity is greater than 100, then the modifier is applied. Since the quantity of the eligible lines is 20 (Order Line 2), the modifier will not be applied.
To add exclude items to a modifier
-
Navigate to the Advanced Pricing - Define Modifier window (Summary tab) and select a modifier. You cannot add excluded items if the modifier level is Order.
-
Click Exclude to display the Exclude Items window.
Exclude Items window
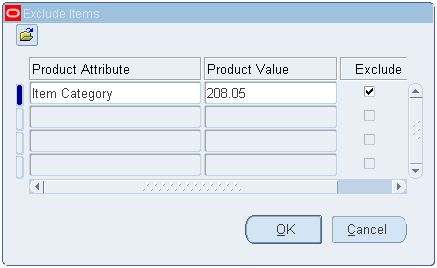
-
Enter a Product Attribute and Product Value to be excluded.
-
Select Exclude and click OK.
-
Save your work.
Creating Line-Level Qualifiers
You can create qualifiers for modifiers at the line level. The pricing engine evaluates qualifiers to determine eligibility for line-level modifiers. The pricing engine evaluates line-level qualifiers in addition to the header-level qualifiers to qualify the modifier against the order header or line
If the item is evaluated from the secondary price list, the customer does not receive the discount unless the qualifier also includes Price List B.
To create line-level qualifiers
-
Navigate to the Advanced Pricing - Define Modifier window.
-
Choose the Modifiers Summary tab and select a modifier line.
-
Click the Line Qualifiers button.
Qualifier Groups window

-
If this modifier line has no qualifiers, the Qualifier Groups window appears. Do one of the following:
-
To add qualifiers from qualifier groups:
-
Select the qualifier group.
-
Select a grouping option: Retain Grouping Numbers Across Qualifier Groups or Generate Unique Grouping Numbers Across Qualifier Groups. For more information on qualifier groups, see: Using Qualifier Grouping Numbers across Qualifier Groups.
-
Click OK to display the Qualifier - Line Level Qualifiers window. The qualifier and qualifier conditions from the selected qualifier group(s) appear in this window.
The Group name (from the related Qualifier Group) appears in the Group column. Verify that the Grouping Number that is provided by default from the qualifier group creates the and and or conditions that you want.
-
-
To add qualifiers and skip the Qualifier Groups window, click OK and go to step 5.
-
-
In the Qualifier - Line Level Qualifiers window, you can add, change, and delete qualifiers, change the grouping numbers, and change the dates.
Qualifier - Line Level Qualifiers
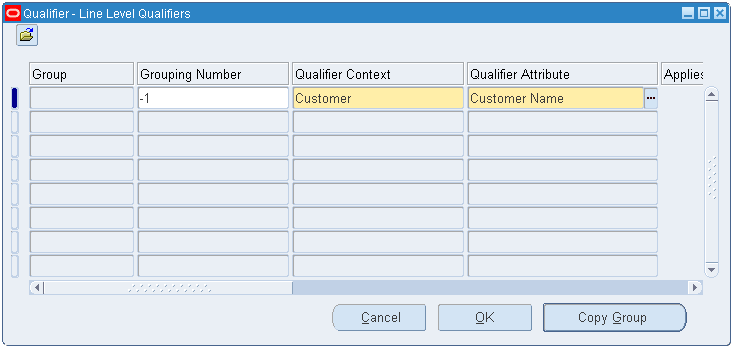
-
If you are entering a new qualifier, enter a Grouping Number. Qualifiers with the same grouping number generate an AND condition, while qualifiers with different grouping numbers generate an OR condition. For more information on grouping numbers, see Using Qualifier Grouping Numbers.
-
Enter the Qualifier Context.
-
Enter the Qualifier Attribute.
Note: After you save a qualifier with Qualifier Context of Modifier List and Qualifier Attribute of Coupon Number, you cannot modify or delete it. Since the pricing engine creates coupons (and a qualifier for each coupon), these coupon qualifiers are not subject to manual changes and deletions.
View the Precedence numbers that appear by default from the qualifier definition. The pricing engine uses precedence for resolving incompatibility. If multiple modifiers are eligible within the same phase and incompatibility level, the modifier with the lowest precedence is applied.
-
Select or clear the Applies To Party Hierarchy check box. This check box is enabled only for attributes that are based on Oracle TCA (Trading Community Architecture) Parties and if the Party Hierarchy Enabled flag has been selected for this attribute on attribute management setups. The Applies To Party Hierarchy check box must be selected to use the party hierarchy functionality for the qualifier attribute. See the Oracle Advanced Pricing Implementation Guide for more details.
Hierarchies consist of tiered relationships where one party is ranked above another; for example, a corporate hierarchy where different companies are related as parent, subsidiary, headquarters, division, and so on. If Applies To Party is selected, then the modifier adjustment or price list (depending on what the qualifier is set up for) would be available to the parent party specified in the Attribute Value field and its subsidiaries. This setting saves you time because you don’t have to create multiple qualifiers, one for each subsidiary or division.
Note: The Applies To Party Hierarchy check box is not available in Basic Pricing. The profile option QP: Pricing Party Hierarchy Type enables the use of TCA hierarchy-enabled attributes.
-
Enter the Operator, Value From, and Value To (if applicable).
-
If you define a Value From/To range using negative numbers, enter the range from lowest to highest value. For example, to define a Volume Order Amount between -99999 to -1, enter the Value From = -99999 and the Value To = -1.
-
Enter Value To only when the Operator is BETWEEN.
-
-
Enter additional details about the selected qualifier in the Value From Meaning field. For example, if the qualifier context is CUSTOMER and the attribute is Ship To, then the Value From field displays the customer name and the Value From Meaning field displays the site-use location for the customer. If the context/attribute combination has no additional details, then Value From and Value From Meaning are identical.
-
Click Copy Group to add qualifiers from other qualifier groups.
-
Click OK.
-
Save your work.
Note: The start and end dates of the line qualifiers must be within the start and end date of the modifier list.
Copying a Modifier List
You can create a new modifier list by copying an existing one. The following modifier information is copied from the original modifier to the new one:
-
Modifier lines
-
Pricing attributes, such as price breaks, other item discounts, coupons, and promotional goods.
-
Qualifiers (list and line levels)
When you copy a modifier, you can enter a unique number and name for the new modifier and either update or keep the effective dates for the modifier list and lines. The combination of modifier name, number, and version must be unique across modifier lists. Although it is possible to copy an existing modifier name, you must enter a unique number for the new modifier.
Promotional limits attached to the original modifier are not copied. The promotional limits must be created again for the new modifier. You can review the newly converted price breaks in the View Log of the concurrent request.
-
If you do not see the modifier list that you are trying to copy, you may not have access privileges to it. You must have at least View Only security privilege to copy a modifier list. Consult your Pricing Administrator.
To copy a modifier list
-
Navigate to the Copy Modifiers window.
Copy Modifiers window
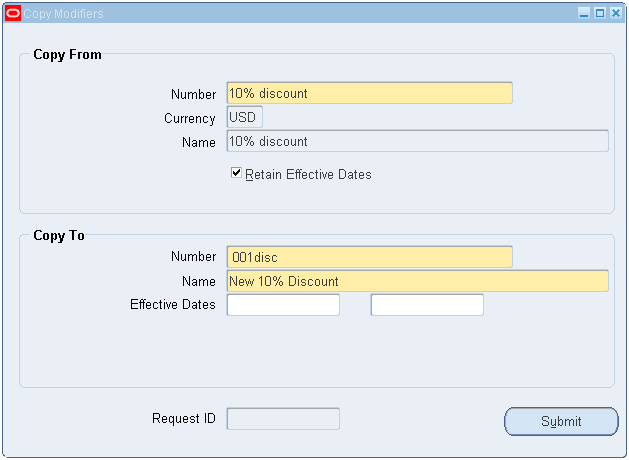
-
In the Copy From region:
-
Number: Select the modifier list to be copied. The currency and name appear for the selected modifier.
-
Retain Effective Dates: Select the Retain Effective Dates to copy the effective dates from the original to the new modifier.
If you select Retain Effective Dates, then the effective dates from the original modifier lines are copied to the new modifier lines. If you do not select this option, you can add effective dates to the new modifier lines once they are created.
Note: Selecting the Retain Effective Dates check box retains the effective dates only for the modifier lines not for the modifier list.
-
-
In the Copy To region:
-
Number: Enter a name for the new modifier in the Number field. Optionally, enter a description in the Name field and the effective dates for the modifier.
-
Global: If the modifier you are copying from is Global (meaning available to all operating units), then the Global check box is selected by default. You can clear or select the Global value to disable or enable global access to the new modifier list.
-
Operating Unit: Verify the value in the Operating Unit field. This value restricts the usage of the modifier list to the named operating unit (if Global is not selected). The operating unit value appears by default if you copy from an operating unit-specific modifier list and your responsibility has security access to the operating unit. If these two conditions do not exist, then the Global check box is selected instead.
Note: The Global check box and Operating Unit fields are visible only if pricing security is enabled. See the Oracle Advanced Pricing Implementation Guide for further details on how to enable pricing security.
-
-
Click Submit to copy the modifier. A Request ID number appears so that you can track your copy request. Select View > Requests and search by your Request ID number to view your request status.
Important: The copied modifier list is always inactive, so you must select the Active check box to make the modifier active.
-
Search for the new modifier in the Find Modifier Lists window.
-
Select the modifier, and then select Active to activate the modifier.
Copying a Modifier Line
You can quickly copy an existing modifier line to a new line record in the Advanced Pricing - Define Modifier window. The following information is copied to the new modifier line:
-
All the contents of the modifier summary and all other tabs.
-
All the Exclude Products attached to this modifier line.
-
All the Pricing Attributes attached to this modifier line.
-
All the Line Qualifiers attached to this modifier line.
-
All the Line Details (additional and get products, price break lines) attached to this modifier line.
All fields that are copied can be updated except for the Level and Modifier type fields. The Product Attribute and Product Value fields can be updated even after you click Define Details. However, once the new modifier line is saved, these fields cannot be updated.
-
Copying price breaks created in releases earlier than R12: When you copy a modifier line, all price break lines are copied from the old to the new modifier line. However, any price breaks created in releases earlier than R12 are converted automatically from non-continuous to the continuous price break format (standard in release R12 and newer). Since the conversion results in changes to the price break setup and break calculations, you should review the copied price break lines and make any required changes to ensure you are getting the correct results. You can review the newly converted price breaks in the View Log of the concurrent request. For more information on price breaks and their effect on pricing adjustments, see Continuous Price Breaks.
-
Duplicate Modifiers: Basic Pricing provides a profile option, QP: Allow Duplicate Modifiers, that can be set to yes or no to control if duplicate modifiers are permitted. This functionality is for Basic Pricing only. In Advanced Pricing, this profile option does is non-functional and, therefore, does not restrict your ability to copy a modifier line. See the Oracle Advanced Pricing Implementation Guide, Profiles Option for more information about this profile option.
To copy a modifier line
-
Display the modifier in the Advanced Pricing - Define Modifier window.
-
Select the modifier line to be copied, and click the New icon in the toolbar to create a new blank line beneath the original line.
-
Choose Edit > Duplicate > Record Above to duplicate the original line. Alternately, select the SHIFT+F6 keys.
-
Once the line is duplicated, you can modify or save it.
-
Save your work.
Using Modifiers in the HTML User Interface
Oracle Advanced Pricing provides an HTML-based user interface (UI) that features guided steps, user-friendly pages, and shortcut links for setting up and maintaining modifiers, price lists, and qualifiers.
You can use the HTML UI to complete many of the pricing tasks that you previously completed using the Oracle Forms-based UI, such as:
-
Searching for modifier lists and modifier lines.
-
Creating modifier lists for the following modifier types only: Deal, Discount List, Promotion, or Surcharge List.
Note: You must use the Oracle Forms-based UI to create a Freight and Special Charge list.
-
Creating the following modifier line types:
Note: You must use the Oracle Forms-based UI to create all other modifier line types.
-
Discount
-
Surcharge
-
Price Break Header
-
Promotional Goods
-
-
Updating a modifier.
Oracle Advanced Pricing provides the Oracle Forms-based interface for features and tasks currently unavailable in the HTML format, such as creating qualifier groups.
Note: Pricing security can affect the View and Maintain features associated with the Update and Details icons in the HTML UI. For more information, see Oracle Advanced Pricing Implementation Guide, Pricing Security.
Pricing Security (HTML Interface)
Pricing security settings affect the Update and Details icons for price lists and modifiers in the HTML UI in the following ways:
When Pricing Security is Off
-
For a modifier or price list, if the PTE and source system are the same as those set in the user's profile options, QP: Pricing Transaction Entity and QP: Source System Code, then the Update icon will be enabled and the Details icon will be disabled.
-
For a modifier or price list, if the PTE and source system are different from those set in the user's profile options, QP: Pricing Transaction Entity and QP: Source System Code, the Update icon will be disabled and the Details icon will be enabled.
-
When the source systems are different (and the PTE is the same as in the QP: Pricing Transaction Entity profile option), you can view only the price lists and modifiers for the PTE specified in the profile option.
When Pricing Security is On
-
For a modifier or price list with Maintain and View privileges, if the PTE and source system are the same as those in the user's profile options, QP: Pricing Transaction Entity and QP: Source System Code, then the Update icon will be enabled and the Details icon will be disabled.
-
For a modifier or price list with Maintain and View privileges, if the PTE and source systems are different from those in the user's profile options, QP: Pricing Transaction Entity and QP: Source System Code, then the Update icon will be disabled and the Details icon will be enabled. This condition occurs when the same PTE is defined for both the user's profile option, QP: Pricing Transaction Entity, and the modifier or price list, but the source systems are different. The behavior is the same in the forms-based UI.
-
If the modifier or price list has View-privileges only, the Update icon will be disabled and the Details icon will be enabled, regardless of the PTE and source system for which the modifier or price list belongs.
Creating a Modifier List (HTML Interface)
A modifier list contains general information that applies to all modifier lines created for the list. You can use modifier lists and lines to adjust net prices either up or down through modifier actions such as discounting, adding surcharges, charging for shipping, or adjusting price based on promotional pricing.
In the HTML UI, you can create the following modifier list types.
-
Deal
-
Discount List
-
Promotion
-
Surcharge List
Note: You must use the Oracle Forms-based UI to create a Freight and Special Charge list.
For each modifier list type, you can create modifier lines that define the price adjustment or benefit to be applied to the pricing requests. To view which modifier line types are supported for each modifier list, see Creating Modifier Lines (HTML Interface).
Creating a modifier list and modifier lines involves the following steps:
-
Enter general modifier list information.
-
Create qualifiers that define eligibility rules for the modifier list. For example, the customer must be a Gold class customer to receive the adjustments and benefits for the modifier list.
-
Review and then save the modifier list.
-
Add modifier lines to the modifier list to define the type and amount of price adjustment or benefit offered.
-
Make the modifier list active by navigating to the General Information page and clicking the Active check box.
Modifier List Concepts
The pricing engine applies modifiers to sales orders of the same currency. If a specific currency is selected, such as U.S. dollars (USD), then the modifier list can only be used with a price list with a matching base currency or to currency (for a multi-currency price list).
Optional Currency
Select Optional Currency if currency is not used as a criteria to select modifiers for the order (this selection leaves the Currency field in the modifier list blank). Selecting optional currency can provide the following advantages to your business:
-
Enables your business to reduce the number of modifiers required to support sales orders in all currencies for which you do business. For example, Optional Currency could be selected for modifiers that are set up with the application method of Percent, since these modifiers could be applied to any sales order regardless of the currency (since no currency conversion is required).
-
Reduces the cost of setup and maintenance of modifiers.
-
Reduces the cost of data storage.
Note: Although Optional Currency is applicable to all modifier types and application methods, it may not be appropriate for all types of modifiers since no currency conversion is done with such modifiers. You must determine if it suits your business requirements and in what situations.
Pricing for Global Use and Operating Unit
The Pricing For Global Use box identifies if this modifier list and lines are available to all operating units or a specific operating unit.
-
If selected, then the modifier list and lines are available for all operating units.
-
If cleared, then the Operating Unit field appears:
-
If multi-org access is not enabled, the operating unit value is provided by default from profile MO: Operating Unit. This operating unit field cannot be updated by users.
-
If multi-org access is enabled, the operating unit value is provided by default from profile MO: Default Operating Unit. Users can override this default and select an operating unit that they have access to as defined by MO: Security Profile.
The pricing engine will only consider this modifier if the order has the same operating unit.
-
The Pricing For Global Use check box appears only after you run the Security Control concurrent program to turn on security. To confirm the security status for your installation, view the profile QP: Security Control to see if security is on or off. Once security is on, all newly created modifier lists will have the global box selected as a default. For more information on pricing security, see the Oracle Advanced Pricing Implementation Guide.
By Request Only
If the By Request Only check box is selected, the customer must specifically request to have the modifier benefit applied (for example, by providing a special discount number), otherwise it will not be applied. This check box is only available for modifier list types of Deal and Promotion.
Note: If the pricing engine selects multiple modifiers to apply to an order line, the modifiers for By request only receive a higher preference than other modifiers.
To create a modifier list
-
Navigate to the Modifier Lists page.
Modifier Lists page
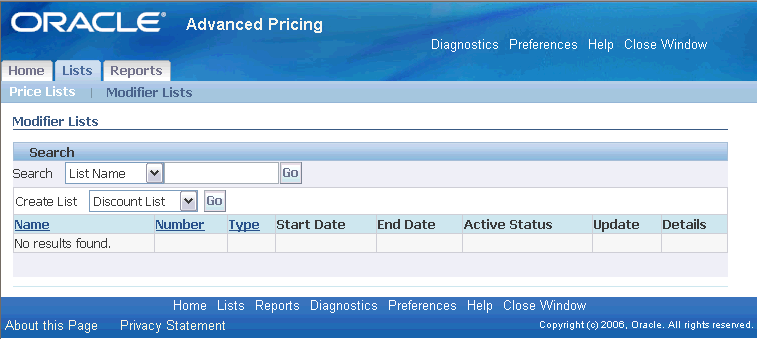
-
Select the type of modifier to be created:
-
Deal
-
Discount List
-
Promotion
-
Surcharge List
-
-
Click Go to display the Create [Modifier Type] General Information page.
Create [Modifier Type] General Information page
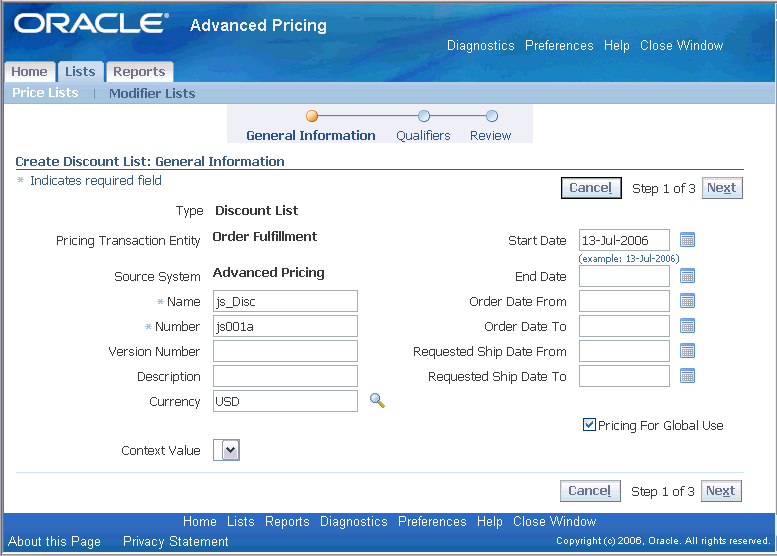
Note: The page name and details may vary slightly depending on the modifier list type being created.
The Type field displays the modifier list type you are creating. The Pricing Transaction Entity and Source System values appear by default from the profiles QP: Pricing Transaction Entity and QP: Source System Code.
-
Enter a Name for the modifier list. You can use an alphabetic or alphanumeric combination to identify the modifier, for example, Promo Modifier or Mod1234.
Note: The modifier Name should be unique across PTEs, otherwise an error occurs. For example, if a modifier named Corporate is created in the Order Management PTE, an error message displays if you create a Corporate modifier in the Purchasing PTE.
-
Enter a modifier list Number. This can be an alpha-numeric combination.
-
Enter a Version Number.
-
Enter a Description for the modifier list.
-
Perform one of the following actions:
-
Select a Currency. If a currency is selected such as US dollars (USD), the sales order must match the modifier currency to determine pricing for the order. For more information, see Currency.
-
Optionally, select Optional Currency to leave the Currency field in the modifier list blank. This option can be selected when currency is not used as a criteria to select modifiers for the order. For more information, see Optional Currency.
-
-
Enter a Start Date and an End Date.
-
Enter an Order Date From and an Order Date To range.
-
Enter a Requested Shipped Date From date and a Requested Shipped Date To date.
-
The Pricing For Global Use box identifies if this modifier list and lines are available to all operating units or a specific operating unit. For more information, see Pricing For Global Use.
-
For modifier types of Deal and Promotion, the By request only check box displays. If selected, the customer must specifically request that the modifier benefit be applied. For example, the customer must provide a special discount number or the benefit will not be applied. If the pricing engine selects multiple modifiers to apply to an order line, the modifiers for By request only receive a higher preference than other modifiers.
For modifier types of Promotion and Deal, in the Parent Promotions Detail region, a parent-child relationship appears for reporting purposes. A Deal modifier list must be associated with a Parent Promotion by providing the promotion name and version. Since this association is for reporting purposes, information that you define on the promotion is independent of and does not affect the information on the Deal modifier. The Promotion must already exist before you can select it.
-
Click Next to display the Qualifiers page where you can define eligibility rules for the modifier list. See Creating Qualifiers (HTML Interface).
Warning: When a qualifier is attached to a price list or modifier header, the effective dates of that QUALIFIER determine the effective dates for the price list or modifier list NOT the effective dates defined in the price list or modifier list window. For example, suppose you create a price list with an effective start date of 23-NOV-2005 and no end date; then you create a qualifier at the header level with effective dates of 10-NOV-2005 and 12-NOV-2005 for customer Computer Service and Rentals. However, after 12-NOV-2005, the price list will not be valid for Computer Service and Rentals or any other customer and the price list becomes expired.
Qualifiers page
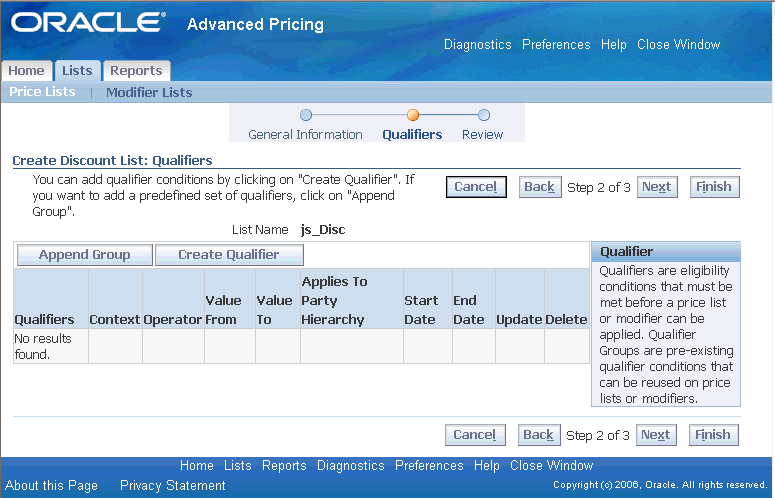
-
Complete your entries, then choose one of the following:
-
Click Next to review your entries before saving your work. If changes are required, click the Back button and update the information.
-
Click Finish to save your work. A Confirmation page confirms that the modifier list has been created, and asks if you want to add modifier lines.
Important: All modifier (and price lists) created in HTML are created as inactive lists. You must select the Active field (which only appears after the list is created) from the Update General Information page to make the modifier list active.
-
Related Topics
Creating Modifier Lines (HTML Interface)
Creating a Discount Modifier Line (HTML)
Creating a Promotional Goods Modifier Line (HTML)
Creating a Price Break Modifier Line (HTML Interface)
Creating a Surcharge Modifier Line (HTML Interface)
Creating Modifier Lines (HTML Interface)
Once you create the modifier list, you can add modifier lines that define the type of price adjustments and benefits that the pricing engine applies to pricing requests. The following table shows the type of modifier line types you can create for a selected modifier list type:
| For the following Modifier List Types.. | You can create these Modifier Line Types |
|---|---|
| Deal | Discount, Price Break, Promotional Goods, or Surcharge |
| Discount List | Discount, Price Break, or Surcharge |
| Promotion List | Discount, Price Break, Promotional Goods, or Surcharge |
| Surcharge List | Price Break, Surcharge |
Note: Pricing security can affect the View and Maintain features associated with the Update and Details icons in the HTML user interface.
To create modifier lines
-
Navigate to the Create Line page to complete your entries.
-
Complete your entries:
-
Modifier Type: The modifier line type you can select depends on the modifier list type selected:
-
Discount: Creates a negative price adjustment.
-
Promotional Goods: Adds a new item to the order line with a price adjustment or benefit when the customer orders a particular item on the same order.
-
Price Break: Applies a variable discount or surcharge price adjustment to a pricing request based meeting the condition of a break type. You can use both point and range type breaks.
-
Surcharge: Creates a positive price adjustment. For example, a 10 percent handling charge is applied to a customer order.
The modifier Line Number defaults and can be updated. Each modifier line number must be unique within the modifier list (the line number cannot be duplicated).
-
-
End Date: If you do not end an End Date then the modifier does not expire.
-
Related Topics
Creating a Discount Modifier Line (HTML)
Creating a Promotional Goods Modifier Line (HTML)
Creating a Price Break Modifier Line
Defining Controls for Modifier Lines (HTML Interface)
In the Controls page, you define pricing controls that govern how the modifier line should be applied.
To define controls for a modifier line (HTML Interface)
Controls page
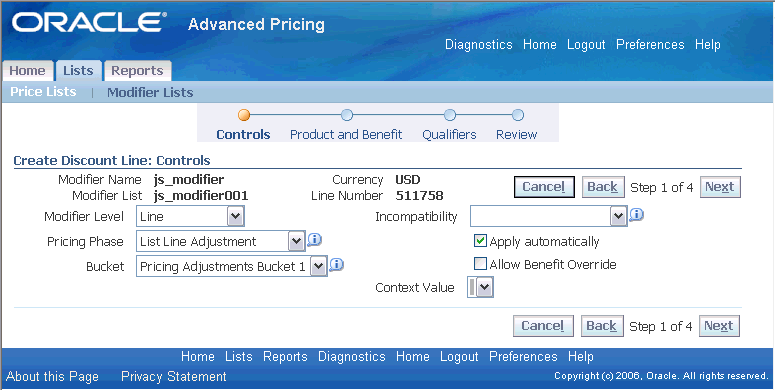
-
Select a Modifier Level at which the modifier line should be applied:
-
Line: Applies only to a specific order line.
-
Group of Lines: Applies to groups of lines in the order.
When Group of Lines is selected as the modifier level, then the Volume Type, Product Attribute, and Product Attribute Value fields become mandatory fields. This condition is true regardless of the modifier type selected, such as (Discount, Surcharge, PBH, and so on).
-
Order: Applies to an entire order. If Order is selected, then all products on the order will receive the benefit or price adjustment.
For example, a volume-based discount modifier applied at the line level will consider only volume on the qualifying line. A volume-based discount modifier applied at the group of lines level will process the volume across all qualifying lines in the product hierarchy.
-
-
Select from other pricing controls:
-
Pricing Phase: Defines the point in the order process when the pricing engine applies the modifier adjustment. See the Oracle Advanced Pricing Implementation Guide for more information on pricing phases.
-
Bucket: Pricing buckets enable you to control how discounts and other benefits are applied using cascading price adjustments. They can be used to determine the net selling price across all pricing phases.
Important: You must select a Bucket value to display the Net Amount Calculation field in the Product page.
When the pricing engine calculates price adjustments, it:
-
Calculates percent type modifiers using the previous bucket's subtotal
-
Sums all bucket modifier values to create a bucket subtotal
If the Bucket field is left blank, the modifier line is assigned to a Null bucket. Modifiers assigned to a Null bucket are applied last and always adjust from the list price. In addition, Order level modifiers must be in the Null bucket. For more information, see Oracle Advanced Pricing Implementation Guide.
-
-
Incompatibility Group: You can assign a modifier line to one of the following incompatibility groups:
-
Exclusive: If one of the modifiers is Exclusive, then only the Exclusive modifier is applied.
-
Group 1 incompatibility
-
Group 2 incompatibility
-
Group 3 incompatibility
Incompatibility occurs when the pricing engine finds more than one modifier line to return but can apply only one. The pricing engine evaluates eligible modifier lines from each incompatibility group, and then resolves any incompatibility between modifier lines by using either precedence or best price. Only one modifier within the same incompatibility group will be applied for each phase. For more information, see the Oracle Advanced Pricing Implementation Guide.
-
-
Apply automatically: Select this option so the pricing engine automatically applies the modifier line. Certain modifiers must be applied automatically and in these cases, you cannot change the value.
-
By Request Only: On the modifier line, the By Request Only check box is read-only, based on the value selected for the modifier list. This field is visible only for modifier list types of Promotion or Deal.
-
Allow Benefit Override: Enables the modifier-adjusted price to be manually overridden. If not selected, then the modifier-adjusted price cannot be overridden. For range break price break lines, do not select the Allow Benefit Override check box.
Note: The Allow Benefit Override box displays only for modifier types that support overrides.
-
Creating a Discount Modifier Line (HTML Interface)
You can create a discount modifier line to create a negative price adjustment. For example, to give a 10 percent discount.
To create a discount modifier line
-
Navigate to the Create Line page. For more information, see Creating Modifier Lines (HTML Interface).
-
Select Discount as the Modifier Type.
The modifier Line Number defaults and can be updated. Each modifier line number must be unique within the modifier list (the line number cannot be duplicated).
-
Click Continue to display the Create Discount Line: Controls page. In this page, you can define controls for the modifier line. For more information on setting up and using controls, see Defining Controls.
-
After you have set up the controls, click Next to display the Create Discount Line: Product and Benefit page.
Create Discount Line: Product and Benefit page
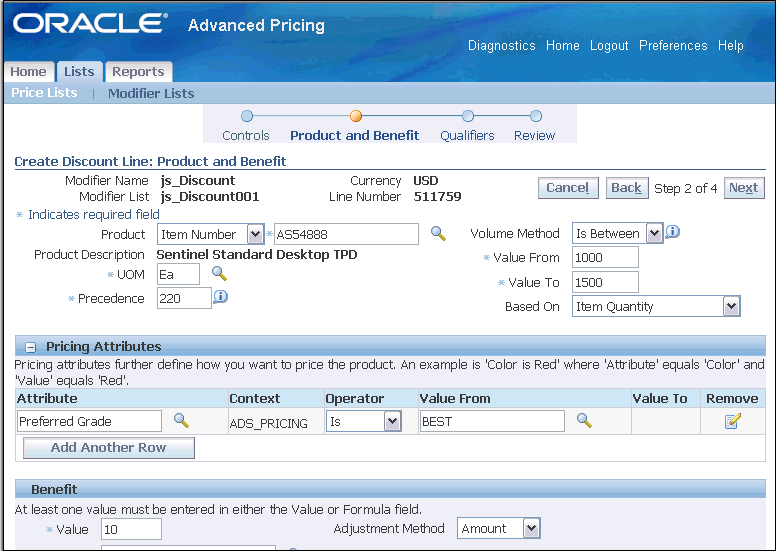
-
Enter information about the product and product volume.
Note: The Product and its related fields will not display if you selected Modifier Level = Order in the Controls page. This means that all products on the order will receive the pricing adjustment you define.
-
Product: Select the product that is eligible for the discount. The Product Description defaults based on the product selected.
-
Volume Method: Select a Volume Method to define specific volume requirements.
If you select a Volume Method, then the following fields display:
-
Value From/To: For the selected Volume Method, enter the Value From/To (where applicable). For example, if you selected Is Between, then you can enter a range in the Value From and Value To fields.
-
Based On: Select a value to define how the buy volume is evaluated before the benefit is given:
-
Item Quantity: Creates an adjustment based on the number of items that the customer orders.
-
Item Amount: This could be a monetary value.
-
-
-
In the Pricing Attributes region, define the attributes for the selected product:
-
Attribute: Select a pricing attribute(s) that further define how you want to price the product such as by color or size. The Context value defaults and is display only.
-
Excluded Products: You can exclude certain products so that the pricing adjustments from the modifier line will not be applied to those products. For example, suppose you set up a Discount modifier line for the Item Category of shoes, but you wanted to exclude designer shoes from the price adjustment. Therefore, in the Excluded Products region, you would select designer shoes to be excluded from the price adjustment.
Note: The Excluded Products region does not appear if Item Number is selected as the Product or if the Product field is left blank.
Benefit region
-
Value: Enter a Value, then select an Adjustment Method. For example, if you selected Percent as the adjustment method, enter 10 as the Value to give a 10 percent adjustment.
-
Formula: Optionally, select a Formula.
Note: Both the Value and Formula fields are not required, but at least one of these fields must be entered. Formulas are available for modifier lines types of Discount and Surcharge.
-
Adjustment Method: Select an Adjustment Method that defines how the pricing engine applies this modifier. For more information, see Adjustment Method.
-
-
Click Next to display the Qualifiers page where you can define eligibility rules for the modifier line.
-
Complete your entries, and click Next to proceed to the review page, or click Finish to skip the review page and save the line.
A Confirmation message confirms if the modifier line is successfully created.
Related Topics
Creating Qualifiers (HTML Interface)
Creating a Price Break Modifier Line (HTML Interface)
You can use a price break modifier to apply a variable discount or surcharge price adjustment to a pricing request based on the conditions of the break type. You can use both point and range type breaks:
-
Point: The pricing engine charges each unit of volume at the price of the break within which the total falls.
-
Range: The pricing engine charges each unit of volume at the price of the break within which it falls.
The following table provides an example of a price break sequence:
| Product Attribute | Value From | Value To | Value (%) |
|---|---|---|---|
| Item A | 0 | 100 | 5 |
| Item A | 100 | 200 | 10 |
| Item A | 200 | Null | 15 |
Suppose a customer is eligible for the preceding price break, and places an order for a quantity of 150 of Item A. The pricing engine calculates the discount differently depending on the type of price break selected:
-
Point: If the total quantity of Item A is 150, the discount is against 150 at 10 percent.
-
Range: If the total quantity of Item A is 150, the discount is against 100 at 5 percent and 50 at 10 percent
Continuous Price Breaks
| Price Break Feature | Example of Price Break Setup |
|---|---|
| All newly-created price breaks are created as continuous price breaks. These are price break lines without gaps between subsequent price break ranges. Example: The first break (0-100) means greater than 0 but less than or equal to 100. A quantity of 100 is eligible for the first price break range (0-100), but a quantity of 100.1 would be eligible for the second price break range (100-200). |
0-100 100-200 200-300 |
| Value From of first break range starts with 0. | 0-100 (greater than 0 to less than or equal to 100) |
| Value From of the current price break (other than the first break range) matches the Value To of the previous break. |
|
Important: If you copy a price break from a pre-R12 release (for example, by copying a price list or modifier list with price breaks or copying a price break line--actions you can complete in the Forms-based UI) , then the price breaks are converted automatically to the continuous format. This conversion changes the price break setup and processing; therefore, you must review the converted price breaks to ensure they continue to achieve your desired pricing results. The following table describes the continuous price break features:
To create a price break line
-
Navigate to the Create Line page. For more information, see Creating Modifier Lines (HTML Interface).
-
Select Price Break as the Modifier Type.
The modifier Line Number defaults and can be updated. Each modifier line number must be unique within the modifier list (the line number cannot be duplicated).
-
Click Continue to display the Create Price Break Line: Controls page. In this page, you can define controls for the modifier line. For more information on setting up and using controls, see Defining Controls.
-
After you have set up the controls, click Next to display the Products page.
Create Price Break Line: Products page
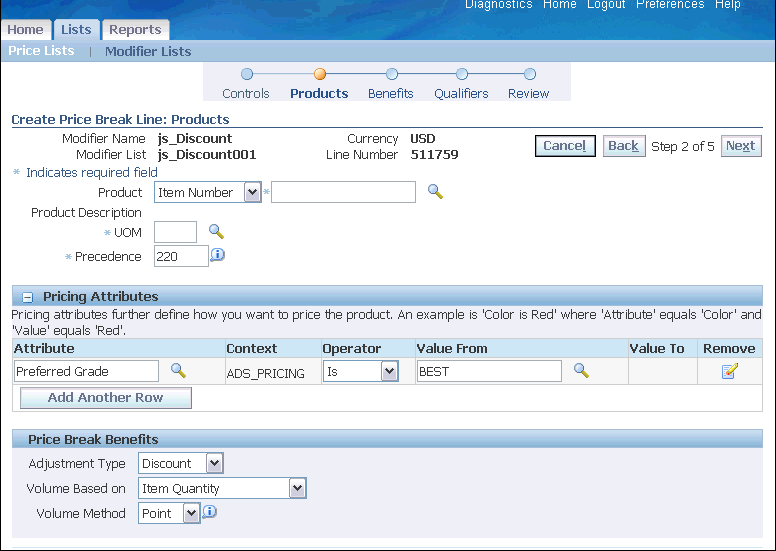
-
Enter information about the product and product volume that the customer must buy to get the benefit.
-
Product: Select the product that is eligible for the price break. The Product Description defaults based on the product selected.
Note: If All Items is selected for Product Level, then the Product Description field defaults to All meaning all products.
-
UOM (unit of measure): The UOM value defaults if an item is selected.
-
Precedence: Defaults based on the product level selected. You can overtype this value.
-
-
In the Pricing Attributes region, select the attribute information:
-
Attribute: Select the pricing attributes that further define how you want to price the product such as by color or size. The Context value defaults and is display only.
-
Excluded Products: The Excluded Products region does not appear if Item Number is selected as the Product Level or if the Product Level field is left blank. You can exclude certain products so that the pricing adjustments from the modifier line will not be applied to those products.
Product Level and Product: Select the product level and product to be excluded from the Item Category or All Items selected in the Product Level field.
For example, suppose you set up a Discount modifier line for the Item Category of shoes but you want to exclude designer shoes from the price adjustment. Therefore, in the Excluded Products region, you would select designer shoes to be excluded from the price adjustment.
-
-
In the Price Break Benefits region, define the price break benefits for the modifier line:
-
Adjustment Type: Select an Adjustment Type such as Discount or Surcharge.
-
Volume Based on: Select a Volume Based on value to define how the buy volume is evaluated before the benefit is given:
-
Item Quantity: Creates a price break based on the number of items that the customer orders.
-
Item Amount: This could be a monetary value. (Item Amount must be selected to use the Net Amount Calculation feature.)
-
Accumulate Line Quantity: Creates an accumulated range price break that accumulates across orders.
-
-
Volume Method: Select either Point or Range. For more information, see Using Point and Range Price Breaks.
-
Accumulation Attribute: Select an Accumulation Attribute that defines the value to be accumulated. This option can only be selected for Range price breaks. For more information, see Using Accumulated Range Breaks.
Note: This field displays only if Accumulate Line Quantity is selected in the Volume Based on field.
-
-
Optionally, select Net Amount Calculation to calculate the selling price based on the bucketed Item Amount volume. For more information, see Using Net Amount with Price Breaks.
To use Net Amount Calculation, the following fields must also be selected.
-
On Controls page:
- Bucket
- Modifier Level: Line or Group of Lines (Group of Lines must be selected to use the For matching products option from the Net Amount Calculation field.)
- Apply automatically box
-
On Products page: Volume Based on is Item Amount.
-
-
After you have set up the products, click Next to see the Benefits page.
Create Price Break Line: Benefits
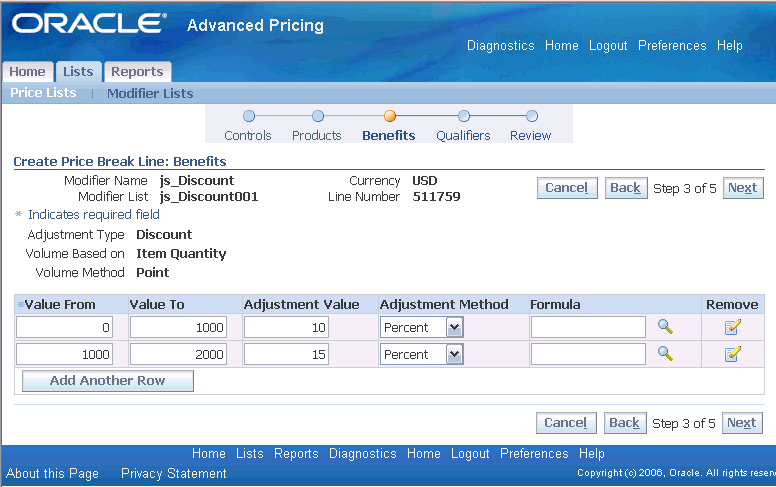
-
Define the following values for each price break:
-
Value From/To: Define the price break range. For example, to define a break for the first 10 items ordered, create a range from 0-10. To do this, enter 0 in Value From and 10 in Value To.
Note: If you leave the Value To field blank, a value of 999999.. (15 digits long) defaults in the database, but does not display in the Value To field.
-
Adjustment Value: Defines the value of the adjustment. For example, if you enter 10 in the Adjustment Value field and select Percent as the Adjustment Method, then you create a 10 percent adjustment.
-
Adjustment Method: Defines how the price is to be adjusted. For more information, see Adjustment Method.
-
Formula: Optionally, select a Formula if you are using a formula to calculate the benefit.
-
-
Click Next to see the Qualifiers page, where you can define eligibility rules for the modifier line.
-
Complete your entries, and click Next to proceed to the review page, or click Finish to skip the review page and save the line.
A Confirmation message confirms if the modifier line is successfully created.
Caution: After you save can the price break lines, they cannot be removed. However, they can still be updated.
Creating a Promotional Goods Modifier Line (HTML Interface)
When the customer orders one or more specified items on the same order, you can create a Promotional Goods modifier line to add a new item to an order and provide a price adjustment or benefit for the item . The item does not need to be originally on the order. Even if the item is on the order, the pricing engine creates a new line for the item.
Note: Recurring other item discounts are not supported.
To create a promotional goods modifier line
-
Navigate to the Create Line page, and select Promotional Goods as the Modifier Type.
-
The modifier Line Number defaults and can be updated. Each modifier line number must be unique within the modifier list (the line number cannot be duplicated).
-
Select a Start and End Date range when the modifier line is effective. You should specify a range that coincides with the period of time that the benefit is offered. If no End Date is entered, then the modifier line does not expire.
-
Click Continue to display the Create Promotional Goods Line: Controls page. In this page, you can define controls for the modifier line. For more information on setting up and using controls, see Defining Controls.
-
After you have set up the controls, click Next to display the Required Products page.
Create Promotional Goods Line: Required Products
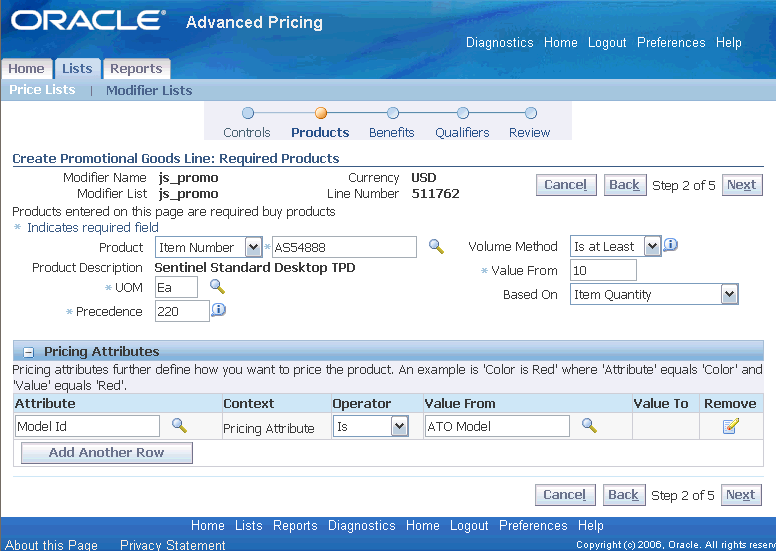
-
Define the required buy product (or category) that the customer must order to get the benefit. For example: you must buy a toothbrush to get a free bottle of mouthwash.
-
Product: Select the product. The Product Description defaults based on the product selected.
Note: If All Items is selected for Product Level, then the Product Description field defaults to All meaning all products.
-
Precedence: Defaults based on the product level selected. You can overtype this value.
-
Volume Method: Select a Volume Method to define specific volume requirements.
If you selected a Volume Method, the following fields display:
-
Value From/To: For the selected Volume Method, enter the Value From/To (where applicable). For example, if you selected Is Between, then you can enter a range in the Value From and Value To fields.
-
Based On: Select a value to define how the buy volume is evaluated before the benefit is given:
-
Item Quantity: Creates an adjustment based on the number of items that the customer orders.
-
Item Amount: This could be a monetary value.
-
-
Net Amount Calculation: Define Net Amount Calculation (optional step). You can use net amount calculation to calculate the selling price based on the bucketed Item Amount volume. For more information, see Using Net Amount with Price Breaks.
Note: To use Net Amount Calculation , the following fields must also be selected.
-
In Controls page:
-
Bucket
-
Modifier Level: Line or Group of Lines (You must select Group of Lines to select "For matching products" from the Net Amount Calculation field.)
-
Apply automatically box
-
-
In Products page: Based On is Item Amount
-
-
-
In the Pricing Attributes region, select pricing attributes that further define how you want to price the product such as by color or size. The Context value defaults and is display only.
-
In the Excluded Products region, select the product level and product to be excluded from the Item Category or All Items selected in the Product Level field. You can exclude certain products so that the pricing adjustments from the modifier line will not be applied to those products.
For example, suppose you set up a Discount modifier line for the Item Category of shoes but you wanted to exclude designer shoes from the price adjustment. Therefore, in the Excluded Products region, you would select designer shoes to be excluded from the price adjustment.
Note: The Excluded Products region does not appear if Item Number is selected as the Product Level or if the Product Level field is left blank.
-
After you have set up the products, click Next to display the Benefits page.
Create Promotional Goods Line: Benefits page
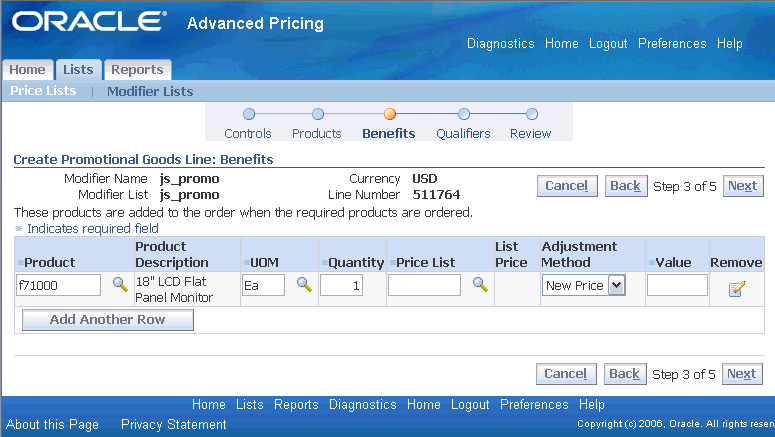
-
Define the product the customers get after they purchase the buy product defined in the Required Products page. For example, if they buy a toothbrush, the toothpaste is automatically added to the order line at a 10 percent discount.
-
Product: Select a Product. The Product Description defaults based on the product selected.
-
UOM: Enter a UOM (unit of measure) such as each (Ea). The unit of measure is used with the Quantity field to determine how the benefit is applied.
-
Price List: For the selected product, select a Price List. The list price will then default based on the price list selected.
-
Adjustment Method: Select an Adjustment Method that defines how the pricing engine applies this modifier. For more information, see Adjustment Method.
-
Value: Enter the Value for the selected Adjustment Method. For example, if you selected Percent as the adjustment method, enter 10 as the Value to give a 10 percent adjustment.
-
-
Optionally, click Add Another Row to add additional benefit lines, or click Remove to remove a selected line. However, once the benefit line is created and saved, you cannot remove this benefit line or update the product.
-
Click Next to display the Qualifiers page where you can define eligibility rules for the modifier line.
If you are using a promotional modifier as a qualifier for another modifier, see Using a Promotional Modifier as a Qualifier for Another Modifier.
-
Complete your entries and click Next to proceed to the review page, or click Finish to skip the review page and save the line. A Confirmation message confirms if the modifier line is successfully created.
Notes
-
Changing the quantity of the free promotional good added to the order line: To prevent a user from changing the quantity of the free promotional good added to the order line (for example, changing the quantity of the promotional good from 1 to 2), select the Pricing Phase 30 (All Lines adjustment) when you create the promotional modifier.
-
Deleting and reapplying a Promotional Goods modifier line: If you apply a modifier line of type Promotional Goods to an order, then delete the modifier line, you cannot reapply the deleted Promotional Goods modifier line.
Related Topics
Creating Modifier Lines (HTML Interface)
Creating Qualifiers (HTML Interface)
Creating a Surcharge Modifier Line (HTML Interface)
You can use a Surcharge modifier line to add a positive price adjustment. For example, to apply a 10 percent special charge to a customer's order.
-
Navigate to the Create Line page and select Surcharge as the Modifier Type.
The modifier Line Number defaults and can be updated. Each modifier line number must be unique within the modifier list (the line number cannot be duplicated).
-
Select a Start and End Date range when the modifier line is effective. You should specify a range that coincides with the period of time that the benefit is offered. If no End Date is entered, then the modifier line does not expire.
-
Click Continue to display the Controls page. In this page, you can define controls for the modifier line. For more information on setting up and using controls, see Defining Controls.
-
After you have set up the controls, click Next to display the Create Surcharge Line: Product and Benefit page.
Create Surcharge Line: Product and Benefit page
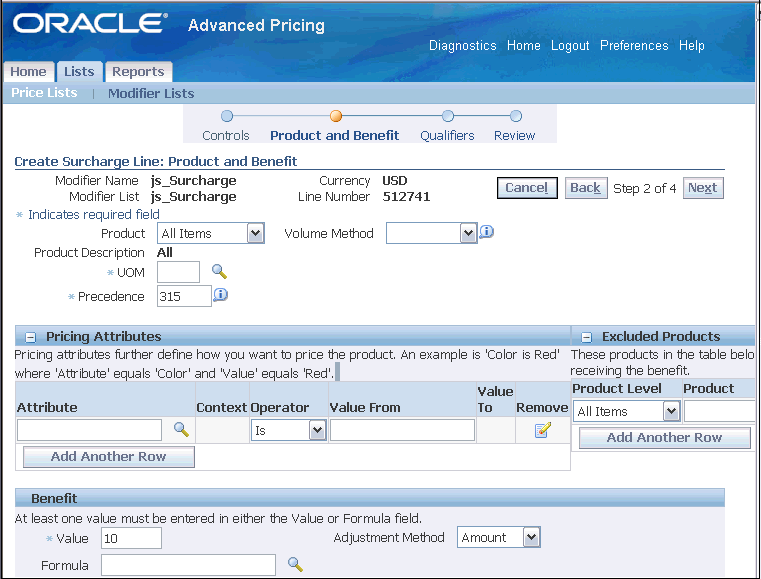
-
Select the product(s) that will receive the surcharge:
Note: The Product and its related fields will not display if you selected Modifier Level = Order in the Controls page. This means that all products on the order will receive the pricing adjustment you define.
-
Product: Select a Product. The Product Description defaults based on the product selected.
Note: If All Items is selected for Product Level, then the Product Description field defaults to All meaning all products.
-
Unit of measure (UOM): The UOM defaults if an item is selected.
-
Precedence: Defaults based on the product level selected. You can overtype this value.
-
Volume Method: Select a Volume Method to define specific volume requirements.
If you selected a Volume Method, then the following fields display:
-
Value From/To: For the selected Volume Method, enter the Value From/To (where applicable). For example, if you selected Is Between, then you can enter a range in the Value From and Value To fields.
-
Based On: Select a value to define how the buy volume is evaluated before the benefit is given:
-
Item Quantity: Creates a price break based on the number of items that the customer orders.
-
Item Amount: This could be a monetary value. (Item Amount must be selected to use the Net Amount Calculation feature.)
-
-
-
In the Pricing Attributes region, select the pricing attributes that further define how you want to price the product such as by color or size. The Context value defaults and is display only.
-
In the Excluded Products region, select the product level and product to be excluded from the Item Category or All Items selected in the Product Level field. You can exclude certain products so that the pricing adjustments from the modifier line will not be applied to those products.
For example, suppose you set up a Discount modifier line for the Item Category of shoes but you want to exclude designer shoes from the price adjustment. Therefore, in the Excluded Products region, you would select designer shoes to be excluded from the price adjustment.
Note: The Excluded Products region does not appear if Item Number is selected as the Product or if the Product field is left blank.
-
Optionally, click Add Another Row to add additional benefit lines, or click Remove to remove a selected line. However, once the benefit line is created and saved, you cannot remove this benefit line or update the product.
-
In the Benefit region, select the following values:
-
Value: Enter a Value, then select an Adjustment Method that defines how the pricing engine applies this modifier. For example, if you selected Percent as the adjustment method, enter 10 as the Value to give a 10 percent adjustment. For more information, see Adjustment Method.
-
Formula: Optionally, select a Formula.
Note: Both the Value and Formula fields are not required, but at least one of these fields must be entered. Formulas are available for modifier lines types of Discount and Surcharge.
-
-
Click Next to display the Qualifiers page where you can define eligibility rules for the modifier line. For more information, on setting up qualifiers, see Creating Qualifiers (HTML Interface).
-
Complete your entries, and click Next to proceed to the review page, or click Finish to skip the review page and save the line.
A Confirmation message confirms if the modifier line is successfully created.
Related Topics
Creating Modifier Lines (HTML Interface)
Searching for Modifier Lists (HTML Interface)
In the Modifier Lists Search page, you can use searches to quickly retrieve information about modifiers. This helps you find information essential to your business such as:
-
All modifier lists in USD currency.
-
Specific modifier lines.
-
All active Promotion modifier lists.
-
All modifier lists for Customer A.
-
All discount modifier lists.
-
All promotions that will end on May 31 (must be an exact date match only).
Note: Alternately, you can do searches for modifier lists from the Oracle Advanced Pricing Home page.
Once the search results are returned, you can view a summary of modifier lists, view general information about the modifier list such as Name, Number, Type, Start/End Dates, and Active status, or select a specific modifier list to view additional details.
In addition to viewing the modifier lists, you can choose to update, and create a new modifier list.
Note: You must be assigned Maintain privileges in pricing security to update or create a new modifier. The Details icon is enabled if you have view or update privileges assigned through pricing security.
To search for modifier lists
-
Navigate to the Modifier Lists Search page.
Modifier Lists Search page
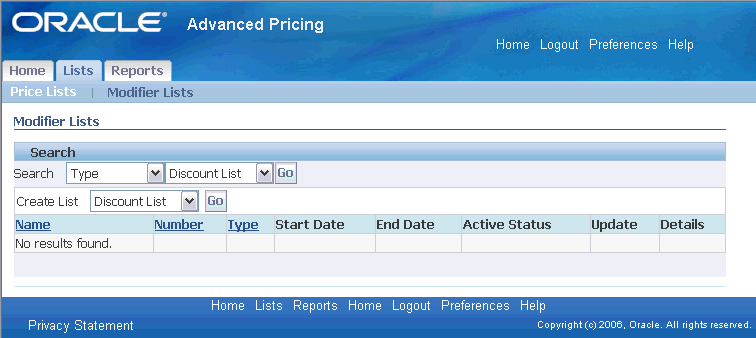
-
Select a search category from the Search list, then enter additional criteria next to the Search list to narrow your search results. Select from the following search categories:
-
Status: Search by Active or non-Active modifier lists.
-
Active: Finds all Active modifier lists.
-
Inactive: Finds Inactive modifier lists.
-
-
Currency: Search by Currency. Select a specific currency such as USD (US dollars) to find all modifier lists set up in USD.
-
List Name: Search by the modifier list name. Enter a specific name or enter the percent sign (%) to list all modifier lists.
-
Dates: Search by modifier list Dates. These start and end dates must match exactly to the dates in the modifier list setup.
-
Line Number: Search by a modifier line number.
-
Type: Search by a specific modifier list type such as Deal, Discount List, Promotion, or Surcharge List.
-
List Number: Search by modifier list number. Enter a List Number to find a specific modifier list.
For example, to find a modifier list by its name, select Name from the Search list, then enter the specific name of the modifier list such as Summer Discount Modifier.
-
-
Click Go to display the following search results in a table:
-
Name: The modifier list Name.
-
Number: The modifier list Number.
-
Type: The modifier list Type.
-
Start/End Date: The start and end date for the modifier list.
-
Active: Indicates if the modifier is Active or Inactive.
Optionally, click Update to update the modifier list, or click Details to view additional details about the modifier list.
Note: When pricing security is turned off, either the Details or Update icon displays depending on the profile QP: Source System. If the modifier list is created in a different source system within the same PTE, you can only view the list. You can only update the modifier list that matches your PTE and Source System.
-
Related Topics
Oracle Advanced Pricing Home page (HTML Interface)
Creating a Modifier List (HTML Interface)
Updating a Modifier (HTML Interface)
Updating a Modifier (HTML Interface)
You can update a modifier to change information such as its effective start and end dates then save your changes. All fields can be updated except for the List Type, Pricing Transaction Entity (if there are modifier lines), Source System (if there are modifier lines), Name, and Number.
Note: Pricing security can affect the View and Maintain features associated with the Update and Details icons in the HTML user interface. For more information, see Pricing Security (HTML Interface).
To update a modifier
-
Navigate to the Update [Modifier Type]: General Information page.
Note: The actual page name depends on the type of modifier being updated.
Update [Modifier Type]: General Information page
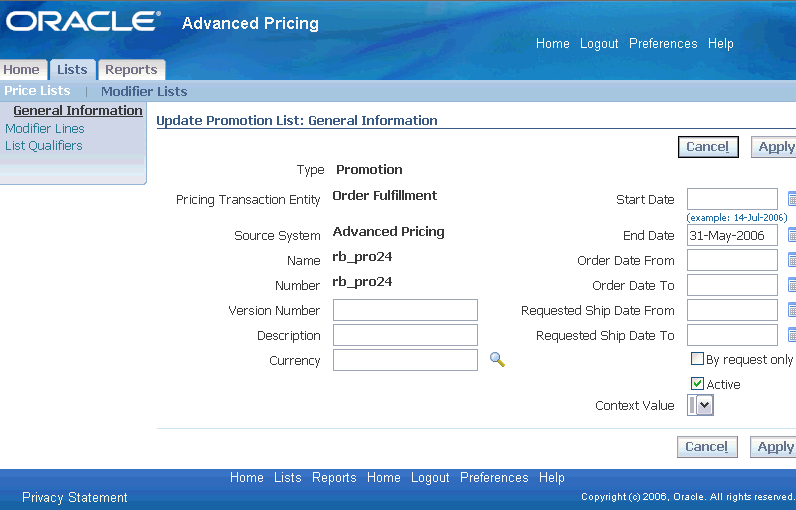
-
Update the fields that require changes:
-
Version Number
-
Requested Ship date
-
Start/End Date
-
Order Date From/To
-
Requested Ship Date From/To
-
Description
-
Currency
-
-
Select or clear the By Request Only check box (if applicable).
-
Select or clear the Active box:
-
To make a modifier active, select Active.
-
To make a modifier inactive, clear Active.
When a modifier list is first created, it is Inactive. The pricing engine evaluates only Active modifiers (when the Active box is selected). When a modifier is no longer required, change the status of the modifier to Inactive so only Active modifiers are evaluated.
-
-
Click Apply to save the changes.
A Confirmation pages displays to advise you if the changes were updated successfully.
Related Topics
Creating a Modifier List (HTML Interface)
Creating Modifier Lines (HTML Interface)
Updating a Qualifier (HTML Interface)
Updating a Modifier Line (HTML Interface)
You can update an existing modifier line to change information such as controls, products and benefits, and qualifiers. You can add additional qualifiers, excluded items, and additional buy and get products.
However, you cannot update the following:
-
The primary buy product for the modifier line cannot be removed or changed.
-
Once a modifier line is saved, you cannot delete additional buy and get items.
The following fields cannot be updated: List Type, Pricing Transaction Entity/Source System, Name, Number, Product Level, Product, Modifier Level, and Line Number.
Note: Pricing security can affect the View and Maintain features associated with the Update and Details icons in the HTML user interface. For more information, see Oracle Advanced Pricing Implementation Guide, Pricing Security.
To update a modifier line
-
Navigate to the Update [Modifier Type]: Modifier Lines page.
-
To find modifier lines for the selected modifier, select a Search category and enter additional criteria for the selected category:
-
Line Number: Enter a modifier line number.
-
Type: Select a modifier Type to search by: Discount, Price Break, Promotional Goods, and Surcharge.
-
-
Click Go to display the search results.
-
Click Update to display the Update Line page.
Update Line page--Controls tab
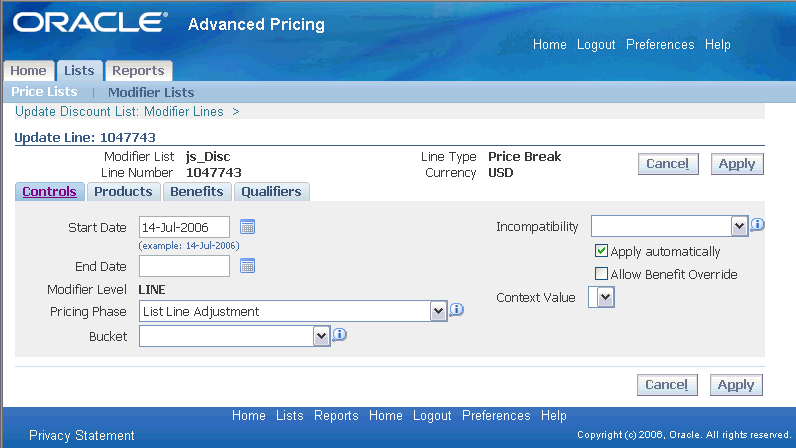
-
Select the Controls tab to update controls that define how the modifier line is applied such as the Start/End Dates, Pricing Phase, Bucket, and Incompatibility Levels. See Defining Controls for Modifier Lines (HTML Interface).
-
Select the Products tab to update information related to the selected product such as UOM and Precedence. You cannot update the Product Level or Product in the update mode.
Note: A Products tab and Benefits tab display when you are updating a price break line. For other line types, a combined Product And Benefit tab displays instead.
Products tab
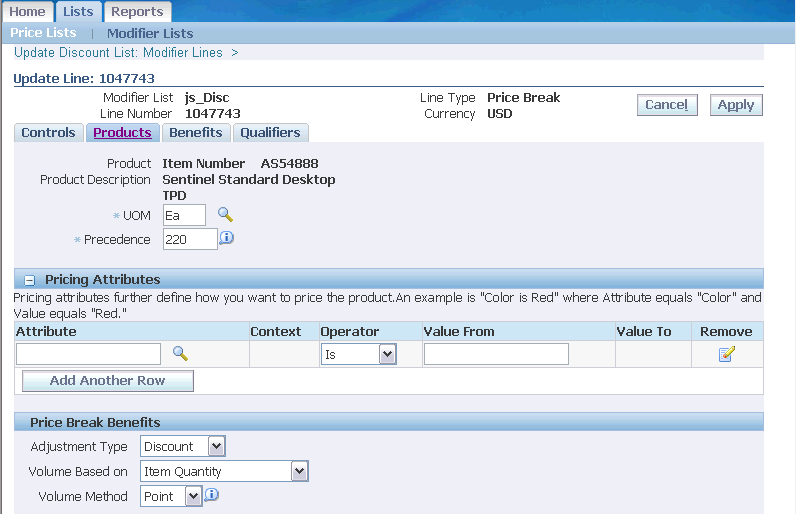
-
In the Pricing Attributes region (if applicable), you can update, add, or remove pricing attributes related to the product.
-
In the Price Break Benefits region (if applicable), you can update the Adjustment Type, Volume Based on, Volume Method, and related fields.
-
Select the Benefits tab to update the benefit information for the modifier line such as Value From/To, Adjustment Value, Adjustment Method, and Formula. For example, you could change the Adjustment Value from 10 to 15 for the Adjustment Method of Percent.
Benefits tab
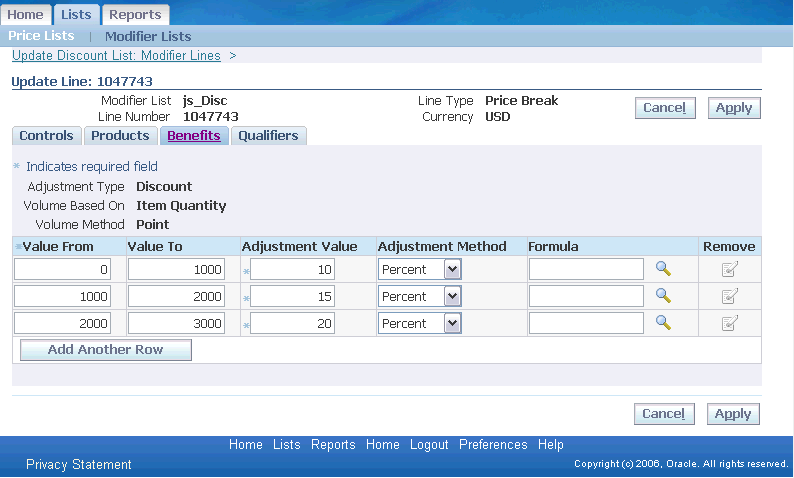
-
Select the Qualifiers tab to update qualifiers and qualifier groups currently associated with the modifier line. You can update the qualifier information, add new qualifiers by clicking Create Qualifier, or append qualifier groups by clicking Append Group.
Qualifiers tab
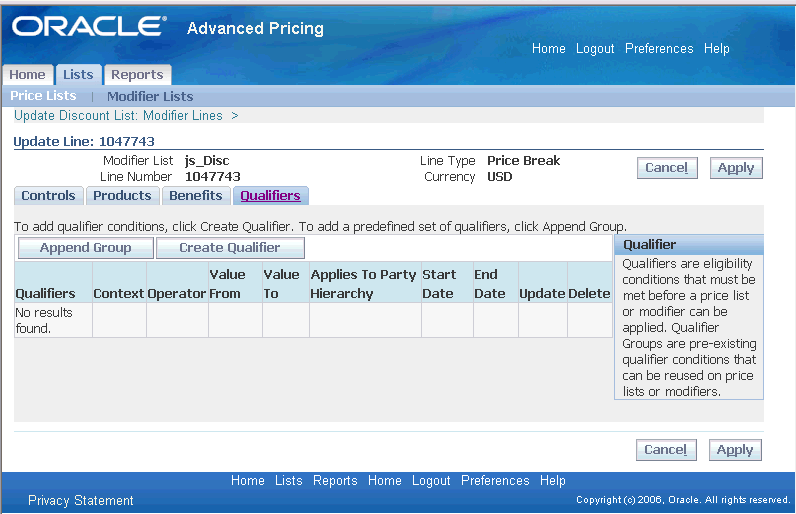
-
After you have completed all your updates, click Apply to save your changes.
Related Topics
Creating Modifier Lines (HTML Interface)
Updating a Qualifier (HTML Interface)
Appending a Qualifier Group (HTML Interface)
Deleting a Qualifier (HTML Interface)
Redeeming Accruals
You can mark accrued price adjustments as redeemed and record redemption transaction information. In addition, you can cancel coupons recorded as redeemed in error.
To redeem accruals
-
Navigate to the Redeem Accruals window.
Note: You cannot create an accrual record in this window.
Redeem Accruals window
-
Do a query to retrieve the accruals. For example, query by Customer name to find all unredeemed accruals for that customer. The window only displays accrual records that the pricing engine created.
-
Select the accrual record.
-
Do the following steps for each accrual that you want to redeem:
Note: You cannot mark an accrual record as partially redeemed. For example, a customer purchases a computer and accrues 100 air miles. You cannot mark 60 air miles redeemed at one time and 40 air miles redeemed later.
-
Select the Redeemed box.
-
Enter the Transaction Reference number for the system that redeemed the accrual.
-
Enter the Payment System that issued the payment for the accrual.
-
Enter the Redeemed Date (the default is the current date).
Alternately, to mark a redeemed accrual record as unredeemed, clear Redeemed. Verify that the Transaction Reference, Payment System, and Redeemed Date fields are blank.
-
Save your work.
Changing Modifier Incompatibility
When you create modifier lines, you can assign a phase and an incompatibility group to each modifier line. Multiple incompatibility groups can be assigned to each pricing phase.
Pricing business rules allow the pricing engine to apply only one modifier for each incompatibility level and phase combination; any incompatibilities must be resolved.
You can review and change incompatibilities in the Incompatibility Groups window. For each incompatibility group within a specific phase, you can view the modifier lines assigned to one incompatibility group or reassign them to another group.
Note: If you are unable to access or update this window, you may not have the appropriate access privileges. Ask your Pricing Administrator.
Incompatibility between modifiers can be resolved using either Precedence or Best Price:
-
Precedence: During the phase List Line Base Price, if the pricing engine selects more than one eligible modifier list line in the desired unit of measure, it resolves the incompatibility by picking the modifier list line with the highest precedence; for example, 1 has higher precedence than 2.
In the pricing phase, List Line Base Price, regardless of the value of the Incompatibility Code set at the User level, the pricing engine selects the list price based on Precedence only.
Note: Use the Event Phases window to set the Incompatibility Resolve Code for a phase.
-
Best Price: For the phases, List Line Adjustment, All Line Adjustments, and Header Level Adjustments, if the pricing engine selects more than one eligible modifier, it resolves the incompatibility using best price processing.
Best price processing instructs the pricing engine to select the modifier that offers the lowest price to the customer. For non-monetary modifiers, the pricing engine uses the estimated general ledger value of the modifier as the value of the modifier.
Note: For Freight/Special Charges, if an Incompatibility Group is not selected for the modifier line, the pricing engine will apply BEST_PRICE regardless of the Incompatibility Resolve Code set for the event phase. In these cases, the best price is the higher charge, not the lowest.
During precedence processing if two or more modifiers tie based on precedence processing, then the engine resolves using best price processing WITHOUT going below the established precedence.
The following table shows an example of the pricing engine using precedence to resolve incompatibilities. The Engine Applies column indicates whether the pricing engine selects the modifier.
| Modifier | Phase | Incompatibility Level | Precedence | Engine Applies |
|---|---|---|---|---|
| 10% Discount | 30 | 1 | 260 | No |
| $100 Promotion | 30 | 1 | 240 | Yes |
| Free Promotional Good | 30 | 2 | 260 | Yes |
| $50 Lumpsum | 30 | 3 | 200 | Yes |
| 3% Discount | 30 | 3 | 240 | No |
| $25 Deal | 40 | 1 | 260 | Yes |
Note: Refer to the phase event mapping discussion to learn how to set phase incompatibility resolution.
Freight and Special Charges Modifier and Incompatibility Processing
Incompatibility processing considers all the modifier types such as Freight and Special Charges and evaluates them as a single entity. Once the incompatibility processing is complete, only one modifier remains which may or may not be the Freight and Special Charge modifier type depending on the incompatibility setup.
Note: For Freight/Special Charges: If an Incompatibility Group is not selected for the modifier line, then the pricing engine will use Best Price incompatibility processing instead of Precedence. The type of engine processing can be defined in the Incompatibility Resolve Code field in the Event Phases window.
Exclusive Modifiers and Incompatibility Processing
You can create one exclusive modifier in each pricing phase. When the pricing engine encounters an exclusive modifier, it suspends incompatibility pricing for the phase and applies only the exclusive modifier. However, during exclusive and/or incompatibility processing, an order level modifier will not be compared to a Line level or Group of Lines level modifier.
To change modifier incompatibility
-
Navigate to the Incompatibility Groups window.
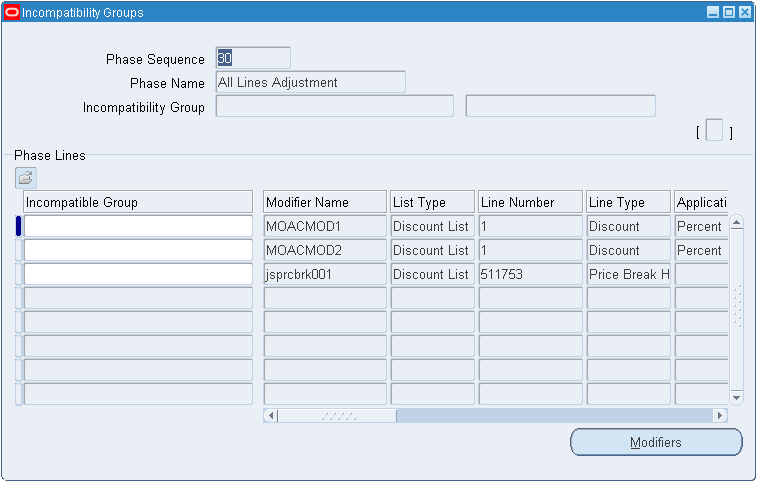
-
Click the Search icon to display the Find Incompatibility Groups window (if you are in a blank Incompatibility Groups window). elect your search criteria to find modifier lines associated with a particular phase or those assigned to a particular Incompatibility Group:
-
Phase Sequence
-
Phase Name
-
Incompatibility Group
Note: If you by phase without specifying an Incompatibility Group, the search returns all modifier lines for this phase, even those not assigned with an incompatibility group.
-
-
Click Find to view the search results in the Incompatibility Groups window.
-
To change the assigned incompatible group for a modifier:
-
Select a different incompatible group from the Incompatible Group column.
-
Alternatively, select the modifier and click Modifiers to display the modifier details in the Advanced Pricing - Define Modifier window. In the Modifiers Summary tab, select a different Incompatibility Group.
-
-
Save your work.
Archiving and Purging Modifiers
You can archive pricing entities such as modifiers and modifier lines by copying pricing data from the pricing application tables to archive tables for long-term data storage. Pricing data that is archived into the permanent pricing archive tables is deleted from the pricing application tables.
By archiving and purging records, the number of pricing records that need to be queried or processed by the pricing engine is reduced, potentially resulting in improved performance.
When the archived data is no longer required or does not need to be retained for legal retention purposes, then you can use the purge feature to purge the data from the archive tables.
Related Topics
Using the Pricing Organizer
Use the Pricing Organizer for creating and saving queries (searches) so you can manage and track your modifiers more efficiently.
You can save frequently-used queries and re-run them without having to re-enter the query criteria. The query can be saved as either a Personal or Public query: a Personal query is not shared with other users while a Public query is shared with other users. When saving a query, select the Public check box to save it as a public query in the Public Folder; otherwise it is saved as a personal query in the Personal Folder.
Once you have saved your queries, you can rename an existing query, move queries between Public and Personal folders, or delete a query that is no longer required.
-
If Pricing Security is ON, a user with View Only access privilege can view modifier information if it displays in the search results. Maintain privilege is required to make any changes.
-
A public query can be renamed, moved from Public to Personal folder, or deleted only if the value of the profile option QP: Administer Public Queries is set to Y (Yes).
To create a modifier query
-
Do a query in the Find Modifiers window to display the search results.
-
Right-click the Search Results folder in the left pane to display the query menu.
-
Choose Save to display the User Defined Queries window.
-
Enter a Name for the query.
-
Select Public to save the query as a Public query that can be shared with other users. Otherwise, it is saved as a Personal query.
-
Click OK to save the query.
To open a queried modifier (from the Pricing Organizer)
You can select a record from either the Headers or Lines tabs and click Open Modifier to view additional details about the modifier or modifier line.
Note: If you select Restrict Lines and click Open Modifier, only those lines that meet the query criteria on the Find Modifiers window are displayed. They display in the Modifiers Summary tab of the Advanced Pricing - Define Modifier window.
To rename a saved modifier query
-
Find the saved query to be renamed in either the Personal Folders or Public Folders.
-
Right-click the query name to display the menu, then choose Rename Query to display the User Defined Queries window.
-
Enter the new name and click OK.
To move a saved query between the Personal or Public folder
-
Find the saved query to be moved in either the Personal Folders or Public Folders.
-
Right-click the query name to display the menu, then choose Rename Query to display the User Defined Queries window.
-
Select or clear the Public box and click OK. The selected query has now moved over.
To delete a modifier query
-
Select the query to be deleted in either the Personal Folders or Public Folders.
-
Right-click the query name, then select Delete to display the Decision window.
-
In the Decision window, click Yes to delete or No to return to the Pricing Organizer window.
-
Save your work.
Finding Modifiers (Pricing Organizer)
In the Find Modifiers window, you can create queries to find specific modifier and modifier line information essential to your business such as:
-
All the active automatic promotions for customer A for a given source system.
-
All the active promotions for customers within the Western region for the month of May.
-
All discounts for item A that customer B is qualified for.
-
All promotions that will end by May 31st for a given customer
-
All modifiers that use price list A as a qualifier.
-
All modifiers for my product category that customer C is eligible for if they ask for the promotion.
You can enter you query criteria in one tab or across multiple tabs to reduce your search results. After you select the query criteria, click Find to retrieve the search results. The modifier(s) that match all the specified search criteria display in the Pricing Organizer window:
-
Header tab: Displays a summary of the modifiers' header information.
-
Lines tab: Displays a summary of modifier line details provided at least one query criteria has been entered in the Lines, Additional Lines, Products, Pricing Attributes, or Qualifiers tab.
Select a modifier header or line detail from the Headers or Lines tab to view the modifier details. You can open a specific modifier from the Pricing Organizer window.
-
From the Find Modifiers window, enter at least one query criteria then click Find to run the query.
Note: Alternatively, to run a saved query, just double-click the query name in the Personal or Public folder in the Pricing Organizer window.
Lines tab
You cannot query the following:
-
additional buy items for promotional goods or other item discounts
-
get items for promotional goods or other item discounts
-
price break lines details
Additional Lines Criteria tab
You can select query criteria if Coupon Issue, Price Break Header, or Discount is selected as the Modifier Type in the Lines tab or if a modifier type is not selected in the Lines tab. Otherwise, the fields are grayed you cannot make any selections.
Product Attributes tab
-
Product Attributes: Select one of the following:
-
Not Specified: If this option is selected, the remaining fields on the window are greyed out and the query ignores whether a modifier line has product attributes or not. This is the defaulted value and additional query criteria is needed for the query to execute.
-
Products: This enables you to query the specified fields on the window.
-
No Products: If this option is selected, the remaining fields on the window are greyed out. The query returns modifier lines that do not have any product attributes defined
If you select Products in the Product Attributes field, you can also query by Exclude Items.
-
-
Product Attribute Value: Can be entered only after a Product Attribute has been selected.
-
Exclude Items region: Enter one or more Exclude Items. The query retrieves modifiers that have that item defined as an Exclude Item. If more than one exclude product is selected, then modifiers with at least one of the Exclude Items defined are retrieved.
Note: When querying by an item, the query results will return modifier lines that specify the item number and not include modifier lines for item category.
Pricing Attributes tab
-
Pricing Attributes: Select one of the following:
-
Not Specified: If this option is selected, the remaining fields on the window are greyed out and the query ignores whether a modifier line has Pricing Attributes or not. This is the defaulted value and additional query criteria is needed to run the query.
-
Pricing Attributes: This option enables the query fields on the window. Enables you to query by one or more combinations of Pricing Context/Attributes. For example, you could query by Volume (Pricing Context) and Total Item Quantity (Pricing Attribute). If no values are entered, the query returns only those modifiers with at least one product attribute.
-
No Pricing Attributes: If this option is selected, the remaining fields on the form are greyed out. The query will return modifier lines that do not have any pricing attributes defined.
Select Pricing Attributes in the Pricing Attributes field to query by pricing context. The Pricing Attribute field is enabled if a Pricing Context is selected. The Pricing Attribute Value is enabled only after a Pricing Attribute has been selected. You can specify up to 3 pricing attributes with a combination of OR/AND operators.
-
-
Operator: Select an operator value such as = or BETWEEN. The Value To field is grayed out if the Operator value is =. If the operator value is left blank or is BETWEEN, the query evaluates the values in the Value From and Value To fields to determine if there is an exact match.
Qualifiers tab
-
Qualifiers: Select one of the following options from the Qualifiers tab:
-
Not Specified: If this option is selected, the remaining fields on the window are greyed out and the query ignores whether a modifier line has a qualifier attribute or not. This is the defaulted value and additional query criteria is needed to run the query.
-
Qualifiers: This option enables you to query the fields on the window:
Qualifier Field Name Value Qualifier Context Customer Qualifier Attribute Customer Name Operator = (exact match) Value World of Business -
No Qualifiers: If this option is selected, the remaining fields on the window are greyed out. The query retrieves modifier lines that do not have any qualifier attributes defined.
-
-
Qualifier Attribute: The Qualifier Attribute field is enabled if a Qualifier Context has been selected. The Value is enabled only after a qualifier attribute has been selected. Otherwise, the fields are grayed out and you cannot specify any qualifier values.
-
Operator: Select one of the following operator values: =, BETWEEN, or NOT=. If you select the = or NOT= operator, the Value To field is grayed out. For an exact match choose =. For a range of values, select BETWEEN. If you want to filter out values for a given range select NOT=. If the operator is left blank or BETWEEN, the query evaluates the values in the Value From and Value To fields to determine if there is an exact match.
-
Exact Effective Date Match: Select the Exact Effective Date Match box to retrieve modifiers with the dates specified in Effective From/To.
-
Applies To Party Hierarchy: This field is only enabled if you select an Oracle TCA (Trading Community Architecture) based Party in the Qualifier Attribute field and Party Hierarchy Enabled flag is selected for the attribute in the attribute management setup windows. Values for this field are:
-
Null (default value): Retrieves modifiers that meet the other selected qualifier criteria, regardless of the value of Applies To Party Hierarchy on the qualifier.
-
Yes: Retrieves modifiers that meet the other selected qualifier criteria and where Applies To Party Hierarchy is selected on the qualifier.
-
No: Retrieves modifiers that meet the other selected qualifier criteria and where Applies To Party Hierarchy is not selected on the qualifier.
-
-
OR/AND: You can specify up to 3 qualifiers by selecting the OR/AND operators.
Examples of using AND/OR operators to query Pricing Qualifiers
You can select up to three qualifiers by specifying the OR/AND operators:
-
Q1=Customer Name
-
Q2= Order Type
-
Q3 = Ship To
Conditions Modifier 1- Cust Name, Order Type, & Ship To Modifier 2 - Customer Name Modifier 3 - Order Type Modifier 4 - Cust Name and Ship To OR/OR Yes (Customer Name/Order Type/Ship To) Yes (Customer Name) Yes (Order Type) Yes (Customer Name/Ship To) AND/AND Yes (Customer Name and Order Type and Ship To) No (not Customer Name and Order Type and Ship To) No (not Customer Name and Order Type and Ship To) No (not Customer Name and Order Type and Ship To) OR/AND Yes (Customer Name/Order Type and Ship To) Yes (Customer Name) No (Not Order Type and Ship To) Yes (Customer Name) AND/OR Yes (Customer Name and Order Type/Ship To) No (not Customer Name and Order Type) No (not Customer Name and Order Type) Yes (Ship To) Null Q1, And/OR Yes (Order Type/Ship To) No (No Q1) Yes (Order Type) Yes (Ship To)
-
Related Topics
Overview of Promotional Limits
Oracle Advanced Pricing enables you to set limits for benefits that a customer can receive for a promotion, deal, or other modifier. By limiting the amount of a benefit that can be received, you can keep promotional spending within budget and prevent promotion budget overruns.
Note: If you cannot access the Promotional Limits window or make updates, you may not have the appropriate access privilege. To make any changes or updates to the windows, you must have Maintain privileges. Contact your Pricing Administrator.
For example, promotional limits could be used to provide a 10 percent discount on the first 500 units of an item sold, or a 10 percent discount for an item until the promotional limit is reached; for example, once the promotion reaches $100,000. In addition to setting limits on promotional spending, you can also monitor current and cumulative promotional spending in real time, order by order.
You can set limits for a specific monetary value, such as the first $500, or by a specific category, such as a customer. Oracle Advanced Pricing enables you to set limits in terms of accrual units, discount cost, gross revenue, item quantity, and usage by customer, by promotion, by promotion and customer. Within a promotion, deal, or modifier, you can also set eligibility for limits by customer, product, or other entity:
-
Customer: Define a limit by customer, a group of customers, or at any level in your customer hierarchy.
-
Product: Define a limit for a product or group of products in your product hierarchy.
If multiple organizations exist for your corporation, you can set a different limit for each sales organization, group of organizations in your company hierarchy, or give the same limit for all. When entering a limit, you can select if you want to consider to set this limit
-
By organization
-
Across all organizations
-
For a specific organization.
You can define a limit across the current transaction or across all transactions to which a promotion or modifier has been applied.
Enforcing Limits
Oracle Advanced Pricing enables you to set up an enforcement policy to manage transactions if the promotional limits are exceeded. When the benefit amount for a transaction or transaction lines exceed the set limit or available limit balance, the default handling method resolves the situation.
For example, if a customer close to their promotional limit places a new order that exceeds their limit amount, under a soft limit the customer gets the full promotion benefit applied to the order. A status message is sent to the calling application (such as Order Management) that the limit has been exceeded.
The default limit enforcement is set up by the System Administrator in the QP: Limit Exceed Action profile option. You can accept the default or optionally, select an alternative handling method. The following limit handling methods are available:
-
Hard - Adjust Benefit Amount: Any partial benefit available will be given up to the limit. A promotion based on Usage (number of times it is given) is considered to be a hard limit.
-
Soft - Full Benefit Amount: The full benefit of the promotion is given and a message is sent to the calling application to advise that the limit has been exceeded. If a limit is exceeded, then the order header and lines need to be placed on a promotional limit hold until appropriate business processes allow progression of the entire sales order. These processes may involve adjusting the promotional limits or repricing the order.
In addition to setting hard and soft limits you can also make the following adjustments when the limit is exceeded:
-
Adjust the limit up or down while the enforcement is operating.
-
Deactivate the promotion or increase the remaining available limit.
Related Topics
Viewing Limit Balances and Transaction Details
Updating an Existing Limit Balance
Creating Limits
Oracle Advanced Pricing enables you to create monetary or usage limits that a customer can receive for a promotion, deal, or other modifier. You can create limits at the:
-
Modifier header level for a promotion, deal, or modifier list.
-
Modifier line level: Limits can be applied to line modifiers and applied to a line, group of lines, or order.
-
Both Modifier header and line levels. However, line limits cannot be created if the Modifier Type for the modifier line is Other Item Discount, Promotional Goods, Coupon Issue, Item Upgrade, or Term Substitution.
You can define header and line level limits using accrual units, discount cost, gross revenue, item quantity and usage (by customer, promotion, or by promotion and customer). The limit can be defined by a specific value or a limit for each element that receives a promotion; for example, a limit of $100 for each customer. The following examples illustrate different ways limits can be applied:
Customers
You can define limits for all individual customers, group of customers, or specifically named customers; for example:
-
No more than $100 of benefit to any one customer on any order from promotion Y.
-
Customer XYZ is limited to $1,000 cumulative benefit from promotion X.
-
All VIP customers are limited to $2,000 cumulative benefit.
Individual stock-keeping units (SKUs) or groups of SKUs
You can define limits for individual SKUs or groups of SKUs that are being promoted; for example:
-
Limit aggregate expense for promotion X to $50,000 for item 1234.
-
Limit VIP customers to $2,000 cumulative benefit.
Individual or aggregated transactions
You can define limits that apply to individual transactions or aggregated transactions; for example:
-
Limit customers so they cannot exceed $50 for any order.
-
Limit customers' use of promotion X for either $400 cumulative discount or placing an order 3 times.
-
Limit the total expense that customers may receive from a fall promotion to $5,000.
When setting up a limit, you must select a basis that defines the unit being monitored for limit checking. Available limit bases are accrual units, charge amount, cumulative discount amount, gross revenue, item quantity, and usage.
For example, if accrual units were used as the basis for monitoring units such as air miles, the limit would monitor the number of air miles accrued.
Note: If the effective end date for a modifier has been reached, you can still attach limits. However, the modifier and associated limit will not be applied if the limit date is expired.
If you plan to set up promotional limits for the modifier, confirm using the following table whether you can apply promotional limits to the desired modifier line type:
| Modifier Line Type | Can Promotional Limits be applied? |
|---|---|
| Coupon Issue | No |
| Discount | Yes |
| Item Upgrade | No |
| Other Item Discount | No |
| Price Break Header | Yes |
| Promotional Goods | No |
| Surcharge | Yes |
| Term Substitution | No |
-
To enter a limit for the modifier, the Automatic check box for the modifier line must be selected, and the Override check box must be deselected.
-
Limits not copied to new modifier: If copying a modifier, existing limits at either the line or header level, are not copied from the original modifier to the new modifier. The promotional limits must be created again for the new modifier.
-
If no Product UOM was defined for the modifier line, line limits with basis of Item Quantity will not get created. If no Benefit UOM was defined for a modifier line, line limits with basis as Accrual Units will not get created. If no Benefit or Product UOM is defined for a modifier line, neither Item Quantity or Accrual Units displays in the Basis list of values (LOV) and line limits cannot be created for that line.
-
Currently limits are not processed for modifiers out of phase. To resolve this, you can include all the events, such as LINE, ORDER, BOOK, SHIP, or BATCH, in all the phases in which you are setting up automatic modifiers.
Prerequisites
- To use limits, Oracle Advanced Pricing must be installed and the System Administrator must set the following profile options:
-
QP: Promotional Limits Installed: Set to Y (Yes) to use limits.
-
QP: Limit Exceed Action: Determines the default handling action if a pricing request exceeds the promotional limit. This value appears as the initial default value in the When Exceeded field (Define Limits window).
-
Soft - Full Benefit Amount
-
Hard - Adjust Benefit Amount
-
-
OM: Promotion Limit Violation Action: Determines the hold action Order Management will take when encountering a initial promotional hold returned by the pricing engine. Set this profile option to place holds (or not place holds) on an order or order line.
To create limits
-
Click List Limits to enter a limit at the modifier header level, or Line Limits to enter a limit at the modifier line level. The Automatic box for the modifier list or modifier line must be selected otherwise the List Limits button or Line Limits button may be grayed out.
Define Limits window
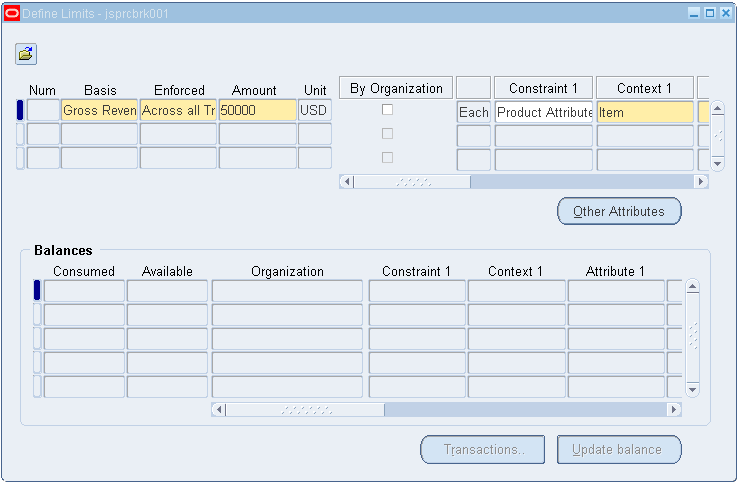
-
Complete your entries in the Define Limits window:
-
Num: A unique limit number that defaults automatically to identify the limit transaction.
-
Basis: Select the Basis for the limit. The basis defines the type of limit that is applied and how the consumption is measured. For example, if the basis is Accrual Units, the limit is calculated by the number of units accrued such as 4,000 air miles. Select from the following available bases:
-
Accrual Units: For example, each customer accrues 100 air miles for each 10 currency units spent up to a limit of 5,000 air miles per customer.
-
Discount Cost: For example, when the cost of the promotion has exceeded $50,000, the promotion ends.
-
Gross Revenue: For example, each customer receives the promotion for the first $250 that they order from the website.
-
Item Quantity: For example, a customer receives $10 off a case of 12 one-gallon cans of orange juice for the first 1,000 cases.
-
Usage: Usage can be based by customer, promotion, or both customer and promotion:
-
Customer: For example, each customer cannot get a promotion more than 5 times.
-
Promotion: For example, promotion is available on the first 25 orders placed.
-
Promotion and Customer: For example, promotion is available to the first 25 different customers who place an order.
When a pricing request is processed, the pricing engine checks each request against the limit to see if it exceeds the limit and applies the amount of the benefit against the limit.
-
-
Enforced: Select how you want the limits enforced:
-
Select Across the Current Transaction if you want the pricing engine to maintain a consumption record for each order that consumes the limit.
-
Select Across All Transactions if you want the pricing engine to maintain one consumption record for all orders that consume the limit.
-
-
Amount: Enter the amount of the limit. You can increase or decrease an existing limit; however, you cannot decrease it lower than the amount by which the limit has been consumed. For example, if two orders each for $100 have consumed the limit, you cannot lower the limit below $200.
-
Unit: Defaults to a unit of measure that corresponds to the Basis selected: for example, a currency unit such as USD for Gross currency.
-
By Organization: To filter limits by sales organization, select . If enabled, the organization for the transaction and modifier must match before the limit can be applied. This enables you to restrict limits to transactions for your organization.
Note: Even if the transaction is ineligible to receive the limit, it may be eligible to receive the modifier.
-
Constraint: Select a constraint to restrict the limit to a product or qualifier attribute:
-
Product Attribute: Set limits for a specific product(s).
-
Qualifier Attribute: Set limits for a qualifier such as a customer, modifier list, or order.
You can select additional criteria from the Constraint, Context, and Attribute fields to restrict eligibility for limits by certain products or qualifiers. For example, the following setup can be used to define eligibility by customer name:
Constraint Context Attribute Qualifier Attribute Customer Customer name -
Select Constraint 1 which can be either a product or qualifier attribute.
-
Select a Context for the product or qualifier constraint.
-
Select an Attribute for the Context. For example, if the Context is Customer, you can select Customer name as the Attribute to restrict the limit by customer name.
-
You can define additional product or qualifier attributes in the Constraint 2, Context 2, and Attribute 2 fields.
Note: If you select Constraint 2, Context 2, and Attribute 2 or additional criteria, an and operator is introduced which means that all criteria must be met before the limits are applied.
-
-
-
When Exceeded: Determines the handling action if a pricing request exceeds the promotional limit. The initial value automatically defaults from the profile option QP: Limit Exceed Action that is set up by the System Administrator. Optionally, if you can select a different handling action:
-
Hard - Adjust Benefit Amount:
Adjusts the order benefit amount so that the order meets but does not exceed the promotional limit. For example, if a customer close to their promotional limit places a new order that exceeds the limit amount, the customer receives the benefit only until the amount is reached.
-
Soft - Full Benefit Amount:
Soft limits provide a way to monitor your promotions while continuously giving the benefit. When a soft limit is exceeded, pricing will still apply the benefit (on subsequent orders) even if the total limit has been exceeded. Since pricing returns a status message that the limit has been exceeded, you must decide what further action should be taken: increase the limit, end date or inactivate the modifier, add qualifiers, or cancel the order.
For example, if a customer close to their promotional limit places a new order that exceeds their limit amount, under a soft limit the customer gets the full promotion benefit applied to the order. A status message is sent to the calling application (such as Order Management) that the limit has been exceeded.
-
-
Hold?: Select one of the following hold actions:
-
Select Hold? to have a status message sent to the calling application when the limit is exceeded.
If Soft - Full Benefit Amount is selected, then the Hold? check box is selected automatically and cannot be updated.
-
Deselect Hold? so that the pricing engine does not place a promotional hold.
-
-
Other Attributes: Optionally, click Other Attributes to define additional criteria. If Balances exist for a limit, the Other Attribute button is grayed out and you cannot add other attributes.
For example, if you have selected customer and customer name and want the limit applied to a particular customer, select the customer name from the Value field.
Important: To qualify for a limit, all the qualifier conditions must be met. Otherwise, the limit will not be applied.
-
Related Topics
Overview of Promotional Limits
Viewing Limit Balances and Transaction Details
Updating an Existing Limit Balance
Viewing Limit Balances and Transaction Details
Oracle Advanced Pricing enables you to view balances including the amounts available and consumed (used) for a selected limit or across transaction limits. For a selected balance, you can view the transactions that have consumed the balance. The available balance is calculated using the following formula:
Available balance = Limit Amount - sum of (Consumed Amounts from saved Transactions)
Manual versus Automatic Updating of Limit Balances
For most transactions, limit balances are updated automatically when orders are re-priced or when the limit amount is changed. However, some balances must be manually updated to reflect the new balances: for example, for returned, cancelled, and deleted orders or when a manual transaction is added to adjust limit balances. To update the limit balances manually, you must click Update balances to view the updated balance.
As transactions are processed, cumulative promotional spending is subtracted from the available limit balance. The pricing engine updates the available balance for transactions that complete successfully such as a booked order line or transactions in progress; for example, a sales order line that is entered but not saved or booked.
However, if a transaction in progress was rolled back or exited abnormally from a calling application (for example, Order Management), the balance is still updated and therefore the available limit balance may not reflect the true balance. When this occurs, you must manually update the balance to reflect the true balance.
Once the order or order line is saved and booked, then the available limit balance is reduced by the amount of the completed transaction(s).
To view a limit balance
-
Navigate to the Define Limits window.
Define Limits window

The limits and their balances display in the Balances region. If the limit is arranged by category such as sales organizations, product attributes, or qualifier attributes, one limit balance displays for each category.
Note: A limit and sub-limits only appear if transactions have posted against them.
-
The Available field displays the amount of the limit or sub-limit remaining. If the limit is set up by category, then the following Organization (Org) fields display:
-
Org Context: Displays the sales organization for the sub-limit balance.
-
Org Attribute: Displays the product attributes/qualifier attributes for the sub-limit balance.
-
Org Value: Displays the product attributes/qualifier attributes for the sub-limit balance.
-
Org Meaning
-
To view limit transaction details
-
Navigate to the Define Limits window.
-
In the Balances section, select the balance whose transaction details you want to view.
-
Click Transactions to view transaction details in the Define Transactions window:
-
Date Request: Display the date the transaction occurred.
-
Price Req Code: Displays the pricing code automatically for an Automatic transaction. You can enter a pricing code manually for a Manual transaction.
-
Manual: Enabled if a manual transaction has been added. You can update, delete, or add a manual transaction.
-
Amount: Displays the amount of the limit consumed.
-
Request Type: Displays the name of the calling application such as Order Management.
-
Reason: Displays a reason (if applicable) for the transaction. You can enter a manual reason which is used especially in manual adjustments.
-
The Define Transactions window displays only if there are transactions applied against the limit. Transactions display after you save a sales order.
-
In the Define Transactions window, you can choose to adjust the limit balance by manually adding new transactions or updating existing manual transactions. A limit transaction created by the pricing engine cannot be updated or deleted. Only manual transactions can be added, update and deleted.
-
-
Related Topics
Overview of Promotional Limits
Updating an Existing Limit Balance
Updating an Existing Limit Balance
Oracle Advanced Pricing provides a running available balance so you know the amount consumed (used) and available for a selected limit. Balances for limits are updated automatically when orders are re-priced or when the limit amount is changed.
In certain cases such as returned, cancelled, and deleted orders, the limit balances are not updated automatically and the balance must be manually updated using the Update balances button. If a manual transaction is added to adjust limit balances, you must click Update balance to view the new available limit balance.
To update an existing limit balance
-
Navigate to the Define Limits window.
Define Limits window

-
Verify that the balances match the sum of the transactions. Click Update balance or run the concurrent process QP: Update Limit Balance.
-
Click Transactions to display the Transactions window. Confirm that the transactions are correctly applied to the balance.
-
To change the limit balance, enter a transaction in the Transactions window. Enter a positive quantity in the Amount field to lower the available balance or use a negative quantity to raise the available balance.
-
Recalculate the balances in the Define Limits window by choosing the Update balance button or by running the concurrent process QP: Update Limit Balance.
Related Topics
Overview of Promotional Limits
Viewing Limit Balances and Transaction Details
Adjusting the Limit Amount
You can increase or decrease an already existing limit for a promotion, deal, or modifier and have the adjustment reflected in the available balance. However, you cannot decrease it lower than the amount by which orders have consumed it. For example, if two orders, each for $100 have consumed the limit, you cannot lower the limit below $200.
Note: A limit (header or line level) that has been created by a different source system code cannot be updated or deleted by a user who has logged in using a different source system. For example, if a limit was created for a modifier by a Trade Management user, the same limit can only get updated or deleted by a Trade Management user. A user logged in Advance Pricing can view limits for the modifier but cannot edit the existing limits.
If the promotion, deal, or modifier is inactive because the limit was previously exceeded, the promotion, deal, or modifier will be re-activated once the limit is increased.
To adjust the limit amount
-
Navigate to the Define Limits window.
Define Limits window

-
Enter the new Amount for the limit. If decreasing the limit, you cannot decrease it lower than the amount by which orders have consumed it.
Related Topics
Overview of Promotional Limits