Table of Contents
Since version 5.2.6 MySQL Workbench has included functionality for managing server instances. A server instance is created to provide a way of connecting to a server to be managed. The first step then is to create a server instance if none exists, or to work with an existing server instance.
MySQL Workbench also provides functionality to administer and configure a server using these server instances. Thus, the Server Administrator functionality can be broadly grouped into two main areas:
Creating and managing server instances
Administration and configuration functions using a server instance
In the Workspace section of the Home screen is an area for Server Administration tasks. This section of the Workspace has the following action items:
Server Administration
Server Administration (icon)
New Server Instance
Manage Data Import/Export
Manage Security
Manage Server Instances
Each of these action items is described in the following sections.
The purpose of this action item is to allow you to quickly connect to a predefined server instance, and carry out administration functions on the associated server. Clicking this item launches the Server Administration dialog, from which you can select the server instance you wish to connect to. A new Admin tab will be launched, which displays the Server Status and Configuration.
Server Administration (icon)
If you have already created server instances, then you can most quickly launch these by clicking the icon for the Server Instance you wish to access. A new Admin tab will be launched, which displays Server Status and Configuration.
For further details see the section Section 8.7, “Server Administration and Configuration”.
This action item enables you to create a new server instance. A server instance is primarily a combination of connection and configuration details for a specific server that you wish to manage. When you click this item a wizard is launched that allows you to specify the connection and various other configuration parameters. After completion of the wizard, a new Admin tab is launched, which displays Server Status and Configuration.
For further details see the section Section 8.6.1, “New Server Instance Wizard”.
The purpose of this action item is to allow you to create a dump file from a database, or restore data from a file to a live database. Clicking this item launches the Import/Export MySQL Data wizard. This enables you to select a server instance to connect to.
For further details see the section Section 8.7.6, “Data Dump tab”.
The purpose of this action item is to take you quickly to the screen that enables you to manage user accounts. It simply launches an Admin page and locates you on the Accounts tab.
For further details see the section Section 8.7.3, “Accounts tab”.
Clicking this action item launches the Manage Server Instances dialog. Within this dialog you can change the configuration of existing server instances, or create a new server instance.
This topic is discussed in more depth in the section Section 8.6, “Creating and Managing Server Instances”.
Server instances can be created and managed from the Home page. As mentioned in the previous section, there are several ways new server instances can be created:
By clicking the New Server Instance action item from the Server Administration section of the Home screen. This launches the Create a new server instance wizard.
By clicking the Manage Server Instances action item from the Server Administration section of the Home screen. This launches the Manage Server Instances dialog, from within which a new server instance can be created.
Each of these two options is now described in turn.
Clicking the New Server Instance action item launches the Create a new server instance wizard. The wizard provides a step-by-step approach to creating a new server instance. This is most suitable for beginners. Once some familiarity is achieved with the various settings and parameters required, a new instance can also be quickly created from the Manage Server Instances dialog discussed later.
The steps presented in the wizard are as follows:
Specify host machine
Operating system
Host SSH Connection
Test Settings
Database Connection
Test DB Connection
MySQL Config File
Specify Commands
Complete Setup
Results
Specify host machine
On this page you can select Localhost if you intend to manage a server on your local machine. Or you can select Remote Host. In this latter case you will need to provide the IP address or the network name of the remote server. Click to continue.
Operating system
On this page you simply select the operating system that applies to your server. You should also ensure that the option you select from the drop-down listbox also reflects your MySQL Server version and installation type, for example, Windows (MySQL 5.1 Installer Package).
Host SSH Connection
If you specified a Remote Host on the Specify Host Machine page, you will be presented with the Host SSH Connection page. This page enables you to enable SSH for the login to the server instance. This facility enables you to create a secure connection to remotely administer and configure the server instance. You need to enter the username and password of the account that will be used to log in to the server for administration and configuration activities. If you do not enter a password, you will be prompted for the password when the connection is established by MySQL Workbench. You can optionally specify the path to your SSH key for use with the server, rather than enter a username and password.
This connection is to allow remote administration and configuration of the MySQL Server itself. It is not the same as the connection used to connect to a server for general database manipulation.
If managing a remote server, you will need to use an SSH connection type if you wish to start or stop the server or edit its configuration file. Other administrative functions do not require an SSH connection type.
Test Settings
On the next page your settings will be tested. The wizard will report back the results of attempting to connect to the server. If an error occurs you will be directed to view the logs, which can be done by clicking the button.
Database Connection
This page enables you to select a connection to a specific database. The settings entered previously have been concerned with the connection to the server required for admnistrative purposes. This page is concerned with connection to a specific database. You can either launch the Manage DB Connections dialog or select a pre-existing connection from a drop-down listbox. The former is most useful if you have not created any connections. If you do need to create a connection at this point then refer to Section 6.6, “Manage DB Connections Dialog”. Once a connection has been selected click to continue.
Test DB Connection
On this page your database connection will be tested and results displayed. If an error occurred you will be directed to view the logs. This can be achieved by clicking the button.
MySQL Config File
For MySQL Server configuration information to be fetched and displayed in MySQL Workbench, the location of the MySQL Server configuration file needs to be known. The wizard will be able to determine the most likely location of the configuration file, based on the selection made on the Operating System page of the wizard. However, it is possible to test that this information is correct by clicking the and buttons. The wizard will then report if the configuration file and server configuration section can in fact be accessed. It is also possible to manually enter the location of the configuration file, and the section pertaining to MySQL Server data, but again these manually entered values should be tested using the buttons provided. Click the button to continue.
Specify Commands
This page enables you to set the commands required to start, stop and check the status of the running server instance. These felds will have defaults set based on the option selected on the Operating System page of the wizard. It is possible to customize the commands if required, but the defaults will be suitable in most cases. Click to continue.
Complete Setup
On this page you finally assign a name to the server instance. This name is used in various parts of the GUI to allow you to recall this instance. After setting a suitable name, click to continue.
Results
This is the final page of the wizard. It simply summarizes the settings you have selected. If everything looks good click to create the server instance and exit the wizard.
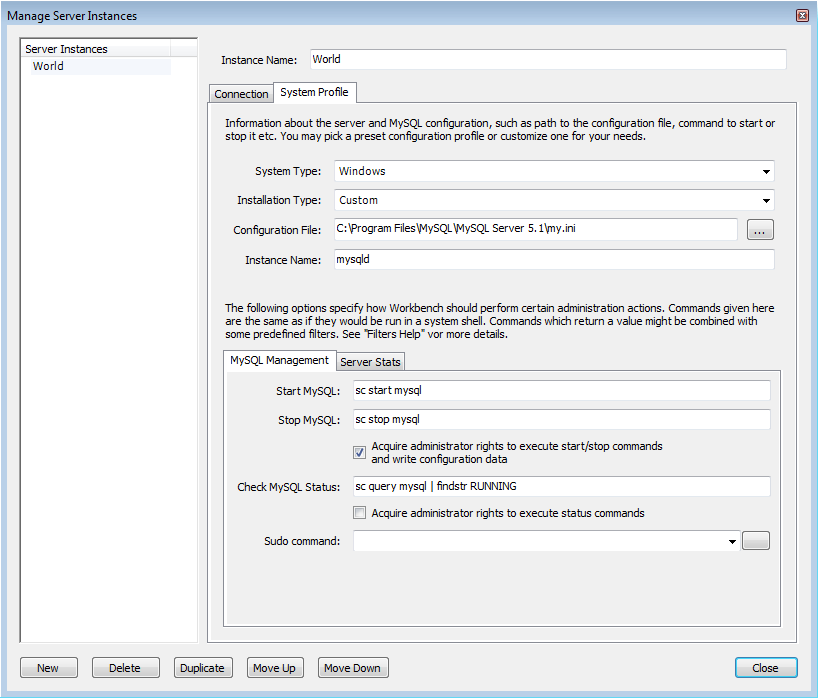
The Manage Server Instances dialog enables you to create, delete and manage server instances. The Connection tab of the wizard enables you to select a predefined connection to connect with a server to be managed. In addition, it is also possible to connect to a remote server using an SSH connection.

The System Profile tab of the wizard allows you to specify server specific information. This is primarily achieved through selecting a Profile Template. A Profile Template contains standard information used in managing the server instance. The following Profile Templates are available:
Fedora Linux (MySQL Package)
Fedora Linux (Vendor Package)
FreeBSD (MySQL Package)
Generic Linux (MySQL tar package)
Mac OS X (MySQL Package)
OpenSolaris (MySQL Package)
RHEL (MySQL Package)
SLES (MySQL Package)
Ubuntu Linux (MySQL Package)
Ubuntu Linux (Vendor Package)
Windows (MySQL 5.0 Installer Package)
Windows (MySQL 5.1 Installer Package)
Windows (MySQL zip package)
Custom
Once a profile is selected a number of default parameters will
be set, including commands used to start and stop MySQL,
commands to check server status and the location of the
my.ini configuration file.
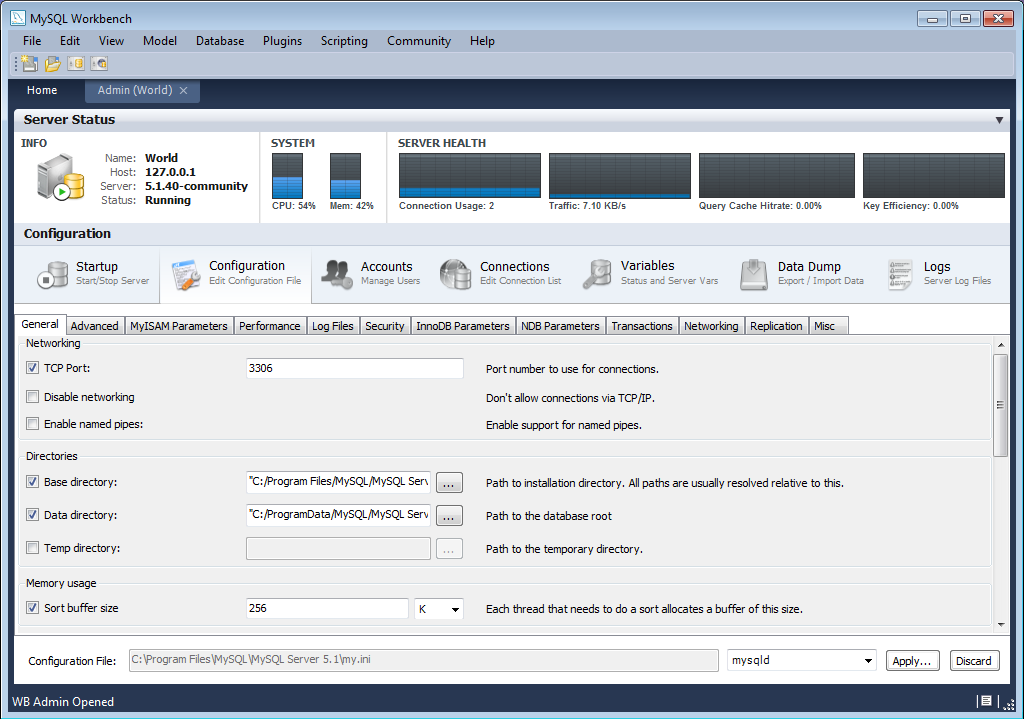
After an instance has been created it can be launched by double-clicking its icon in the Server Administration panel of the Home page. This creates an Admin page. The Admin page has two main panels, the Server Status panel, and the Configuration panel. The Configuration panel features multiple tabs: Startup, Configuration, Accounts, Connections, Variables, Data Dump, and Logs.
The functionality included in MySQL Workbench for administering servers is similar to that formerly provided by MySQL Administrator. The Administrator functionality in MySQL Workbench is grouped into several tabs:
Startup: Enables you to start and stop the MySQL server, and view the startup message log.
Configuration: Enables you to view and edit the MySQL Configuration file (
my.ini) using GUI controls.Accounts: Enables you to create user accounts and assign roles and privileges.
Connections: Displays connections to MySQL Server.
Variables: Displays server and status variables.
Data Dump: Import and export of data.
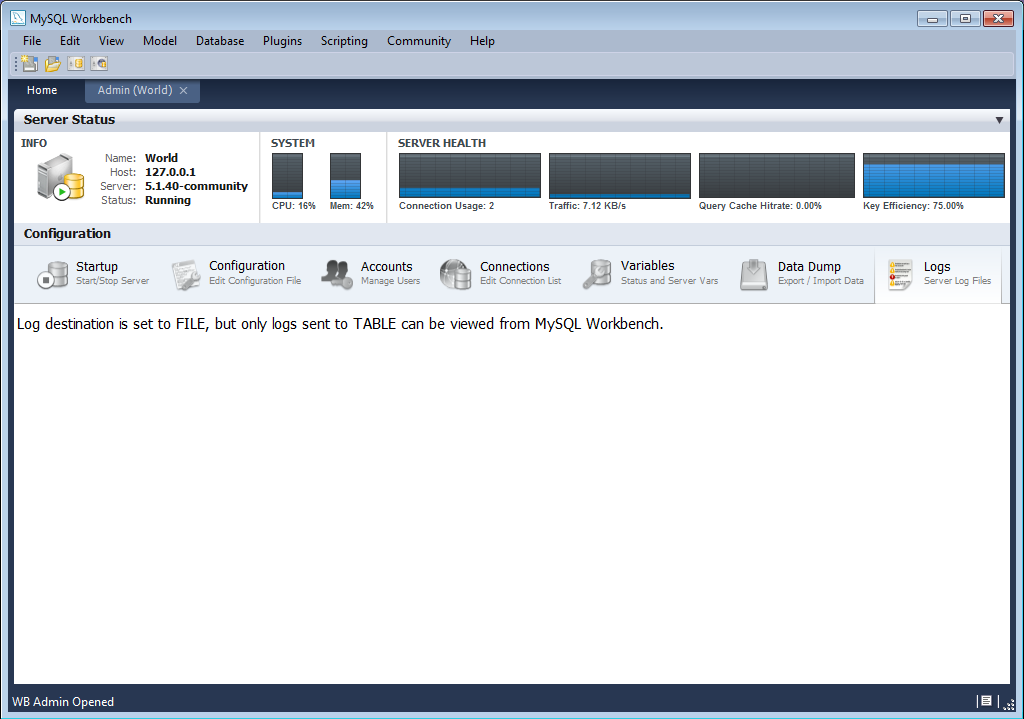
Logs: Displays server log file entries.
The Administrator also displays system and server status. System status displayed includes:
CPU utilization
Memory usage
Connection Health
For server health the following are displayed:
Connection Usage
Traffic
Query Cache Hit Rate
Key Efficiency
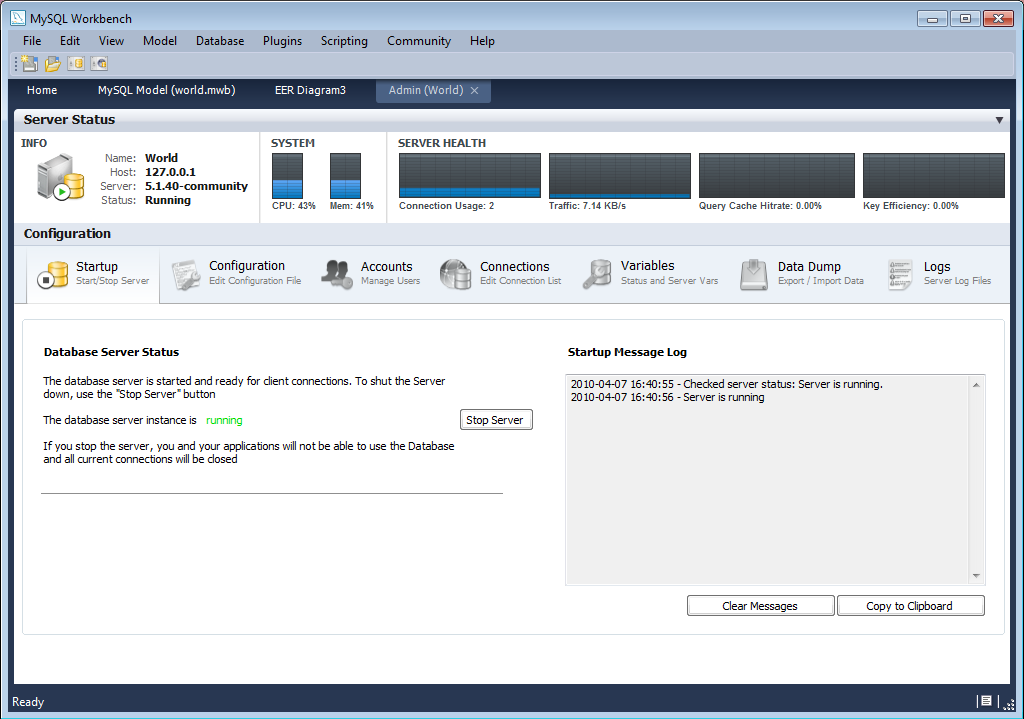
The Startup tab has several purposes:
Displaying database server status.
Start up and shut down the server.
Displaying the Startup Message log.
The ability to select whether the server starts up when the system starts up.

The configuration tab enables you to edit the
my.ini configuration file through selecting
checkboxes and other GUI controls. This tab also features a
number of sub-tabs, which provide access to various sub-sections
within the configuration file. The sub-tabs are:
General
MyISAM Parameters
InnoDB Parameters
Performance
Log Files
Replication
Networking
Security
Advanced
The Accounts tab has two sub-tabs:
Server Access Management
Schema Privileges
Server Access Management enables you to list existing user accounts. You can also add and delete accounts. You can allocate administrative roles and also set account limits.
Schema Privileges enables you to set specific privileges on a user basis.
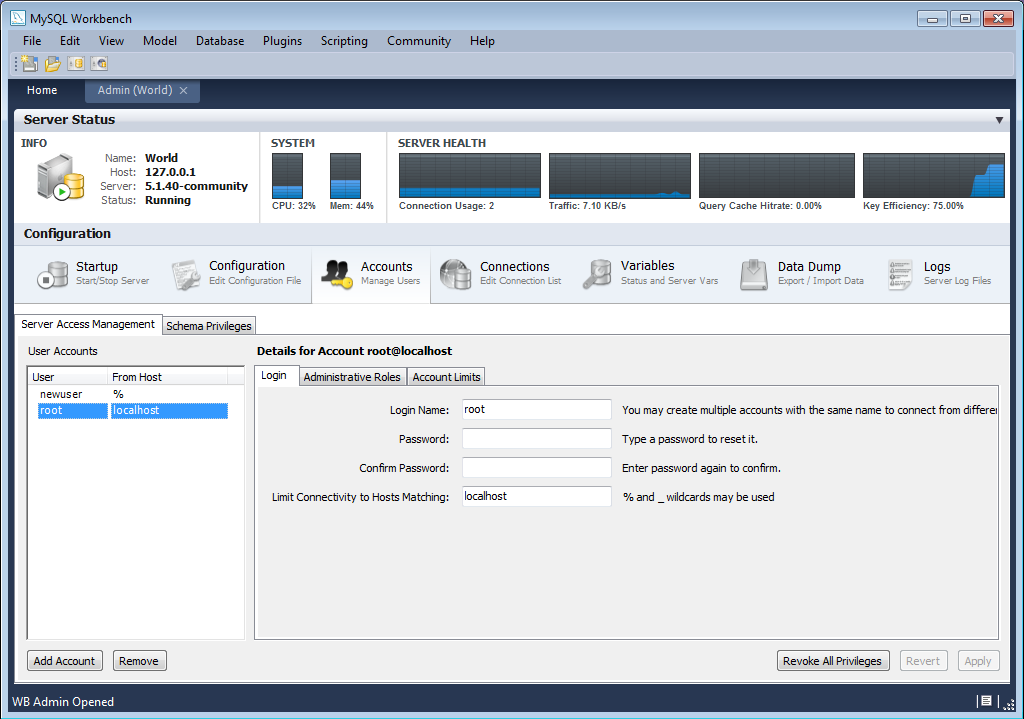
In the current version of MySQL Workbench it is not possible to manage privileges below the schema level. For example, it is not possible to view or manage grants at the table, column, or procedure level. Support for this feature is however planned for MySQL Workbench 6.0.
To aid in the assignment of privileges to MySQL Server users,
MySQL Workbench introduces the concept of Administrative Roles.
Roles are a quick way of granting a number of privileges to a
user, based on the work the user needs to carry out on the
server. It is also possible to assign multiple roles to a
user. To assign roles, click the User Account you wish to
modify, then click the Administrative
Roles tab. Then click the checkboxes according to
the roles you wish to allocate to the user. Note once you
select a role to a user you will see the accumulated
privileges in the Global Privileges Assigned to
User panel. For example, if you select the role
BackupAdmin the privileges granted would
include EVENT, LOCK
TABLES, SELECT, SHOW
DATABASES. Then if you additionally select the role
of ReplicationAdmin, the list of privileges
will be expanded to also include REPLICATION
CLIENT, REPLICATION SLAVE and
SUPER.
The roles available are:
DBA: Grants all privileges
MaintenanceAdmin: Grants privileges to maintain server
ProcessAdmin: Grants privileges to monitor and kill user processes
UserAdmin: Grants privileges to create users and reset passwords
SecurityAdmin: Grants privileges to manage logins and grant and revoke server
MonitorAdmin: Grants privileges to monitor server
DBManager: Grants privileges to manage databases
DBDesigner: Grants privileges to create and reverse engineer any database schema
ReplicationAdmin: Grants privileges to set up and manage replication
BackupAdmin: Grants privileges required to backup databases
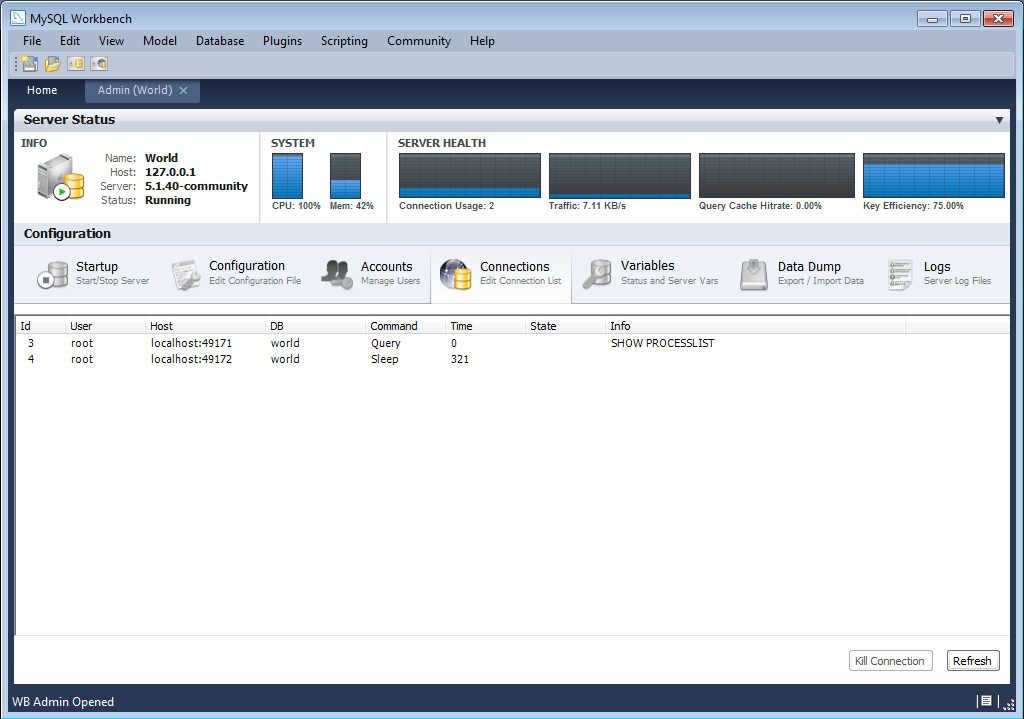
This tab lists all current connections to the monitored server.
The Variables tab displays a list of all server and status variables.

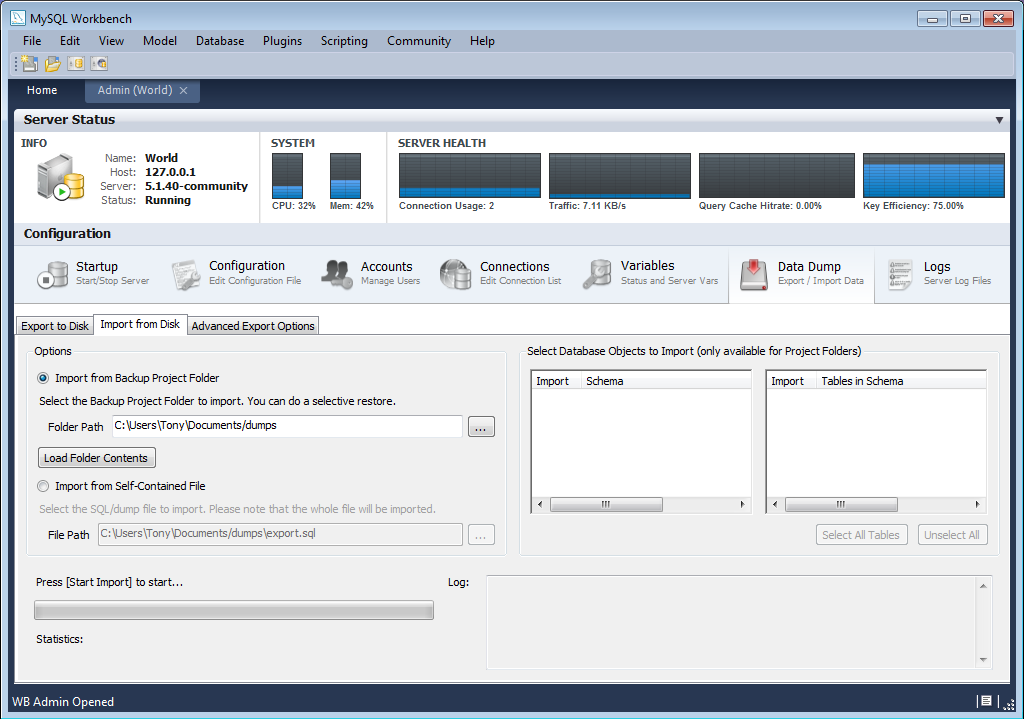
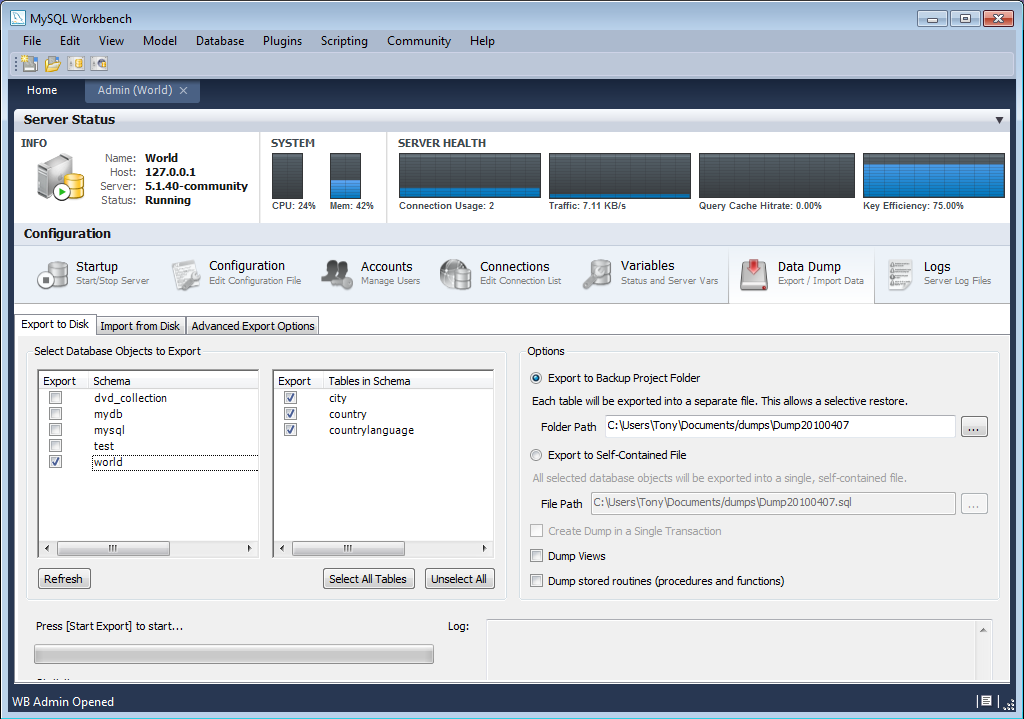
The Import/Export Server Data tab enables you to create a dump file, or restore data from a dump file. Clicking the Import/Export Server Data action item launches a new Admin screen, at the Data Dump tab.
Within the Data Dump tab are three further tabbed windows:
Export to Disk
Import from Disk
Advanced Options
This tab enables you to select the schema and tables you wish to export. You also have the option to export tables to their own files, or all tables to a single file. Exporting tables to individual files enables you to restore on a per-table basis.
This tab enables you to import a previously exported project. You can select to import a project where tables were stored in individual files, in which case you will also be able to select which of these tables you wish to import. You can also simply import a project saved to a single file.