3.4 How to Install a PCI Card
3.4.1 Before You Begin
Complete these tasks:
Read the documentation supplied with the PCI card for information about jumper settings, PCI slot requirements, and cable connections.
For information about the system's PCI slots and locations, see "C.1.2 PCI Bus".
3.4.2 What to Do
-
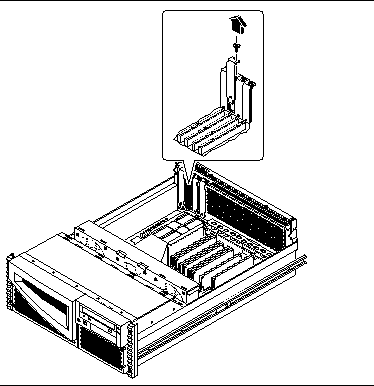
If you are installing a PCI card in an unused slot, remove the corresponding filler panel from the back of the system. Otherwise go to Step 2.
-
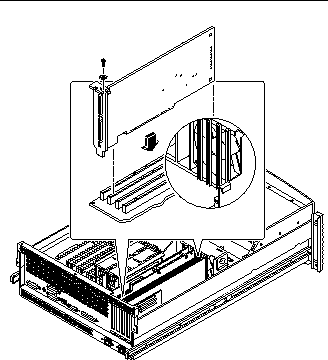
Insert the PCI card into the appropriate slot on the main logic board.
-
Insert the faceplate end of the card into the appropriate opening in the back panel.
If you are installing a PCI long card, guide the opposite end of the PCI card into the card slot on the fan tray assembly.
-
Push the card into the corresponding connector on the main logic board.
Apply even pressure along the edge of the card.

-
-
Secure the PCI card faceplate to the back panel with the Phillips screw.
-
If necessary, connect any internal cables to the PCI card's internal connectors.
-
If necessary, connect any external cables to the PCI card.
3.4.3 What Next
Complete this task to reassemble the system:
When you are ready to restart the system, be sure to run OpenBoot Diagnostics tests to verify that the system functions correctly with the new parts you have just installed. For additional information, see:
You must also perform a reconfiguration boot so that your system is able to recognize the new PCI card. For additional information, see:
- © 2010, Oracle Corporation and/or its affiliates

