3.6 How to Install a CPU Module
3.6.1 Before You Begin
Complete these tasks:
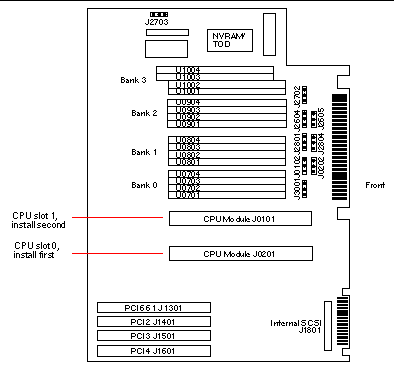
The system supports one and two CPU module configurations. When replacing or installing CPU modules, you must fill the CPU slots in the following order.
|
System Configuration |
Main Logic Board CPU Slot |
|---|---|
|
One CPU |
CPU slot 0 |
|
Two CPUs |
CPU slots 0 and 1 |

For further information about CPU modules, see your Sun Enterprise 220R Server Owner's Guide.
3.6.2 What to Do
-
Locate the appropriate slot for the CPU module that you are installing in the CPU card cage on the main logic board.
-
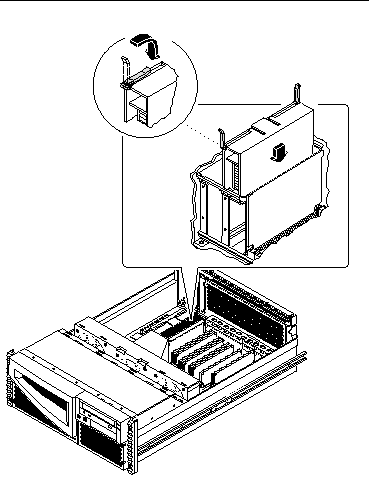
Align the edges of the CPU module board with the corresponding grooves in the CPU card cage.
-
Verify that the two ejection levers are open.
-
Slide the CPU module evenly into the grooves in the CPU card cage.
Push down until the CPU module meets the connector at the bottom of the CPU card cage.

-
Engage the notch in each lever with its side of the CPU card cage.
-
Simultaneously push both levers toward the center of the CPU module until the CPU module seats in its connector.
3.6.3 What Next
Complete this task to reassemble the system:
When you are ready to restart the system, be sure to run OpenBoot Diagnostics tests to verify that the system functions correctly with the new parts you have just installed. For additional information, see:
- © 2010, Oracle Corporation and/or its affiliates
