| C H A P T E R 3 |
|
Linux Installation |
This chapter provides instructions for installing:
Topics in this chapter are organized as follows:
Before starting the Linux installation, you should ensure the following requirements are met.
For a networked system, use the checklist to gather the following information:
|
|
|
The following tasks must be performed in the order in which they are listed. Note that not all tasks are mandatory.
|
Established installation environment. For more information see: |
||
|
Set optimal default settings in the BIOS Setup Utility. For more information, see Configure BIOS Settings for New Installations |
||
|
Locate the Sun Fire X2250 Tools and Drivers CD or download the mandatory device drivers for Linux from the following site: |
||
|
Boot the Linux installation media to initiate the operating system installation. For more information see: |
||
|
Installed the system device drivers required for Linux installations. For more information, see Install System Device Drivers (Post Linux Installation). |
This section describes how to install the Red Hat Enterprise Linux v.4 Update 6 or Red Hat Enterprise Linux v.5 Update 1 from Linux Distribution CD/DVD or ISO CD-images.
| Note - If you are using Sun-provided RHEL4 CDs, you must upgrade the RHEL4 operating system to Update 6 immediately after completing the installation. |
The following requirement must be met prior to performing the RHEL installation:
Refer to the following procedures to install the Red Hat Enterprise Linux from local or remote media:
To install Red Hat Enterpise Linux from a PXE network environment, see Install RHEL4 or RHEL5 Using PXE Network Environment for more information.
|
1. Prepare the installation media by performing one of the following:
If you are using the Sun ILOM Remote Console application to perform the installation, ensure that the CD-ROM option is selected in the Device menu of the Sun ILOM Remote Console application.
For more information about redirecting storage devices in the Sun ILOM Remote Console, see Appendix A.
2. Reset the X2250 server, for example:
As the server begins the power-on sequence it will go through a series of tests and provide you the opportunity to configure the BIOS, storage, network controllers, and boot selection.
After a few seconds, the splash screen for the Red Hat installation appears. The bottom half of the splash screen lists instructions, function keys, and the boot prompt.
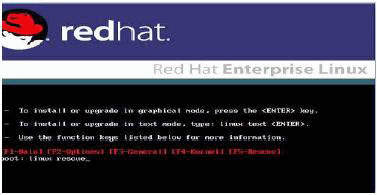
3. In the Red Hat Enterprise Linux splash screen, press Enter to continue the normal user interactive installation.
4. In the Testing CD Media screen, press the Tab key to select Skip and press Enter.
| Note - If you are experiencing problems with the initial setup for the installation, it may be necessary to test the installation CD media by selecting OK. |
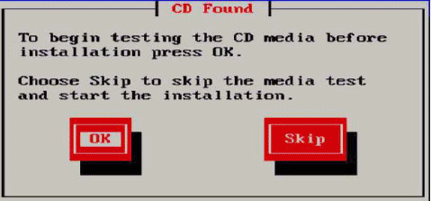
A message appears about running Anaconda, the Red Hat Enterprise Linux system installer. After a few seconds the Red Hat splash screen appears displaying the Welcome screen.
5. In the Red Hat Welcome screen, press Next to continue the installation.

6. In the Language screen, select the appropriate language and click Next.
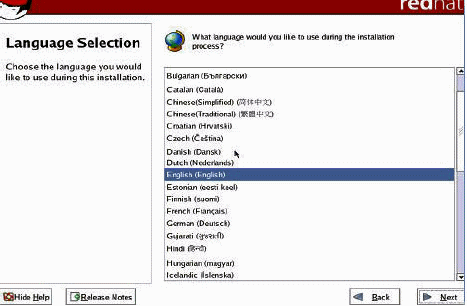
The Keyboard Configuration screen appears.
7. In the Keyboard Configuration screen, select the appropriate keyboard configuration and click Next.
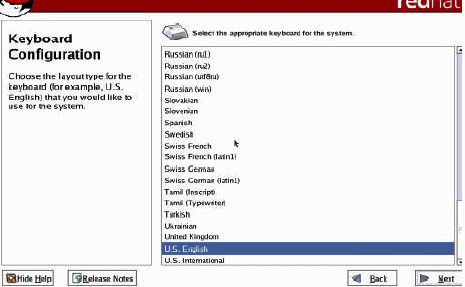
8. When the Disk Partitioning Setup screen appears, do the following:
a. Select the Manual Disk Partitioning radio button.
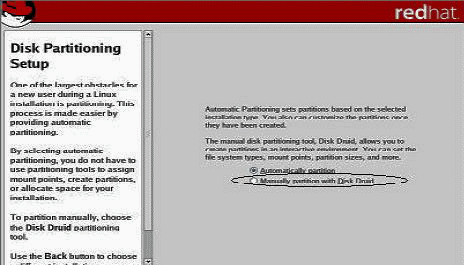
b. Partition the disk as appropriate by referring to the instructions presented on the Red Hat disk partitioning screen.
9. Continue the basic Red Hat installation setup.
10. Upon completing the basic Red Hat installation setup, perform the following post-installation tasks:
a. Configure your system for automatic updates.
Refer to Red Hat documentation for more information.
b. If required, download and install the latest errata and bug fixes for
RHEL4-U6.
Refer to Red Hat documentation for more information.
|
Note that if you are using the Sun ILOM Remote Console application to perform the installation, ensure that the CD-ROM option is selected in the Device menu of the Sun ILOM Remote Console application.
For more information about redirecting storage devices in the Sun ILOM Remote Console, see Appendix A.
2. Reset the X2250 server, for example:
As the server begins the power-on sequence it will go through a series of tests and provide you the opportunity to configure the BIOS, storage, network controllers, and boot selection.
After a few seconds, the splash screen for the RHEL5-U1 installation appears. The bottom half of the splash screen lists instructions, function keys, and the boot prompt.
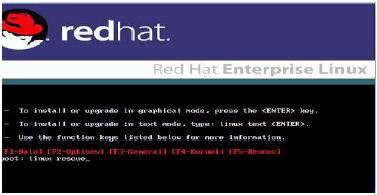
3. In the Red Hat Enterprise Linux splash screen, press Enter to continue the normal user interactive installation process.
4. In the Language screen, select the appropriate language and click OK.
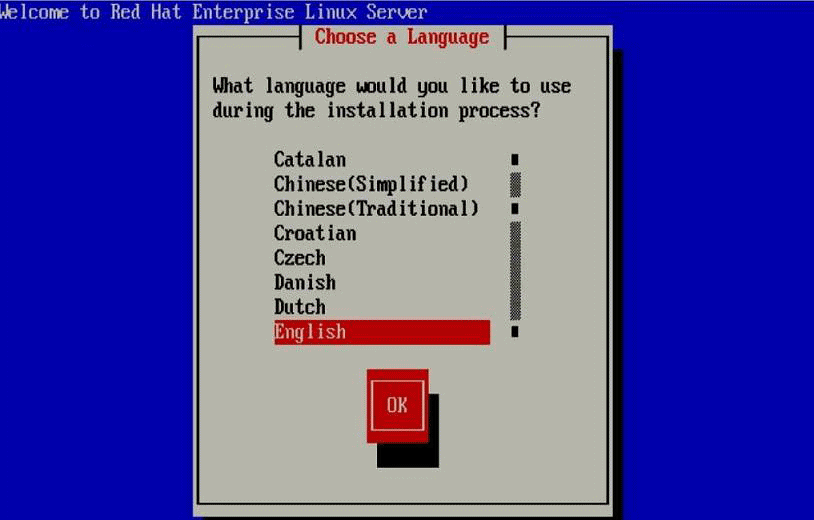
The Keyboard Type screen appears.
5. In the Keyboard Type screen, select the appropriate keyboard configuration and click OK.
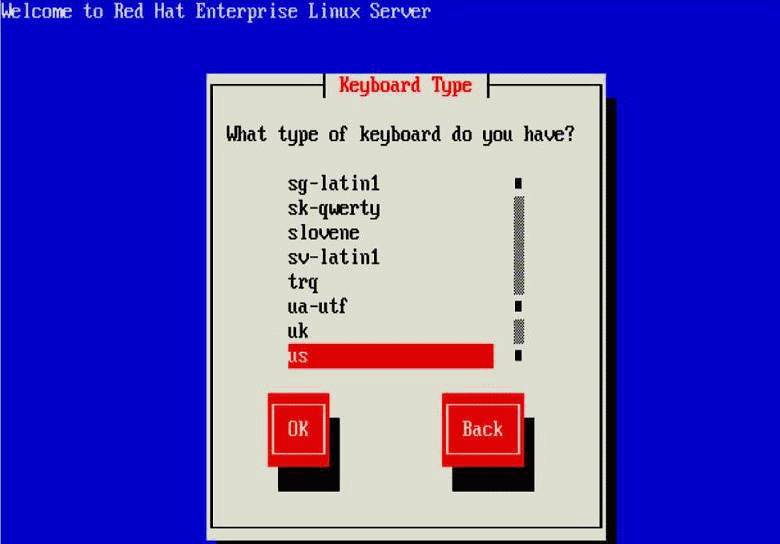
The Installation Method screen appears.
6. In the Installation Method screen, select the appropriate installation method (Local CDROM or NFS Image) and click OK.
7. In the CD Found screen, click Skip.

The Red Hat Enterprise Linux 5 screen appears.
8. In the Red Hat Enterprise 5 screen, click Next.
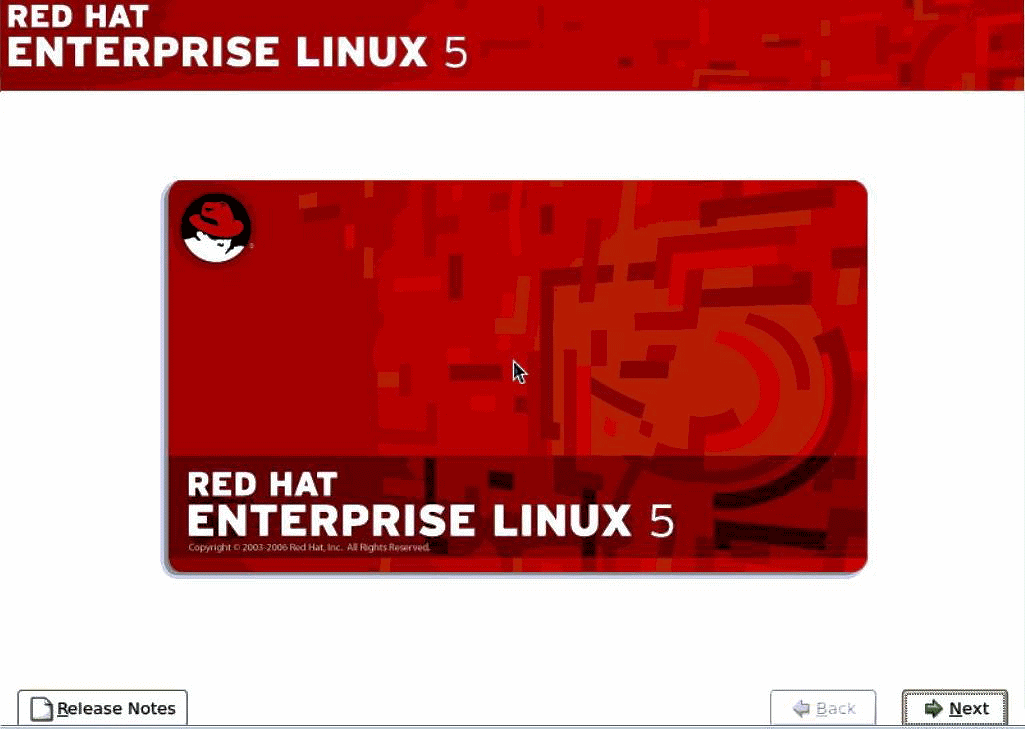
The Installation Number dialog appears.
9. In the Installation Number dialog, enter the “Installation number” or click “Skip entering installation number” then click OK.
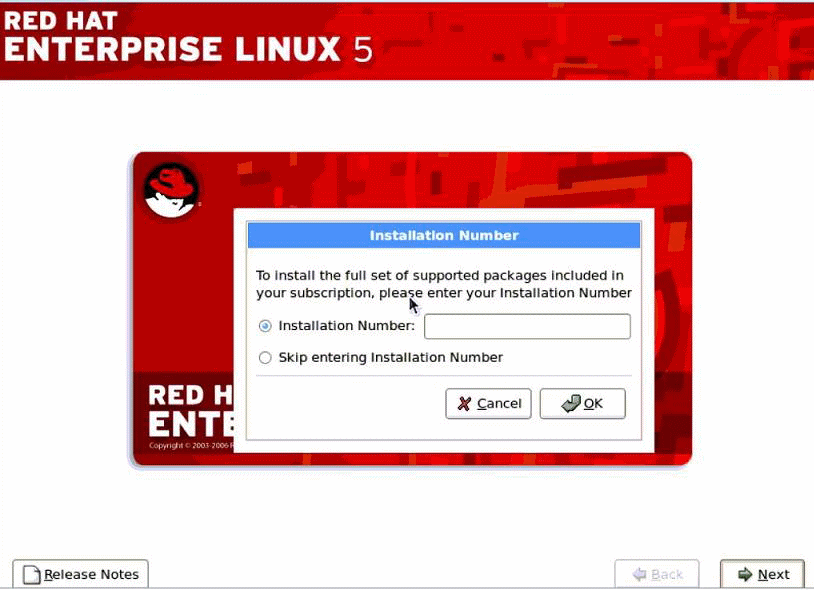
The Default Disk Partition screen appears.
10. In the Default Disk Partition screen, do the following:
a. In the drop-down list box, select the create custom option.
b. Partition the disk as appropriate by referring to the instructions presented on the Red Hat disk partitioning screen.
11. Continue the basic Red Hat installation setup.
12. Upon completing the basic Red Hat installation setup, perform the following post-installation tasks:
a. Configure your system for automatic updates.
Refer to Red Hat documentation for more information.
b. If required, download and install the latest errata and bug fixes for RHEL5-U1.
Refer to Red Hat documentation for more information.
This section describes how to install the Red Hat Enterprise Linux v.4 Update 3 or later software from an established PXE-based network environment using a customer-provided KickStart image.
KickStart is Red Hat’s automated installation method. It enables a system administrator to create a single image containing the settings for some to all installation and configuration parameters that are normally provided during a typical Red Hat Linux installation. Typically, a KickStart image is placed on a single network server and read by multiple systems for installation.
The following procedure documents the initial steps you must perform to install RHEL over the network.
| Note - If you are installing RHEL4 and using Sun-provided RHEL4 CDs, you must upgrade the RHEL4 operating system to Update 6 or later immediately after completing the installation. |
| Note - The following procedure assumes that you are using a customer-provided KickStart image that contains all the Red Hat Enterprise Linux v.4 Update 6 (or later) OS files. |
|
1. Reset the X2250 server, for example:
2. Press F12 to boot from the network.
A message appears prompting you to select the appropriate Ethernet port to perform the network boot.
3. In the message, select one of the two Ethernet ports listed then press enter.
After a few seconds, the splash screen for the Red Hat installation appears. The bottom half of the splash screen lists instructions, function keys, and the boot prompt.

4. At the boot prompt, press Enter to initiate the installation process.
As the Red Hat installation program initializes, a series of messages appear. After about 20 to 40 seconds, a message appears about running Anaconda, the Red Hat Enterprise Linux system installer. After a few more seconds the Red Hat splash screen appears displaying the Red Hat Welcome screen.
5. In the Red Hat Welcome screen, press Next to continue the installation.

6. When the Disk Partitioning screen appears, do the following
a. Select the Manual Disk Partitioning option.

b. Partition the disk as appropriate.
Refer to the instructions presented on the Red Hat disk partitioning screen for details.
7. Continue the basic Red Hat installation setup.
8. Upon completing the basic Red Hat installation setup, refer to the Red Hat installation documentation and perform the following post-installation tasks:
a. Configure your system for automatic updates.
b. If required, automatically download and install the latest errata and bug fixes for RHEL4-U6 or later.
This section describes how to install the SUSE Linux Enterprise Server 10 (SLES10) with Service Pack 1 or later software from the Linux Distribution CD/DVD or ISO CD images.
SUSE Linux Enterprise Server installation program provides an easy-to-use graphical interface for installing and configuring the operating system. Whether you are using distribution CDs/DVDs to install SLES from a locally attached CD/DVD drive or from a remote CD/DVD drive attached via KVMS, the installation procedure is fundamentally the same.
The following requirements must be met prior to performing the SLES10 installation:
|
1. Prepare the installation media by performing one of the following:
If you are using the Sun ILOM Remote Console application to perform the installation, ensure that the CD-ROM option is selected in the Device menu of the Sun ILOM Remote Console application.
For more information about redirecting storage devices in the Sun ILOM Remote Console, see Appendix A.
2. Reset the X2250 server, for example:
As the server begins the power-up sequence it will go through a series of test(s) and provide you the opportunity to configure the BIOS, storage, network controllers, and boot selection.
After a few seconds the SUSE initial boot screen appears.
3. In the initial SUSE boot installation screen, use the tab key to select the second option Installation and press Enter.
This option continues the normal user interactive installation process.
4. In the Language screen, select the appropriate language option then click Next.
| Note - It may take several minutes for the Language screen to appear. |
The License Agreement screen appears.
5. In the License Agreement screen, select Yes I agree then click Next.
The Installation Mode screen appears.
6. In the Installation Mode screen, select New Installation then click Next.
The Clock and Time Zone screen appears.
7. In the Clock and Time Zone screen, select the appropriate clock and time zone settings then click Next.
The Installation Settings screen appears.
8. In the Installation Settings screen, click the Expert tab.

9. In the Expert tab of the Installation Settings screen, do the following
a. Click the Partitioning option.
The Boot Loader Settings screen appears.

10. In the Boot Loader Settings screen, click the Boot Loader Installation tab.
The Boot Loader Installation tab appears.
11. In the Boot Loader Installation tab, type Boot Loader then click Finish.

|
Caution - Do NOT install any boot loader. |
The Expert tab of the Installation Setting screen appears.
12. In the Expert tab of the Installation Settings screen, click the Partitioning option.
The Suggested Partitioning screen appears.
13. In the Suggested Partitioning screen, click the Create Custom Partition Setup option then click Next.
The Preparing Hard Disk screen appears.
14. In the Preparing Hard Disk screen, click the Custom Partitioning option then click Next.

The Expert Partitioner screen appears.
15. In the Expert Partitioner screen, partition the drive as appropriate then click Finish.
Refer to the YaST partitioning documentation for more information.
The Expert tab of the Installation Settings screen appears.
16. In the Expert tab of the Installation Settings screen, click the Booting option.
The Boot Loader Setting screen appears.
17. In the Boot Loader Settings screen, do the following:
a. In the Boot Loader Type drop-down list box, select GRUB.
b. In the Boot Loader Location, select or specify the appropriate location.
For example, a Master Boot Record may be specified as /dev/sda.
The Expert tab of the Installation Settings screen appears.
18. In the Expert tab of the Installation Settings screen, do the following:
a. Specify the appropriate software options for your installation.
b. Verify that the appropriate Installation Settings are configured.
c. Click Accept to begin the installation
A confirmation dialog appears.
d. In the confirmation dialog, click Install.
19. Continue the basic installation setup until all the SLES10 OS files are installed and the system reboots.
20. After completing the basic installation setup, refer to the YaST documentation and perform the following post-installation tasks:
a. Provide a password for your account.
b. Configure and test the Internet access and network settings.
c. Automatically download and install the latest errata and bug fixes for SLES10-SP1 or later.
This section describes how to install the SLES10 SP 1 or later software over an established PXE-based network environment using an AutoYaST control file.
Novell AutoYaST is a method for installing one or more SUSE Linux systems automatically and with minimal user intervention. You must perform AutoYaST installations using a control file containing both installation and configuration data. For more information about creating the AutoYaST control file and applying it to a YaST installation, consult Novell’s documentation (http://www.novell.com).
The following procedure documents the initial steps you must perform to install SUSE Linux over the network using an AutoYaST control file.
The following requirement must be met prior to performing the SLES10 PXE installation:
|
1. Reset the X2250 server, for example:
2. Press F12 to boot from the network.
The network bootloader loads and a boot prompt appears. Wait for the five second time-out and the installation kernel will begin to load.
After a few seconds the SLES installation program will load.
The SUSE Linux Novell License Agreement screen appears.
3. In the SUSE Linux Novell License Agreement screen, click Accept.
The SUSE YaST installation program initializes. The YaST graphical installation screen appears.
Depending on the AutoYaST file configuration, the YaST Language Selection screen might appear.
4. If the YaST Language Selection screen appears, specify which language to use.
Depending on the AutoYaST file configuration, the YaST Installation Mode screen might appear.
5. If the YaST Installation Mode screen appears, select New Installation, then click OK to continue.
The system’s hardware is detected. The YaST Installation Settings screen appears.
6. In the YaST Installation Settings screen, do the following:
a. Click the Partitioning option.
b. Select Create Custom Partition and click OK.
c. Partition the disk as appropriate.
Refer to the YaST Partitioning instructions for more information.
7. Continue the basic installation setup until all the SLES OS files are installed and the system reboots.
8. After completing the basic installation setup, refer to the YaST documentation and perform the following post-installation tasks:
a. Provide a password for your account.
b. Configure and test the Internet access and network settings.
c. Register the OS, then download available updates to the operating system.
After installing the Linux software on the X2250 server, you should install the AST2000 VGA driver.
| Note - The Sun Fire X2250 Server Tools and Drivers CD in the Documentation and Media Kit, which is a customer-orderable option. If necessary, you can also download an ISO image of the Tools and Drivers CD at http://www.sun.com/servers/x64/X2250/downloads.jsp. |
| Note - This installation method includes directing the server output to the local console or to the Sun ILOM Remote Console when a local or remote CD/DVD drive is used. For more information about redirecting devices to the Sun ILOM Remote Console, see Appendix A. |
|
If your server has an onboard DVD drive or attached CD drive, you can install the drivers directly, using the Sun Fire X2250 Server Tools and Drivers CD.
1. Prepare the installation media by performing one of the following:
2. Depending on the Linux operating system, change to the linux/red_hat or linux/suse directory by typing the one of the following commands:
# cd /cdrom/cdrom0/drivers/linux/red_hat
# cd /cdrom/cdrom0/drivers/linux/suse
3. Run the install script by typing the following command:
The system device drivers are now installed. The script prompts you to reboot the system for changes to take effect.
Copyright © 2009 Sun Microsystems, Inc. All rights reserved.