| C H A P T E R 8 |
|
Finishing Component Replacement |
This chapter describes how to finish the replacement of internal workstation replaceable components, close the system, and prepare it for operation.
1. Verify that you have not left any tools, loose screws, or loose components inside the system.
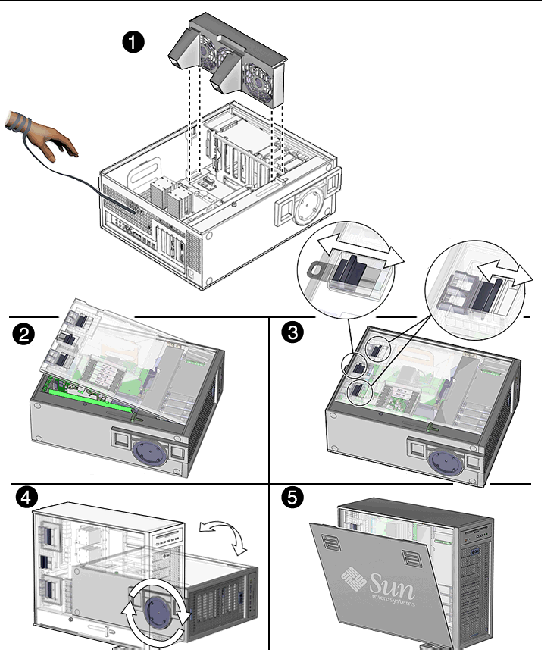
2. Replace the fan tray if you removed it.
See FIGURE 8-1.

|
Caution - Take particular care to ensure that cables will not interfere with or get tangled in the fan tray. |
3. Remove the wrist strap from your wrist and from the workstation.
4. Fit the access panel into the chassis.
a. Ensure that the access panel latches are secure.
b. Slide the lock block to the left.
See FIGURE 8-1.
5. Return the chassis to the upright position.
6. Pivot the support leg from underneath the workstation.
See FIGURE 8-1.
7. Lift the side cover and press it in until the latches click.
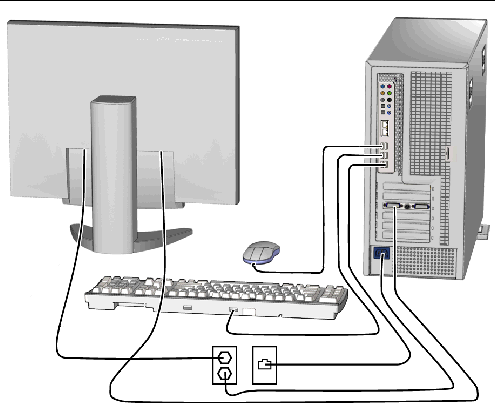
8. Reconnect the keyboard, mouse, monitor, network connections, and any peripherals.
9. Reconnect the power cord to the workstation and the power source.
10. Power on any connected peripherals or monitors.
| Note - The monitor must be powered on before the workstation so that the monitor can communicate with the graphics accelerator when the workstation powers on. |
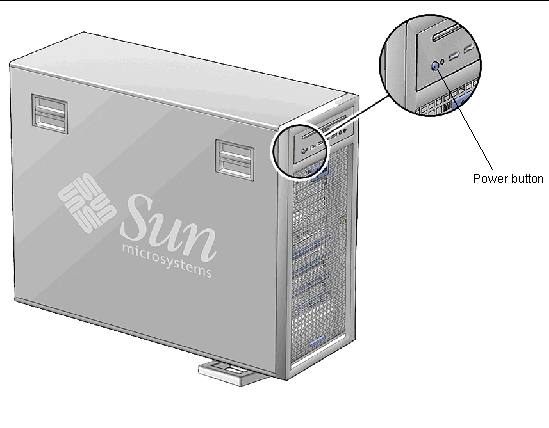
11. Power on the system by pressing the Power button on the front panel.
See FIGURE 8-3.
12. Select a boot source and insert the media, if necessary.
13. If you installed a hard drive, a CD-RW drive, or a PCI-X card, log in as superuser and reboot the workstation.
This forces the system to recognize newly installed hardware.

FIGURE 8-1 Reassembling the Workstation

FIGURE 8-2 Reconnecting the Cables

FIGURE 8-3 Powering On the Workstation
Copyright © 2008, Sun Microsystems, Inc. All Rights Reserved.