Rack Mounting Kit
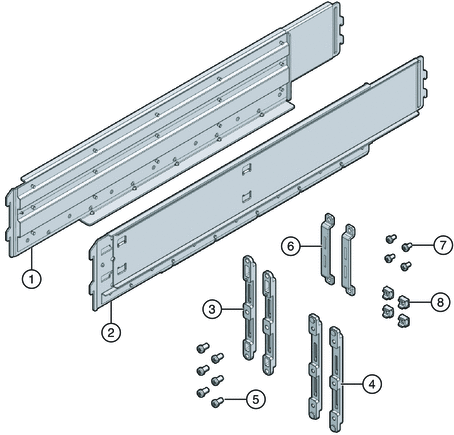
The rack mounting kit comes with the following hardware:

|
|---|
1, 2 |
Left (1)
and right (2) shelf rails |
Once the front and rear mounting brackets are
installed on the rack, the shelf rails drop into place. The flanges on
the rails hook into the pins on the brackets. The shelf rails expand to
match the depth of the rack. These are not slide rails. Once the
server is mounted in the chassis, it does not move. |
3, 4 |
Front mounting brackets
(2 pair) |
These attach to the rack and support the shelf rails. There are
two types of front mounting brackets; one for round-hole racks (3), and another
for square-hole racks (4). Use the one that matches your rack. |
5 and 7 |
An
assortment of M6 and 10-32 screws |
Oracle provides extra screws to support different
configurations. Unused hardware can be discarded or recycled when you have completed the
installation. |
6 |
Rear mounting brackets (1 pair) |
These attach to the rack and support the
shelf rails. |
8 |
M6 cage nuts |
Used to adapt the rear mounting bracket to the
back of square-hole racks. |
|

