| Exit Print View | |
Sun Fire X4800 Server Rack Mounting and Shipping Bracket User's Guide |

|
About This Documentation (PDF and HTML)
Installing the Server Hardware
Location of the Rack Mounting Kit and the Shipping Bracket Kit
Installing the Server In a Rack
How to Remove Components to Reduce Weight
How to Install the Rack Mounting Hardware in the Rack
How to Insert the Server Into the Rack
The shipping bracket kit consists of a front bracket, a rear bottom bracket,
a rear top bracket, screws to connect them to the rack, and
cage nuts to be used with the rear brackets on racks with square
holes. These appear in ![]() How to Install the Shipping Brackets.
How to Install the Shipping Brackets.
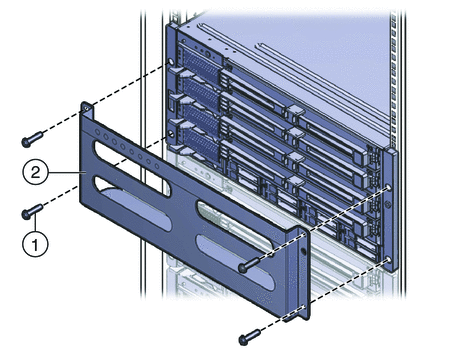
Remove the four screws (1) that fasten the front bracket (2) to the front of the server and remove it.

The front shipping bracket contains eight threaded holes used for storing unused screws (four M6 and four 10–32). Remove the screws that match the threads on your rack and use them to secure the server to the rack.
There might be two sets of screws stored on the front of the shipping bracket. Use the set that matches the threading on your rack.
Thread the long screws that you removed in Step 1 into the four empty holes on the shipping bracket.
They will be stored there in case you need to reinstall the shipping bracket.
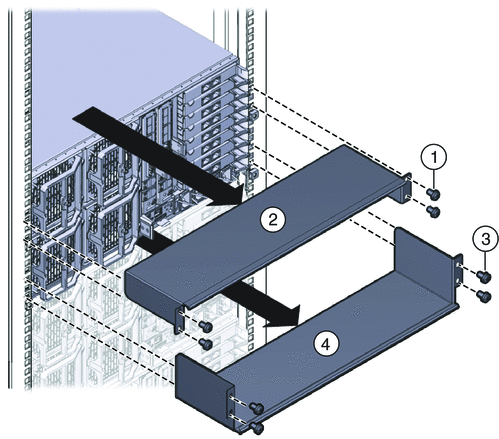
Remove the four screws (1) that fasten the rear top bracket (2) over the back of the server and remove it.
Remove the four screws (3) that fasten the rear bottom bracket (4) under the back of the server and remove it.
