 To Assign LDAP Users and Groups to a Task
The Task Definition Editor includes an LDAP browser that allows you to browse the LDAP directory, and then drag and drop users and groups directly from the LDAP browser into the assignment lists.
-
Complete the steps under (Optional) Connecting to the LDAP Server and Creating the Worklist Manager Task Definition.
-
If it is not already open, double–click the task definition file to open it in the Task Definition Editor.
-
In the Task Definition Editor toolbar, click the LDAP Connection icon (this looks like a blue triangle).
The LDAP Connection pane appears.
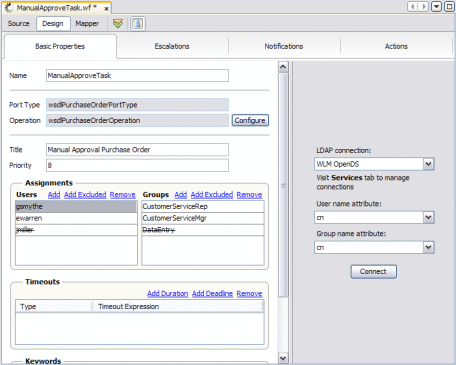
-
Select the name of the LDAP connection to connect to, and then select the user and group name attributes you want to browse. To select an attribute that is not in the list, select Other and then enter the attribute name in the dialog box that appears.
-
Click Connect.
The directory opens in the LDAP Connection panel.
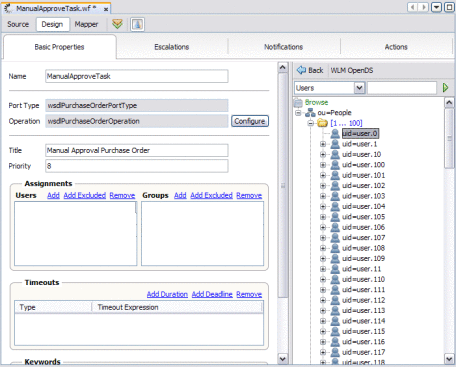
-
To search for a user or group entry, do the following:
-
In the top left field, select the LDAP entity or attribute you want to search by.
-
In the top right field, enter a value for that entity.
To perform a wildcard search, enter an asterisk (*) for any characters you are unsure of.
-
Click the right arrow button to initiate the search.
The results appear in the browser panel.
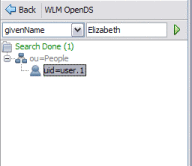
-
Double-click a result to view detailed information about the entry.
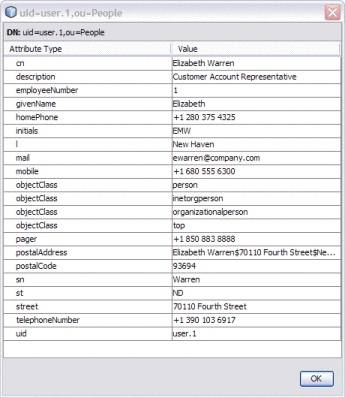
-
-
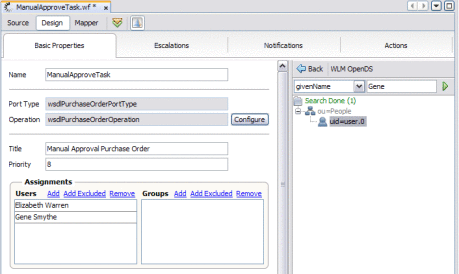
To assign a user to a task, display their entry in the browser panel and then drag and drop the entry into the Users list.
The user's name appears in the list.
-
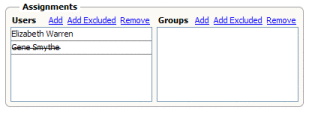
To exclude a user from a task, display their entry in the browser panel and then press the Ctrl key and drag and drop the entry into the Users list.
The user's name appears in the list with strikes through the text.
-
To delete an entry from the Users list, select the entry to delete and then click Remove in the Users section.
-
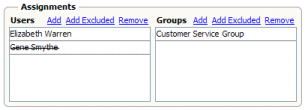
To assign a group to a task, display the group entry in the browser panel and then drag and drop the entry into the Groups list.
The group name appears in the list.
-
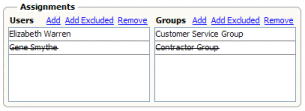
To exclude a group from a task, display their entry in the browser panel and then press the Ctrl key and drag and drop the entry into the Users list.
The user's name appears in the list with strikes through the text.
-
To delete an entry from the Groups list, select the entry to delete and then click Remove in the Groups section.
-
Click Save All on the NetBeans toolbar.
-
Continue to Configuring Advanced Task Options (optional).
- © 2010, Oracle Corporation and/or its affiliates
