Accessing ePM
This section describes how to access the eXchange Partner Manager.
 To access ePM
Before You Begin
In Enterprise Designer:
-
You must have already set up at least one B2B Host and built it to create an eXchangeService. See Building a B2B Host.
-
You must have already built and deployed the ePM GUI project. See Building and Deploying the GUI Projects.
-
The Integration Server (domain) and the LDAP server for the associated eXchangeService must already be running.
Note –
the Repository does not need to be running.
-
Open a new browser window and point it a URL that has the following form:
http://domain_machinename:baseport+1/epm
The http port is 1 greater than the base administrative port. Thus, for a domain running on localhost port 18000, the URL would be as follows:
http://localhost:18001/epm
Note –This URL is case-sensitive. If the you receive a status 404 with the warning “Requested resource not available,” ensure that in the final four characters of the URL — /epm — you entered the three letters “epm” in all-lowercase.
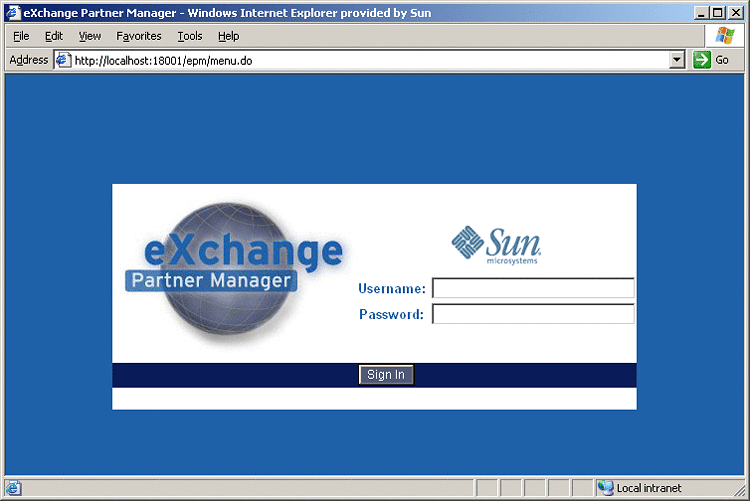
After a pause, the browser displays the eXchange Partner Manager sign-in screen. See Figure 5–5.
Figure 5–5 Sign-In Screen for eXchange Partner Manager (ePM)

-
Enter the appropriate user name and password and click Sign In.
Note –Username/password combinations are set up in Integration Server Administration; see Providing Access to B2B Web Facilities. The only users authorized to access ePM are those that have a “PartnerManager” entry in their Group List.
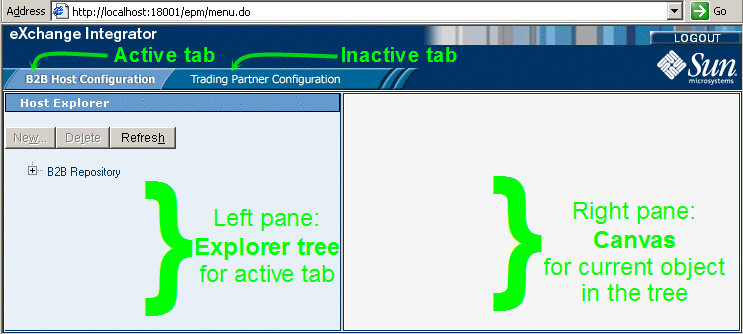
After a pause, the window displays eXchange Partner Manager (ePM), a two-pane window with an explorer tree and a canvas. See Figure 5–6.
Figure 5–6 eXchange Partner Manager (ePM) — Initial State

Basic B2B Host Operations in ePM
Some operations in ePM are not tied to any particular B2B Host or Trading Partner, for example, navigating the explorer tree, renaming a Host or TP, exporting and importing Hosts and TPs, and setting up schedules. This section contains procedures for each of these tasks.
 To locate a B2B Host in the explorer
tree
-
Expand the root folder, B2B Repository, to see all the B2B Hosts it contains.
See Figure 5–7.
Figure 5–7 ePM Repository Showing B2B Hosts

You can rename any B2B Host from its default name (formed by concatenating the Environment with the B2B Host instance as it appears on the Connectivity Map) to a name that is meaningful to you. You can also rename any Trading Partner.
 To rename a B2B Host or Trading Partner
-
Select the Host or TP.
-
In the right pane, under the Settings tab, in the General parameters section, edit the value of Name.
-
When you are finished, click Save.
Note –Because many actions in ePM cause unsaved changes to be discarded, any time you add or change a value, it is good practice to verify the change and then click Save.
 To export a B2B Host or Trading Partner
-
In the explorer tree on the left, select the Host or TP you want to export.
-
In the canvas on the right, at the bottom of the pane, click Export.
-
In the File Download dialog box, click Save.
-
In the Save As dialog box, provide a location and filename and then click Save.
An XML file of filetype .exp is saved to the specified location.
 To import/overwrite a B2B Host or
Trading Partner
-
In the explorer tree on the left, select the Host or TP you want to overwrite.
-
In the canvas on the right, at the bottom of the pane, click Import.
-
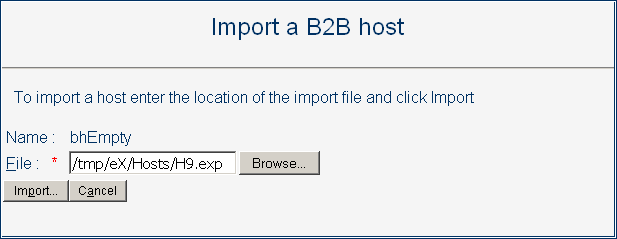
In the Import a B2B Host [Trading Partner] pane, click Browse.
-
Navigate to and open the .exp file you want to import, and then click Import.
See Figure 5–8
Figure 5–8 Importing a B2B Host

-
When you are finished, click Save.
Note –Because many actions in ePM cause unsaved changes to be discarded, any time you add or change a value, it is good practice to verify the change and then click Save.
 To create, view, or configure a schedule
-
In the B2B Host Configuration tab, in the Host Explorer tree, select the Schedules folder at the bottom of the tree and do one of the following:
-
To create a new schedule: Click New and, in the canvas on the right, enter a name and provide values for Type, Frequency, Start Date, and Time.
-
To view or configure an existing schedule: Open the Schedules folder and click the schedule you want to display or modify.
-
-
Configure the schedule’s type and frequency as follows:
See Figure 5–8
-
For several-times-a-day schedule: Set Type to Periodically and, for Frequency, specify how many seconds, (or minutes, or hours) elapse between events.
-
For a per-day schedule: Set Type to Daily and, for Frequency, specify whether the event occurs every few days, every day, or every weekday.
-
To configure a per-week schedule: Set Type to Weekly and, for Frequency, specify either that the event occurs on the day(s) in the list (use [SHIFT]-click to select a range of days and [CTRL]-click to include or exclude a particular day); or, alternatively, that it occurs weekends only, weekdays only, or every day.
-
To configure a per-month schedule: Set Type to Monthly and, for Frequency, specify whether the event occurs on a particular date or day within the month(s) specified in the list. In the list of months, use [SHIFT]-click to select a range of months and [CTRL]-click to include or exclude a particular month.
-
-
Specify an appropriate start date and time for the schedule.
-
When you are finished, click Save.
- © 2010, Oracle Corporation and/or its affiliates
