| C H A P T E R 3 |
|
Configuring the Preinstalled OpenSolaris Operating System |
This chapter explains the steps for configuring the OpenSolaris Operating System (OS) that is preinstalled on the hard disk drive (or solid state drive), if ordered. The preinstalled OpenSolaris version is OpenSolaris 2009.06 or later.
Before you begin configuring the preinstalled OpenSolaris OS, do the following:
1. If your system contains a service processor (SP) module, perform initial configuration of the server’s Integrated Lights Out Manager (ILOM) service processor and determine the server’s network settings, as described in Connecting to the ILOM Service Processor.
2. Ensure that main power has been applied to the server. For more information, see To Power On Main Power Mode.
3. Gather the information that you will need for the configuration, as listed in Installation Worksheet. Note that default values are indicated by an asterisk (*).
4. The server ships with its console redirected to the serial port. You can choose an option to send the output to VGA (video port). For more information, see Redirect the Console Output to the Video Port (Optional).
Use the worksheet in TABLE 3-1 to gather the information that you need to configure the preinstalled OpenSolaris OS. You only need to collect the information that applies to your application of the system.
| Note - If your system contains a service processor, you need to set it up before you perform this procedure. If you have not done so, see Before You Begin. |
Use the information that you gathered in Installation Worksheet as you perform the configuration.
After configuring the server ILOM service processor (SP), you can configure the preinstalled OpenSolaris Operating System (OS) over the network using Secure Shell (SSH) or locally using the SER MGT port to connect to the system console.
Configuration instructions, see the following topics:
|
| Note - This procedure can be used only for systems that contain an SP module. |
a. In a networked terminal window, enter ssh root@<IP_address>
Where <IP_address> is internet address of the server in the format xxx.xxx.xxx.xxx.
b. At the password prompt, enter the default password changeme.
ILOM displays a default command prompt (
2. Verify that the communication properties of the service processor are set to the defaults.
-> show /SP/serial/host /SP/serial/host Targets: Properties: commitpending = (Cannot show property) pendingspeed = 9600 speed = 9600 Commands: cd show |
| Note - If the speed is anything other than 9600, change it using this command:
-> set /SP/serial/host pendingspeed=9600 commitpending=true |
3. Start the serial console mode by entering the following:
Only accounts with Administrator privileges are enabled to configure the SP.
4. When the following prompt appears, type y:
Are you sure you want to start /SP/console (y/n)? y
|
| Note - This procedure can be used for systems that contain an SP and systems that do not contain an SP. If your system does not contain an SP module, skip Step 3 and Step 4 and continue with instructions in Configure the Preinstalled OpenSolaris Operating System. |
1. Use a cable to connect the SER MGT port of the host server to the serial port of the client system.
2. To access the system console, start a terminal session using one of the following methods:
Type the appropriate command to start a terminal session. For example, you can start a terminal session on a OpenSolaris console by typing:
Open the appropriate program to start a terminal session. For example, you can start a terminal session on a Windows console by selecting:
Start -> Programs -> Accessories -> Communications -> Hyperterminal
Type the appropriate command to start a terminal session. For example, to start a terminal session on a Linux console, you could launch Minicom.
Minicom is a text-based serial communication program that is included in the Linux distributions. For more information, see the man pages included in the Linux distribution.
3. Press Enter on the terminal device to establish a connection between the terminal device and the ILOM SP.
ILOM displays a login prompt, after a short wait.
| Note - If you connect to the serial port on the server before the ILOM SP has been powered on or during its power-on sequence, SP boot messages might be displayed prior to the login prompt. |
4. Type the default user name and password to log in to the ILOM SP.
ILOM displays a default command prompt (
|
1. Press and release the main Power button on the server front panel.
Power-on self-test (POST) messages appear on your screen as the OS boots up.
2. Follow the OpenSolaris preinstallation on-screen prompts.
3. Use the information gathered in Installation Worksheet to help you enter the system and network information as you are prompted.
The screens that are displayed will vary, depending on the method that you chose for assigning network information to the server (DHCP or static IP address).
After you have entered the system configuration information, the server completes the boot process and displays the OpenSolaris login prompt.
|
GRUB, the open source boot loader, is the default boot loader in the OpenSolaris OS for x86-based or x64-based systems. The boot loader is the first software program that runs after you power on a system.
1. Connect to the server over the network or locally as described in these procedures:
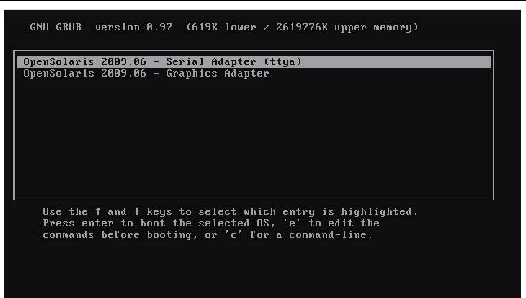
2. From the GRUB menu, you have the option of displaying the installation process to a ttya connection (Serial Port) or a VGA connection (video port) (see FIGURE 3-1).
FIGURE 3-1 OpenSolaris GRUB Menu Screen

3. To display output to the video port, choose this option:
OpenSolaris 2009.06 Graphics Adapter
|
The GRUB menu on the preinstalled image has been configured for an infinite timeout so that you can choose the console output on power-up. However, you can modify this setting so that your system boots automatically.
To modify the GRUB menu to auto boot, edit the /rpool/boot/grub/menu.1st file as follows:
1. Change the -1 value on the timeout line to reflect the duration you want the menu to be presented.
For example, for a 10-second delay, change the timeout value to 10.
2. Add a line that specifies the default boot entry.
For example, to specify the first entry, add default 10.
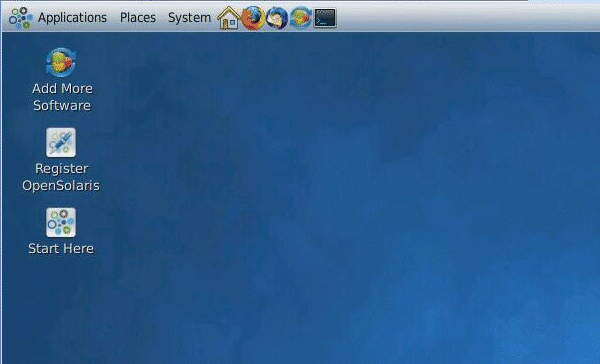
For information on getting started on OpenSolaris, click the Start Here icon on the OpenSolaris Desktop (see FIGURE 3-2).
FIGURE 3-2 OpenSolaris Desktop

This section provides pointers to information about the OpenSolaris Operating System.
You can access the various collections of the OpenSolaris OS user documentation at:
http://opensolaris.org/os/documentation/
Sun provides flexible training options that accommodate your personal schedule and learning style. The training options include instructor-led, web-based online, CD-ROM, and Live Virtual Class. For OpenSolaris Training and Certification options at a glance, go to:
http://www.opensolaris.com/learn/subscriptions/
The documentation listed in this section provides instructions for using the OpenSolaris installation program and is available at the following web site:
http://dlc.sun.com/osol/docs/content/2009.06/getstart/index.html
After you configure the preinstalled OpenSolaris OS, the OpenSolaris installation program reboots the system and prompts you to log in.
If you want to reinstall the OpenSolaris OS or install a different version of the OpenSolaris OS, refer to Getting Started With OpenSolaris 2009.06 at:
http://dlc.sun.com/osol/docs/content/2009.06/getstart/
You can download software for the OpenSolaris OS from the following sites:
http://opensolaris.org/os/TryOpenSolaris/
http://sunsolve.sun.com/show.do?target=opensolaris
Copyright © 2009 Sun Microsystems, Inc. All rights reserved.