| Skip Navigation Links | |
| Exit Print View | |

|
Sun Blade Storage Module M2 Product Documentation |
About This Documentation (PDF and HTML)
Overview of the Sun Blade Storage Module M2
Installing the Storage Module Into the Chassis
Assigning and Managing Storage
Overview of the Sun Blade Storage Module M2 Product Notes
Supported Firmware, Hardware and Software
Solaris Operating System Issues
Performing Maintenance and Hot Plug Actions
Importing Existing Virtual Drives to a Replacement REM
Storage Module Sensors and Indicators
Introduction to the Sun Blade Storage Module M2
Maintaining the Sun Blade Storage Module M2
Options and Replaceable Components
Antistatic Procedures and Precautions
Replacing the Storage Module (FRU)
How to Remove the Storage Module
Upgrading Storage Module Firmware
Before You Begin
If you are replacing a storage module that was previously in the chassis, you must install the storage module into its original slot.
If the storage module was previously installed in the chassis, replace it in the same slot.
 | Caution - If the chassis is powered on, insert the disk module within 60 seconds of removing the filler panel. Otherwise chassis cooling may be compromised. |
Note - Filler panels should remain in any unused slots because they ensure that the chassis maintains the proper cooling and complies with FCC limits on electromagnetic interference (EMI).
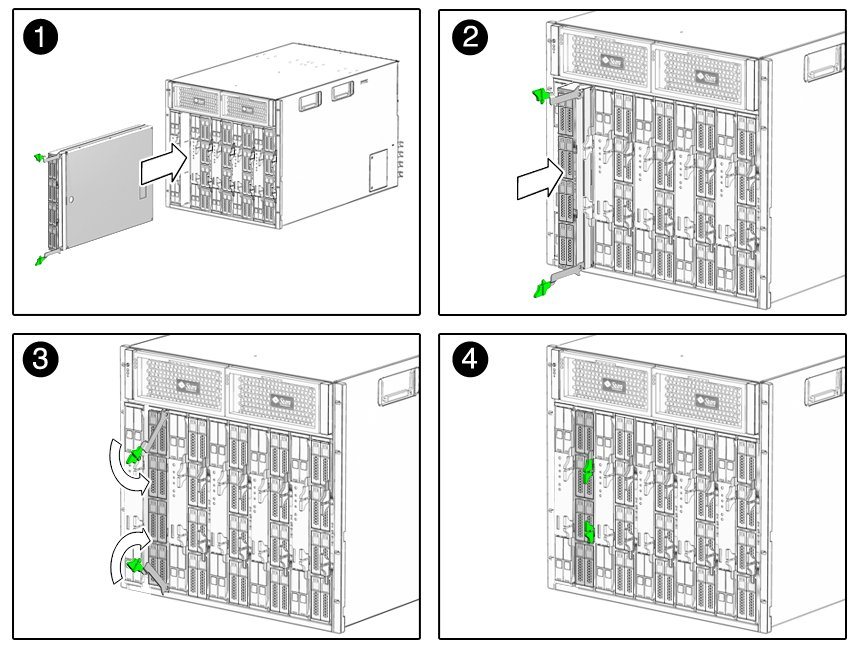
The disk module should now be flush with the chassis (although the disk drives stick out about 1.5 mm) and the ejectors are locked [3, 4].

Chassis power will immediately be applied to the storage module. The module activity LED will begin blinking as the CMM discovers the module. For additional information on storage module LEDs, see Front Panel Indicators and Buttons.
Note - For advanced users or Sun technicians: If the CMM ILOM configurations have changed between the time you removed the old storage module to the time you are ready to replace it with the new module, you have the option of editing the CMM ILOM configuration XML file to copy the old storage assignments to the new CMM ILOM configuration XML file. For more information on performing this procedure, refer to the ILOM documentation.
The host REM might identify the storage module virtual drives as a foreign configuration (MegaRAID), or inactive (Fusion-MPT IR). A foreign or inactive configuration can be recovered using the REM management software.
For MegaRAID (SGX-SAS6-R-REM-Z), use the import feature described in the LSI MegaRAID SAS Software User's Guide. For Fusion-MPT IR (SGX-SAS6-REM-Z), use the activate feature described in the LSI SAS2 Integrated RAID User's Guide. These documents can be downloaded from http://www.lsi.com/sep/Pages/oracle/sas_6gbs_support.aspx.