Composing Messages
Your email address is typically your login ID and your machine's host name, combined like this: name@host. If there is more than one domain on your network, you may need to append a domain name to the address as well. For instance, the name would appear in this format: name@host.domain. Check with your system administrator to make certain.
Others on your network will typically have the same address format. When you are certain of your email address, try sending a test message to yourself.
Composing a New Message
To compose a new message:
-
In the Header window control area, click SELECT on Compose.
The Compose Message window is displayed.
-
Click SELECT on the To text field, and fill in the message header information.
-
Press Return as you complete each line
-
In the To and Cc text fields, separate multiple email addresses with a comma, a space, or both. For example: here@machine, there@elsewhere, outside@somewhere
-
-
Move to the Text pane either by pressing Return or clicking SELECT in the Text pane.
The dimmed insert point darkens to indicate it is active.
-
Type your message.
The Compose window Text pane uses standard text editing functions.
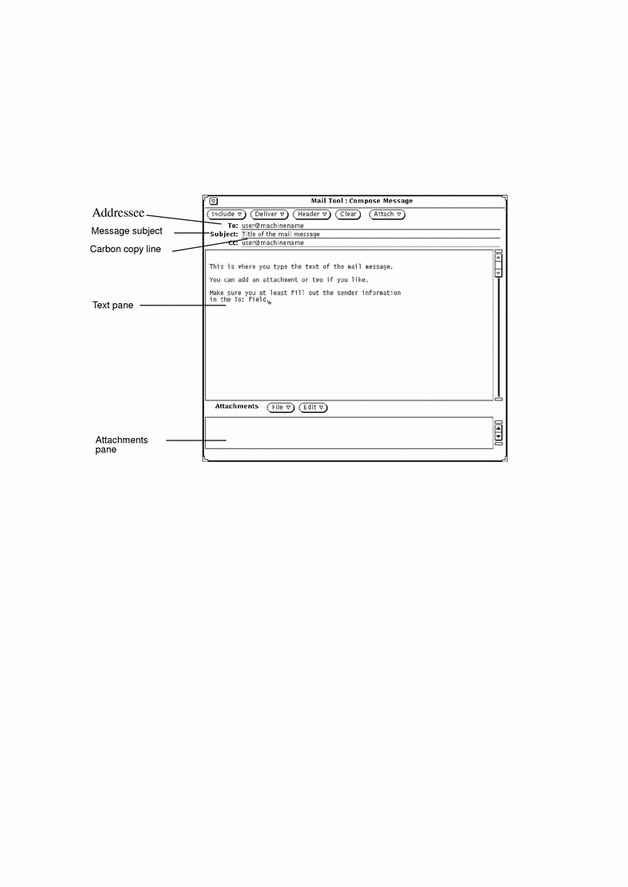
Figure 4-12 shows a sample message.
Figure 4-12 Addressing a Message

To include an attachment, see "Sending Mail Attachments".
-
To send the message, click SELECT on Deliver.
The message is delivered, and the Compose window closes.
Replying to a Message
Replying to a message is similar to composing a message.
-
In the Header window control area, press MENU on Reply.
-
Choose the appropriate item for your recipient(s).
The Compose Message window is displayed. Note the following:
-
The To and Subject text fields are filled out.
-
A copy of the original message is included only if you chose Reply To Sender, Include or Reply To All, Include.
-
-
Type or edit your message and its header, and send the message.
Refer to the section "Composing Messages".
Forwarding Messages to Third-Parties
You can forward a message to another person in two ways, depending on where you start from:
-
Forwarding a message from the Header window.
-
Including a message from the Compose Message window.
Forwarding a Message
To forward a message from the Header window:
-
Select the message(s) you want to forward.
-
Click SELECT on the first message header.
-
Click ADJUST on additional message headers.
-
-
Choose Forward from the Compose menu.
The Compose Message window is displayed. Note the following:
-
The Subject text field is filled in. You need to fill in the other To text field, and if desired, the Cc text field.
-
The Text pane displays the original message.
-
The Attachments pane includes any attachments to the original message..
-
-
Type your message, and send the entire new message.
Refer to the section "Composing Messages".
Including a Message
To include a message from the Compose window.
-
Compose your message.
-
In the Header window, click SELECT on the header of the message(s) you want to include.
-
In the Compose window, choose Bracketed or Indented (as you prefer) from the Include menu.
Your choice determines the formatting of the original message:
-
Bracketed labels the beginning and end of the message.
-
Indented indents each line of the message and marks each line with a greater-than sign (>).
-
-
To send the message, click SELECT on Deliver.
- © 2010, Oracle Corporation and/or its affiliates
